Updated August 28, 2023
Introduction to 3D text in After Effects
After Effect is an effective software used by video and VFX industries, the software also has a feature of 3D text creating for multiple purposes, which will be discussed below in this article. This enhances the visual appearance of the titles of Films, Serial, YouTube channels, advertisements, and all other media-related areas for promotions and etc. We will be discussing multiple attributions of the 3D text creating using after effects. This adds information to the project, and we can even configure the title scrolling with a theme it such as traveling, crime, etc., as themes in title backgrounds. And there are many other benefits of the 3D text in after effects. We shall see more details of it further.
How to Create 3D Text in After Effects?
Today we are going to see different attribution and options used for 3D text creation and effects applied using After Effects.
Step #1
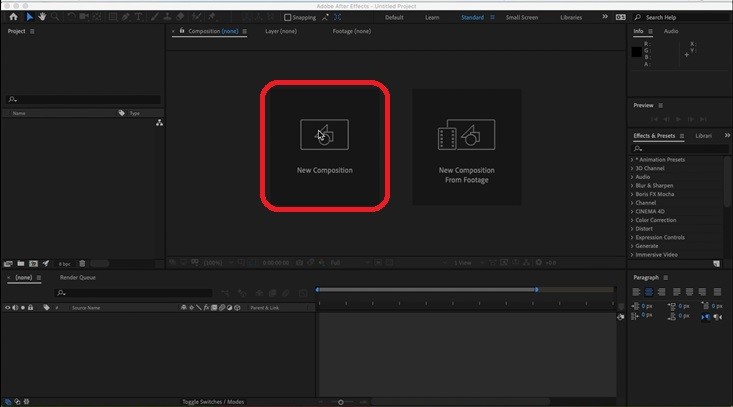
Open After effects and click on create a new composition for the new project.
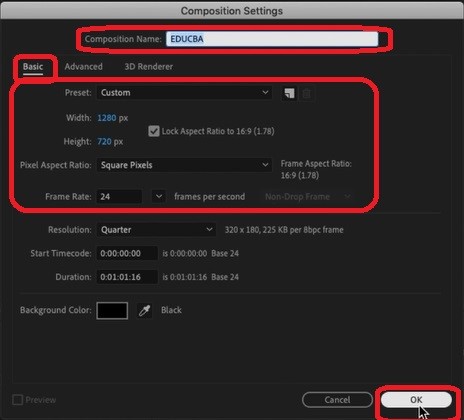
Configure the new compositions with the parameters such as Width, Height, Name, Preset and other details as required and click ok.
Step #2
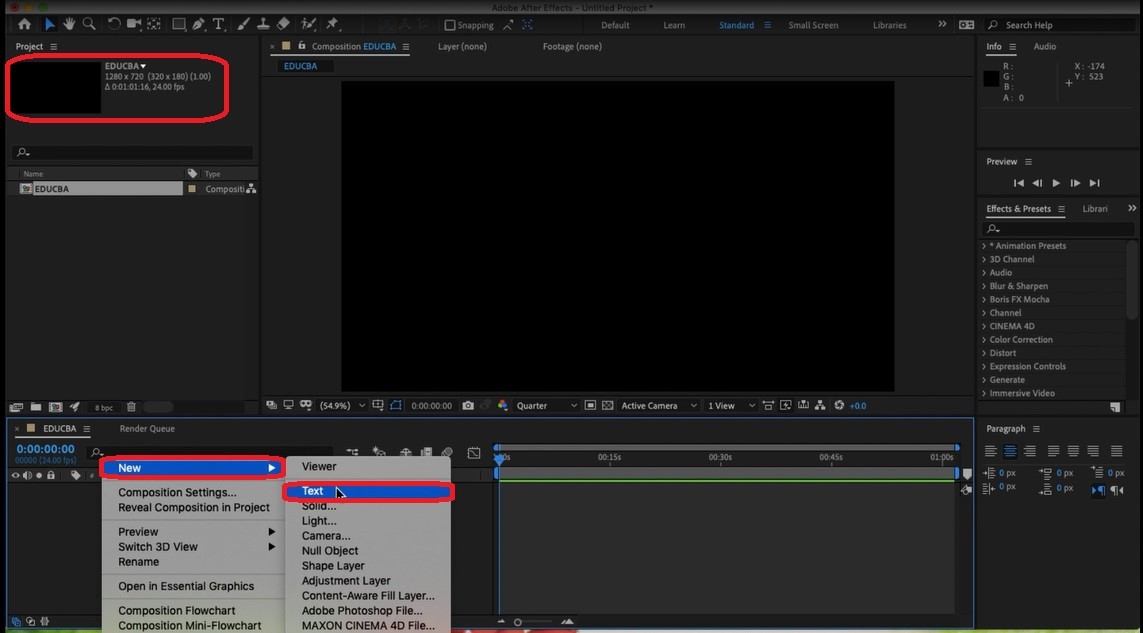
We can see new composting is created on the left top corner of the application along with it as we want to create a 3D text so right-click on the bottom left corner where there is a “Source name” option and Right-click on layers pane>select New>Text.
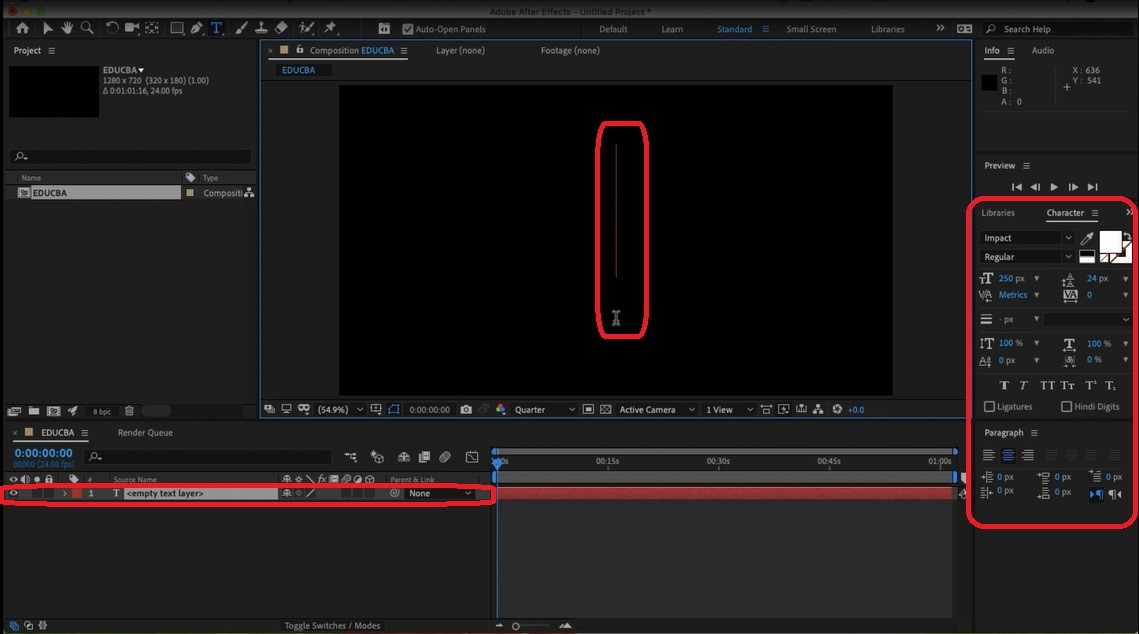
We can see the text option will be available on the screen and all the attribution of word file such as Bolt, Front, Size, Underline, paragraphing, text color, and few other texts personalizing can be done to text which we are creating.
Step #3
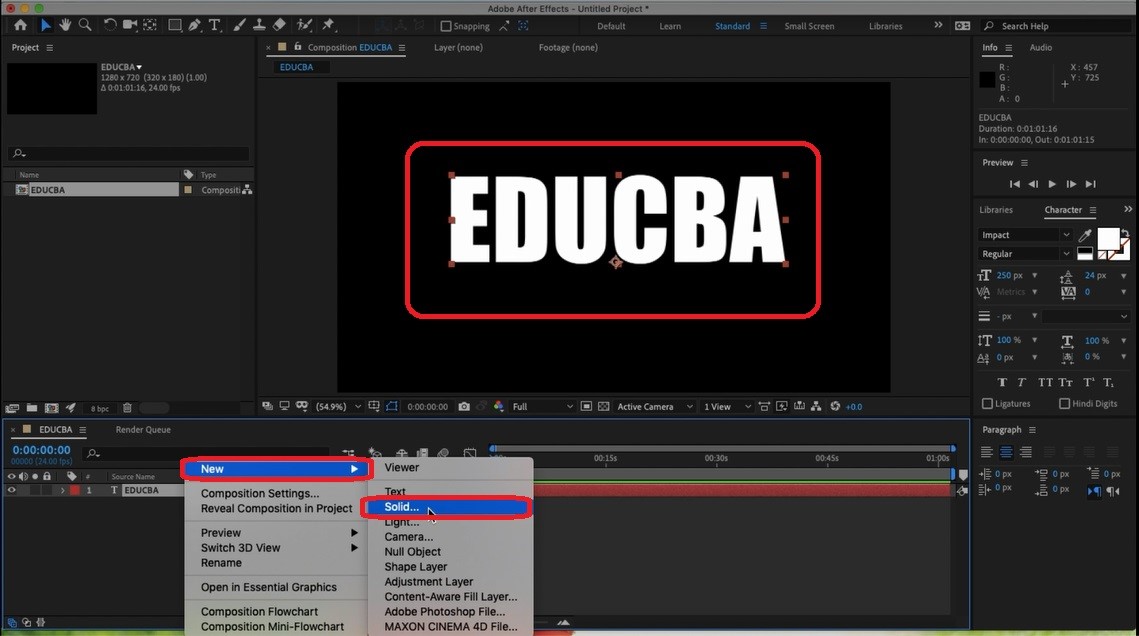
After adding text, we need to add depth (thickness) to it. We need to make 2D text to 3D by making it solid. This brings the 3D look and feels to the text.
Right-click on layers > New > Solid.
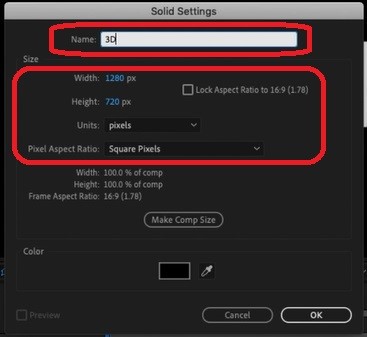
Add properties for Solid as required and click on OK once done. This attribution adds depth to the content. We can even use scaling in the z-axis to add depth.
Step #4
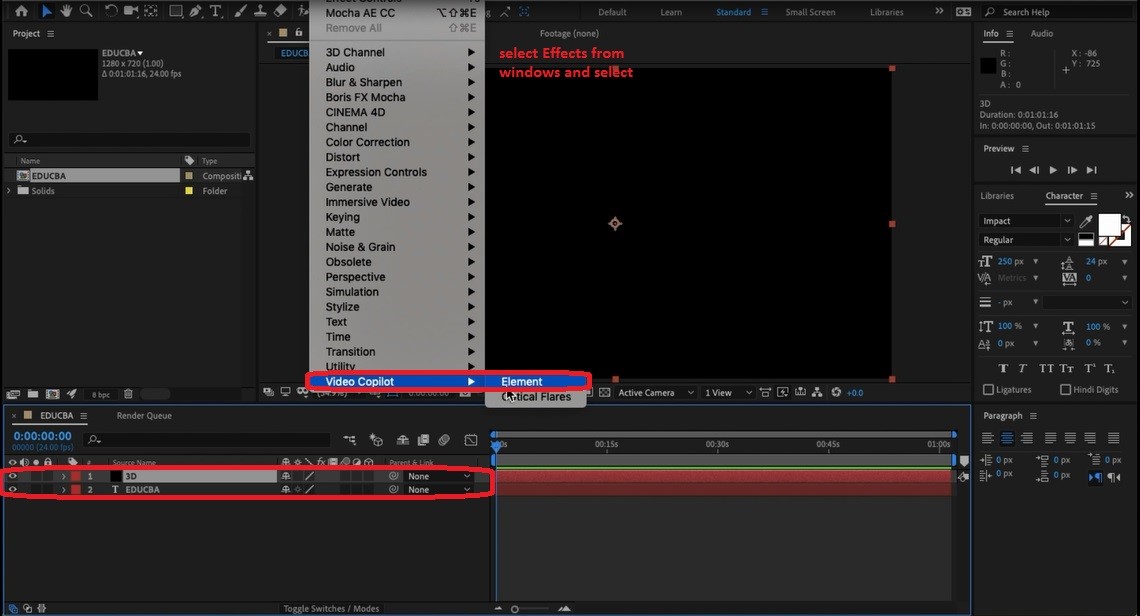
Select 3D from layers, add z-axis depth to the content and select Effects from the menu bar, hover the cursor on “Video Co-pilot, ” and click elements. The menu bar contains the effects of adding values to the data which we are creating.
Menu Bar > Effects > Video Co-Pilot > Elements.
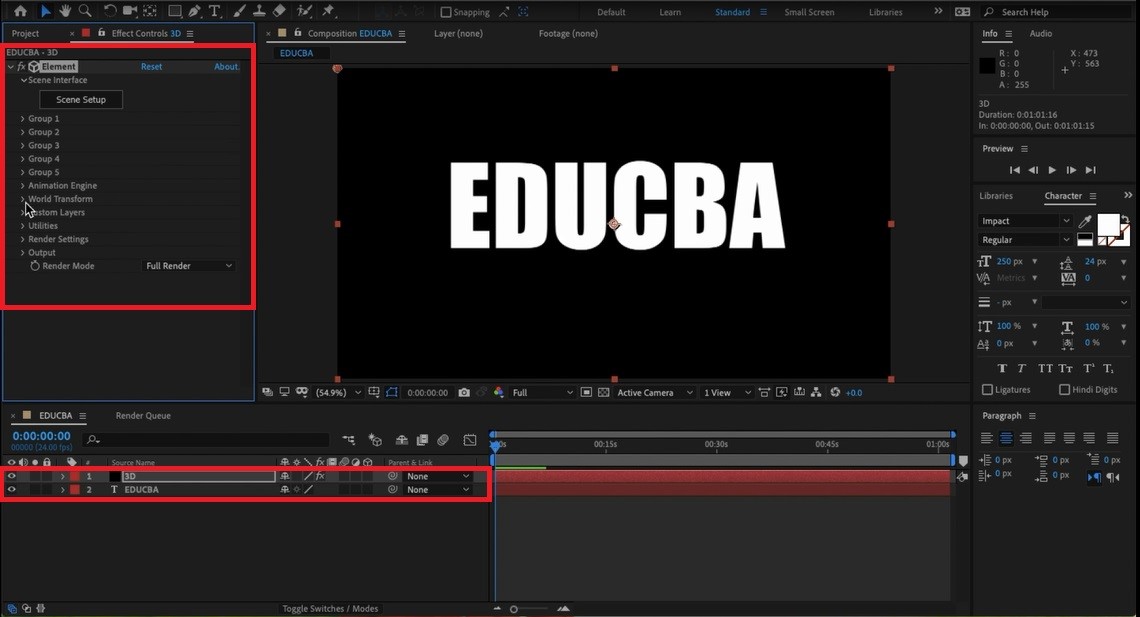
Now we can see 3D element properties are appended in the left pane. Next to the layer pain bottom, we also have a timer pane where we can frame each angle and make a small animation video or footage for advertisements.
Step #5
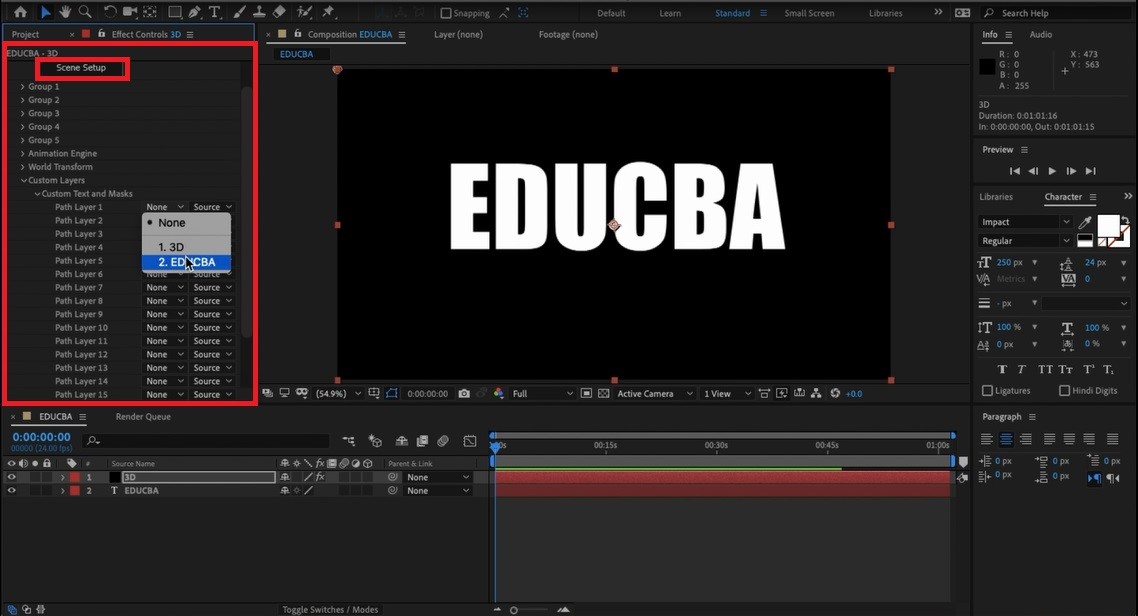
Select Custom layers > Custom Text and Masks > Path Layer1 beside it; there is no drop down select “Educba” layer in it to apply textures to the 3D text.
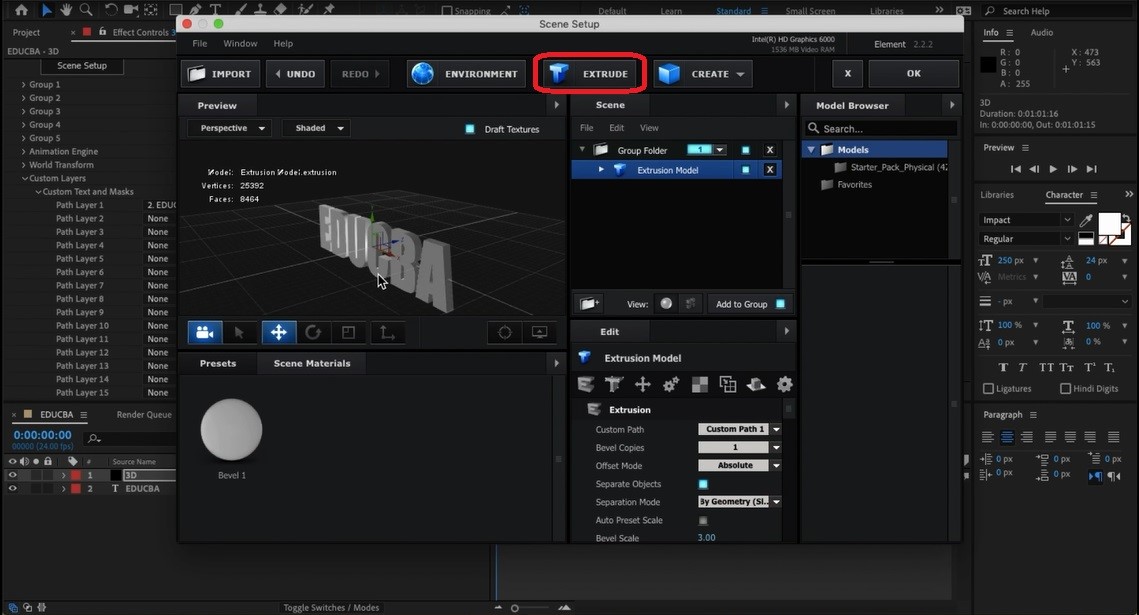
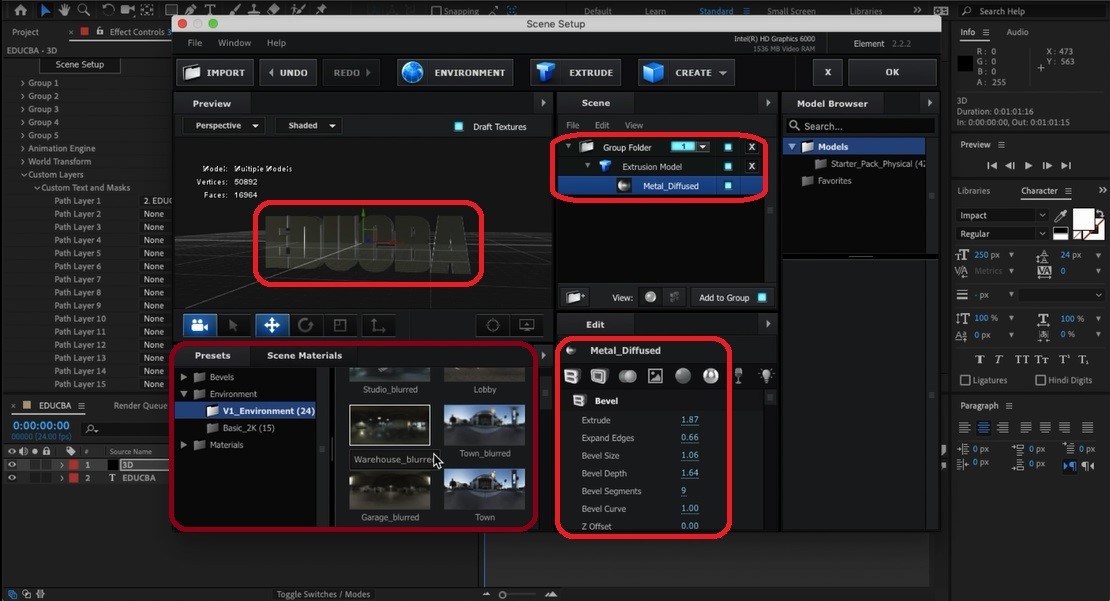
As shown below, scene setup windows open, select extrude option. As we can see, multiple options are also available in the same window. Extrude option of the solid text 3D objects properties of preset, visual appearance, Material, Scene, Preview and edit of extrusion property can be done.
Step #6
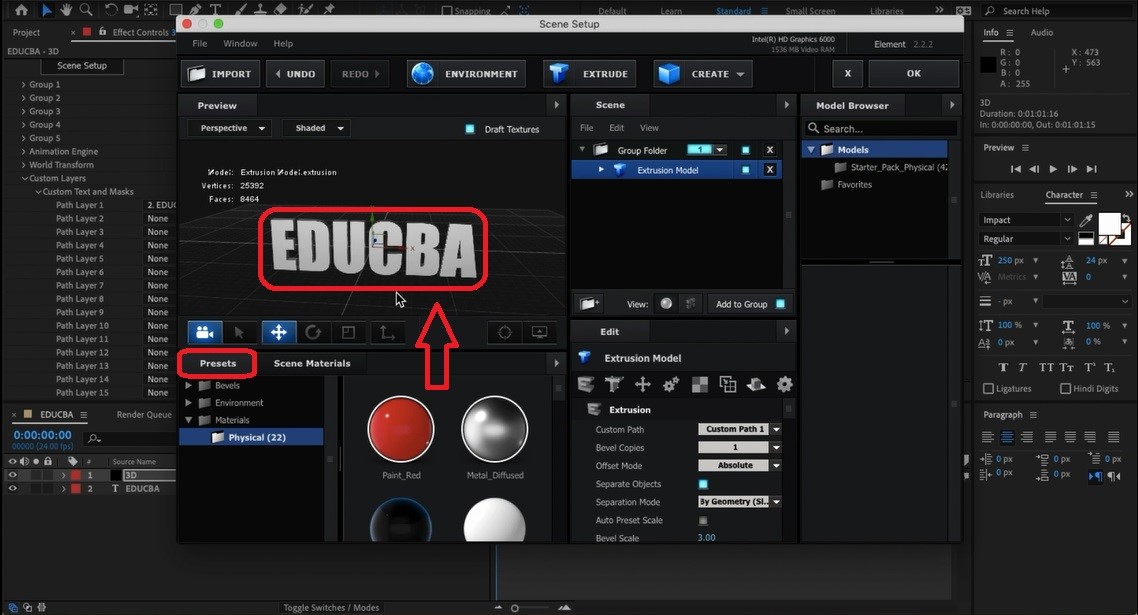
Rotate and check the text visually the depth, height, and width based on requirements. There are presets of fixed color texture lamberts or texture files. There are many other options of sizing, rotating, moving, camera angling and projection, and more.
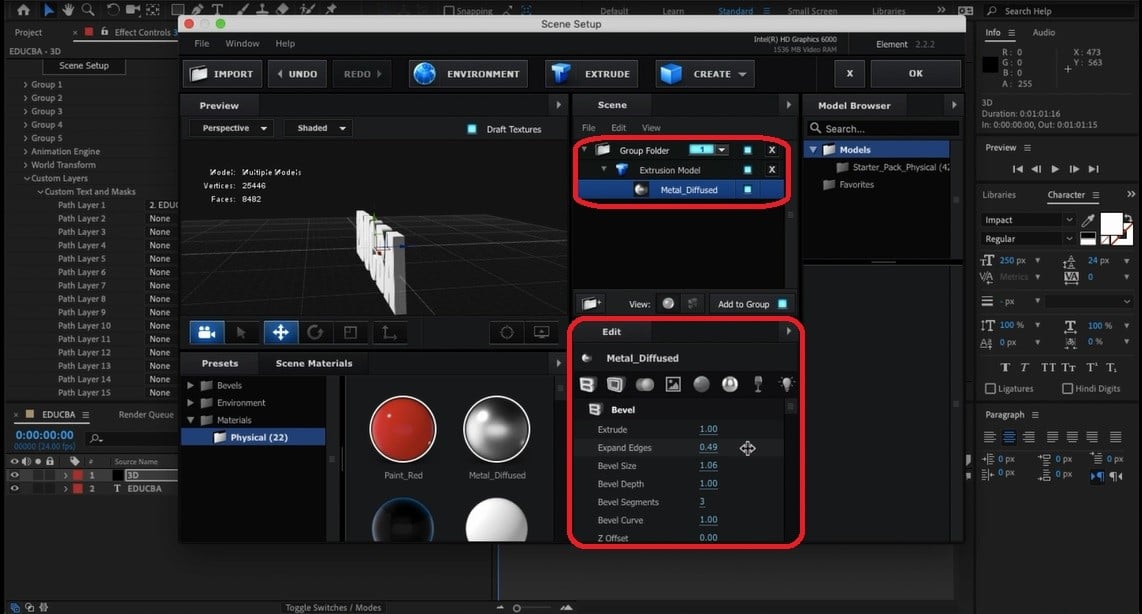
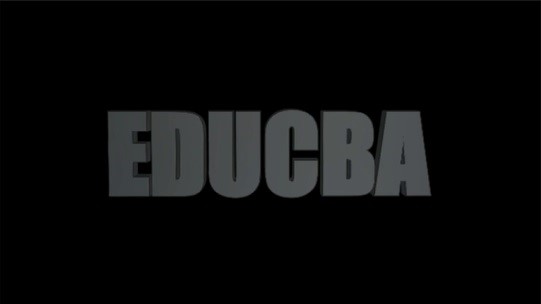
By dragging and dropping the color textures which are available within the color library and the properties of the material and text can be changed in the same window. We can perform few attributions like Bevel size, Extrude, Extrude edge, Bevel Curve and many more to improve the visual standards of the text.
Step #7
Learners can explore these options. There are multiple presets and plug-ins available to modify the text for multiple visual appearances of fire, water, flames etc. can be used below are few examples tried on the same. Exploring the source available with the application is important with practice. Many ranges of the material difference and presets will be available with the basic installation of the application by default.
Smoothing the edges of the text, stokes, presets, fill color can be applied to improve the visual standards of the text when animating with an output file or in MP4, GIF, and many other file formats.
Step #8
Below is an example of 3D text with gold color on it. We can even add Cameras, Lights, and frame video to set the duration length as required for the output.
3D text with silver color is added below. We can add material, reflection, and other attributions as required.
Application is very flexible, and applicability’s to the content. Reflection of the text, mirror text, different fonts of text title making can be used.
We can change the layers and properties of the layers. Using appropriate animation presets. Animate the source text layer using the characters and proportions based on the need for the size of the screen where it’s going to be projected. Titles, Graphic titles, and scans that appear before the movie or short film use this trick.
Conclusion
Using this, we can create 3D text for Title themes and effects for YouTube channel, television sections, film titles, etc. Along with this, we have also seen effects and audio tracks to the content to make it more interesting and visually to the viewers. This complete course needs to be practiced along with theory for better understanding and to gain hands-on experience to apply when needed in a smart way and in less time. System compatibility must also be checked as the end of the day we need to render. Commercial private colleges, MNC advertisements, and others use the same technique to create their advertisement footages. There are huge opportunities at national and international levels of the market for after effect professionals to get jobs in multiple studios of gaming, television, VFX, movie post-production and various other entertainment studios.
Recommended Articles
This is a guide to 3D Text in After Effects. Here we discuss how to create 3 D Text in After Effects step by step with the given screenshots. You may also have a look at the following articles to learn more –
