Updated May 15, 2023
Fill Handle in Excel
Fill Handle in Excel is used to fill up the data by creating a series of values that either follows a pattern or check if the values we entered are of series. It is very easy to implement. Fill Handle is available at the bottom right of any cell. Enter some values such as numbers or alphabets or dates in at least 3 cells to have a pattern. Select the cells with values and drag the Fill Handle, or double click will also work here.
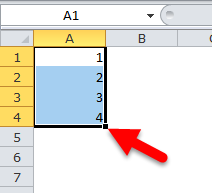
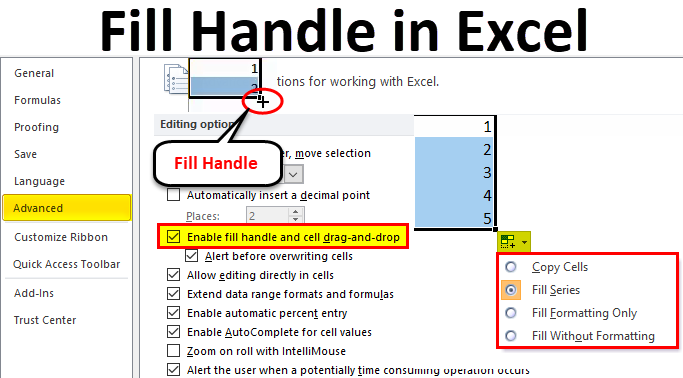
In the active cell of the worksheet, the fill handle is a small black box at the bottom right corner, as shown in the below image.
A basic level of knowledge about fill handle could save you tons of productive time at your workplace.
It is a tool that can be used to autocomplete a series of lists in Excel. Generally, in Excel, we enter serial numbers. Let us say serial numbers from 1 to 10 from cells A1:A10. We usually type 1, 2, 3, 4… Like that, isn’t it?
Instead of manual typing, we can use an Excel fill handle to auto-fill the series of numbers, dates, days, etc.…
Enable fill handle if you cannot find the fill handle in Excel
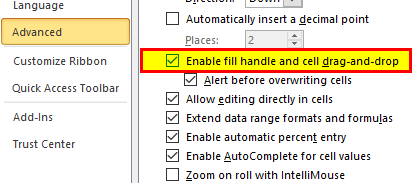
If you do not find a fill handle in Excel, you must do some settings here. We can enable the fill handle option (although it is enabled by default, you may disable it by mistake).
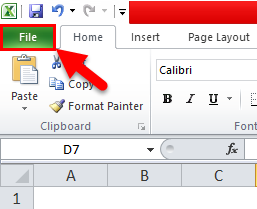
Step 1: Go to File.
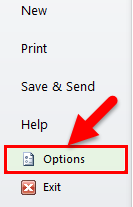
Step 2: Go to Options.
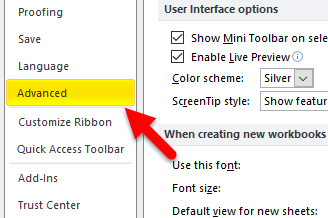
Step 3: Select Advanced.
Step 4: Ensure you have enabled the fill handle and cell drag-and-drop option checked.
How to Use Fill Handle in Excel?
Fill handle in Excel is very simple and easy to use. Let us understand the working of Excel Fill handle by some examples.
Example #1
Assume you want to fill the numbers from 1 to 20 from cell A1 to A20. Here are the steps to auto-fill your series of numbers.
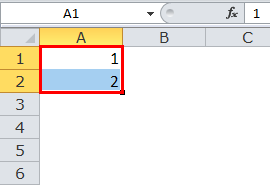
Step 1: Enter numbers 1 and 2 from A1:A2 and select those two cells.
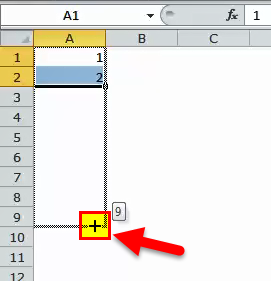
Step 2: Hover the mouse over the bottom-right edge of the selection; you will see a plus icon appear – and drag until you find cell A20.
Example #2
Pro tip: In the above case, you must drag until you find your desired cell. However, if there is a value in the adjacent column, you can hover the mouse over the right edge of the selection and double-click. It will automatically fill the list to the last cell based on the data in the adjacent column.
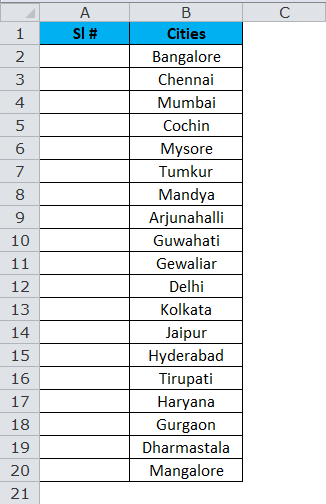
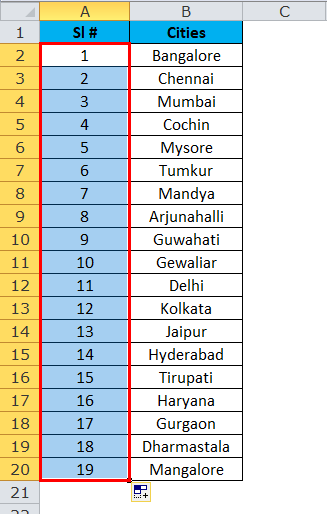
Look at the below image, where I have a list of cities from B1 to B20. Now I need to insert serial numbers from A1 to A20.
I just need to type 1 and 2, select the two numbers, and double-click. It will fill until cell A20.
Example #3
Autofill Numbers that Decrement by 1
As the previous example shows, we can auto-fill numbers incremented by one. Similarly, we can insert numbers decremented by 1.
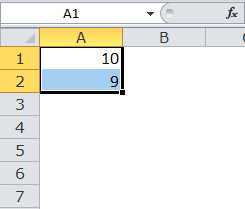
Step 1: Type 10 and 9 in cells A1:A2.
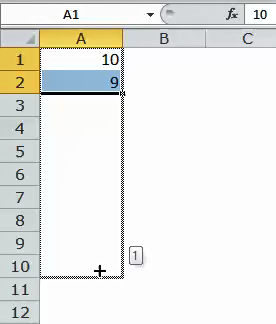
Step 2: Since we do not have a value in the adjacent column, we cannot double-click on the fill handle. Instead, drag until cell A10.
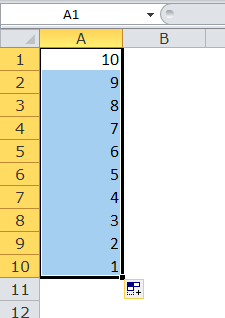
Step 3: Now, it will insert the numbers for you.
Example #4
Autofill Weekday Names (Both Short Name & Full Name)
We can use the fill handle in Excel to autocomplete weekday names. It could be either the three alphabets nomenclature (Mon, Tue…) or the full name ( Monday, Tuesday )
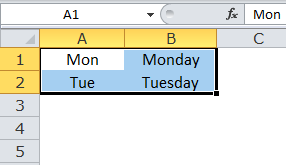
Step 1: Type Mon & Tue from cell A1:A2. Now type Monday & Tuesday from B1:B2.
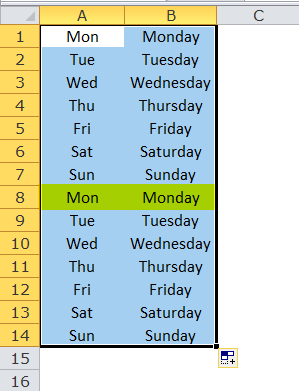
Step 2: Keep dragging the fill handle to auto-fill the weekday names.
Note: Once all the week names end, it will start over again from the day you started. In the above case, I started with Monday and ended on Sunday. Once I cross all the days in a week, it will start from Monday only again.
Example #5
Autofill Dates
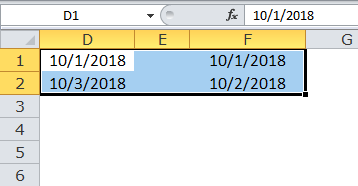
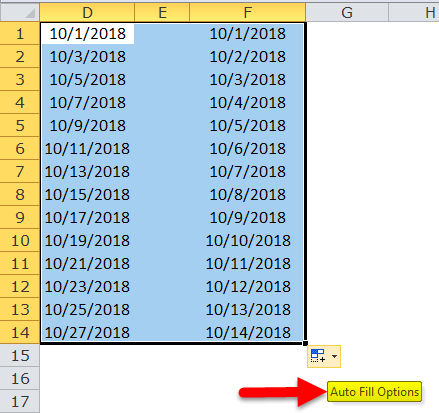
We can auto-fill dates too. Any date format recognized by the Excel it will auto-fill. We can increment the date by 1, by 2, that we can auto-fill.
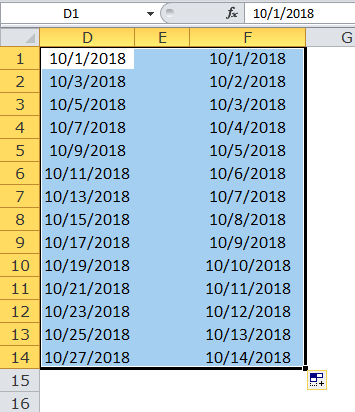
If we drag and drop the above dates, the first column will increment the date by 2, i.e. it will insert alternative days. The second column will increment by 1.
Example #6
Autofill Weekdays Dates
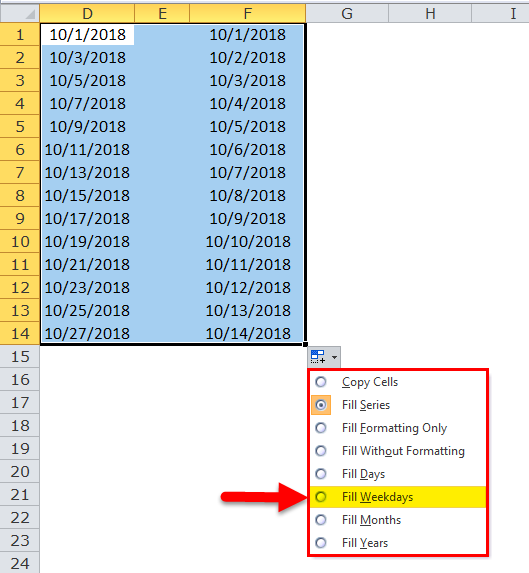
We can auto-fill only weekday dates. Click on Auto Fill Options.
These are the below options you will get. Now select Fill Weekdays.
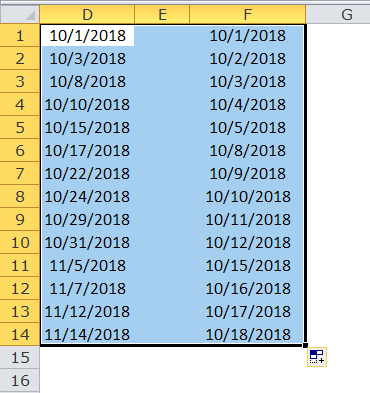
It will insert only weekdays.
Similarly, you can exercise all the options listed in the above image.
Things to Remember
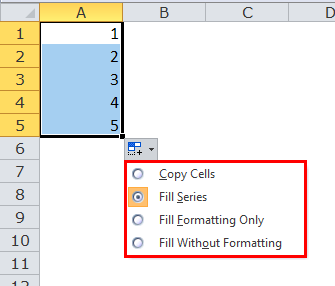
When we insert numbers, we get so many fill options. Look at all the options one by one.
- Copy Cell: If you select this option, it will simply copy-paste the cells from the above.
- Fill Series: It fills the cells with numbers incrementing by 1.
- Fill Formatting Only: It only fills the formatting and not the values.
- Fill Without Formatting: This option fills the cells based on the recognized pattern but does not copy the formatting.
Recommended Articles
This has been a guide to Fill Handle in Excel. Here we discuss how to use the fill handle in Excel to make your data entry easier, along with Excel examples. You may learn more about Excel from the following articles –

