Updated August 19, 2023
Not Equal To in Excel
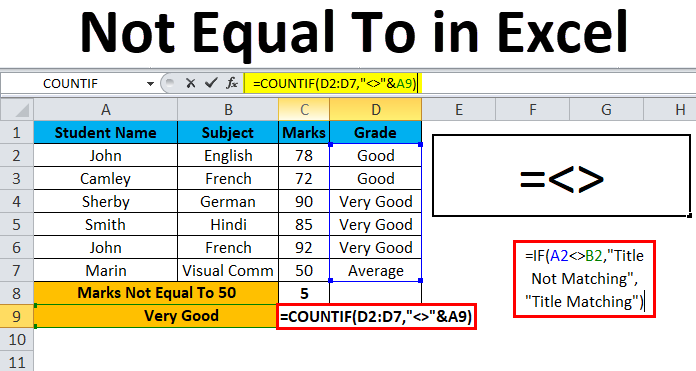
Not Equal To generally is represented by striking an equal sign when the values are not equal. But in Excel, it is represented by greater than and less than operator sign “<>” between the values we want to compare. If the values are equal, then it used the operator will return as TRUE, else we will get FALSE. We can use the Not Equal to in the Excel operator and other conditional functions such as IF, SUMIF, and COUNTIF functions to get other meanings of results.
How to Put ‘ Not Equal To ‘ in Excel?
Not Equal To in Excel is very simple and easy to use. Let’s understand the working of Not Equal To Operator in Excel by some examples.
Example #1 – Using ‘ Not Equal To Excel ‘ Operator
In this example, we will see how to use Excel’s Not Equal To logical operation <>.
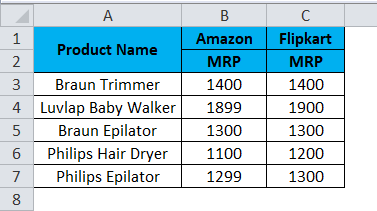
Consider the below example, which has values in both columns now; we will check the Brand MRP of Amazon and Flipkart.
Now we will check that Amazon MRP is not equal to Flipkart MRP by following the below steps.
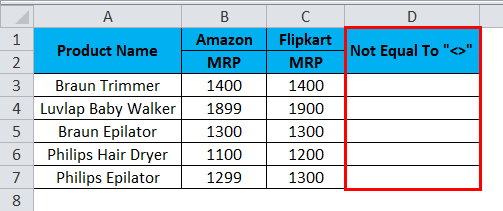
- Create a new column.
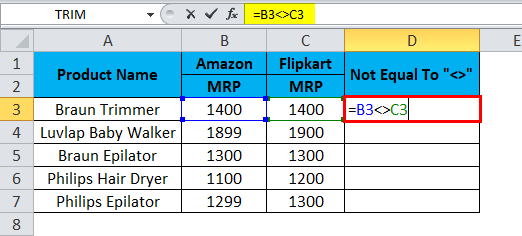
- Apply the formula in Excel as shown below.
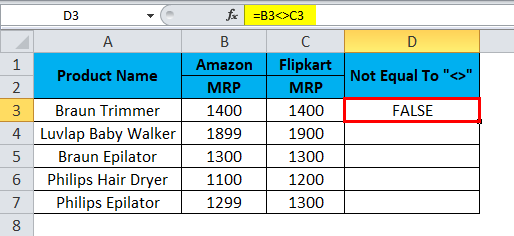
- So as we can see in the above screenshot, we applied the formula as =B3<>C3 here; we can see that in the B3 column, Amazon MRP is 1400, and Flipkart MRP is 1400, so the MRP matches exactly.
- Excel will check if B3 values are not equal to C3, then it returns TRUE, or else it will return FALSE.
- In the above screenshot, we can see that Amazon MRP is equal to Flipkart MRP, so that we will get the output as FALSE, shown in the screenshot below.
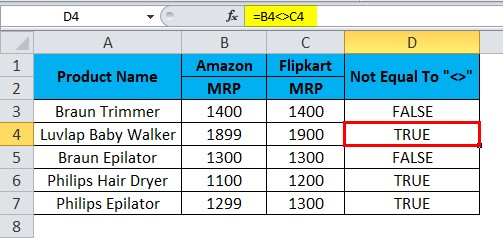
- Drag down the formula for the next cell. So the output will be as below:
- We can see that the formula =B4<>C4; in this case, Amazon MRP is not equal to Flipkart MRP. So Excel will return the output as TRUE, as shown below.
Example #2 – Using String
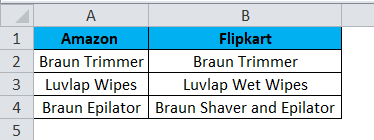
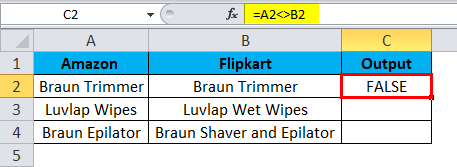
In this Excel example, we will see how not equal to Excel operator works in strings. Consider the below example, which shows two different titles named Amazon and Flipkart.
Here we will check that Amazon’s title name matches the Flipkart title name by following the below steps.
- First, create a new column called Output.
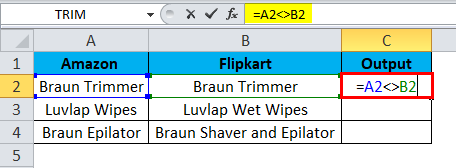
- Apply the formula as =A2<>B2.
- So the above formula will check for the A2 title name is not equal to the B2 title name. If it is not equal, it will return FALSE, or else it will return TRUE; as we can see, both the title names are the same and will return the output as FALSE, shown in the screenshot below.
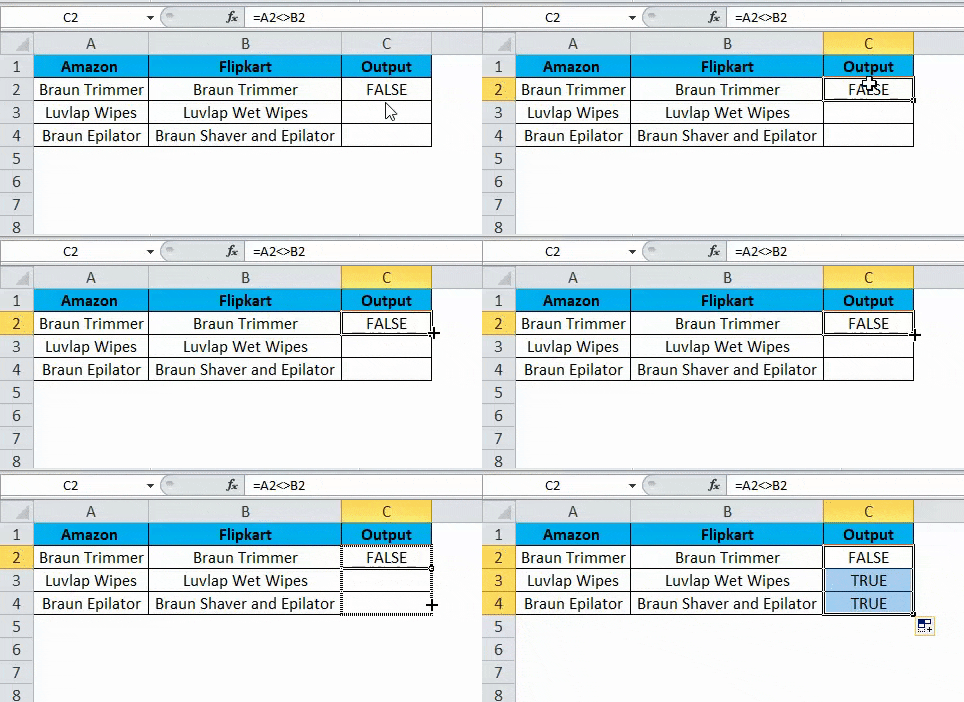
- Drag down the same formula for the next cell. So the output will be as below:
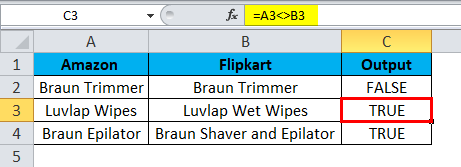
- As =A3<>B3, where we can see the A3 title is not equal to the B3 title, we will get the output as TRUE, shown as the output in the screenshot below.
Example #3 – Using IF Statement
This Excel example shows how to use the if statement in the Not Equal To operator.
Consider the below example, where we have title names of both Flipkart and Paytm, as shown below.
Now we will apply the Not Equal To Excel operator inside the if statement to check whether the title names are equal or not equal by following the below steps.
- Create a new column as Output.
- Now apply the if condition statement as follows =IF(A2<>B2, “Title Not Matching”, “Title Matching”)
- Here in the if condition, we used not equal to Operator to check whether the title is equal to or not equal.
- Moreover, we have mentioned in the if condition in double-quotes as “Title Not Matching”, i.e., if it is not equal to it, it will return as “Title Not Matching”, or else it will return “Title Matching”, as shown in the below screenshot.
- We can see that both the title names are different, and it will return the output as Title Not Matching shown in the screenshot below.
- Drag down the same formula for the next cell.
- In this example, we can see that the A3 title is equal to the B3 title; hence, we will get the output as “Title Matching “, shown as the output in the screenshot below.
Example #4 – Using the COUNTIF Function
This Excel example shows how the COUNTIF Function works in the Not Equal To operator.
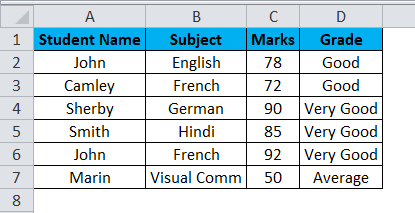
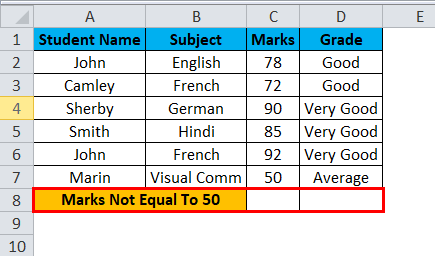
Consider the example below, which shows the student’s subject marks and grade.
Here we will count how many students have taken marks in it equal to 94 by following the steps below.
- Create a new row named Marks Not Equal To 50.
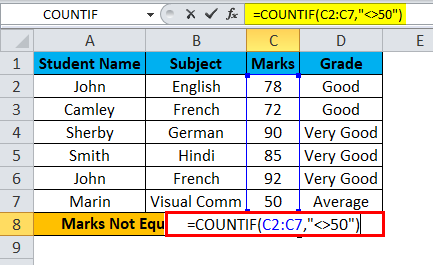
- Now apply the COUNTIF formula as =COUNTIF(C2:C7,”<>50″)
- As we can see in the above screenshot, we have applied the COUNTIF function to find out Student marks not equal to 50. We have selected the cells C2:C7; in the double quotes, we have used <> not equal to Operator and mentioned the number 50.
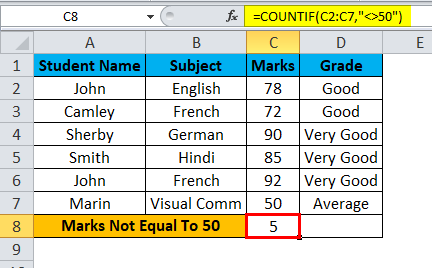
- The above formula counts the student’s marks which are not equal to 50 and returns the output as 5, as shown in the below result.
- In the below screenshot, we can see that marks not equal to 50 are 5, i.e., Five students scored marks more than 50.
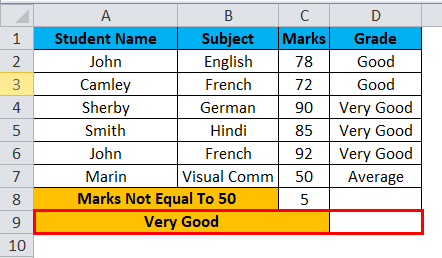
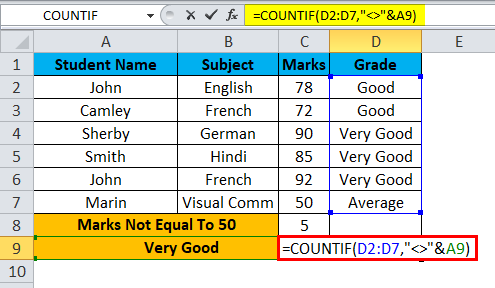
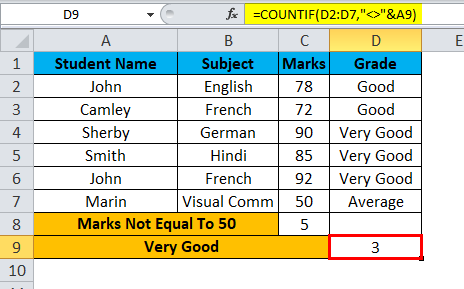
- Now we will use a string to check the student’s grade stating how many students are not equal to the grade “Very Good”, which is shown in the below screenshot.
- For this, we can apply the formula as =COUNTIF(D2:D7,”<>”& A9).
- So this COUNTIF function will find the student’s grade from the range we have specified D2:D7 using the Not Equal To Excel OPERATOR. The grade variable “VERY GOOD” has been concatenated by the operator “&” by selecting A9. This will give us the result of 3, i.e., 3 students’ grades are not equal to “Very Good,” which is shown in the below output.
Things to Remember About Not Equal To in Excel
- In Microsoft Excel, logical operators are mostly used in conditional formatting, which will give us the perfect result.
- The Not Equal To operator always requires at least two values to check whether it is “TRUE” or “FALSE”.
- Ensure you are giving the correct condition statement while using the Not Equal To the operator, or else we will get an invalid result.
Recommended Articles
This has been a guide to Not Equal To in Excel. Here we discuss how to put Not Equal To in Excel, practical examples, and a downloadable Excel template. You can also go through our other suggested articles –
