Updated August 11, 2023
Calendar in Excel
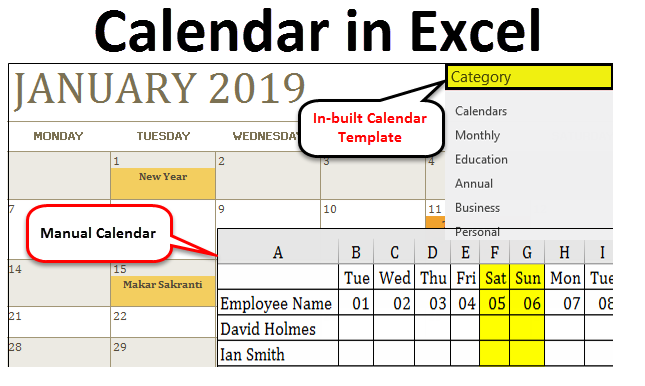
Excel Calendar is a customized calendar in which we can create our calendar with the help of a template available. The main problem comes when we must decide what the first day of the year will be. For the Year 2020, we all know that the first day started on Wednesday. To decide the day of 1st Jan, use the DATE function to find the first date of the month and then subtract the 1st Weekday Date using the WEEKDAY function along with DATE.
Excel provides a variety of different templates which is already formatted and ready to use.
How to use the Pre-Built Calendar in Excel?
To create a pre-built calendar in Excel, follow the below process:
- Go to the File tab.
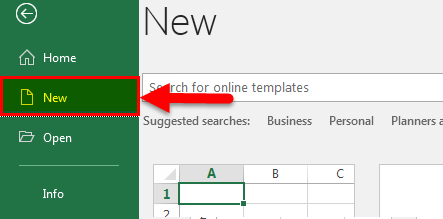
- In the left pane bar, click on the New option.
- It will open several options in the right side window. Refer to the below screenshot.
- In this window, we have to enter what we are looking for in the search box.
- Type Calendar in the box and press Enter key like the below screenshot.
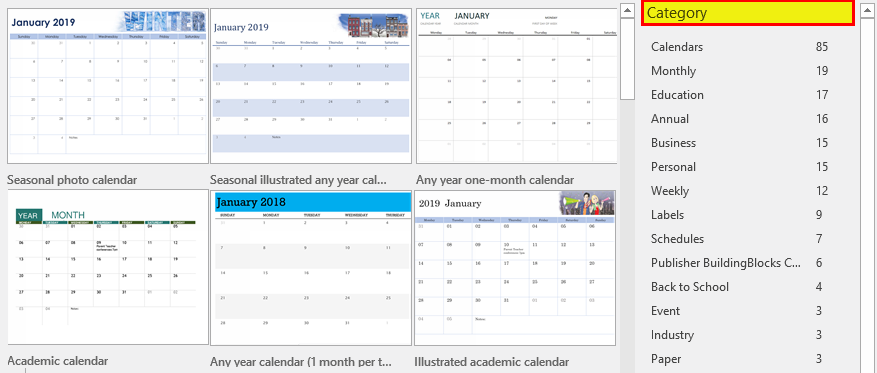
- It will display various types of calendar options, as shown below.
- It has many options like monthly and yearly calendar formats.
- Scroll the bar and choose the Photo calendar (Mon) option. Refer to the below screenshot.
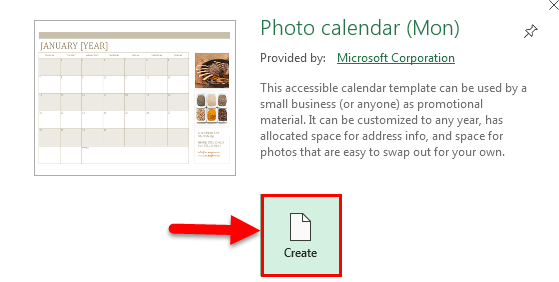
- After clicking on this, it will open a dialog box like the below screenshot.
- Click on Create icon.
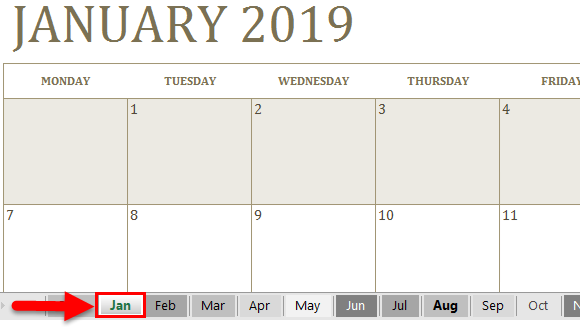
- It will open an Excel workbook having a month-wise date calendar. Here month-wise tab is available, as shown in the screenshot below.
- Click on the Jan month tab.
- It will look like the below screenshot.
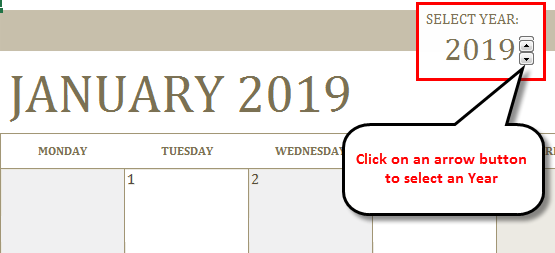
- You can select the Year you want to work for by clicking on the Down/Up arrow icon, as shown in the screenshot below.
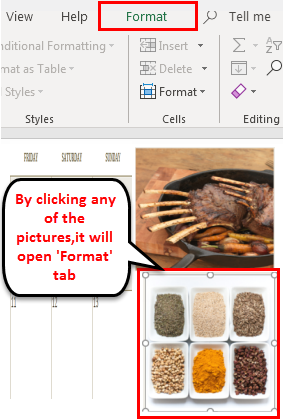
- Click on the right-side image. It will open a Format tab in the menu bar.
- We can format this calendar by changing pics as per our choice.
- For this, click on the right-side image. It will open a Format tab in the menu bar. Refer to the below screenshot.
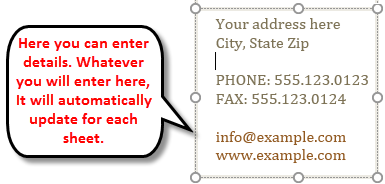
- You can change the address and contact details in the box available on the right side. Refer to the below screenshot.
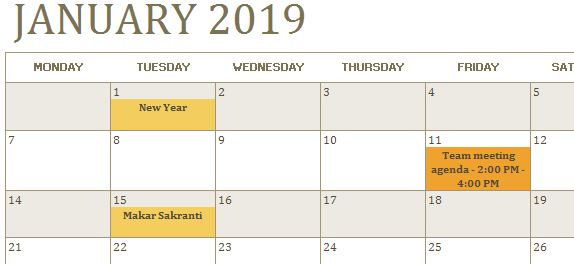
- By clicking on any date inside the calendar, you can make notes date-wise or month-wise.
- Like in the below screenshot, we have mentioned some notes date-wise.
- You can customize the calendar using the format tab as per your requirement.
A calendar in Excel is very important in any company, and it uses for different purposes. Here we are taking an example where we will see a way to create a calendar in Excel for a team.
Use Custom Calendar Sheet in Excel
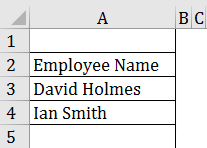
Let’s consider two employee data in a calendar in the Excel sheet. David & Ian are two employees in a team, as shown below:
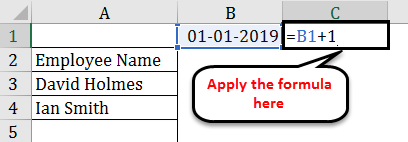
Thus, we are creating a monthly Excel calendar for them. Let’s write the first date of the Jan 19 month in Cell B1. Now, in Cell C1, we will apply the formula =B1+1 for the next date, as shown in the screenshot below.
- Hit the enter key and drag this formula in the next columns for the last day of the month. Here drag till the 31st Jan 19.
- Copy the same dates in Row 2. Refer to the below screenshot.
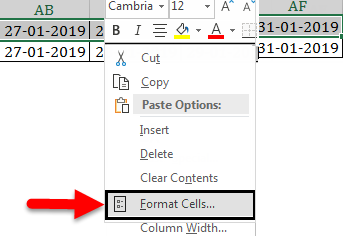
- Now select the dates from Cell B1 to Cell AF1 and do right-click.
- It will open a drop-down list of items.
- Click on Format Cells as shown in the below screenshot.
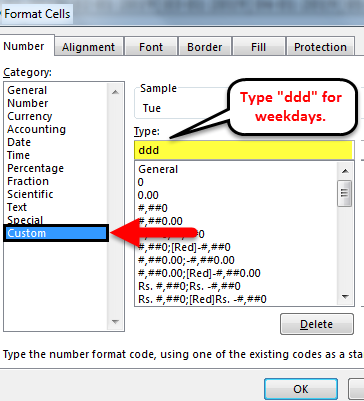
- Choose the Custom option from the Category window and write “ddd” under the Type field for Weekdays. “ddd” refers to Mon, Tue, etc. Refer to the below screenshot.
- It will convert the dates into weekdays in Row 1.
- Again select the whole dates in Row 2 and write “dd” in the Type field under the Custom option. It will convert the dates into days, as shown in the below screenshot.
- Select the columns from B to AF and move the cursor on the line between any two columns, and it will compress the cells as shown in the below screenshot.
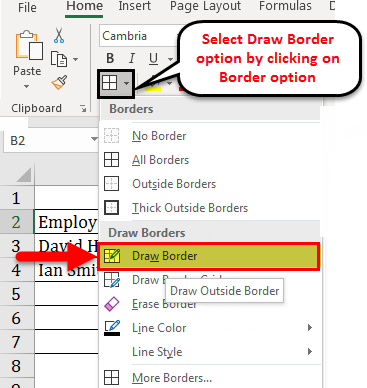
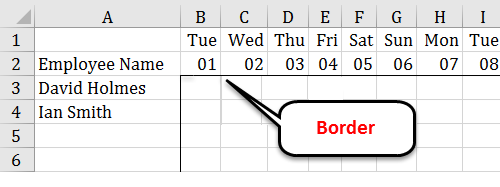
Now we draw a line using the Draw Border option by clicking on the Border option under the Font section, as shown in the below screenshot.
And our calendar will look like below:
Now our Template is ready. Make a copy of this sheet and give the month name of the sheets, like Jan 2019, Feb 2019, etc. Put the name of this sheet as Template.
For Feb 2019 month, we need to change the date of months like below.
Using the Hide option, we will then highlight the weekends and hide the unnecessary rows and columns.
As we can see, the calendar template is ready with us, and now we can use this for scheduling team employee activities date and month-wise.
How to Print a Customized Calendar in Excel?
In the above section, we learned how to create a calendar. We also can take the print of this. Follow below steps for printing a customized calendar:
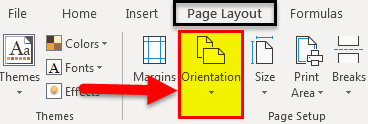
Step 1 – Go to the Page Layout tab.
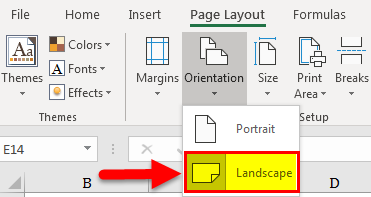
Step 2 – Click on the Orientation option under the Page Setup section, as shown in the below screenshot.
Step 3 – It will open a list of options. Click on Landscape as shown in the below screenshot.
Step 4 – Choose 1 page under Width and Height boxes in the Scale to Fit, As shown in the screenshot below.
Now your customized calendar is ready to print on one page.
Things to Remember
- Using this Excel Calendar, you can easily keep track of daily, weekly, and monthly activities, schedules, etc.
- You can keep track of your business growth by watching the progress on a fixed-date timeline.
- You can keep real-time watch and visibility into the business’s status, resources, and performance.
Recommended Articles
This has been a guide to Calendar in Excel. Here we discuss how to use a pre-built calendar in Excel, a Custom calendar, and print the customized calendar along with practical examples and a downloadable Excel template. You can also go through our other suggested articles –

