Updated August 21, 2023
Shortcut to Delete Row in Excel
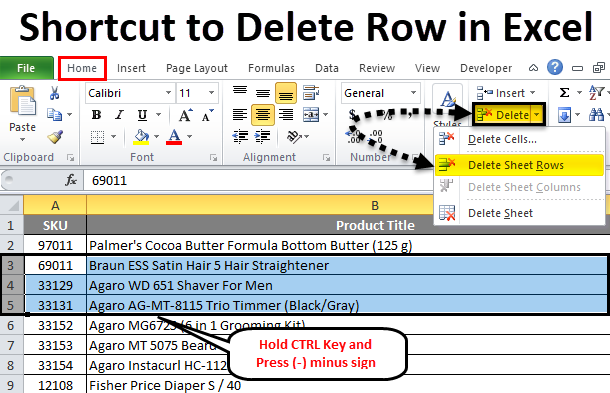
This article will teach us about Shortcut to delete Row in Excel. To delete a row in Excel, select the Rows we want to delete and press Ctrl + Minus (“-“) sign together. This will eliminate the rows which we do not want. This can also done by selecting the row in Excel and choosing the Delete Row option in the right-click menu list. We can even Delete a cell from any row by selecting Shift Cell Up from Right-click menu’s Delete option. This will move the data up by cell position, which we remove.
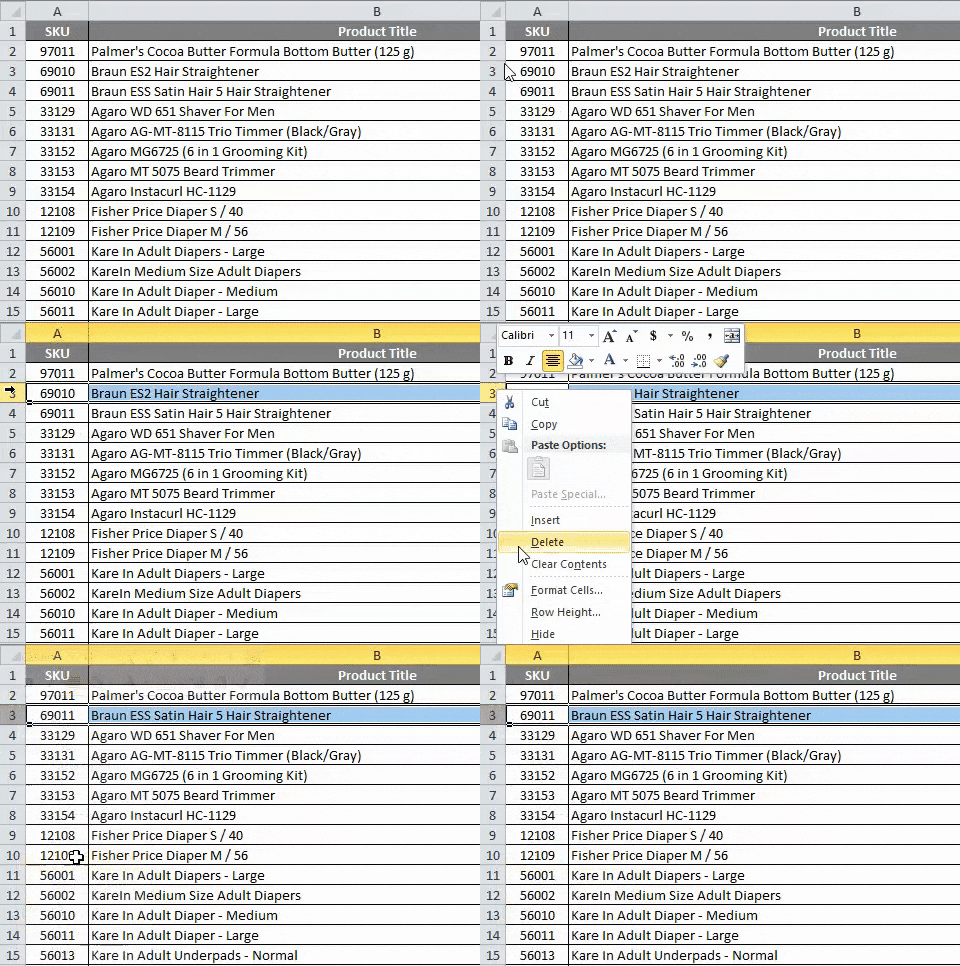
How to delete a row in Excel using right-click menu without Shortcut
- First, select the row that you want to delete.
- Right-click on the row cell.
- We will get the dialog box.
- Click on delete so that the selected row will be deleted.
How to delete the Excel row using the ribbon menu
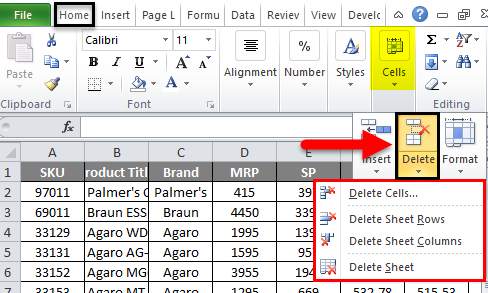
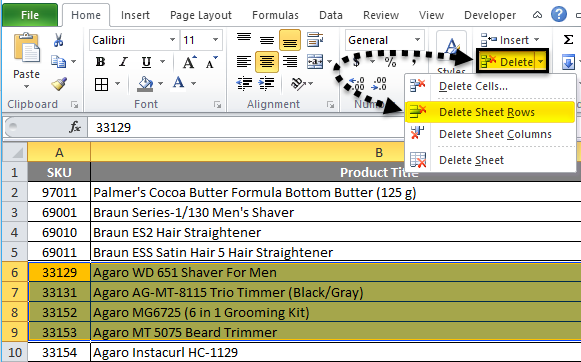
In Microsoft Excel, we can find the delete cells on the home menu, shown in the screenshot below.
Once you click on the delete cells, we will get the following options:
- Delete cells: You can use this to delete the selected cells.
- Delete Sheet Rows: You can use this to delete the selected rows.
- Delete Sheet Column: You can use this to delete the selected column.
- Delete Sheet: You can use this to delete the entire sheet.
We will see all these options one by one.
Example #1 – Delete Cells
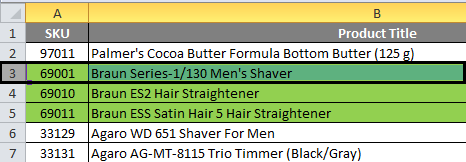
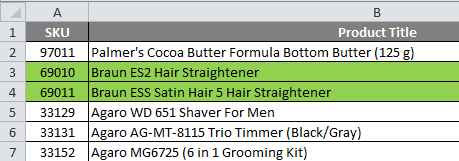
Sometimes it is required to delete unwanted rows and columns in the data. Consider the below example, which has sales data. So, we need to delete the cells shown in the below steps.
Assume that we need to delete the row that has been highlighted in green color.
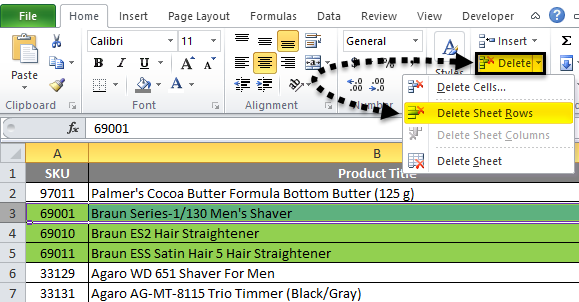
- First, select the row you need to delete, as shown in the figure below.
- Go to the delete cells. Click on the delete cells to get the delete option below, as shown in the screenshot below. Click on the second delete option called “delete sheet rows.”
- So that the selected row will be deleted, as shown in the below screenshot
We can see the difference that the first column, named SKU 69001 row, has been deleted, and the count of a row highlighted in green color has been reduced to two rows before the highlighted green color row count was three.
Example #2 – How to delete entire selected rows
In this example, we will see how to delete the entire row by following the steps below.
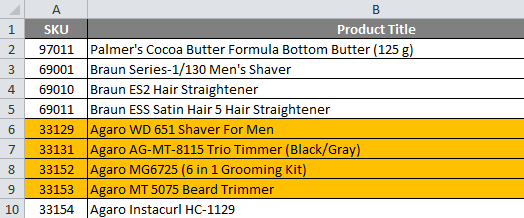
Here we need to delete the highlighted rows.
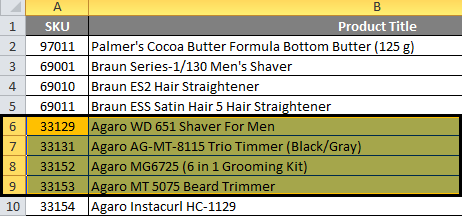
- First, select the highlighted row we need to delete, as shown in the screenshot below.
- Now click on the delete cells. Click on the second delete option, “delete sheet rows.”
- So that the selected entire row sheets will be deleted, which is shown in the below output.
In the above screenshot, we can see that selected rows have been deleted to see the difference that highlighted rows had been deleted.
Example #3
(a) Use the Keyboard shortcut to delete the row in Excel
In Microsoft Excel, we have several shortcut keys for all functions, where we have a shortcut key for deleting the Excel row and column. The shortcut key for deleting the row in Excel is CTRL +” -” ( minus sign), and the shortcut key for inserting the row is CTRL +SHIFT+” +” (plus sign), and the same shortcuts can be used for inserting and deleting for the same. Mostly we will be using the number pad for inserting numbers. We can also use the number pad shortcut key to delete the row. Apply the shortcut key CTRL+” +” (Plus Sign) to act.
Steps to use shortcut keys to delete the row in Excel
The keyboard shortcut key to delete the row in Excel is CTRL+ “-“i.e., the Minus sign, which we need to use.
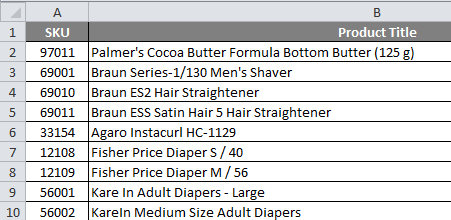
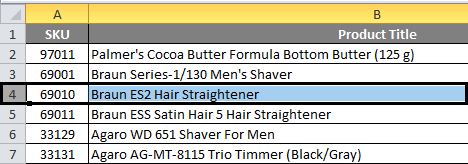
- First, select the cell where you need to delete the row shown below.
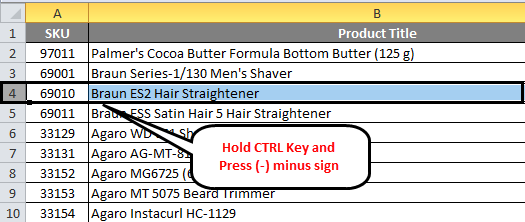
- Use the keyboard shortcut key. Hold CTRL Key and Press the “-” minus sign on the keyboard.
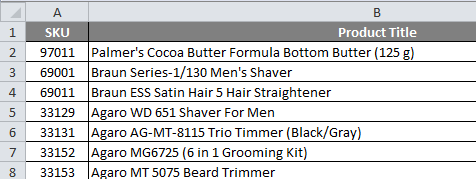
- So that the entire row will be deleted, which is shown below.
Here we can see the difference that the Product title name “Braun ES2 Hair Straightener “row has been deleted, as we notice in the above screenshot.
(b) How to Delete Entire Rows in Excel Using the Keyboard Shortcut key
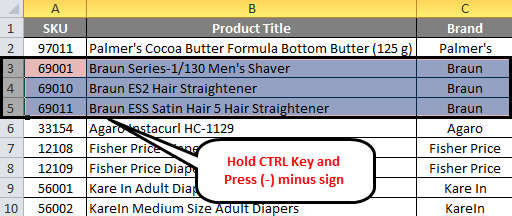
Consider the example below where we need to delete rows of the brand name “BRAUN”, highlighted for reference.
To delete the Excel rows using a keyboard shortcut, follow the below steps.
- First, select the row cells which has been highlighted in pink color.
- Press the CTRL key and hold it. By holding the CTRL key, press the “-” minus sign.
- The selected row will be deleted once you press the CTRL key and – key at a time. We will get the below result which is shown in the below screenshot.
The above screenshot shows that the BRAND name called “BRAUN” rows has been completely deleted.
Example #4 – Deleting Selected and Multiple Rows in Excel
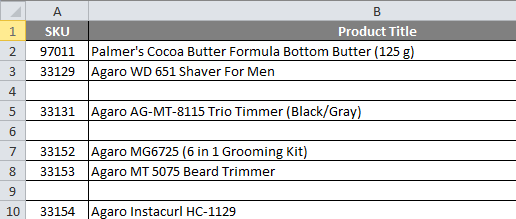
Consider the below example where we can see unwanted blank rows in the sheet that makes the data inappropriate. In this scenario, we can delete the blank rows simultaneously using the keyboard shortcut or the delete cells menu.
Now we need to delete the blank rows in the above sales data and make the sheet with clear input.
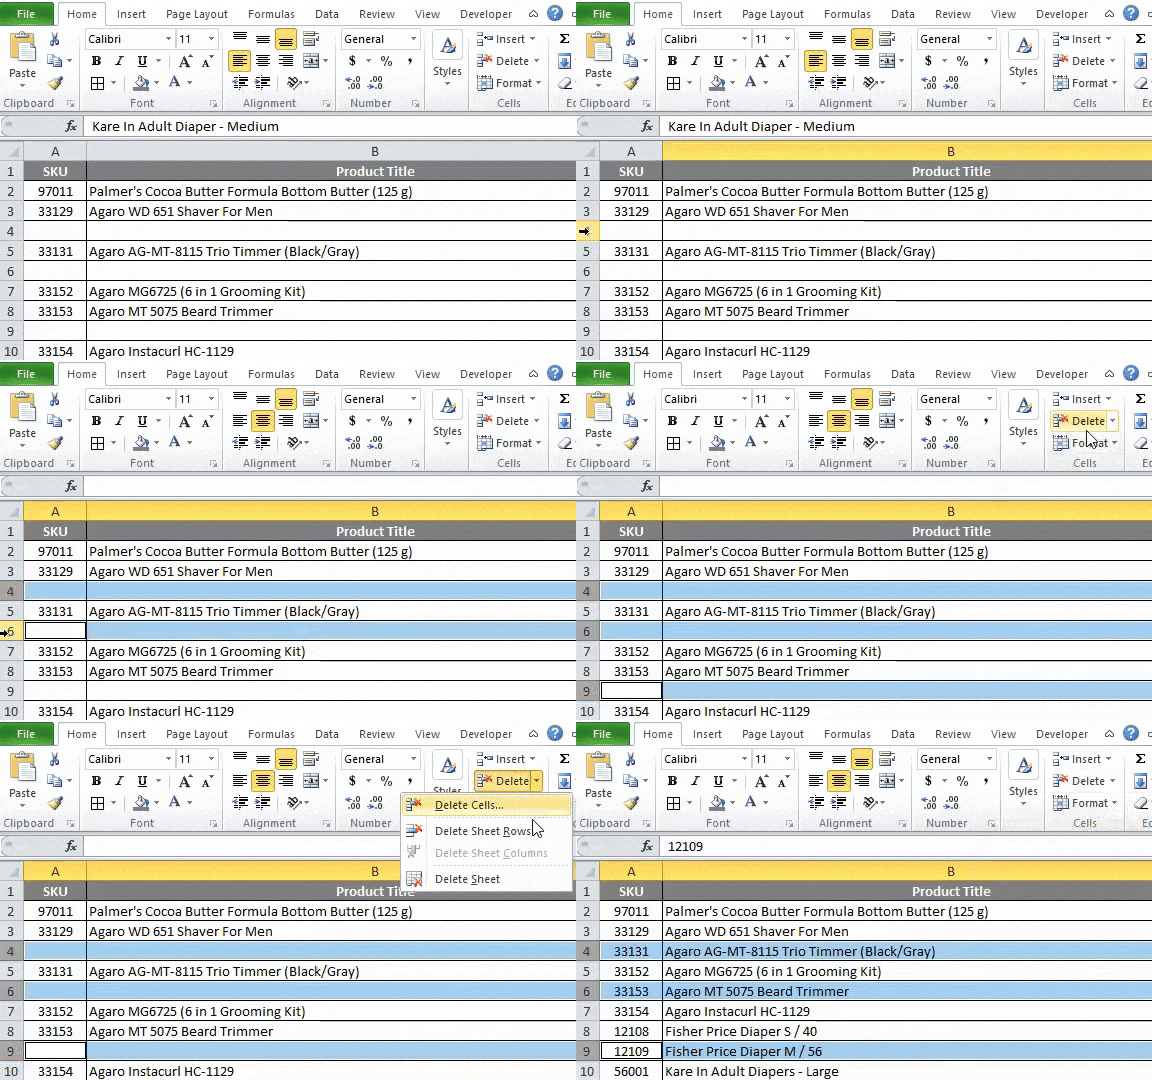
To delete multiple rows at a time, follow the below simple steps.
- First, hold the CTRL Key.
- Select the entire blank rows by holding the CTRL key.
- We can see that selected rows have been marked in blue color.
- Now go to delete cells. Click on delete sheet rows.
- Once you click on the delete sheet rows, all the selected rows will be deleted within a fraction of a second.
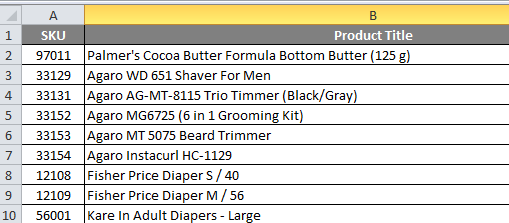
- We will get the result as follows, which is given below.
In the above screenshot, we notice that all blank rows are now deleted, and the data looks better when compared to previous data.
Things to Remember About Delete Row Excel Shortcut
While deleting the data in Excel, ensure the data is not required. However, we can retrieve the deleted rows by doing undo in Excel.
You can download this Delete Row Shortcut Excel Template here – Delete Row Shortcut Excel Template.
Recommended Articles
This has been a shortcut guide to delete a row in Excel. Here we discuss how to delete a row in Excel using a shortcut – 1) keyboard shortcut, 2) Using Right Click, 3) Using the Delete Sheet Row option, along with practical examples and a downloadable Excel template. You can also go through our other suggested articles –

