Updated August 11, 2023
Sort By Number in Excel
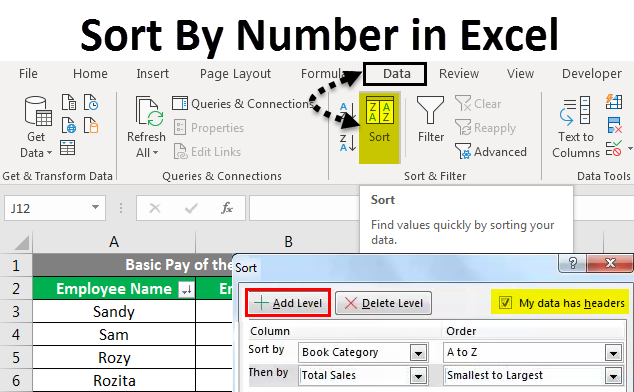
In Excel, there are two ways to sort numbers. First, select the data and click the Sort option from the Data menu tab(Sort By Number in Excel). Choose the column whose value we want to sort, then choose Sort on Value from the drop-down. Now we can Sort the number by Largest to Smallest and vice-versa. We can also customize the sorting method for that. The second is using filters. Please select the column with numbers; after applying filters, we will be able to sort numbers from Largest to Smallest and vice-versa.
The structure of a workbook is such that it allows data in a tabular format. In addition, it allows you to view the data in different ways by using the following features:
- Sort
- Filter
- Group
Today we will discuss the Sort By Number in Excel.
Sorting is a method that allows the user to order data. The textual data can be arranged in alphabetical order or in reverse alphabetical order. The Numerical data can be arranged in ascending order or descending order. The date data can be arranged in the oldest to newest order or in the newest to oldest order. In addition, we can sort the data on a single criterion or multiple criteria.
Today, we will work on the Sort by Number in Excel.
How to Implement Sort By Number in Excel?
It is very simple and easy to use. This is the guide to Sort by Number Excel with Detailed Examples. In Excel, we can find the Sort option in two places:
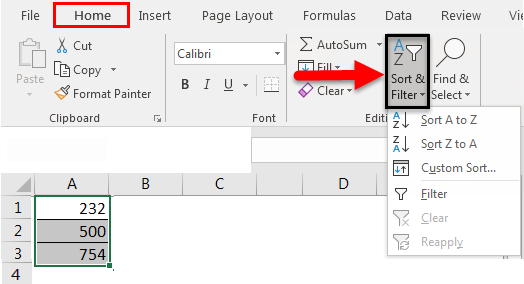
- Under the File tab – under Editing Group – Click on Sort and Filter Dropdown Menu.
- Then Sort A to Z or Z to A for textual data.
- Then Sort oldest to newest or newest to oldest for Date data
- And then Sort largest to smallest and smallest to largest for Numerical Data.
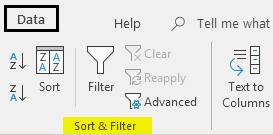
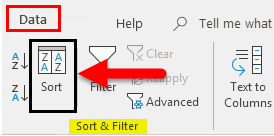
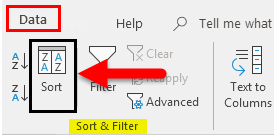
- Under the Data tab – under Sort and Filter Group
- Then Sort A to Z or Z to A for textual data.
- Then Sort from oldest to newest or newest to oldest for Date data.
- And then Sort largest to smallest and smallest to largest for Numerical Data.
We can also use the Custom Sort option for the data sorted using multiple criteria. In Excel, we can find the sort option in two places:
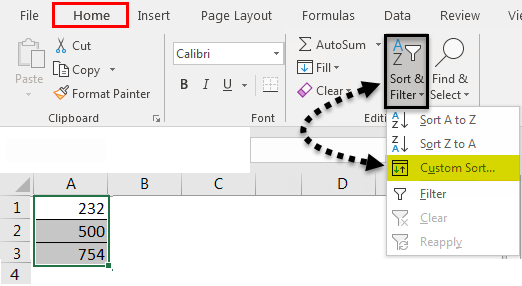
- Under the File tab – under Editing Group – Click on Sort and Filter Dropdown Menu – Click on Custom Sort.
- Under the Data tab – under Sort and Filter Group – Click on Sort.
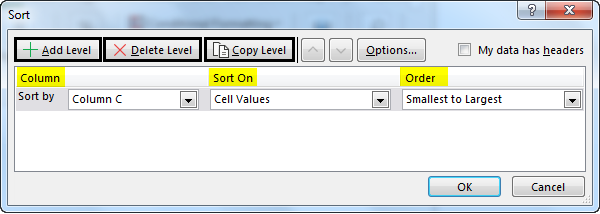
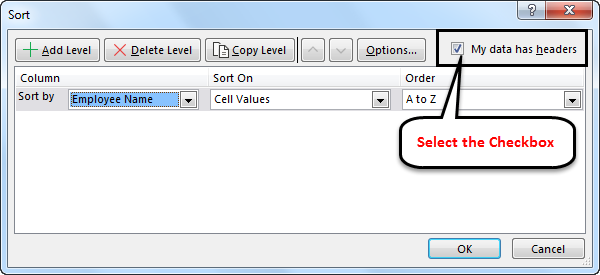
After this, A dialog box of Custom Sort will open as the following figure:
We will find three headings:
- Columns: We will find all the column headings of the table or range.
- Sort On: It will give us a description of the data on Values, Cell Color, Font Color, and Cell Icon.
- Order: We can also select the order from smallest to largest or largest to smallest.
We can also use the following tabs:
- Add Level: To add one or more criteria.
- Delete Level: To delete the selected criterion or criteria.
- Copy Level: To copy an existing criterion or criteria.
Examples of Sort By Number in Excel
There are two types of Sorting:
- Single Level or one-column sorting
- Multi-level or two or more columns sorting
Let’s understand Sort by Number in Excel by some examples.
Sort By Number in Excel- Example # 1
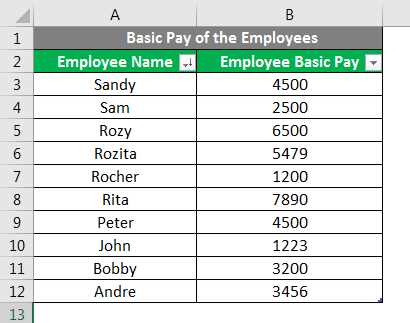
Single-level or one-column sorting is sorting the data using one column.
In the above figure, sorting the data using Employee Basic Pay is single level sorting.
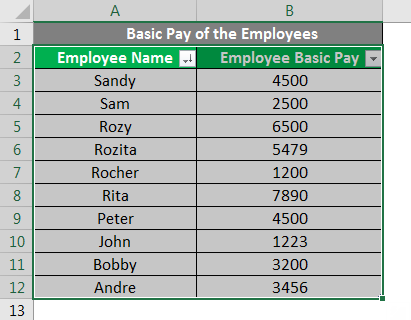
- Step 1: Select the data range from A2 to B12.
- Step 2:Go to the File tab – under Editing Group – Click on Sort and Filter Dropdown Menu – Click on Custom Sort.
Or
- Go to the Data tab – under Sort and Filter Group – Click on Sort.
- Step 3: Now select the checkbox of the My data has headers so that the first row of the selected data of A2:B12 is taken as the header and not as data.
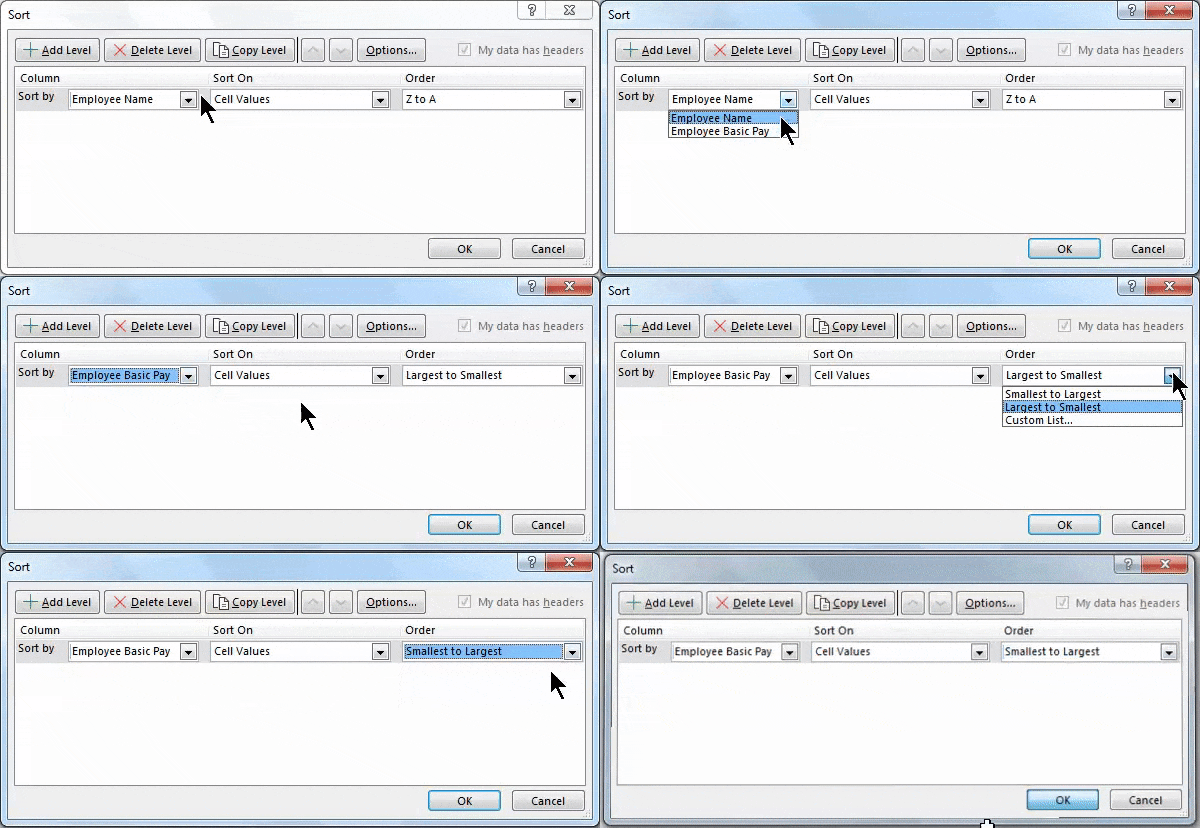
- Step 4: Now click on the Sort drop-down menu to select the column heading Employee Basic Pay.
- Step 5:Under the Order drop-down menu, select Smallest to Largest.
- Step 6: Click on OK.
- Step 6: Click on OK.
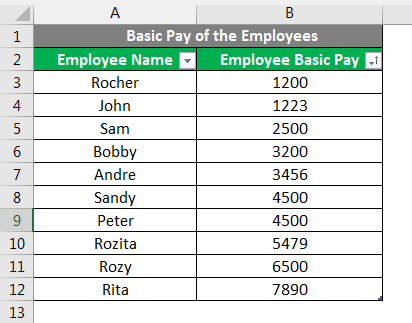
After all settings for Sort By Number in Excel, the result will appear as follows:
Sort By Number in Excel – Example # 2
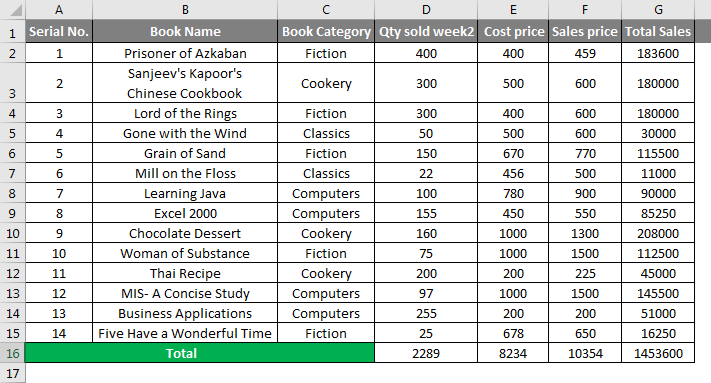
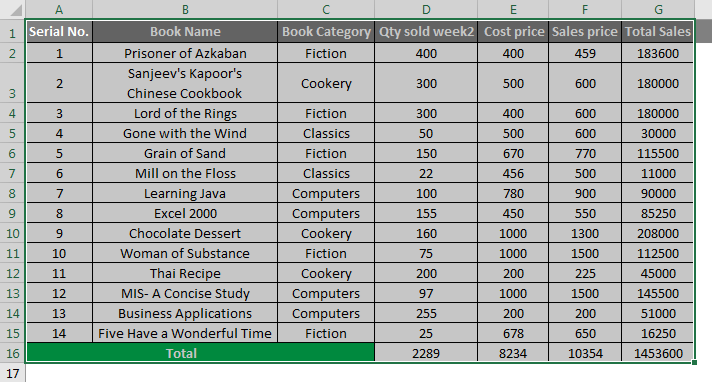
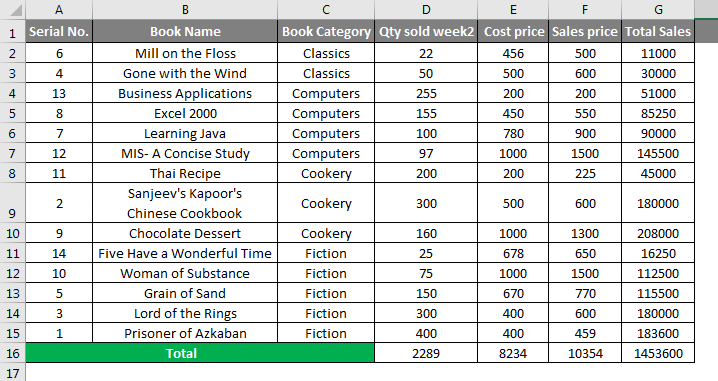
- Step 1: Select the data range from A1 to G16
- Step 2: Go to the File tab – under Editing Group – Click on Sort and Filter Dropdown Menu – Click on Custom Sort.
Or
- Go to the Data tab – Under Sort and Filter Group – Click on Sort.
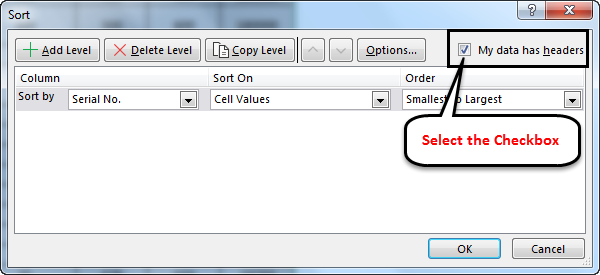
- Step 3: Now select the checkbox of the My data has headers so that the first row of the selected data of A1:G13 is taken as the header and not as data.
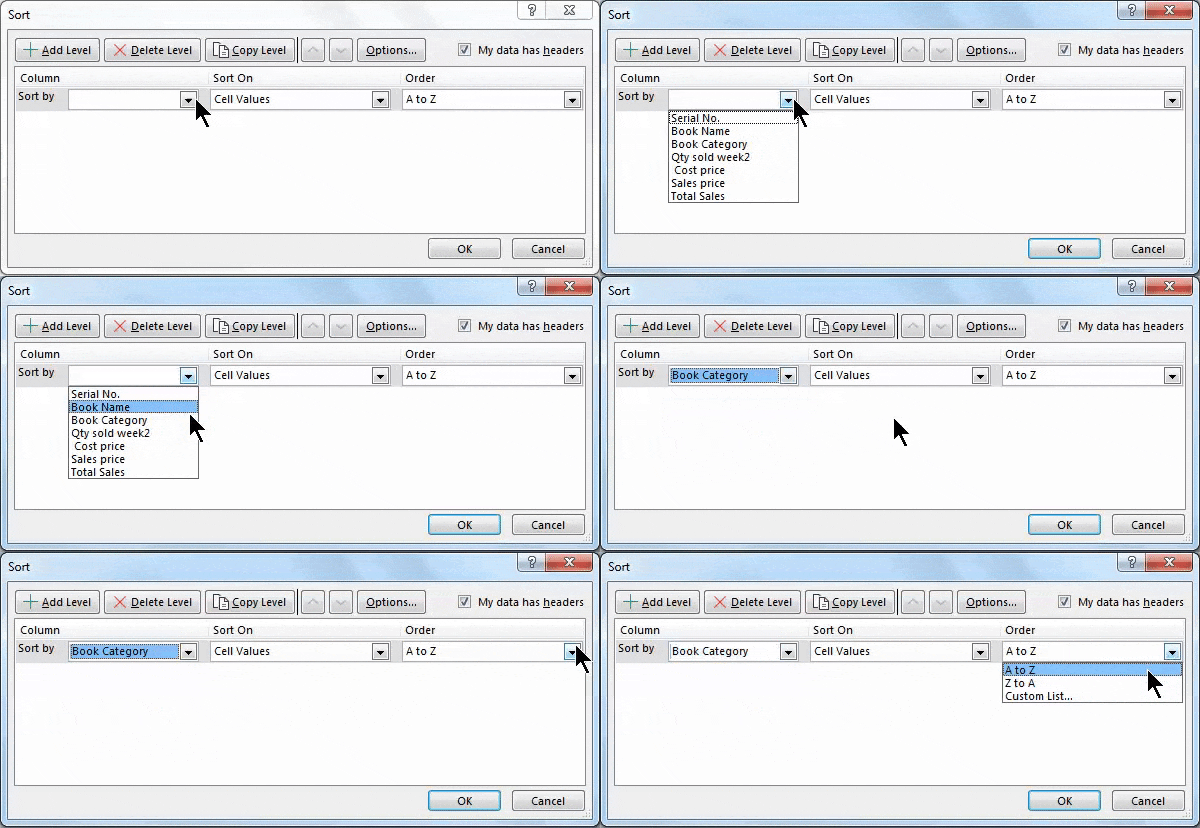
- Step 4: Now click on the Sort drop-down menu to select the column heading Book Category.
- Step 5: Select A to Z or Z to A under the order drop-down menu
- Step 6: Then click on Add Level to add other criteria.
- Step 7: Now click on the Sort drop-down menu to select the column heading Total Sales.
- Step 8: Select Smallest to Largest or Largest to Smallest under the order drop-down menu.
- Step 9: Click on OK.
After adding all settings for Sort By Number in Excel, the result will appear as follows:
Things to Remember
- Our data will get jumbled, and reports will be incorrect if we do not sort the entire data table or range.
- We have to select the check box; my data has headers so that Excel can understand the first row as the column heading and not as Data.
- We can sort the numerical values to Sort by Number in Excel as smallest to largest and largest to smallest.
- We can sort the textual values as A to Z or Z to A.
- Sorting dates in Excel is possible by selecting the options Oldest to Newest or Newest to Oldest.
- We can add many levels, such as single-level or multi-level, to change or alter the date according to our requirements.
- We can sort only one color at a time concerning sorting based on cell color or font color.
Recommended Articles
This is a guide to Sort By Number in Excel. Here we discussed how to Sort By Number in Excel and How to implement Sort By Number in Excel, along with practical examples and a downloadable Excel template. You can also go through our other suggested articles –

