Updated August 21, 2023
Add Column in Excel
Of course, there is more than one way to accomplish a task, as in all Microsoft programs. Excel allows a user to add columns, whether left or right, of the column in the worksheet called Add Column in Excel. These instructions cover how rows and columns can be added and modified in an Excel worksheet using a keyboard shortcut and the context menu with a right-click.
How to Add Column in Excel?
Adding a column in Excel is very easy and convenient whenever we want to add data to the table. There are different Methods to Insert or add Column, which is as follows:
- Manually we can do this by just right-clicking on the selected column> and then clicking the insert button.
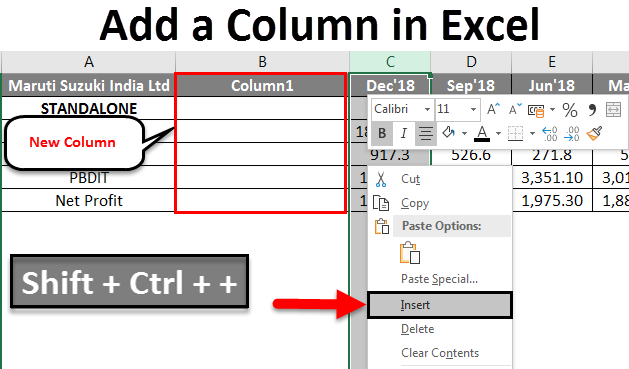
- Use the Shift + Ctrl + + shortcut to add a new column in Excel.
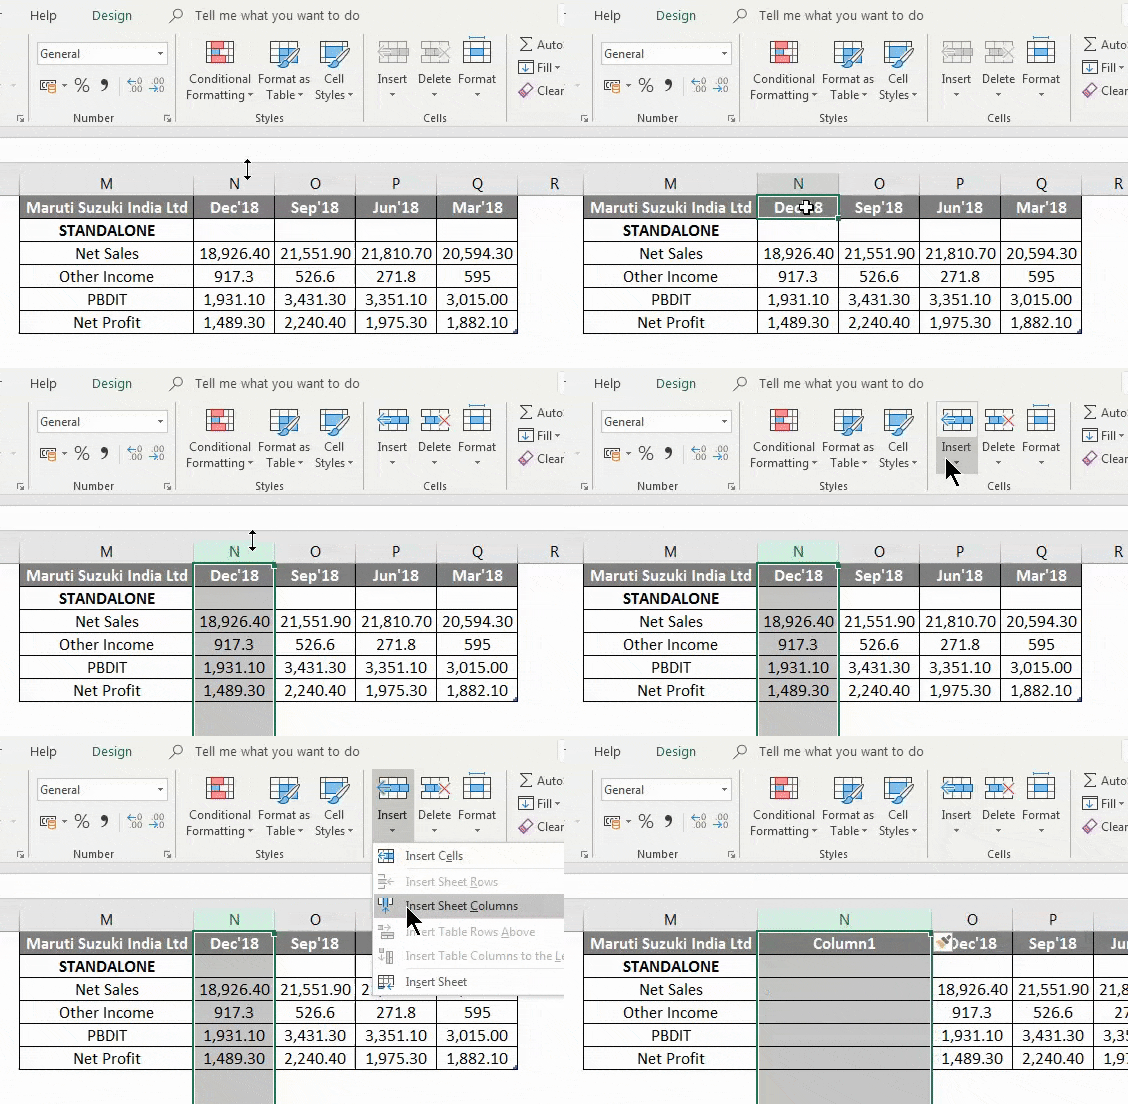
- Home tab >> click on Insert >> Select Insert Sheet Columns.
- We can add N number of columns in the Excel sheet; a user needs to select that many columns which the number of columns he wants to insert.
Let’s understand How to Add Columns in Excel with a few examples.
Example #1
A user has a standalone book data of sales, income, PBDIT, and Profit details of each Maruti Suzuki India Pvt Ltd quarter in sheet1.
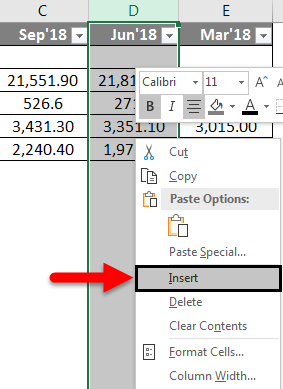
Step 1: Select the column where a user wants to add the column in the Excel worksheet (The new column will insert to the left of the selected column, so select accordingly)
Step 2: A user has selected the D column where he wants to insert the new column.
Step 3: Now Right-click and select the Insert button or use the shortcut Shift + Ctrl + +
Or
As we can see, as it was required to insert a new column between C and D columns, we have added a new column in the above example. So, as a result, it will move the D column data to the next column, which is E, and it will take the place of D.
Example #2
Let’s take the same data to analyze this example. A user wants to insert three columns left of the B column.
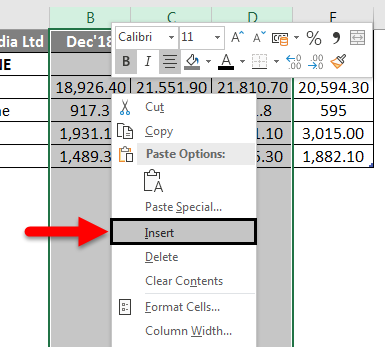
Step 1: Select B, C, and D columns where a user wants to insert new 3 columns in the worksheet (The new column is inserted to the left of the selected column, so select accordingly)
Step 2: A user has selected the B, C, and D columns where he wants to insert a new column
Step 3: Now Right-click and select the Insert button or use the shortcut Shift + Ctrl + +
Or
As we can see, as it was required to insert a new column left of the B, C, and D column, we added a new column in the above example. As a result, it will move B, C, and D column data to the next column, E, F, and G; it will replace the B, C, and D columns.
Example #3
Step 1: Go to Worksheet >> Select the column’s heading where a user wants to insert a new column.
Step 2: Click on the Insert button.
Step 3: One drop-down will open; click the Insert Sheet Columns.
As the user wants to use the Insert toolbar to insert a new column, as, in the above example, it is added.
Example #4
The user can insert a new column in any version of Excel; in the above examples, we can see that we had selected one or more columns in the worksheet then >Right click on the selected column> and then click on the Insert button.
Add a new column in the Excel worksheet.
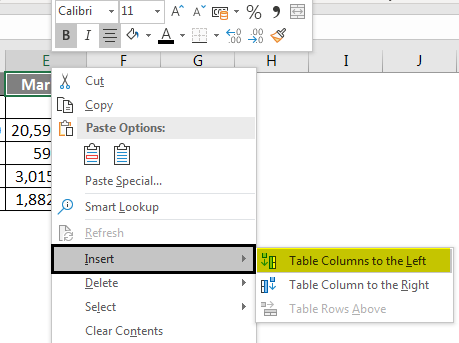
Click on Table Columns to the Left from the Insert option. Click in a cell to the left or right where you want to add a column. If the user wants to add a column to the left of the cell, then follow the below process:
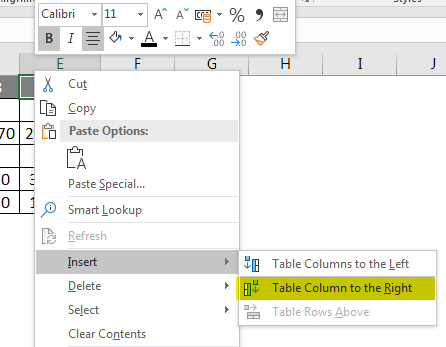
And if a user wants to insert the column to the right of the cell, then follow the below process:
- Click on Table Columns to the Right from the Insert option.
How to Modify a Column Width?
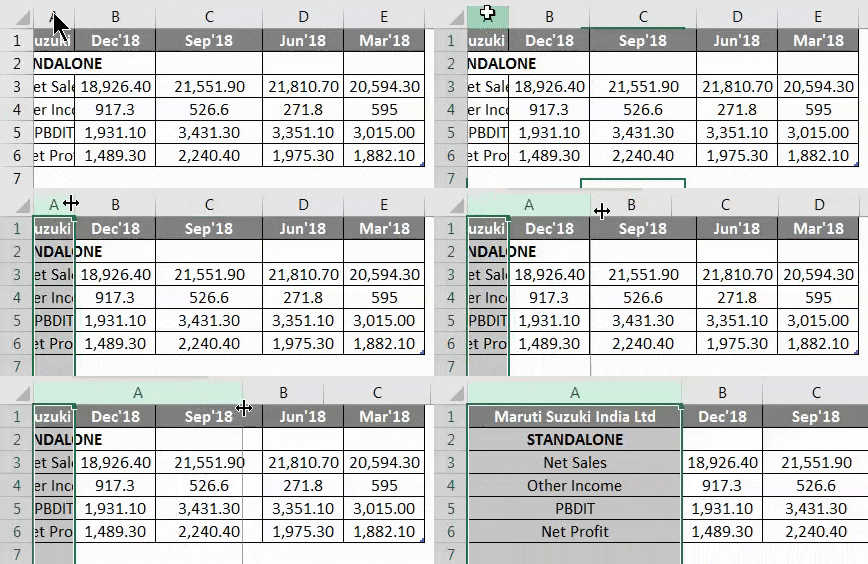
A user can modify the width of any column. Let’s take an example, as some of the content in column A cannot be displayed. We can make all this content visible by changing the width of column A.
Step 1: Position the mouse over the column line in the column heading to the Black Cross. (As shown below)
Step 2: Click, hold, and drag the mouse to increase or decrease the column width.
Step 3: Release the mouse. The column width will be changed.
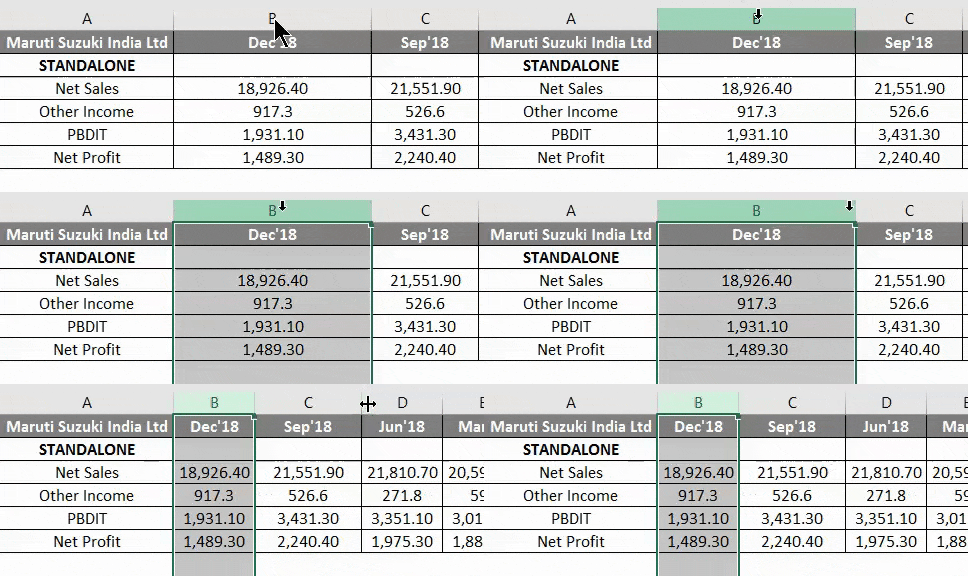
A user can auto-fit the width of the column. The AutoFit feature will allow you to automatically set a column’s width to fit its content.
Step 1: Position the mouse over the column line in the column heading to the Black Cross.
Step 2: Double-click the mouse. The column width will be changed automatically to fit the content.
Things to Remember About Add a Column in Excel
- The user needs to select the column where the user wants to insert the new column.
- By default, every row and column has the same height and width, but a user can modify the column’s width and the row’s height.
- The user can insert multiple columns at a time.
- You can also AutoFit the width for several columns at the same time. Simply select the columns you want to AutoFit, and then select the AutoFit Column Width command from the Format drop-down menu on the Home. This method can also use for row height.
- All the rules will also be applied for rows, as applied to column insertion.
- Excel allows the user to wrap text and merge cells.
- For deleting also, we can go to Home Tab >> Delete >> Delete Sheet Columns; either we can select the column which we want to delete or >> Right Click >> click on Delete.
- After adding the insert column, all the data will be shifted to the right side after that column.
Recommended Articles
This is a guide to adding a column in Excel. Here we have discussed How to Add a column in Excel using different methods and How to modify a column in Excel, along with practical examples and a downloadable Excel template. You can also go through our other suggested articles –

