Updated June 9, 2023
Insert Date in Excel
In Microsoft Excel, we can insert the date in various ways, either by using built-in function formula or by inserting the date manually, like 1/02/2019, 01-Feb-19, 01-Feb, or February 1, 2019. These date functions are normally used in accounting and financial analysis for cash flows.
In Excel, for inserting the date, we have a built-in function called TODAY () which will insert the exact today’s date, and this function will give you the updated date whenever we open the workbook. We can also use the NOW () built-in function, which inserts the current date and time, and this function also will be kept on getting updated when we open the workbook multiple times.
How to Insert?
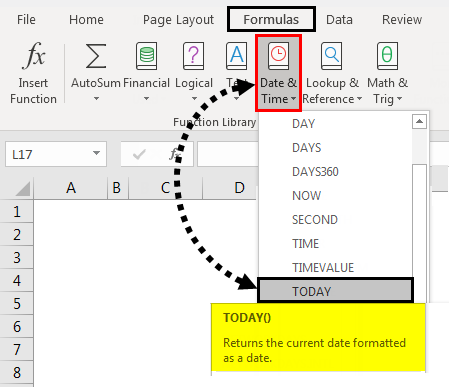
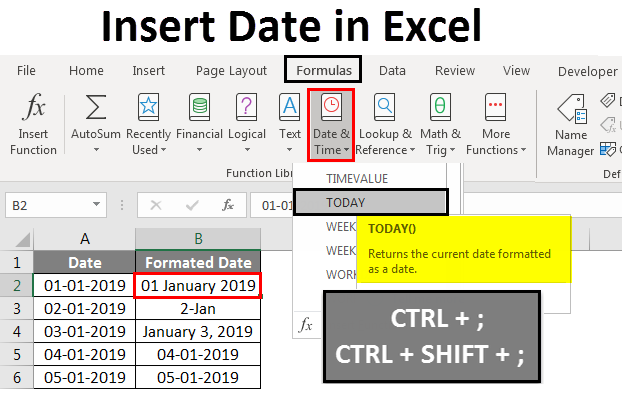
TODAY built-in function is categorized under the DATE/TIME function in the Formula tab.
We can use the alternative ways to insert the date in Excel by using the keyboard shortcut key listed below.
- CTRL+; (Semicolon), which will insert the current date.
To insert the current date and time, we can use the below shortcut key as follows.
- CTRL+, and then CTRL+SHIFT+, which will give us the current date and time.
Let’s understand How to Insert Dates in Excel by different methods, along with some examples.
Insert Date in Excel – Example #1
Insert date automatically in Excel Using Function TODAY:
In this example, we will see how to automatically insert the date using the TODAY built-in function by following the below steps.
Step 1 – Open a new workbook.
Step 2 – Go to the Formulas tab.
Step 3 – Select the DATE & TIME to get the list of functions as shown below.
Step 4 – Select the TODAY function.
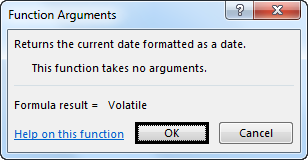
Step 5 – Once we click on the today function, we will get the dialog box for Function Arguments. Then Click on OK.
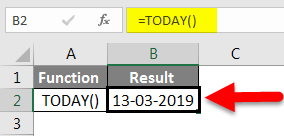
Excel will insert the current data, as shown below.
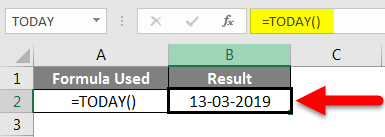
Step 6 – We can type the function directly as TODAY, then press the Enter key to get the current date in the sheet below.
Alternatively, we can also use the shortcut key for inserting the date as CTRL + ;
Insert Date in Excel – Example #2
Insert the date automatically in Excel Using the NOW Function:
In this example, we will see how to use the NOW function to insert a date in Excel by following the below steps.
Step 1 – First, open a new sheet.
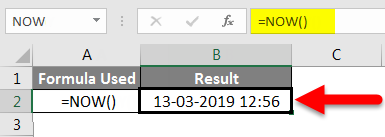
Step 2 – Type =NOW() function in the worksheet. Then press the Enter key to get the current date and time, as shown below.
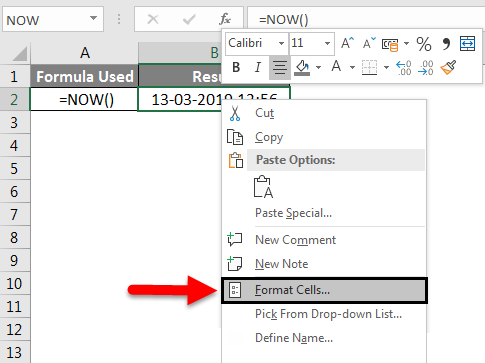
Step 3 – We can format the date and time by right-clicking the cells to get the format cells to the option shown below.
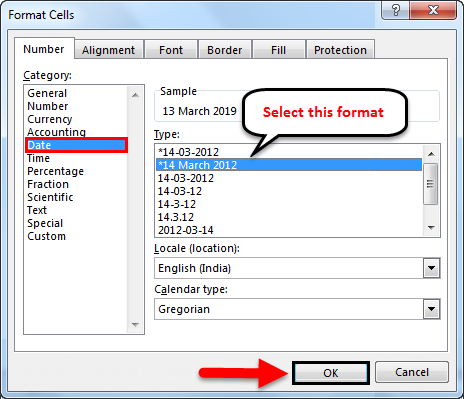
Step 4 – Once we click on the Format Cells, we will get the below dialog box. Then choose the desired format that we need to display here in this example.
We will choose the date format of the second option, i.e., Date/Month/Year, as shown below.
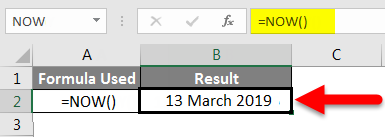
Step 5 – Click OK to get the date in the desired format, as shown below.
Insert Date in Excel – Example #3
Manually Insert a date in Excel:
In this example, we will learn how to insert the date manually with the below example
In Excel, if we enter the normal data by default, Excel will convert the number to date format, in rare cases, if we import the sheet from other sources, Excel will not recognize the design. In such a case, we must manually enter the date and change it to date format.
Follow the below steps to insert the date
Step 1 – Open a new workbook.
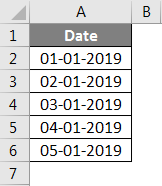
Step 2 – Insert the various dates manually as 01-01-19, 01-02-19,03-03-19, which are shown below.
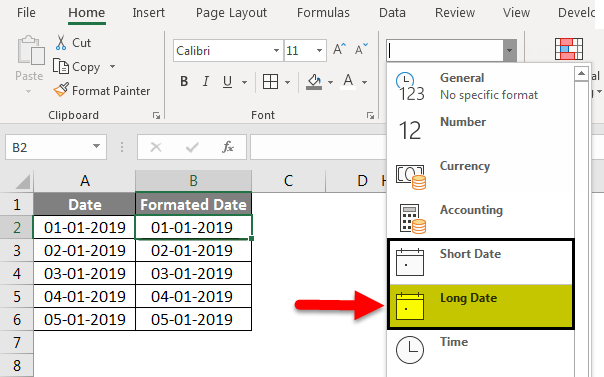
Step 3 – We can change the date format by selecting the format option below.
In the above screenshot, we can see the date format as Short Date and Long Date.
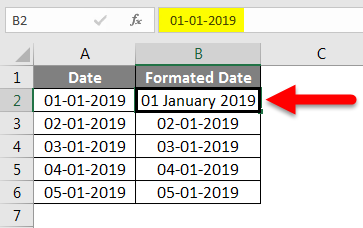
Step 4 – Click on the Long Date to get the date in the desired format, as shown below.
We can insert the date in various formats by formatting the date as follows.
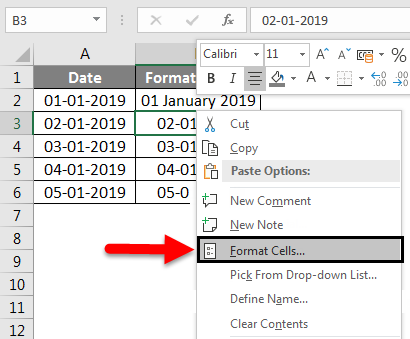
Step 5 – Click on cell B3 and right-click on the cell to get the format cells to the option shown below.
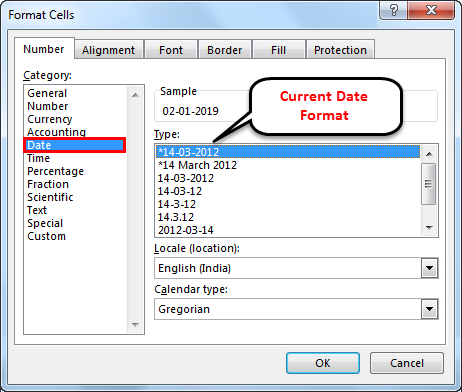
Step 6 – Click on the format cells so that we will get the format option dialog box which is shown below.
The above format option by default Excel will show the * (Asterisk)mark, which means the current date format.
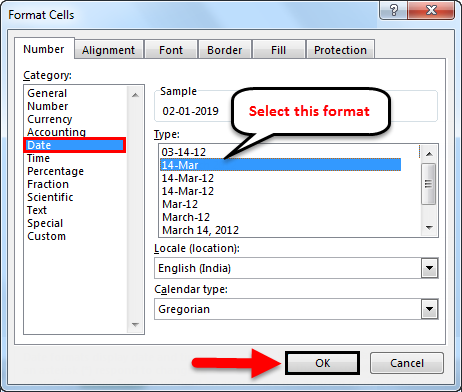
Step 7 – Select the other date format as 14-Mar, which means Date- Month, shown below.
Step 8 – Now click OK to get the desired date output.
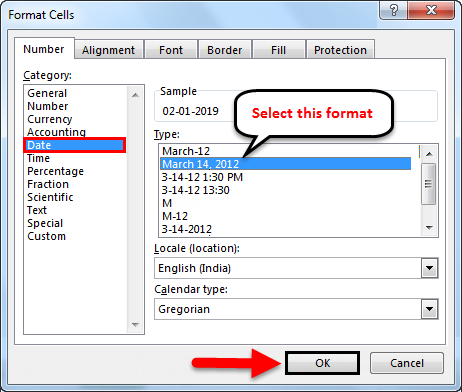
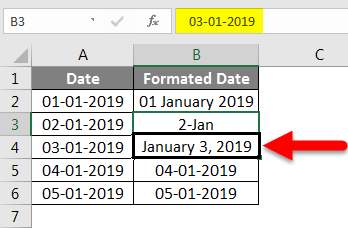
We can change the third date also in a different date format by applying the formatting option as above, where we have selected the below option as Month, Date, Year.
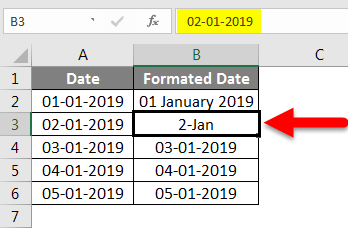
Step 9 – Click OK so that we will get the final output which is shown below.
In the below screenshot, we have inserted the date in a different format using the formatting option.
Insert Date in Excel – Example #4
Insert dates automatically by dragging the cells:
In Excel, we can simply insert the date and drag the cell automatically by following the below steps.
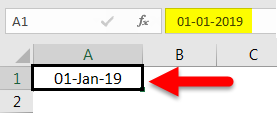
Step 1 – Open a new workbook and Type the date as 01-Jan-19, shown below.
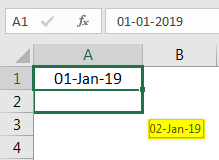
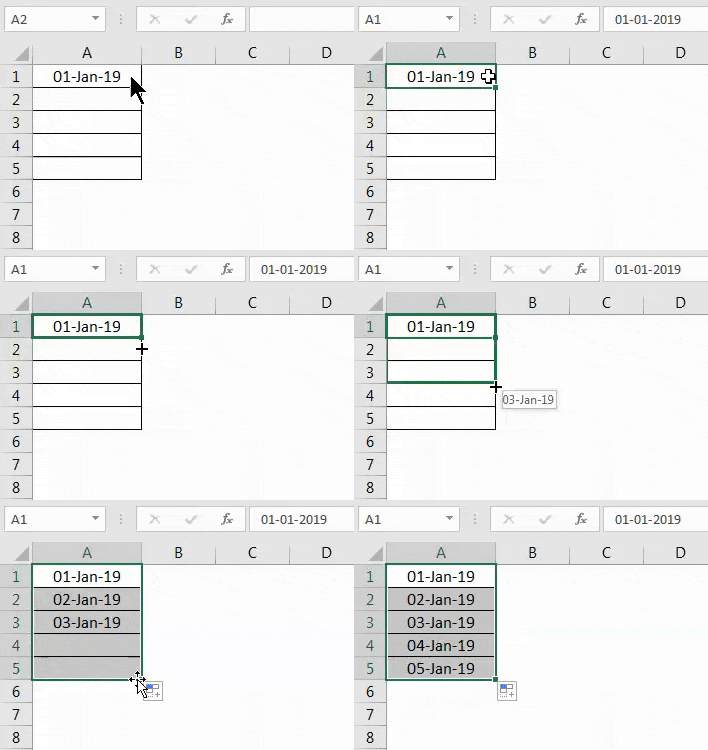
Step 2 – Now drag down the cells using the mouse, as shown below.
Once we drag down the mouse, Excel will display the auto-increment date in the below cell.
Step 3 – Drag down the cells up to 05-Jan-19, as shown below.
We have inserted the date by just dragging the cells, and we notice a + (Plus) sign symbol that allows us to auto-fill the date.
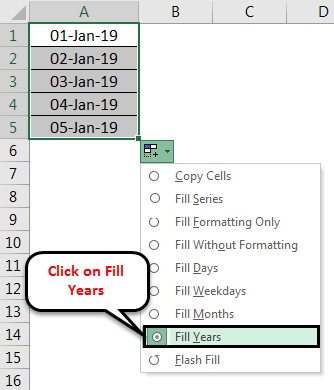
Once we click on the + sign symbol, we will get options like Fill Days below. Fill Weekdays, Fill Months, Fill Years.
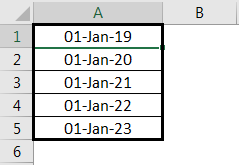
Step 4 – Now, just click on the option Fill years so Excel will insert the years automatically, as shown below.
Now we can see the difference that auto-fill has changed the date by incrementing only the years and keeping all the dates as a common number.
Things to Remember
- We must be very careful using the TODAY built-in function in Excel because the Today function will always return the current date. For example, if we applied the today function in the report yesterday and if you try to open the same report, we will not get yesterday’s date, and the today function will update only the current date.
- We can insert the date using auto-fill options but ensure we insert the correct dates in the Excel because autofill will change the date for the entire cell.
Recommended Articles
This has been a guide to Insert Date in Excel. Here we discussed Insert Date in Excel and How to Insert Date using different methods in Excel, along with practical examples and a downloadable Excel template. You can also go through our other suggested articles–


