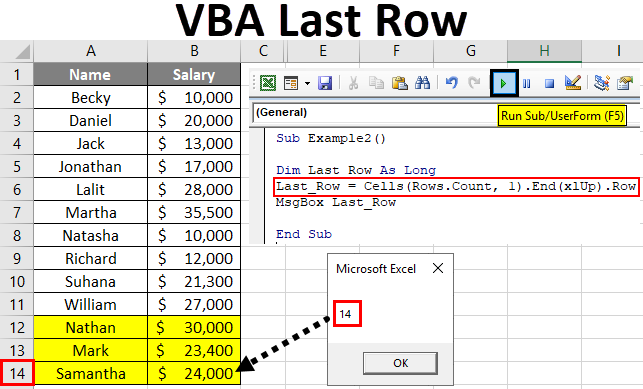
Excel VBA Last Row
Finding the last row in a column is an important aspect in writing macro’s and making those dynamic. As we would not prefer to update the cell ranges every now and then when we are working with Excel cell references. As being a coder/developer, you would always prefer to write a dynamic code which can be used on any data and suffice your requirement. Moreover, it would always be great if you have the last row known of your data so that you can dynamically change the code as per your requirement.
I will just point out one example which iterates the importance of dynamic code.
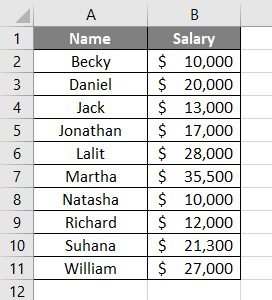
Suppose I have data as given below with employee and their salaries.
And look at the code given below:
Code:
Sub Example1()

  Range("D2").Value = WorksheetFunction.Sum(Range("B2:B11"))

End Sub
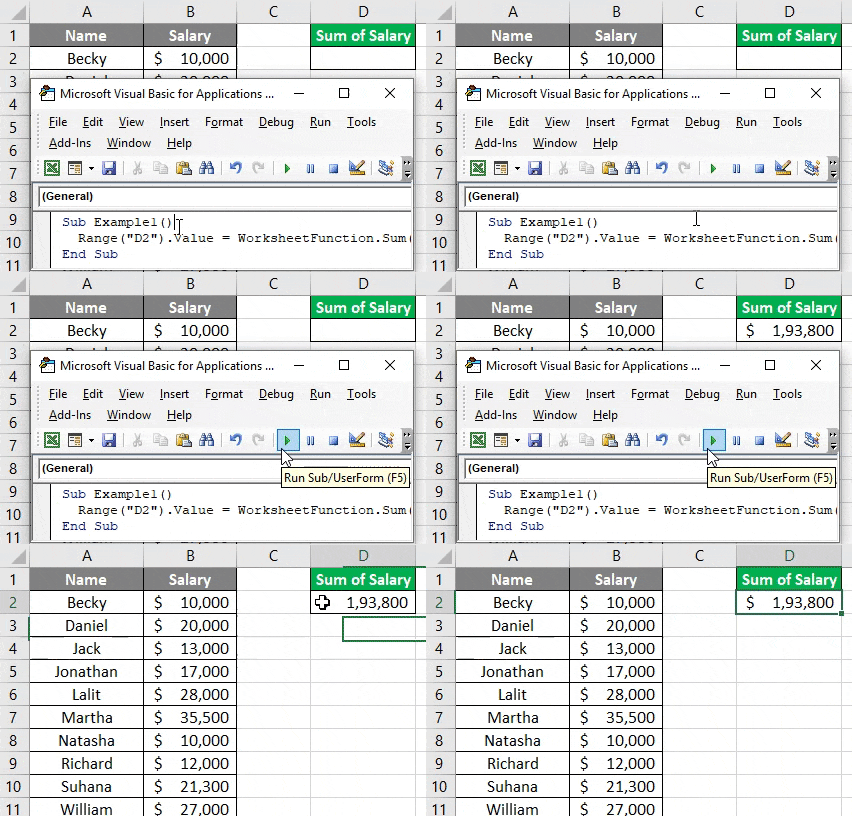
Here, this code prints the sum of salaries for all employees (cell B2:B11) in cell D2. See the image below:
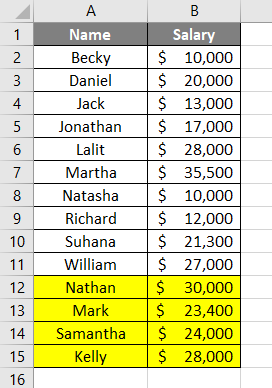
Now, what if I add some cells to this data and run this code again?
Logically speaking, the above code will not sum up all the 14 rows from column B. Reason for the same is the range which we have updated under WorksheetFunction (which is B2:B11). This is the reason a dynamic code which can take the last filled row into consideration makes it more important for us.
In this article, I will introduce some methods which can be useful in finding out the last row for a given data set using VBA code.
How to Find Last used Row in Column Using VBA?
Below are the different examples with different methods to find the last used Row of a Column in Excel using VBA Code.
Example #1 – Using Range.End() Method
Well, this method is as same as using the Ctrl + Down Arrow in Excel to go to the last non-empty row. On similar lines, follow the below steps for creating code in VBA to reach to the last non-empty row of a column in Excel.
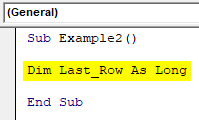
Step 1: Define a variable which can take value for the last non-empty row of the excel column.
Code:
Sub Example2()

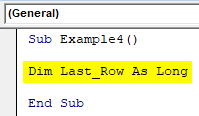
Dim Last_Row As Long

End Sub
Here, the variable Last_Row is defined as LONG just to make sure it can take any number of arguments.
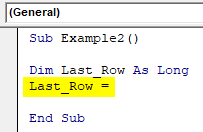
Step 2: Use the defined variable to hold the value of the last non-empty row.
Code:
Sub Example2()

Dim Last_Row As Long
Last_Row =

End Sub
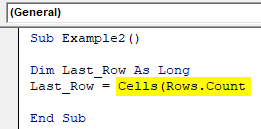
Step 3: Type the code starting with CELLS (Rows.Count in front of Last_Row =.
Code:
Sub Example2()

Dim Last_Row As Long
Last_Row = Cells(Rows.Count

End Sub
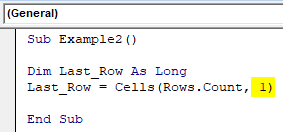
Step 4: Mention 1 after a comma in the above-mentioned code. The value numeric 1 is synonyms to the first column in the excel sheet.
Code:
Sub Example2()

Dim Last_Row As Long
Last_Row = Cells(Rows.Count, 1)

End Sub
This code allows VBA to find out the total number of (empty + non-empty) rows present in the first column of the excel worksheet. This means this code allows the system to go to the last cell of Excel.
Now, what if you are at the last cell of the excel and want to go up to the last non-empty row? You’ll use Ctrl + Up Arrow, right?
The same logic we are going to use in the next line of code.
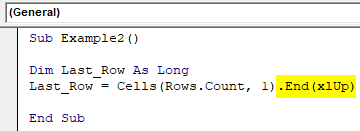
Step 5: Use a combination of End key and xlUp to go to the last non-empty row in excel.
Code:
Sub Example2()

Dim Last_Row As Long
Last_Row = Cells(Rows.Count, 1).End(xlUp)

End Sub
This will take you to the last non-empty row in the excel. However, you wanted a row number for the same.
Step 6: Use ROW to get the row number of the last non-empty row.
Code:
Sub Example2()

Dim Last_Row As Long
Last_Row = Cells(Rows.Count, 1).End(xlUp).Row

End Sub
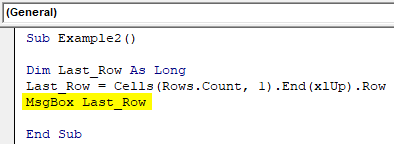
Step 7: Show the value of Last_Row, which contains the last non-empty row number using MsgBox.
Code:
Sub Example2()

Dim Last_Row As Long
Last_Row = Cells(Rows.Count, 1).End(xlUp).Row
MsgBox Last_Row

End Sub
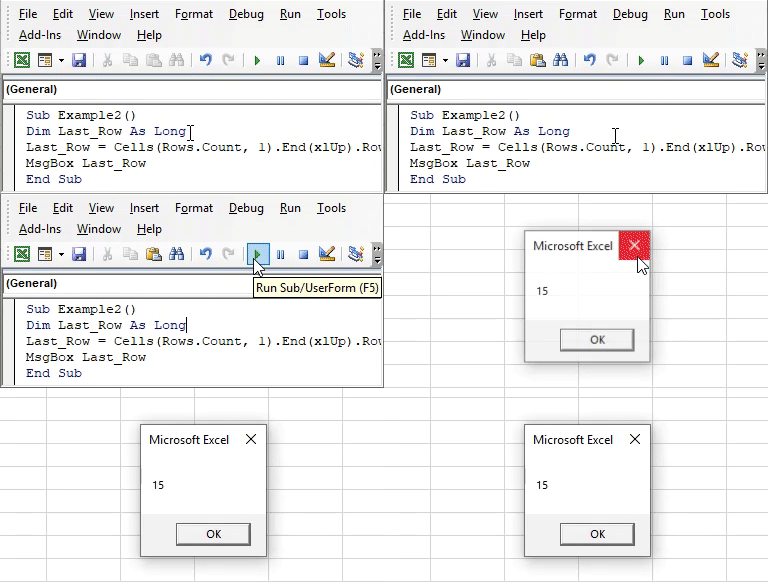
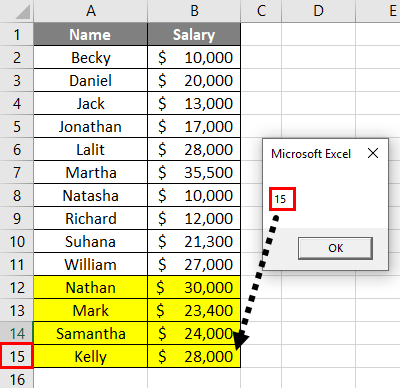
Step 8: Run the code using the Run button or hitting F5 and see the output.
Output:
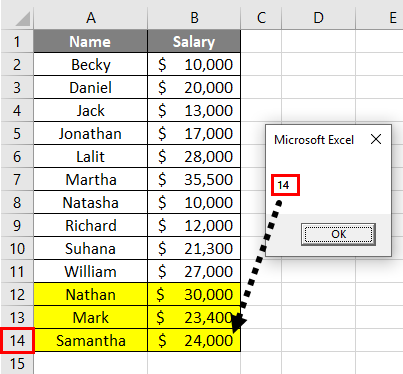
Step 9: Now, let’s delete one row and see if the code gives an accurate result or not. It will help us checking the dynamism of our code.
Example #2 – Using Range and SpecialCells
We can also use the Range and SepcialCells property of VBA to get the last non-empty row of the excel sheet.
Follow the below steps to get the last non-empty row in excel using VBA code:
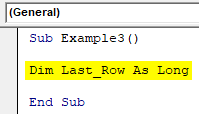
Step 1: Define a variable again as Long.
Code:
Sub Example3()

Dim Last_Row As Long

End Sub
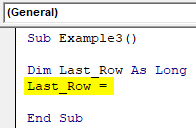
Step 2: Start storing the value to the variable Last_Row using the assignment operator.
Code:
Sub Example3()

Dim Last_Row As Long
Last_Row =

End Sub
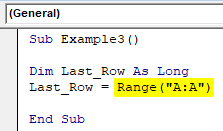
Step 3: Start Typing Range(“A:A”).
Code:
Sub Example3()

Dim Last_Row As Long
Last_Row = Range("A:A")

End Sub
Step 4: Use the SpecialCells function to find out the last non-empty cell.
Code:
Sub Example3()

Dim Last_Row As Long
Last_Row = Range("A:A").SpecialCells(xlCellTypeLastCell)

End Sub
This function SpecialCells selects the last cell from your excel as it is written in the parentheses (xlCellTypeLastCell allows you to select the last non-empty cell from your excel sheet).
Step 5: Now, use ROW to get the last row from your excel sheet.
Code:
Sub Example3()

Dim Last_Row As Long
Last_Row = Range("A:A").SpecialCells(xlCellTypeLastCell).Row

End Sub
This will return the last non-empty row for you from your excel.
Step 6: Now, assign this value of Last_Row to MsgBox so that we can see the last non-empty row number on the message box.
Code:
Sub Example3()

Dim Last_Row As Long
Last_Row = Range("A:A").SpecialCells(xlCellTypeLastCell).Row
MsgBox Last_Row

End Sub
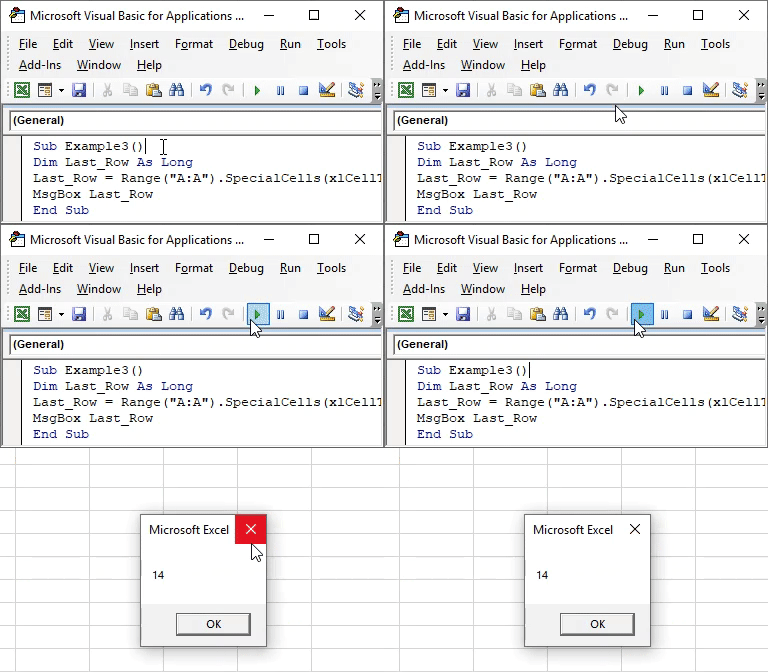
Step 7: Run the code by hitting the F5 or Run button placed at the top of the left corner.
Output:
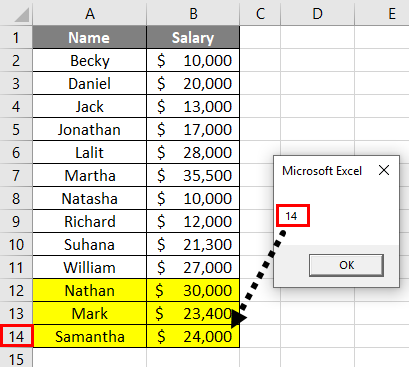
You can see that the last non-empty cell number is popped out through MsgBox with reference to the column A because we have mentioned the column A under the Range function while defining the variable formula.
Step 8: If we delete a row and can run this formula. Let’s see what happens.
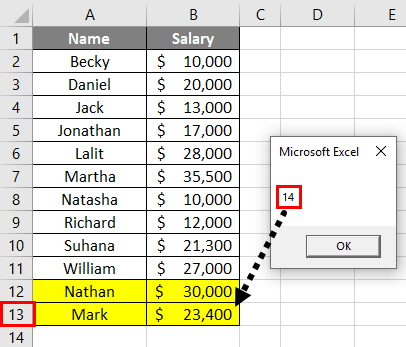
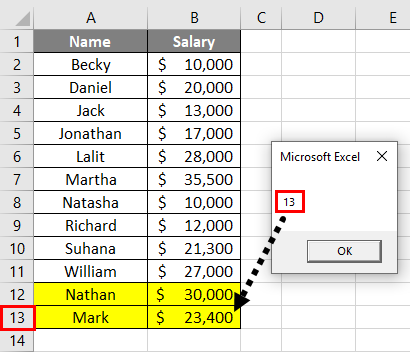
You can see the system has still given a row count of 14. Even though I have deleted a row and the actual row count is 13, the system has not captured the row count accurately. For the system to capture the actual row count, you need to save the worksheet and run the code again.
You can see the actual row count is showing in this screenshot now.
Example #3 – Using Range.Find()
Follow the below steps to get the last non-empty row in excel using VBA code:
Step 1: Define a variable as long.
Code:
Sub Example4()

Dim Last_Row As Long

End Sub
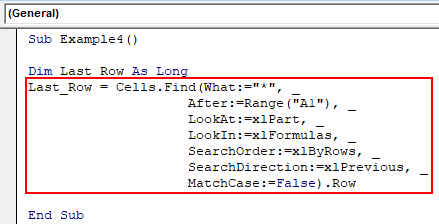
Step 2: Now, use the following code to see the last non-empty row.
Code:
Sub Example4()

Dim Last_Row As Long
Last_Row = Cells.Find(What:="*", _
                    After:=Range("A1"), _
                    LookAt:=xlPart, _
                    LookIn:=xlFormulas, _
                    SearchOrder:=xlByRows, _
                    SearchDirection:=xlPrevious, _
                    MatchCase:=False).Row

End Sub
Here, the FIND function looks for the first non-blank cell. Asterisk (*) is a wildcard operator which helps in finding out the same.
Starting from cell A1, the system goes back to the last cell from the sheet and searches in a backward direction (xlPrevious). It moves from right to left (xlByRows) and loops up in the same sheet through all the rows on similar lines until it finds a non-blank row (see the .ROW at the end of the code).
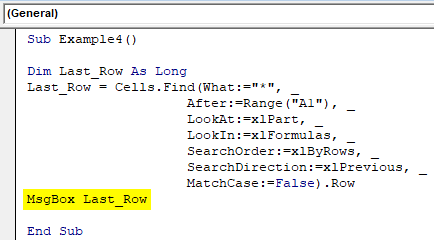
Step 3: Use MsgBox to store the value of the last non-empty row and see it as a pop-up box.
Code:
Sub Example4()

Dim Last_Row As Long
Last_Row = Cells.Find(What:="*", _
                    After:=Range("A1"), _
                    LookAt:=xlPart, _
                    LookIn:=xlFormulas, _
                    SearchOrder:=xlByRows, _
                    SearchDirection:=xlPrevious, _
                    MatchCase:=False).Row
MsgBox Last_Row

End Sub
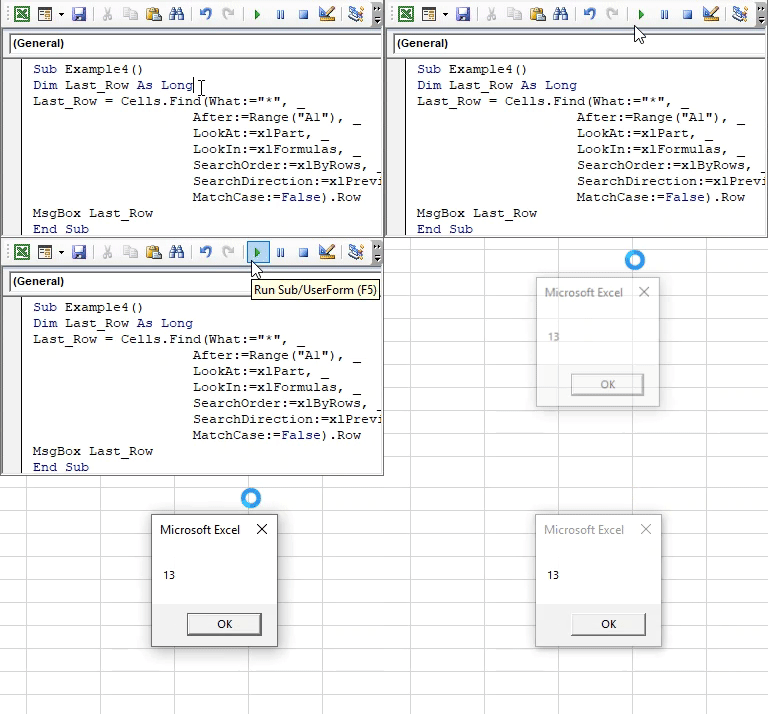
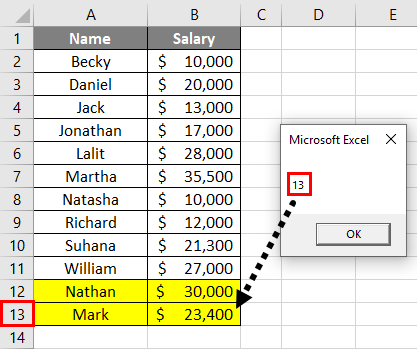
Step 4: Run the code and see the output as a pop-up box containing the last non-empty row number.
Output:
Things to Remember
- End (Example1) can be used to find out the first blank cell/row or last non-empty cell/row in a given column using the VBA code.
- The end works on a single column most of the time. If you have data in ranges, it would be difficult to decide which column should be used to find out the last non-empty row.
- Find (Example3) works on an entire range from the point of start and finds out the last non-empty cell/row in a given column using VBA code. It also can be used to find out the last non-empty column.
Recommended Articles
This is a guide to VBA Last Row. Here we discuss how to find the last used row in a given column along with some practical examples and a downloadable excel template. You may also look at the following articles to learn more –

