Introduction to Graphic Styles in Adobe Illustrator
Adobe Illustrator is considered to be the powerhouse of effects and editing styles. The program is used widely by most of the editors and graphic designers. Generally, all the designers working on 2D projects and artworks use Adobe Illustrator. This program is one of its kind vector graphics software that is loaded with a robust toolset and enormous functions. Being a designer requires a lot of patience and time to create desired projects and outputs. In this topic, we are going to learn about Graphic Styles in Illustrator.
A designer is always looking for an alternative way to create any artwork or design that can save time and give efficient results as well. Adobe Illustrator is the perfect program to experiment with different styles and alternatives used for gaining desired results. One such feature in Adobe Illustrator is the use of Graphic Styles within the program. These graphic styles can either be created by the user or are also available pre-installed in the software. The basic use of Graphic styles is to save the time of the user, and a lot of manual work can be saved.
A Graphic Style, once created, can be used infinite times by the user on any text or object specifically. The Graphic Styles are a set of properties that can be reused numerous times. These Styles helps in modifying the appearance and physical factors of any text or object with just a single click. These Graphic styles prove to be useful and conserve the time and hard work of the designer.
How to Create a Graphic Style?
Below is the step-by-step procedure that will help us create a new Adobe Illustrator’s graphic style.
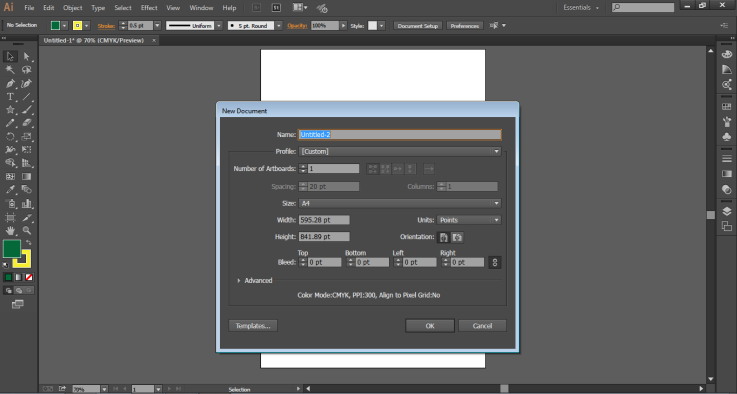
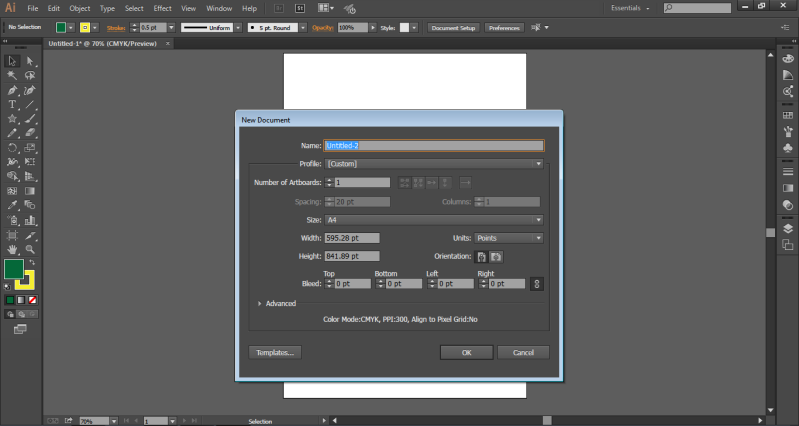
Open A New Document Of A4 Size
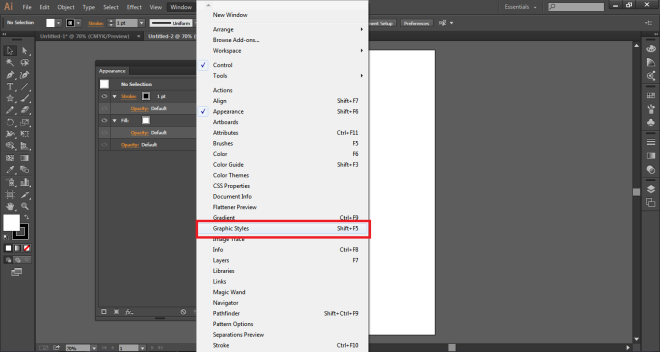
Go to Windows Panel and click on Graphic Styles to see the Dialog Box.
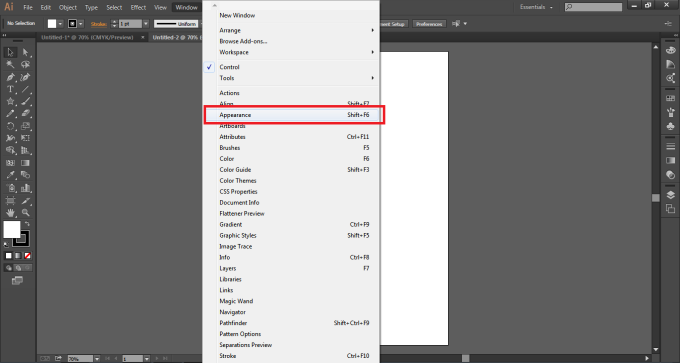
Next, Go to Windows Panel and click on Appearance to see the Dialog Box.
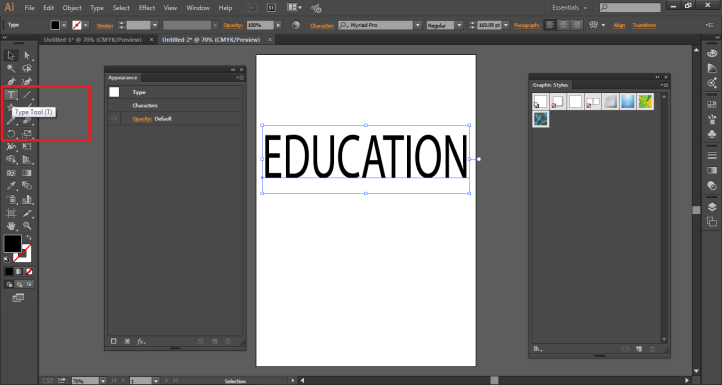
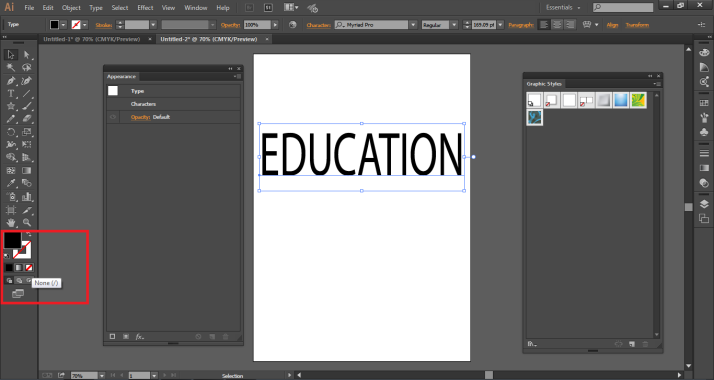
When we create a Graphic style, the style is created and modified in the Appearance Panel while saved in the Graphic Style panel. Now, using the text tool, write EDUCATION on the page.
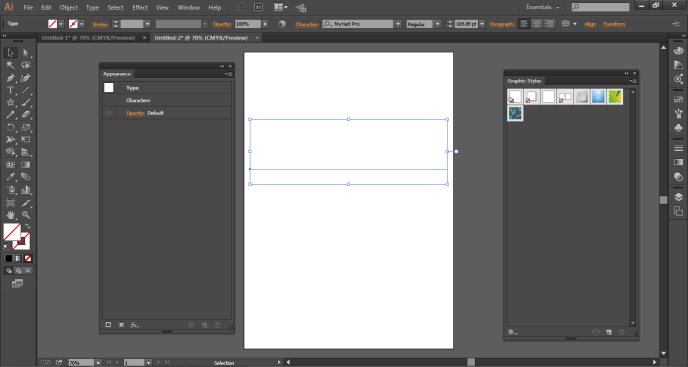
By default, the fill color of the text is black. Make the fill color as NONE, as shown in the figure.
You will see the result below.
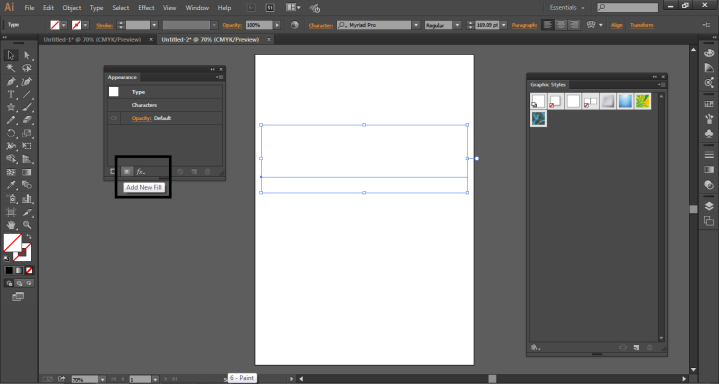
Go to the Appearance Panel and click on NEW FILL, as shown in the figure.
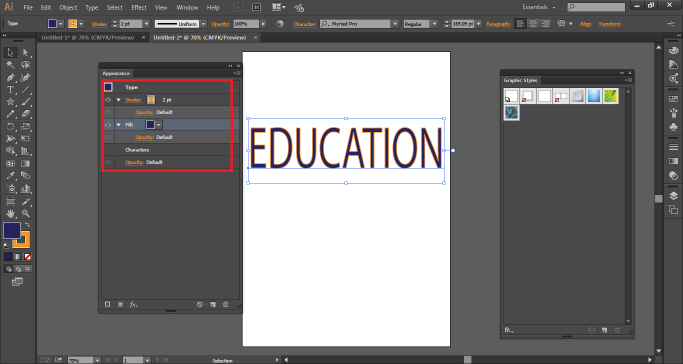
Make the fill color Blue and the Stroke color as Yellow, and the Stroke Weight as 2pt.
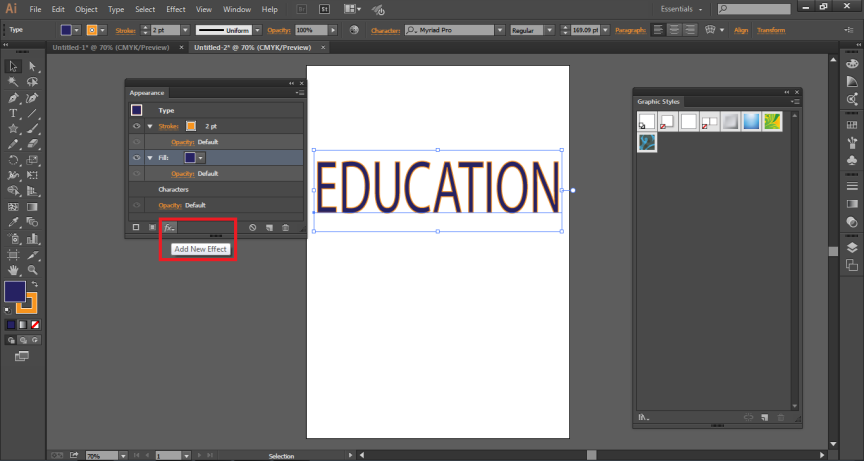
Now, to add more effects to this style, click on the ADD NEW EFFECT option from the Appearance Panel.
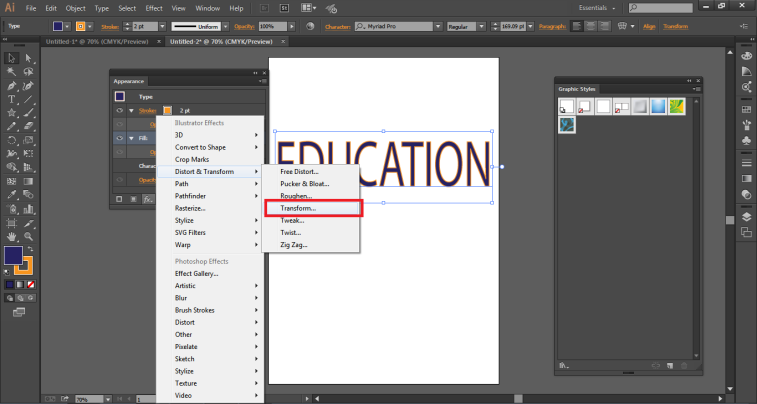
Select Transform from Distort and Transform Option. This option will create a number of copies of the same text.
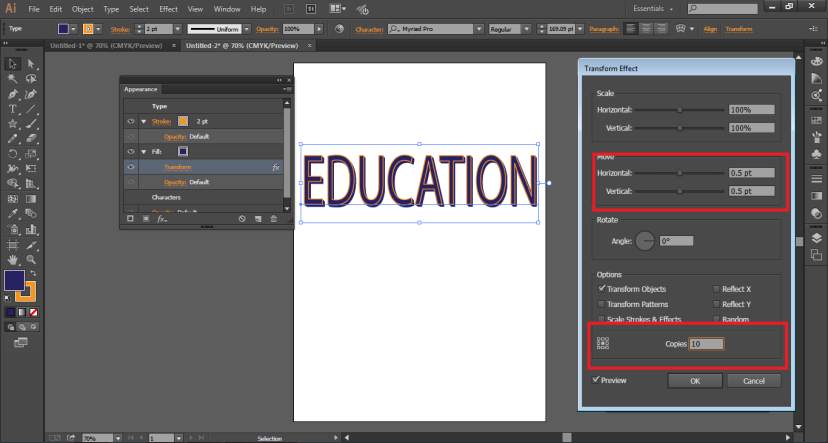
A dialog box will appear; in the Move Option, write 0.5 Horizontal and 0.5 Vertical and provide the count for COPIES as 10. Click on preview as shown in the figure below.
Similarly, any effect can be added to the text.
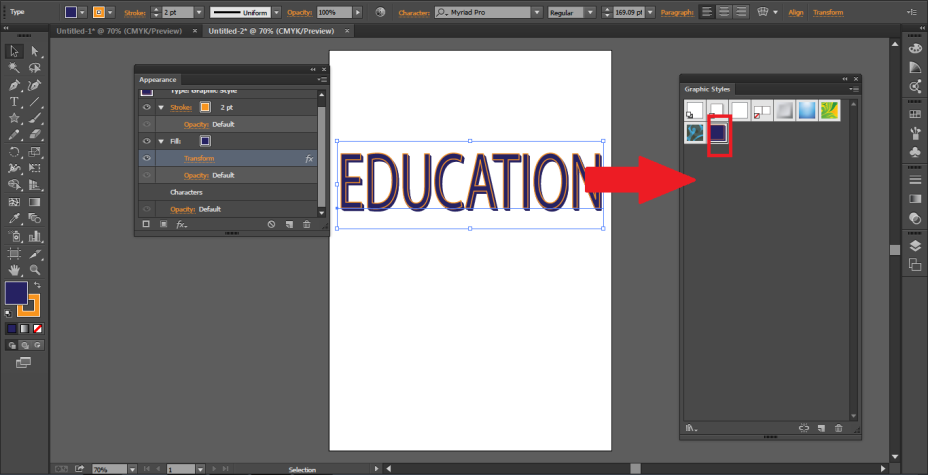
Now, this text can be made as a graphic style just by dragging the text into the GRAPHIC STYLE PANEL as shown in the figure.
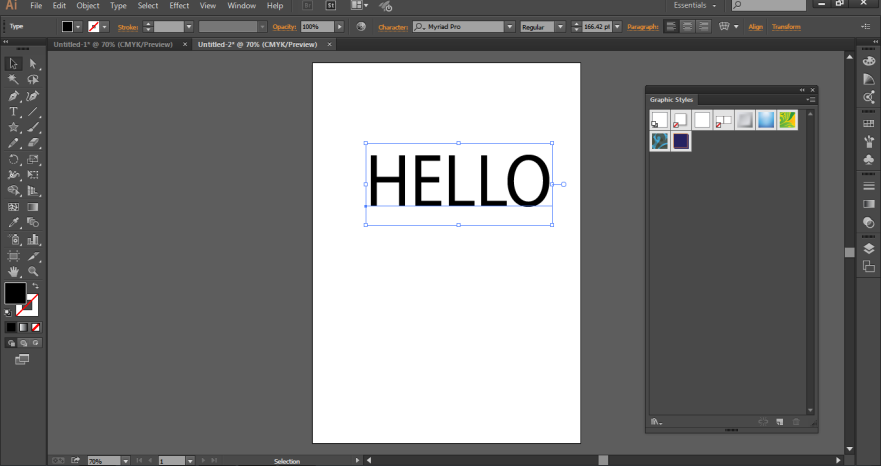
To check the graphic style, create another text and delete the older one. This time write down HELLO on the page.
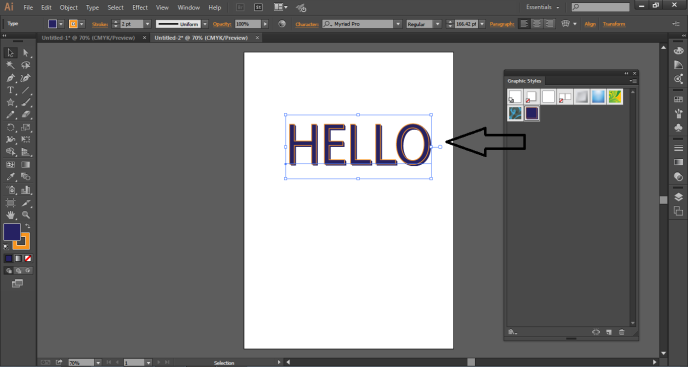
From the Graphic Style Menu, drag the recent created Style on this text. You will see that the HELLO text has been modified just like the EDUCATION text.
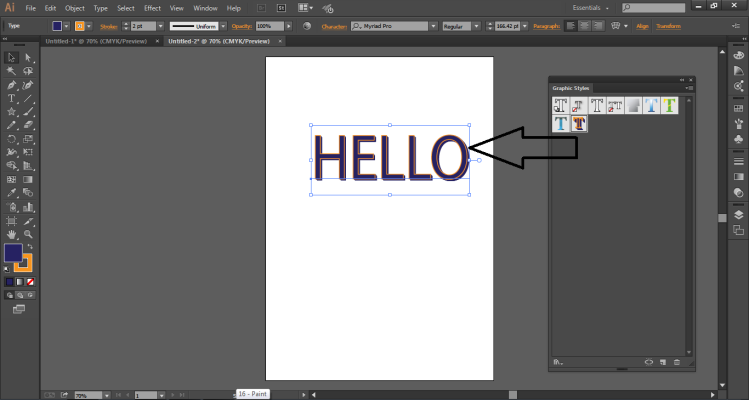
If you are using Graphic Styles for any TEXT or TYPE, you can click on the corner button of the Graphic Style menu and select USE TEXT FOR PREVIEW as shown in the figure.
Example to Apply Graphic Style to The Object
- Create a new document.
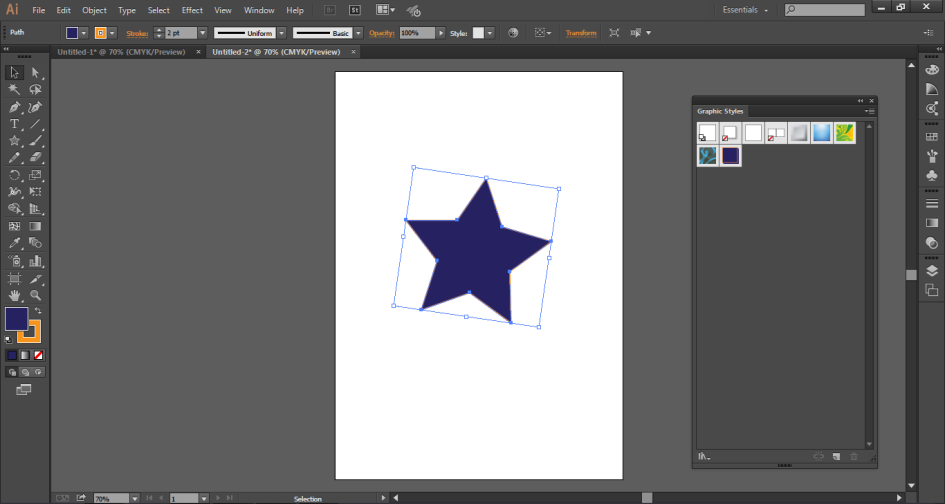
- On the page, create a star using the Star Tool.
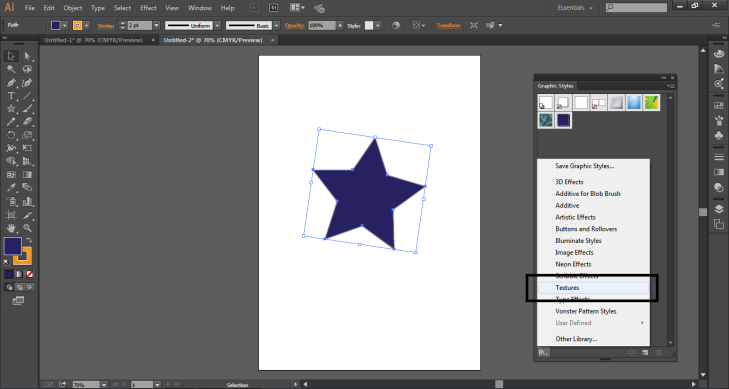
- From the Graphic Style Panel, Click on Textures as shown in Figure Below.
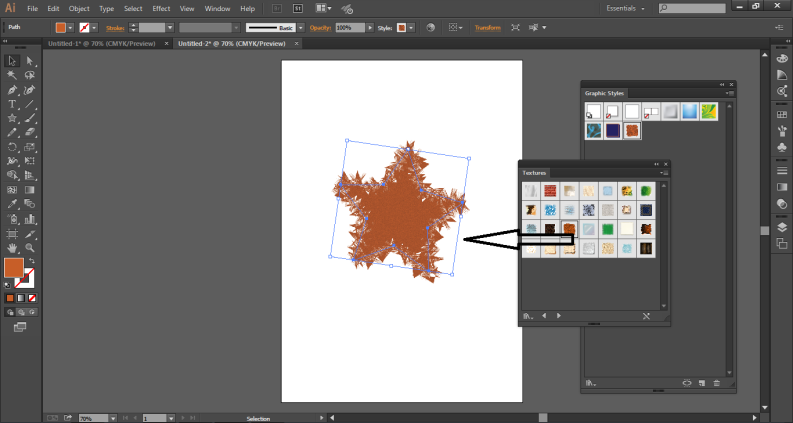
- Use any Effect on the Star by dragging the same on the Star. As shown in the figure.
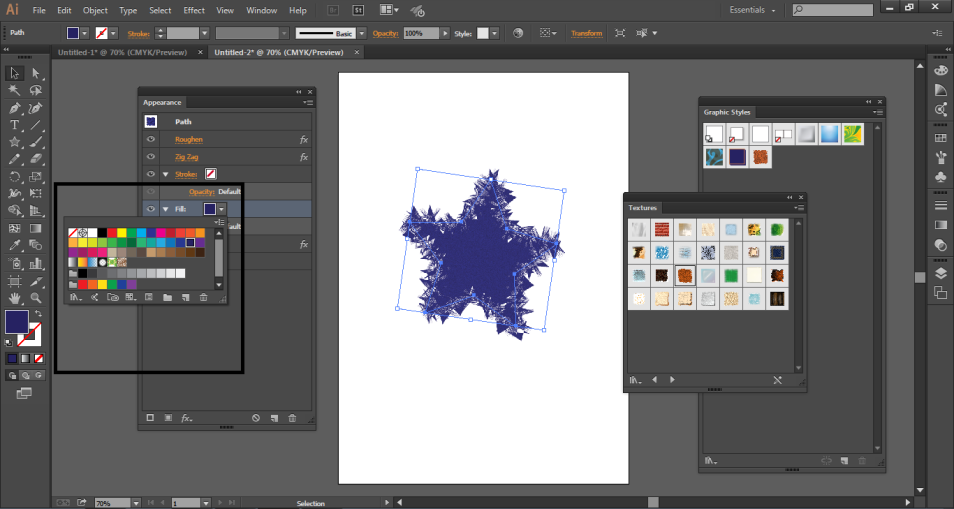
- You can modify the Fill color or the stroke, or any other attribute anytime from the Appearance panel as shown in the figure. Just select the object and modify the same.
Conclusion
These are some of the ways the user can create a graphic style as well as apply the same on any object. The user can also delete any Graphic Style, just like adding a style. These graphic styles can also be applied to a group or layer. If the graphic style is applied to any layer, then the objects present in that layer will all be having the same graphic style. While, if you move an object outside that layer, it will no longer have the Graphic Style attributes and will remain independent of its own.
The Graphic Styles are very easy to use and understand while making working on the program easier as well. We can also import our Libraries to Graphic Style and create stunning artworks and effects.
Recommended Articles
This is a guide to Graphic Styles in Illustrator. Here we discuss How to Create a Graphic Style with the help of step by step procedure. You may also look at the following article to learn more –

