Updated July 6, 2023

Introduction to Gold Text Effect in Photoshop
Today, let’s learn to give the Midas effect, i.e., the very versatile Gold effect, to the text in Photoshop. This text effect is used widely in various platforms like in ads, websites; I even saw it as a movie logo of a recent Bollywood movie called GOLD. Anyway, today we are providing you with a cheat sheet of how to create this effect that too in two ways. One that will show the very generic and more tedious but fun method using mainly the Layer Styles, and the other the easiest to perform and impress method, but I loved them both just the same.
Creating Gold Text Effect in Photoshop
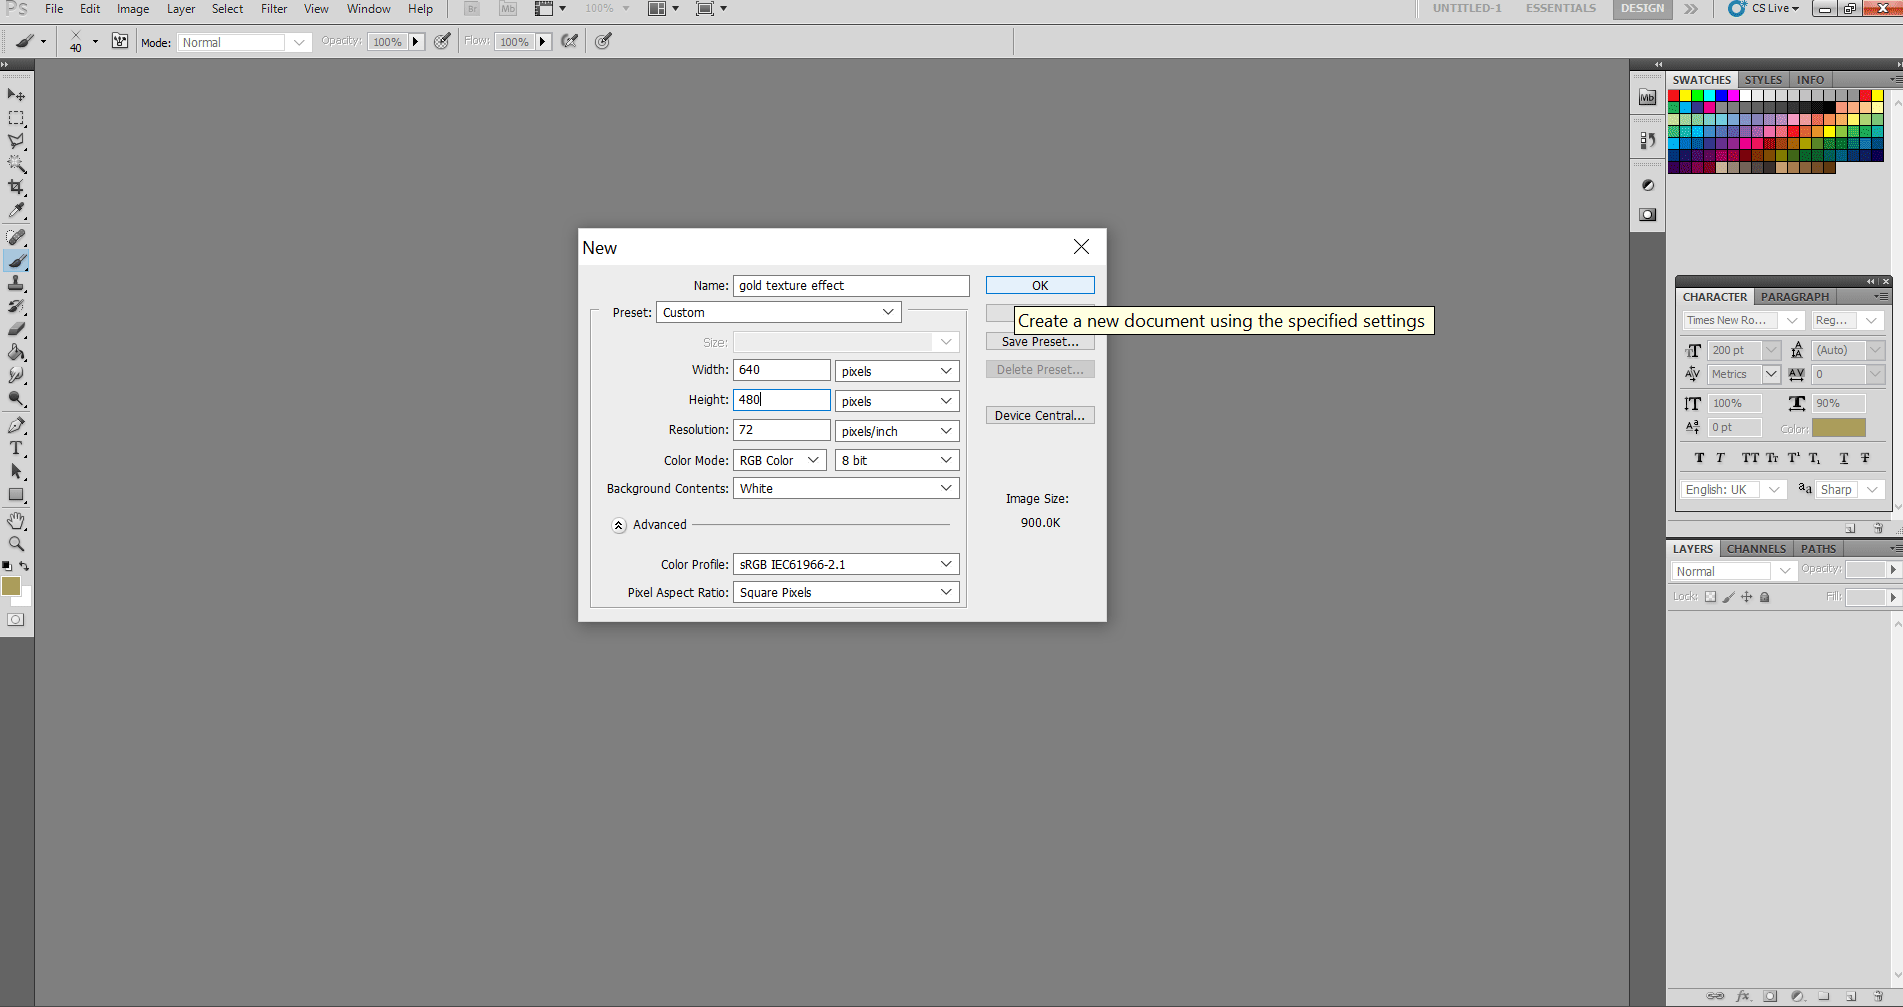
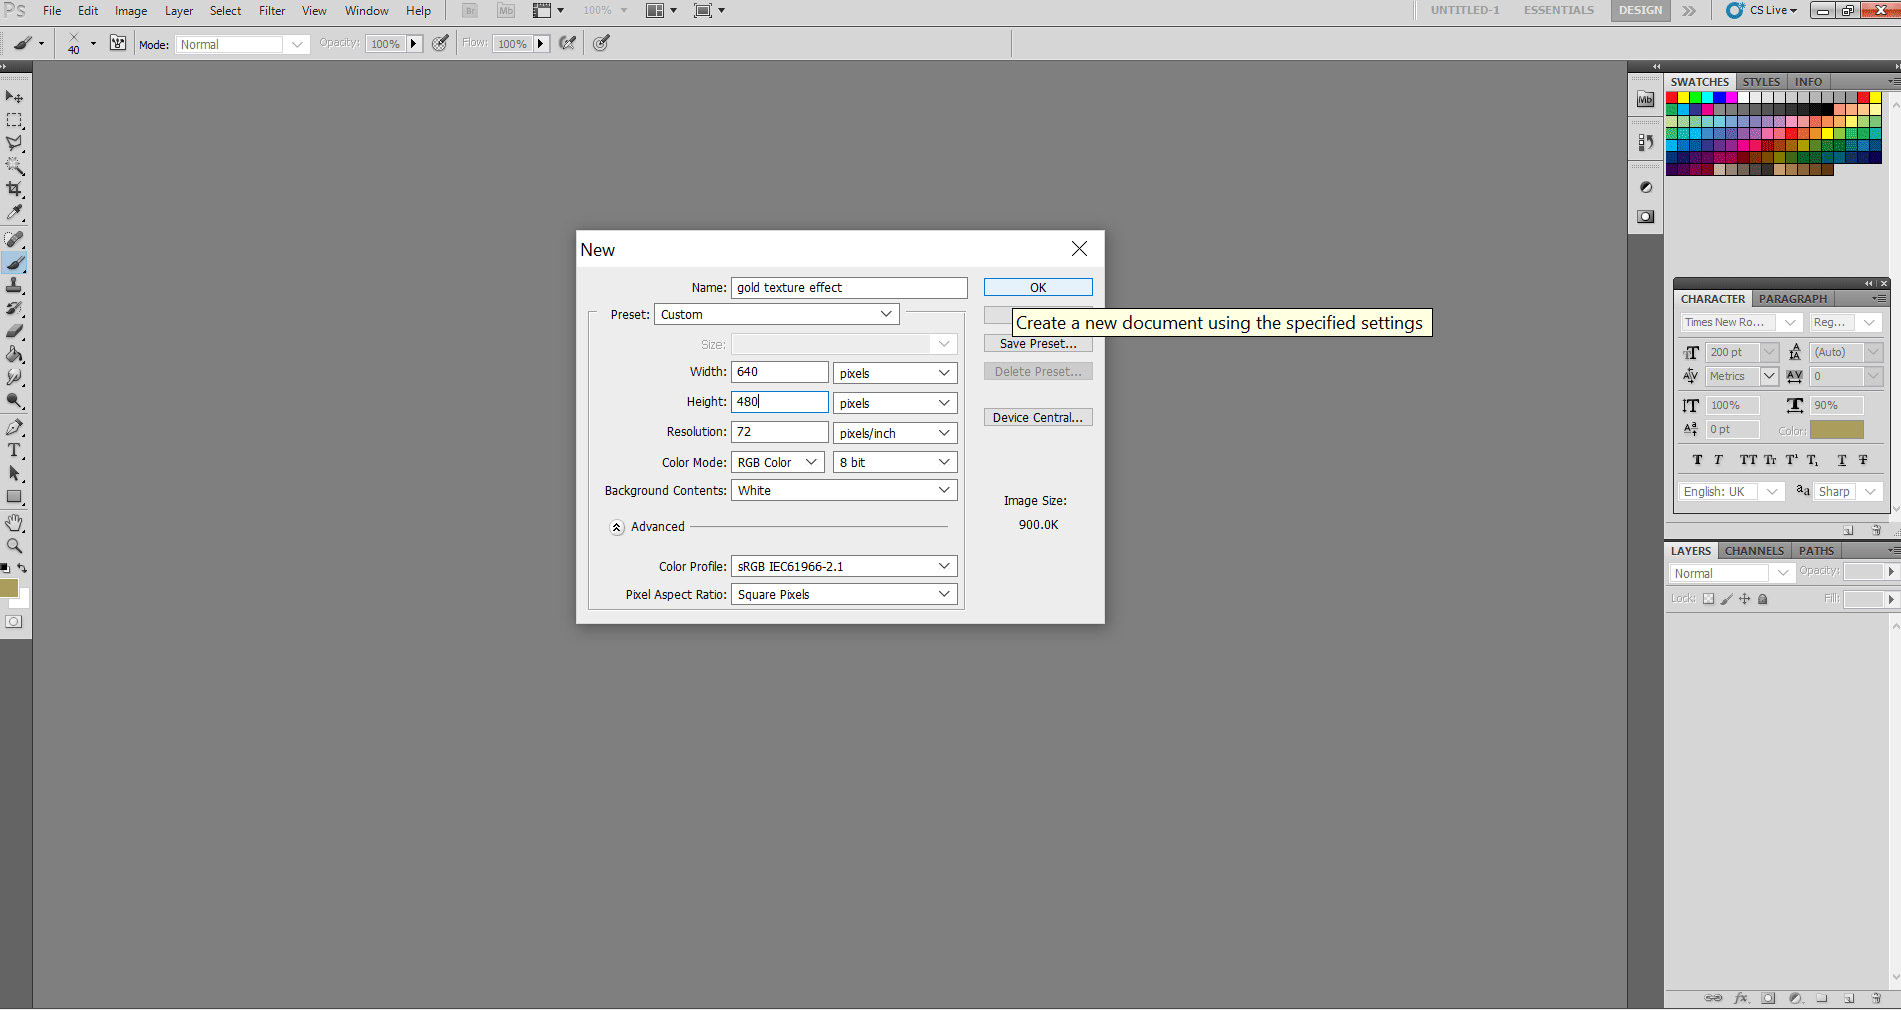
Step 1: First, select File>New. This time I experimented with the size of width: 640 pixels and Height: 480 pixels.
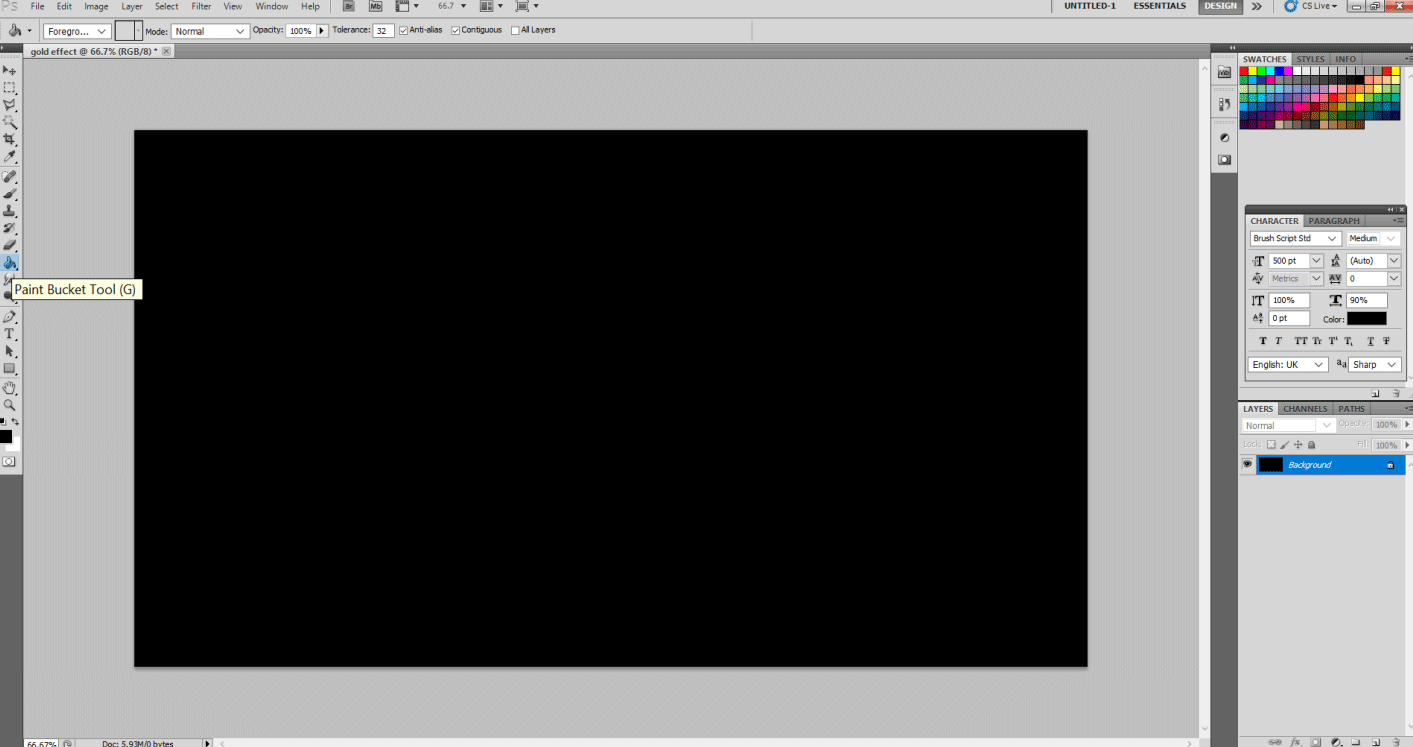
Step 2: Now, usually, it does not matter what your background color is, but I suggest let’s keep the background color black. Change the background color using the paint bucket tool.
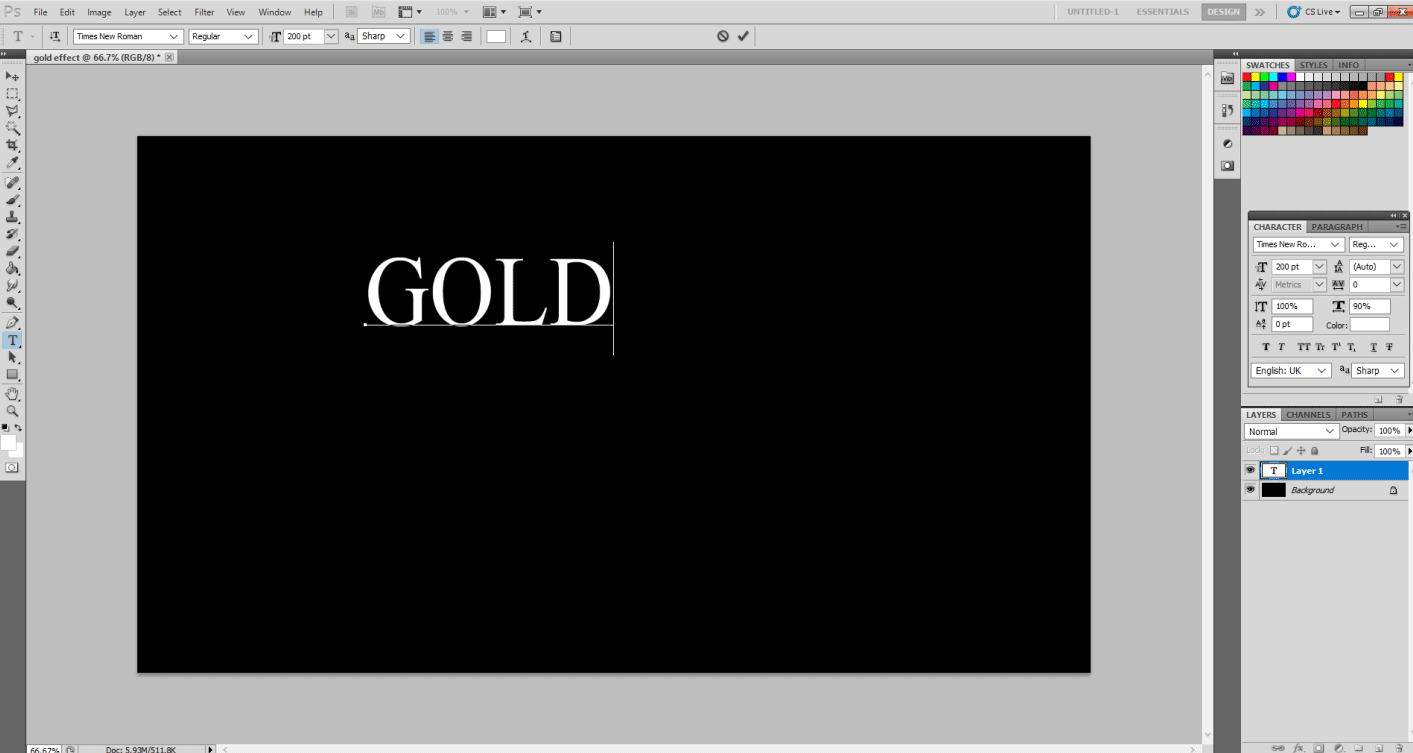
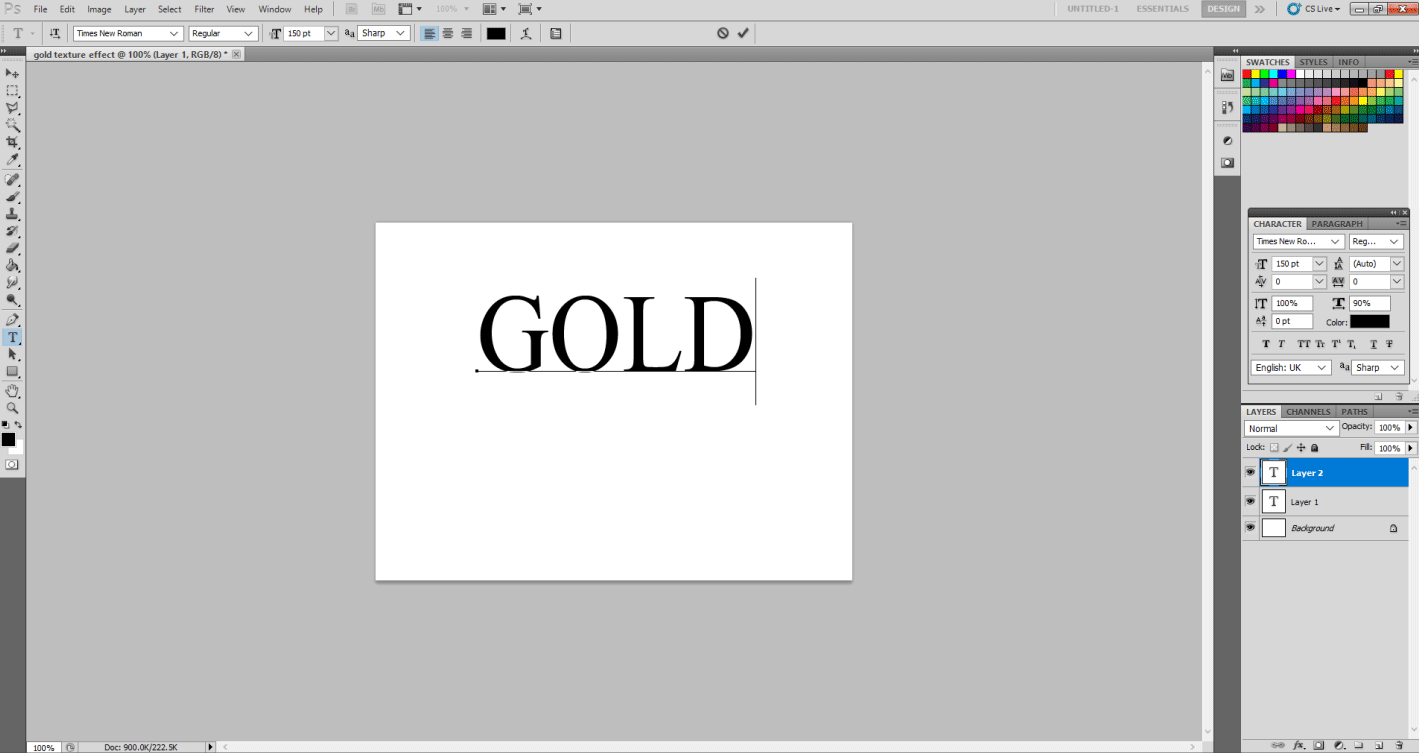
Step 3: Now, with the use of type tool type in GOLD. You can choose any font or size of the font. I chose Times New Roman Font Style and size of font 200 pt.
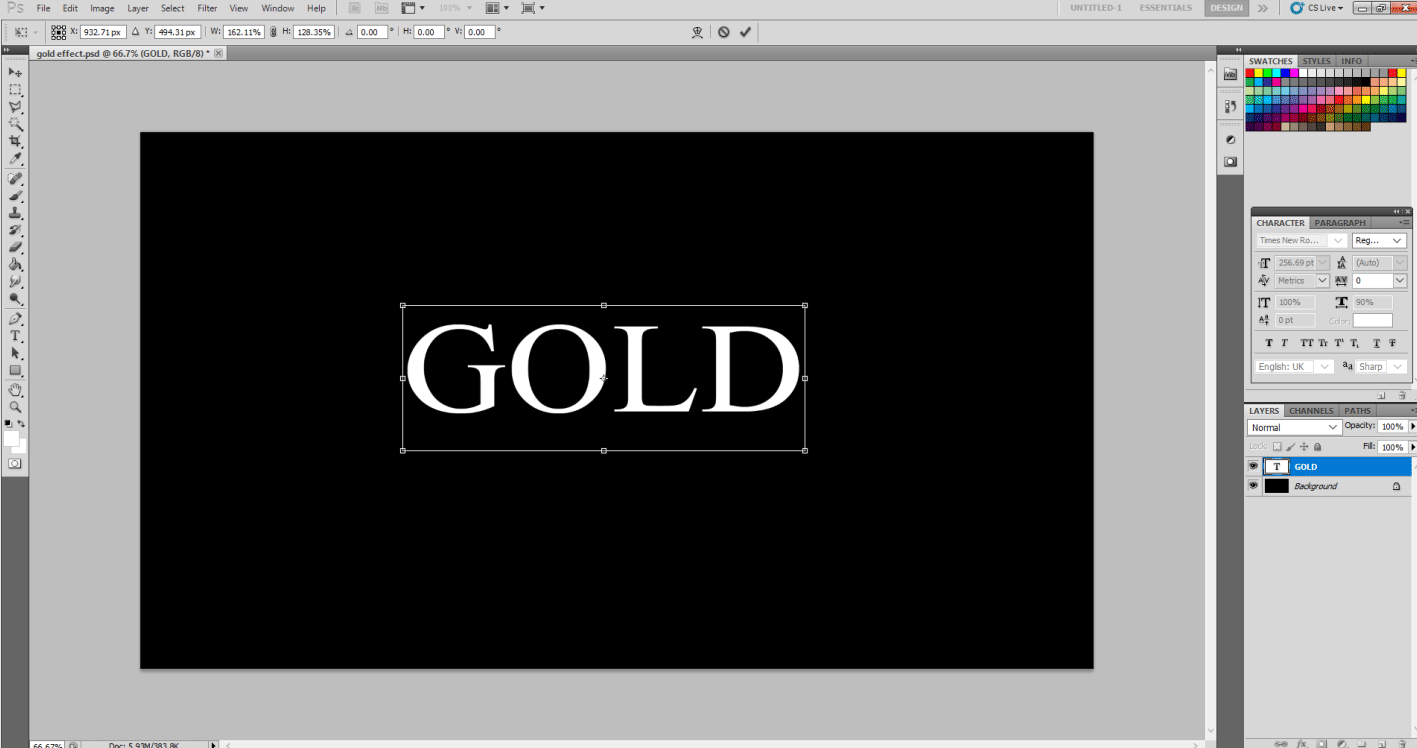
Then select the layer named Gold and with the use of Move Tool stretch and resize the font with your liking.
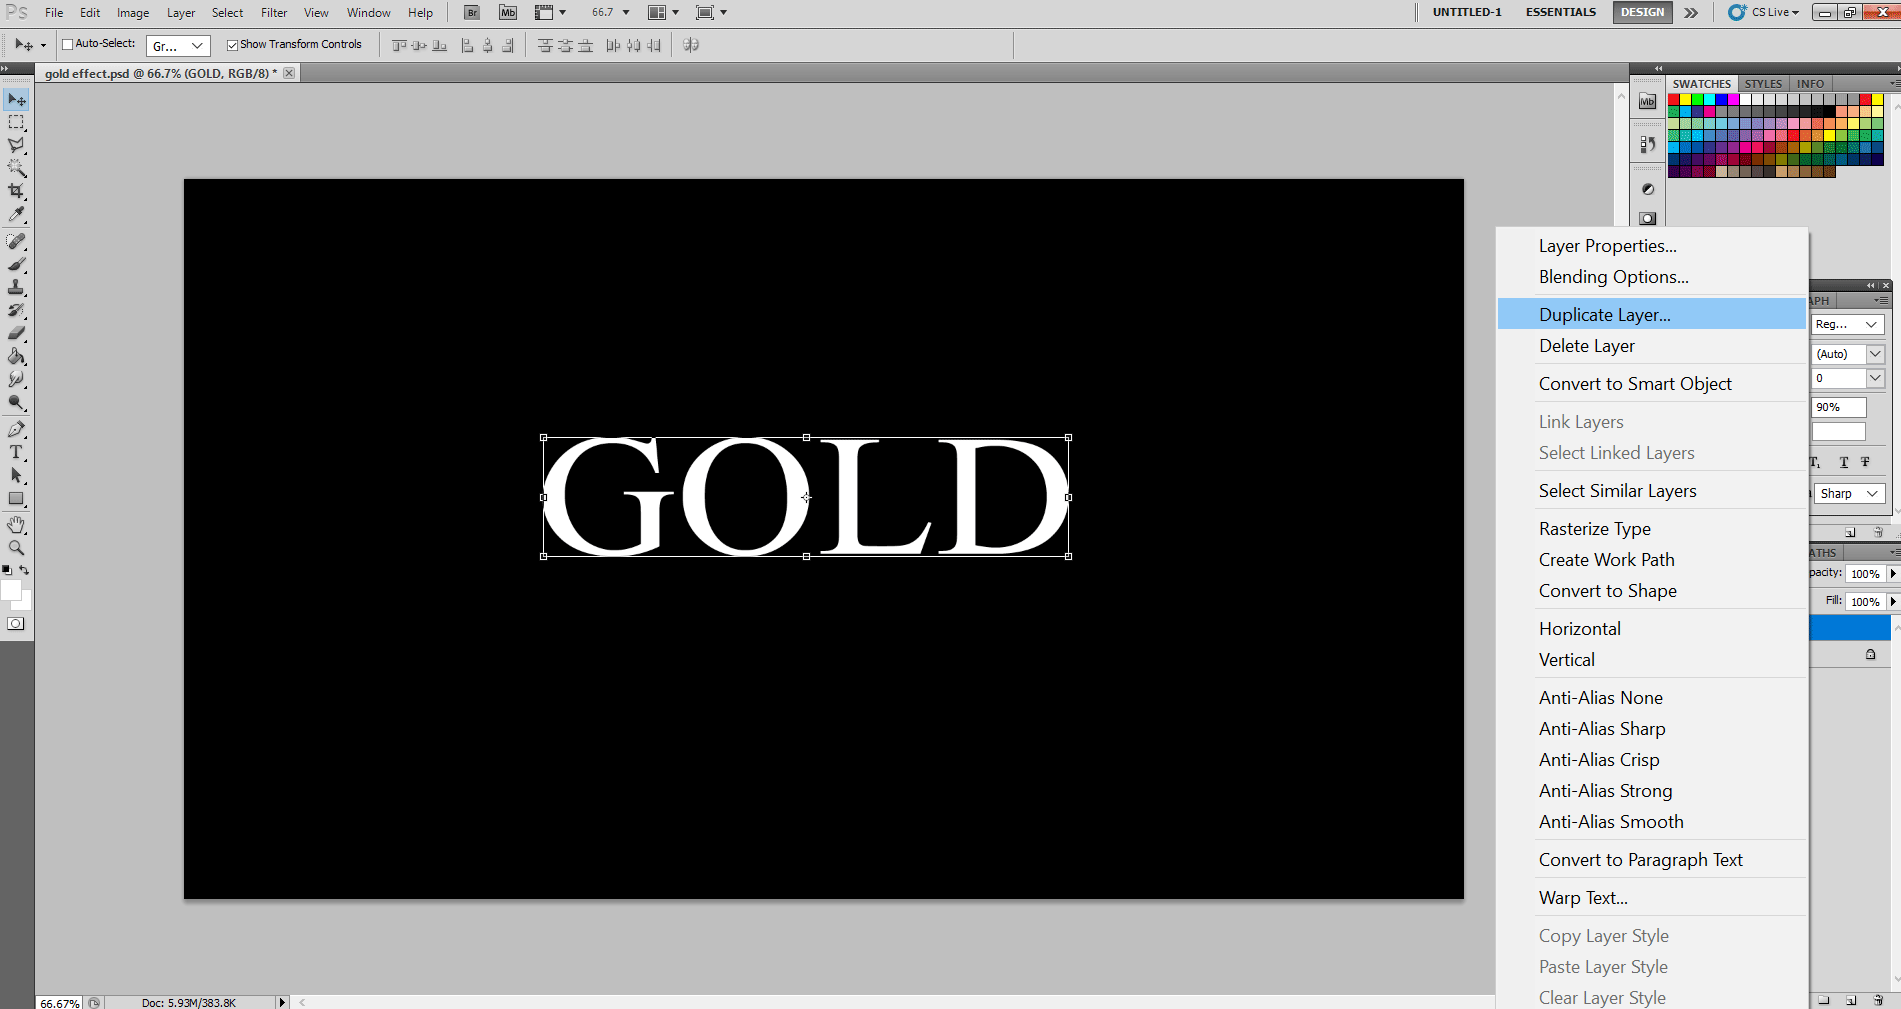
Step 4: Here, you may work and add layer styles and effects in one layer, but if you want a more realistic effect, you can simultaneously work in two layers to give that extra embossing and golden blockish effect. So, select the Gold layer, right-click on it, and select the Duplicate layer option. Now it’s imperative you select the Gold copy layer as; first, we will bedazzle the duplicate layer.
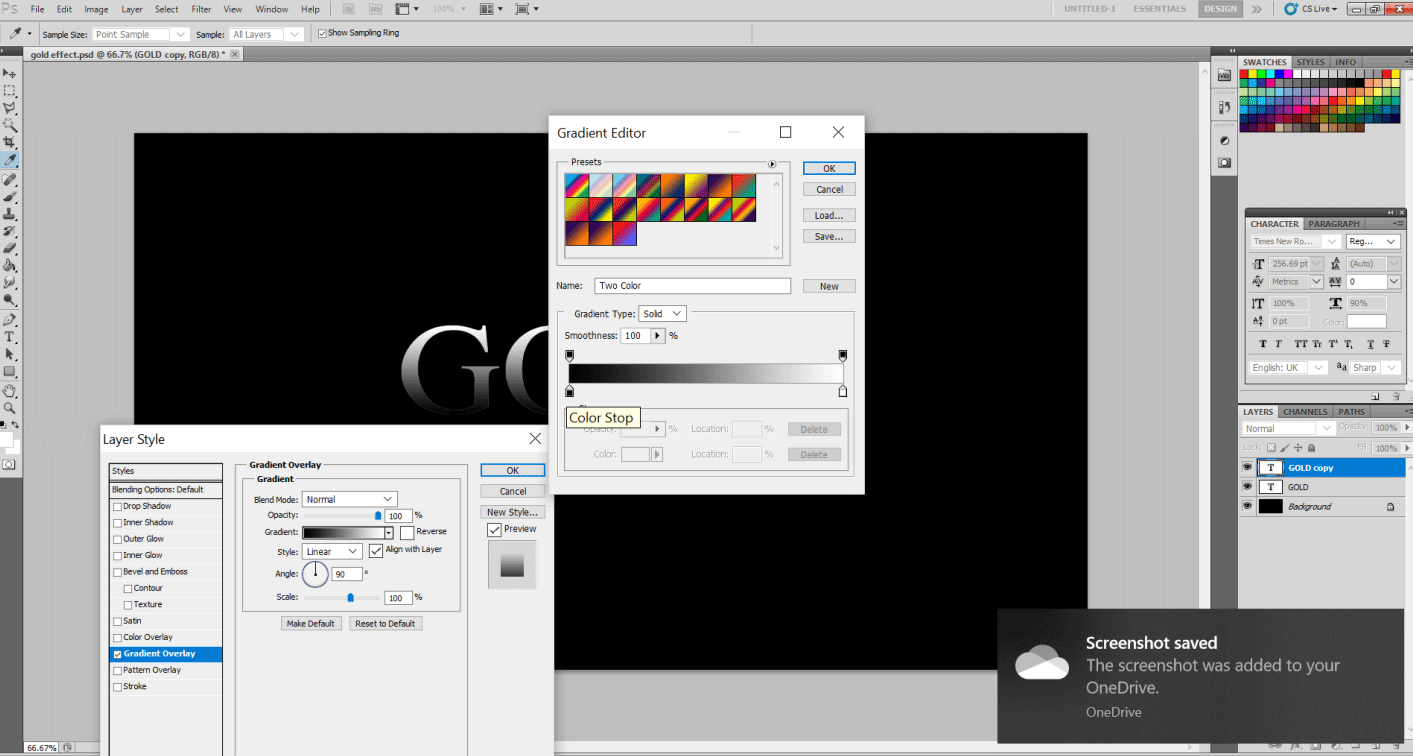
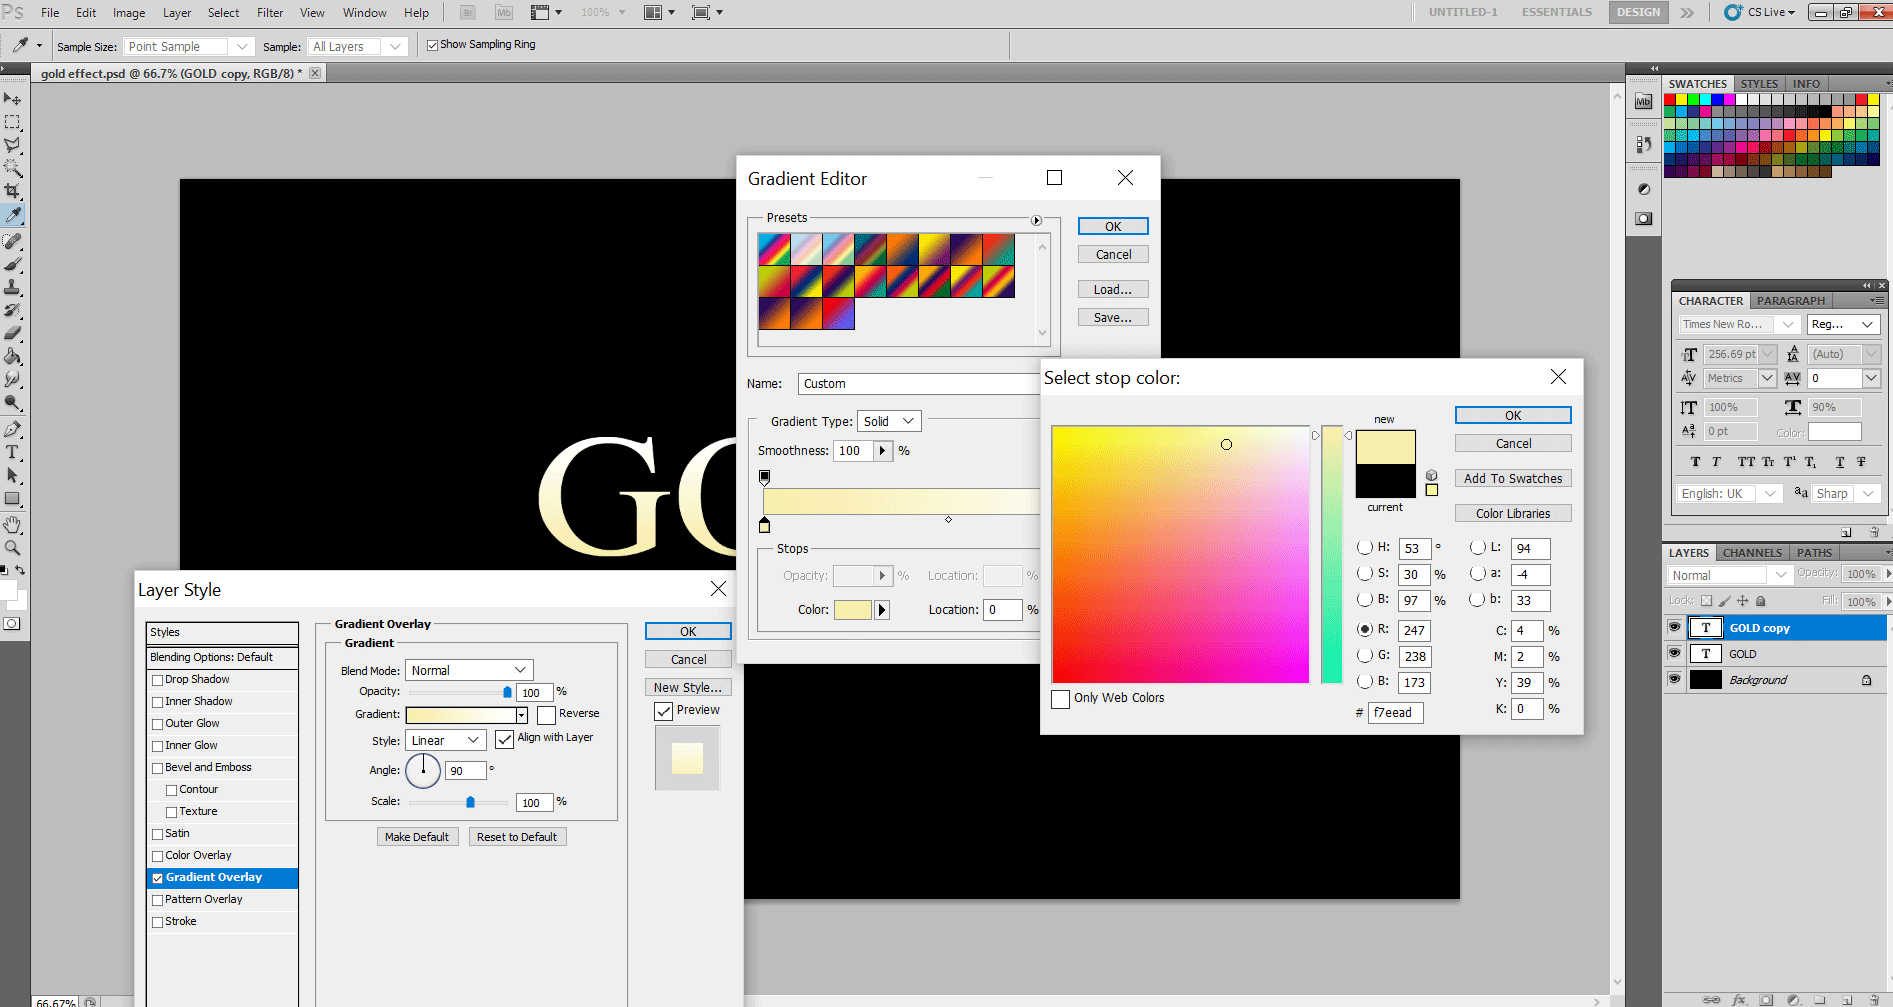
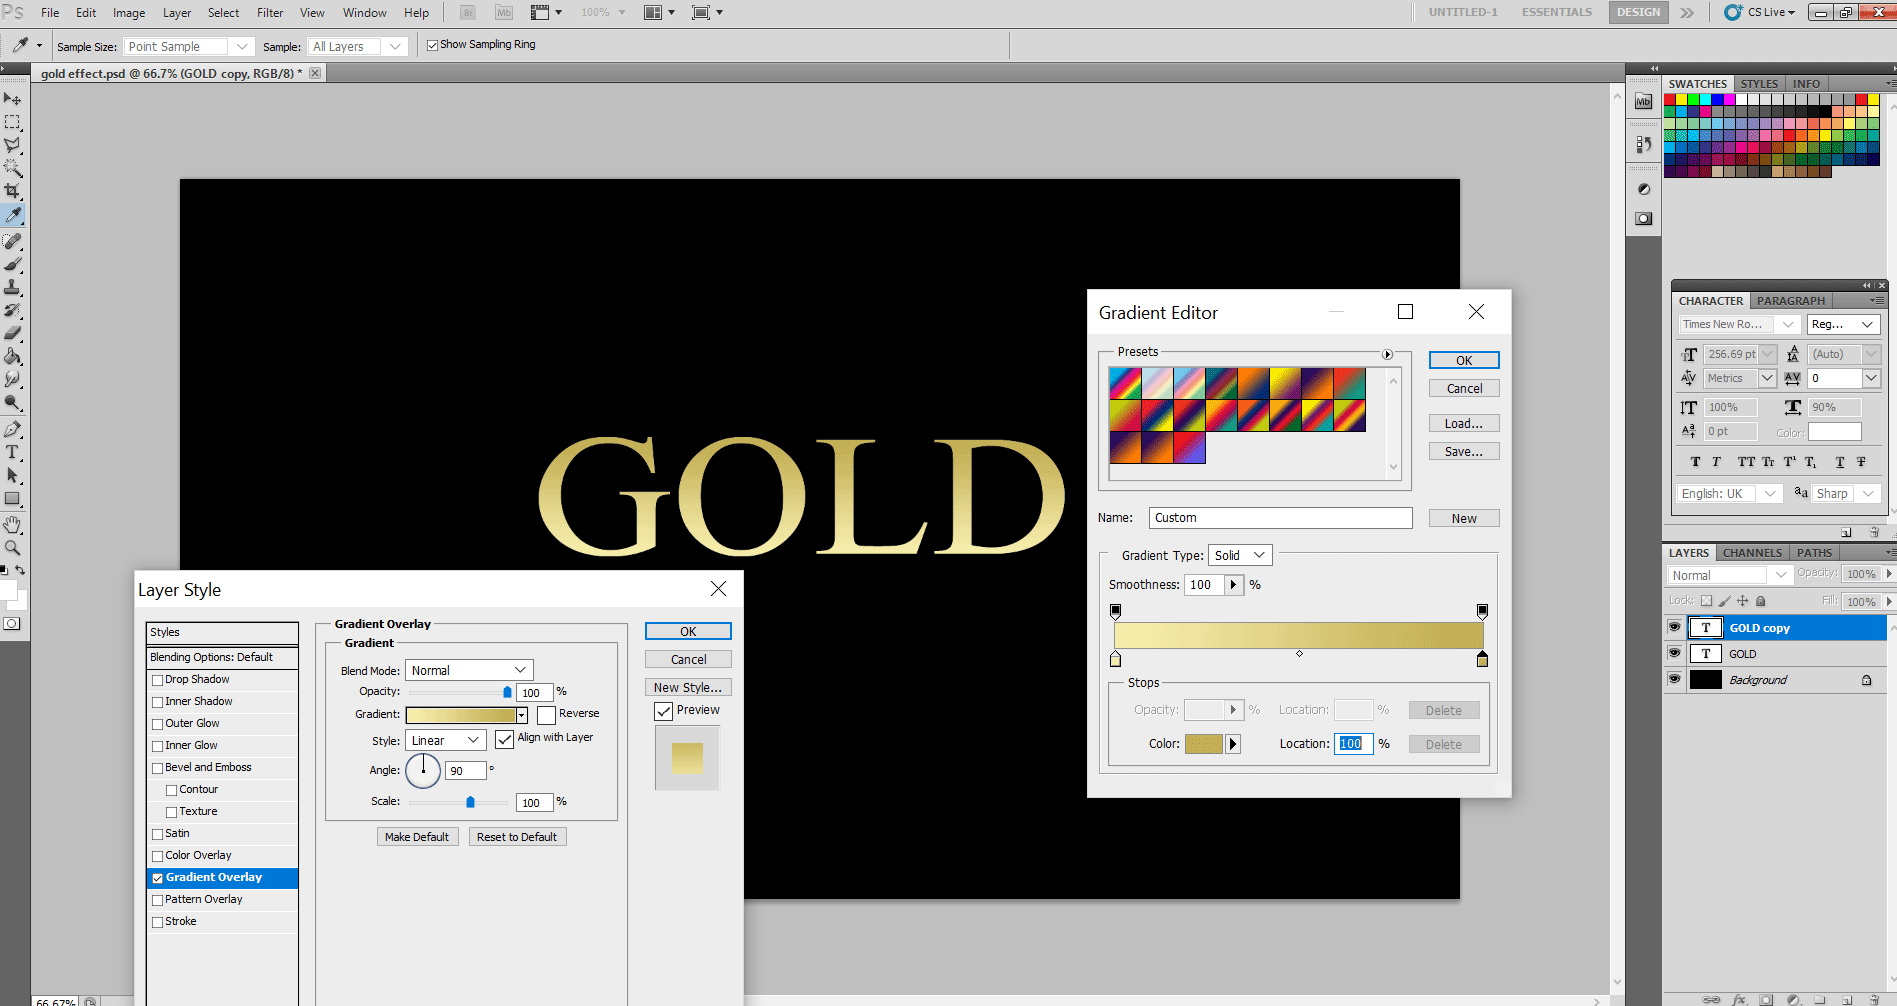
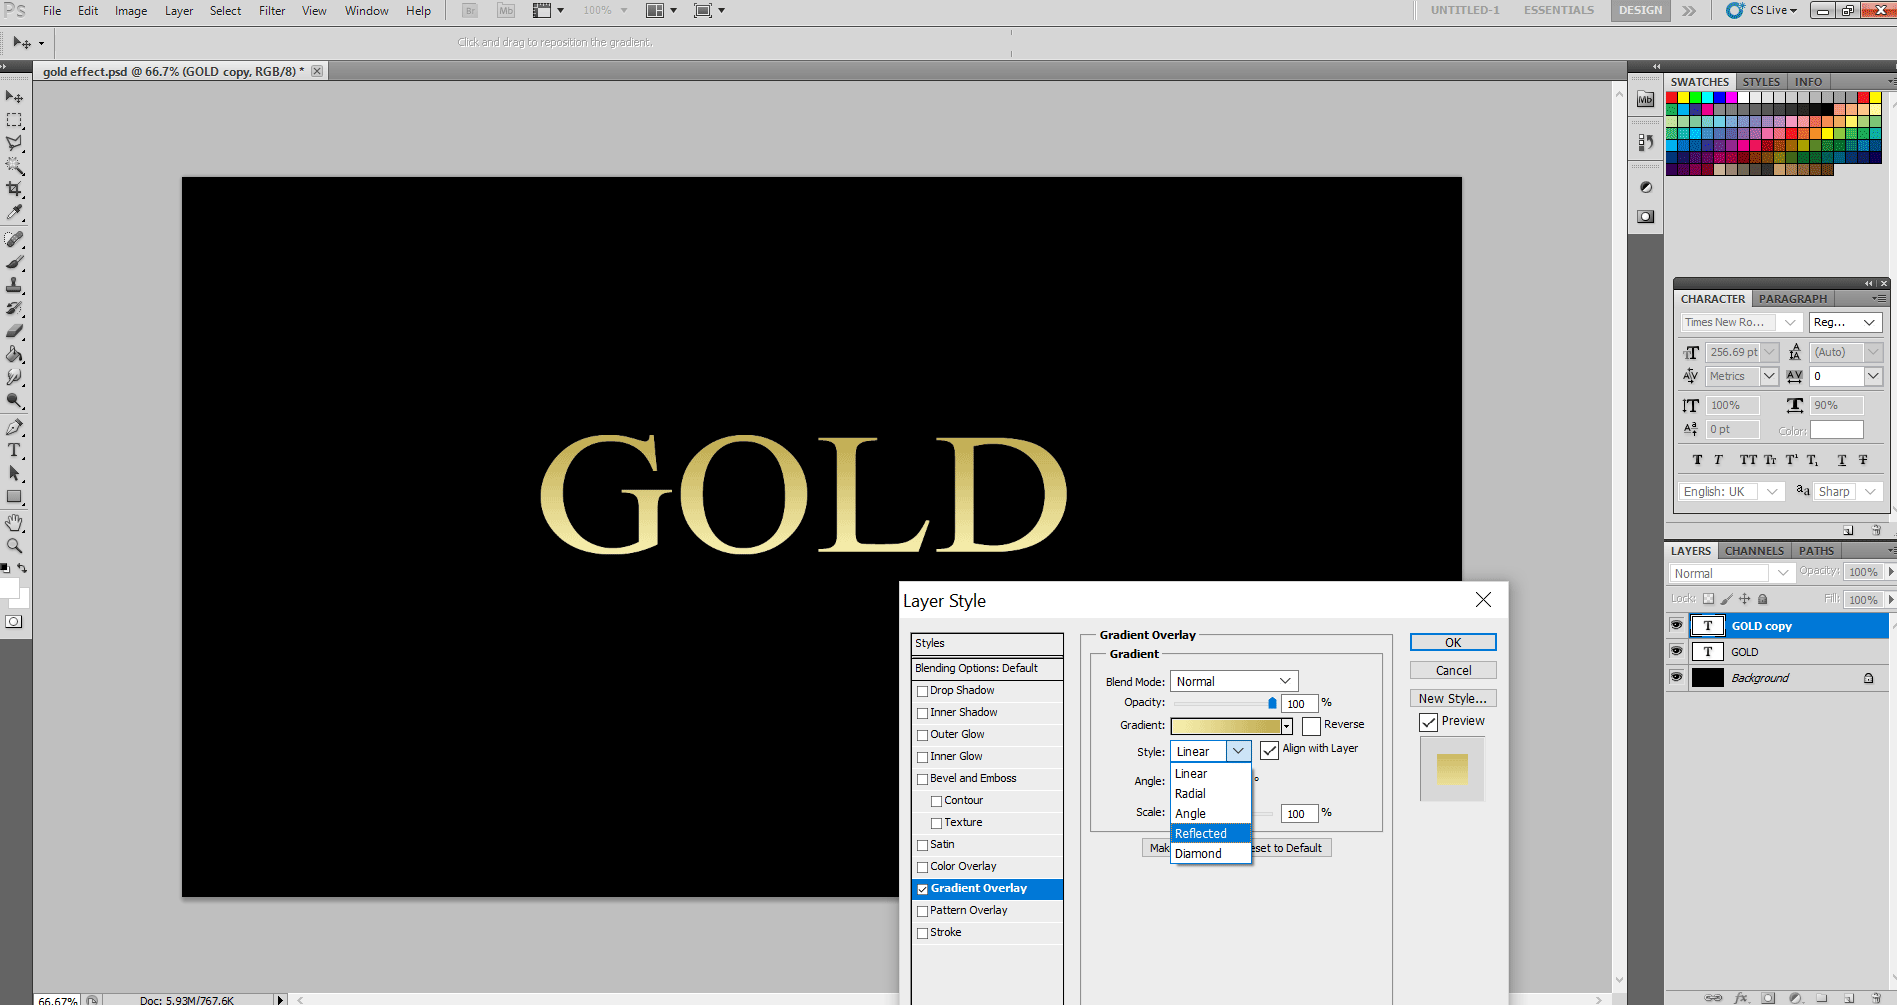
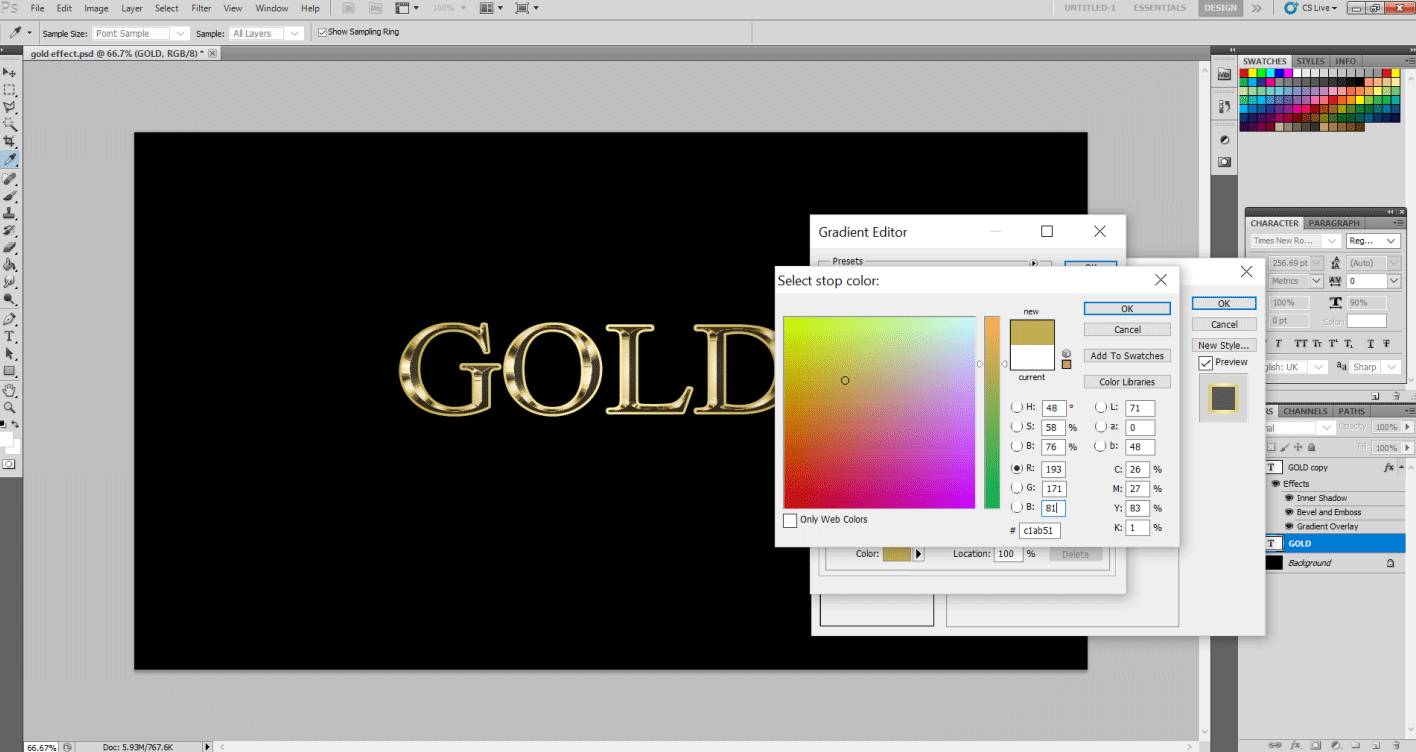
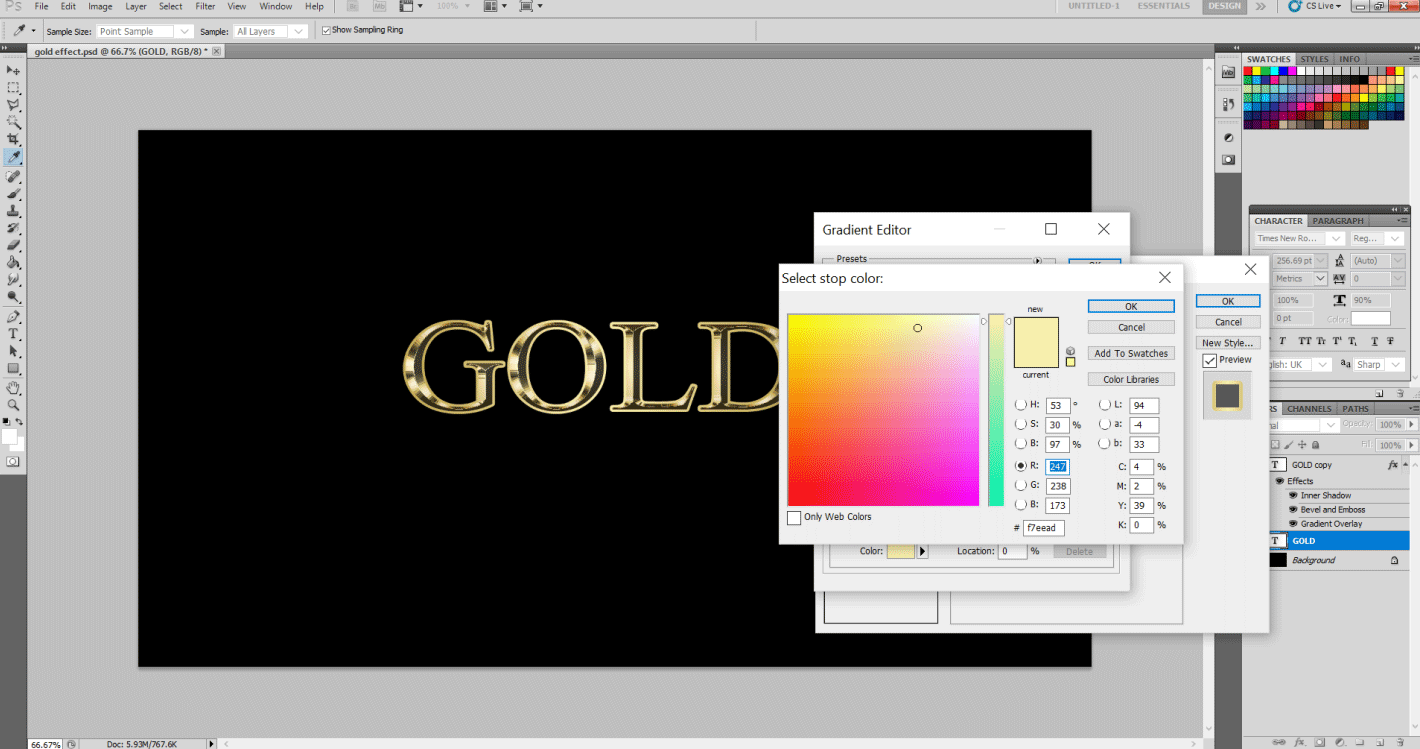
Step 5: Now, right-click on the Gold copy layer and select Blending Options. Select the Gradient Overlay. You will see the gradient is black and white. Hence let’s make its gold color. Left handle color values are R: 247, G: 238, B: 173, and right handle color values are R: 193, G: 172, B: 81. The text looks like this.
You can obtain the RGB values of dull yellow and Gold color easily online. So let’s change the color as shown below.
After that, style changes are reflected, as shown below.
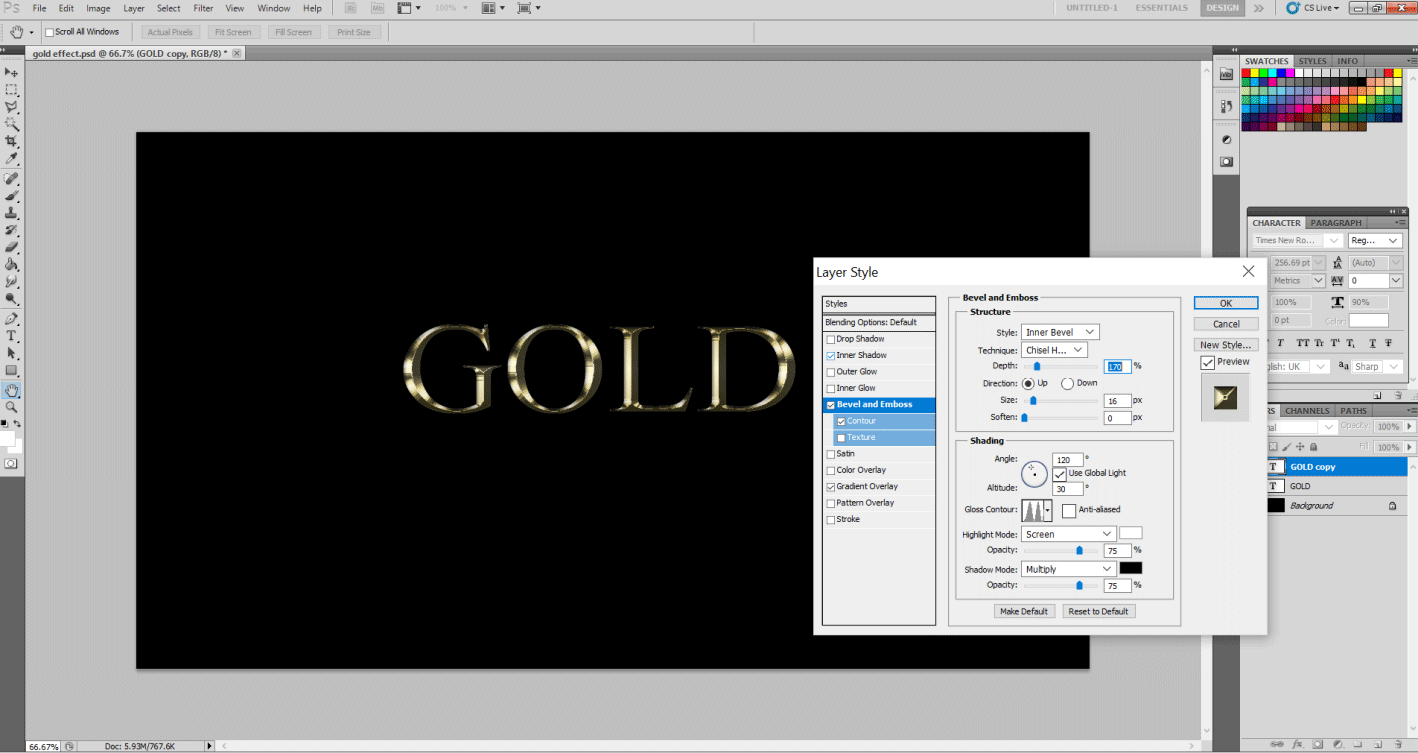
Step 6: Now, Hit Bevel and Emboss and change the following parameters in the Structure Box.
- Technique: Chisel Hard, Depth : 170, Size : 16 px. And change the following parameter of Glass Contour in the Shading options to the Ring Double option, which is the third from left in the bottom row. Select the Contour option headed under the Bevel and Emboss Option on the left.
The following effect looks like this so far.
Step 7: So far, it has a good effect but let’s make it more metallic. Select the Inner Shadow Layer style from the left and make the following changes in the parameters.
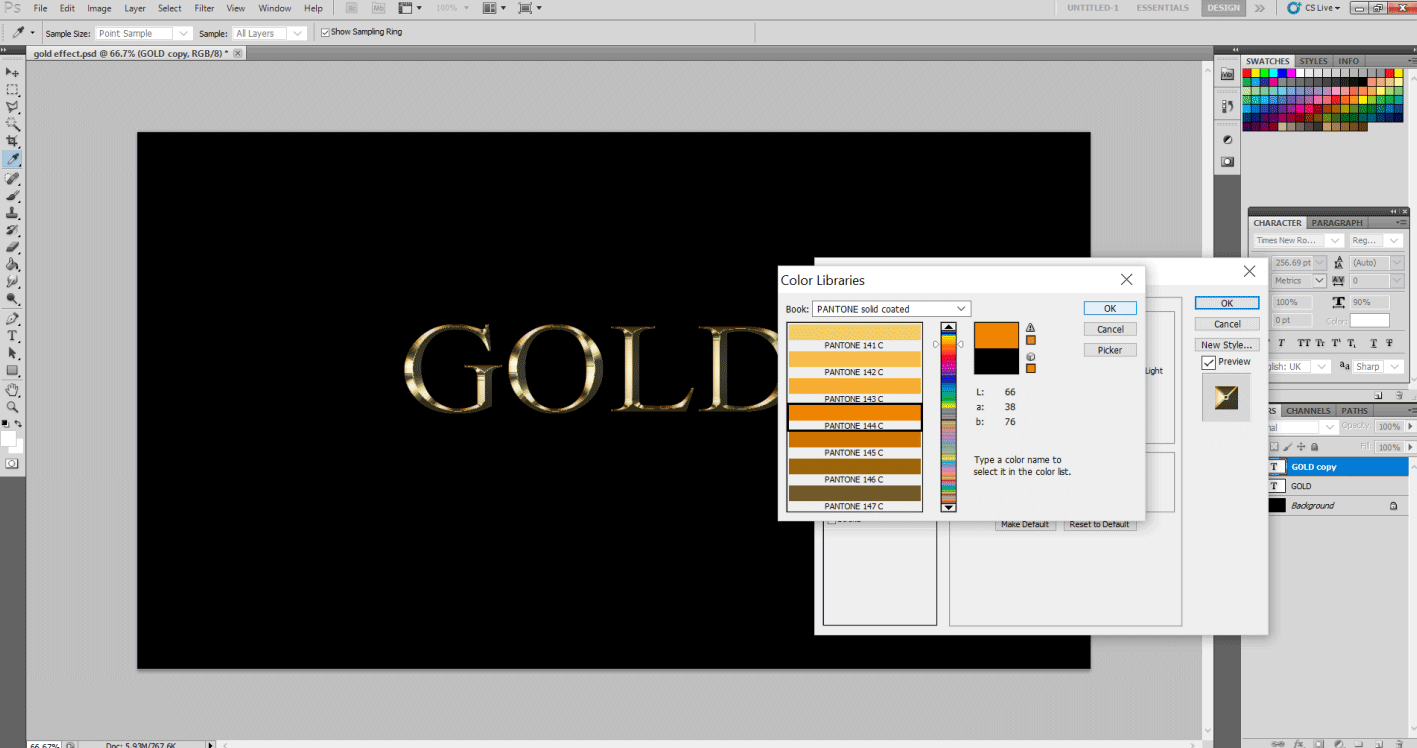
- Blend Mode: Multiply, Opacity : 50 % and Size : 15 px. Now select the black color from the Color Swatch right below the Noise option. This will open another dialog box that lets you change the color of the glow. Let’s set the values of orange color in RGB options. So R: 232, G: 128, B: 31.
Step 8: This effect looks good already. But let’s add some nice layer styles to the original layers to it make more realistic. Select the Gold Layer. Right-click on it and select Blending Options.
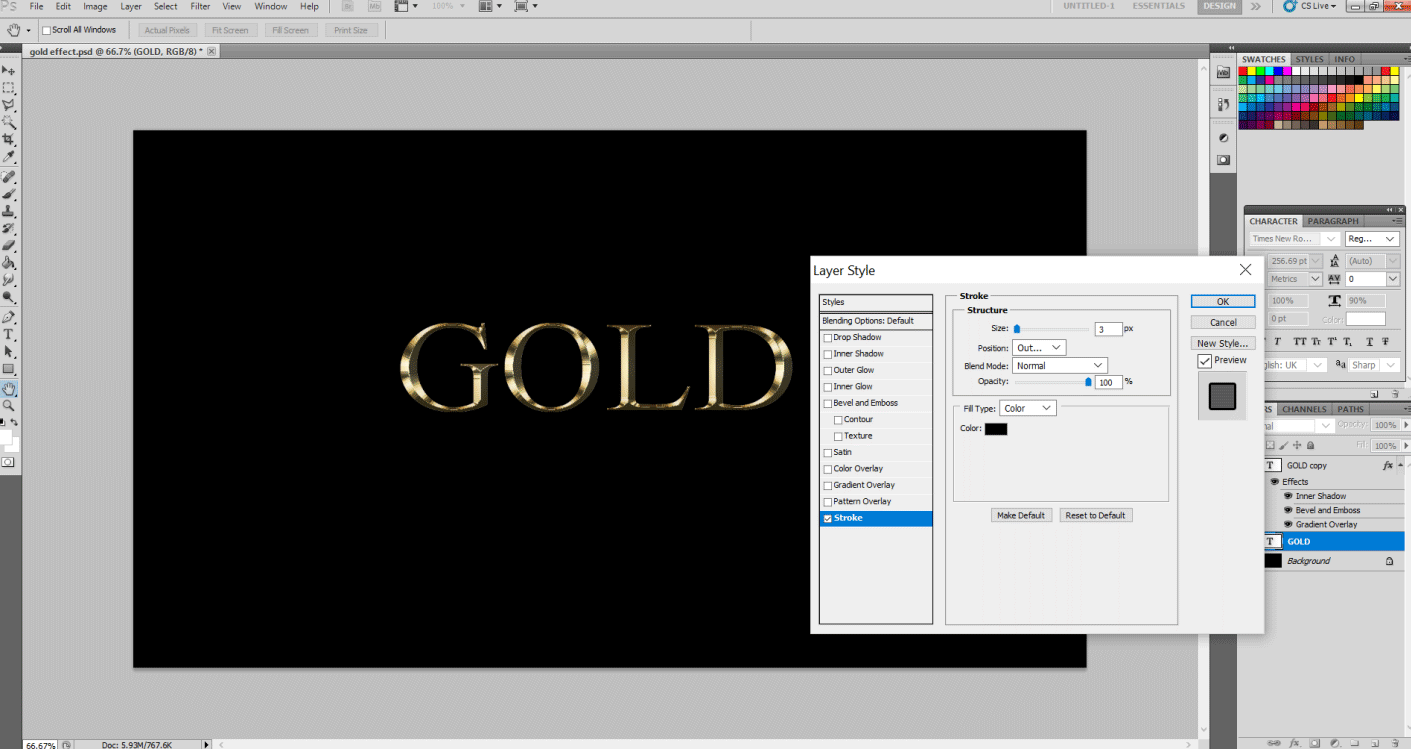
Step 9: Select the Stroke option and make the following changes in the parameters below.
This will give volume to the outline of the text. Size: 5 px, Fill type: Gradient, and Style: Reflected.
Let’s change the gradient color to gold color values as done in Step 5.
Step 10: Now apply the Bevel and Emboss option. Click on the Contour option below it. Now change the following parameters. Style: Stroke Emboss, Technique: Chisel Hard, Depth: 200, Size 5 px and finally Glass Contour: Ring Double option.
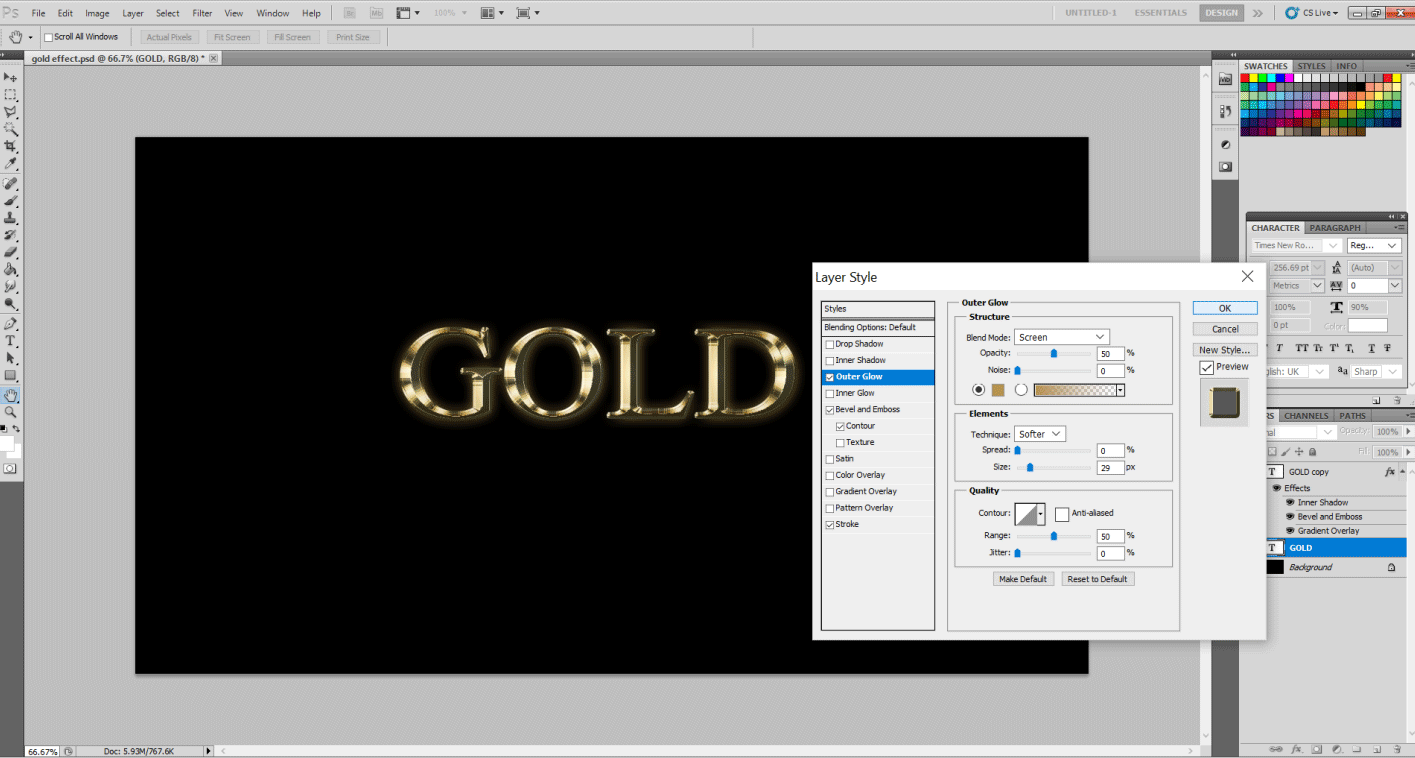
Step 11: Now click on the Outer Glow option and make the following changes. Opacity: 50 % and Size: 30 px. Let’s change the color in the color swatch below the Noise option. Put R: 183, G: 145 and B: 79 and hit OK. And then Apply, your effect will look like this.
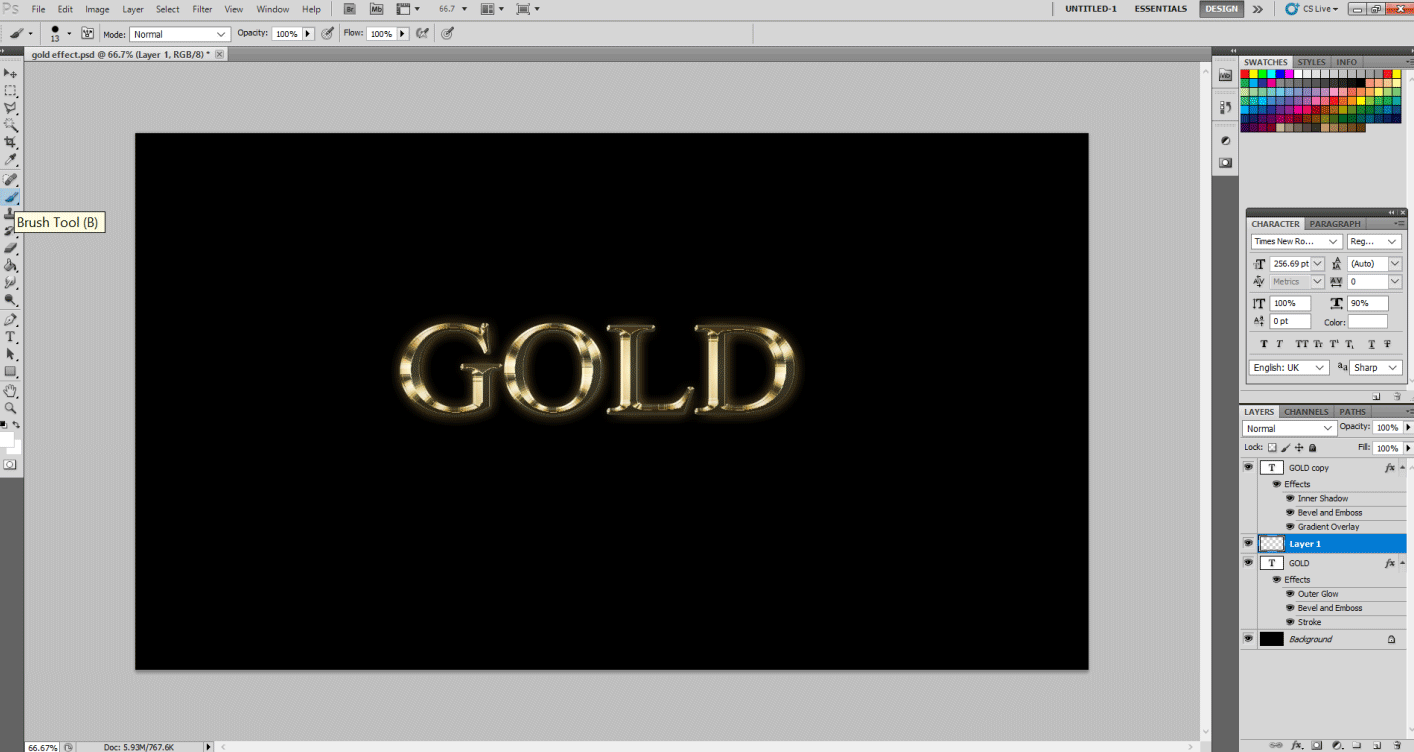
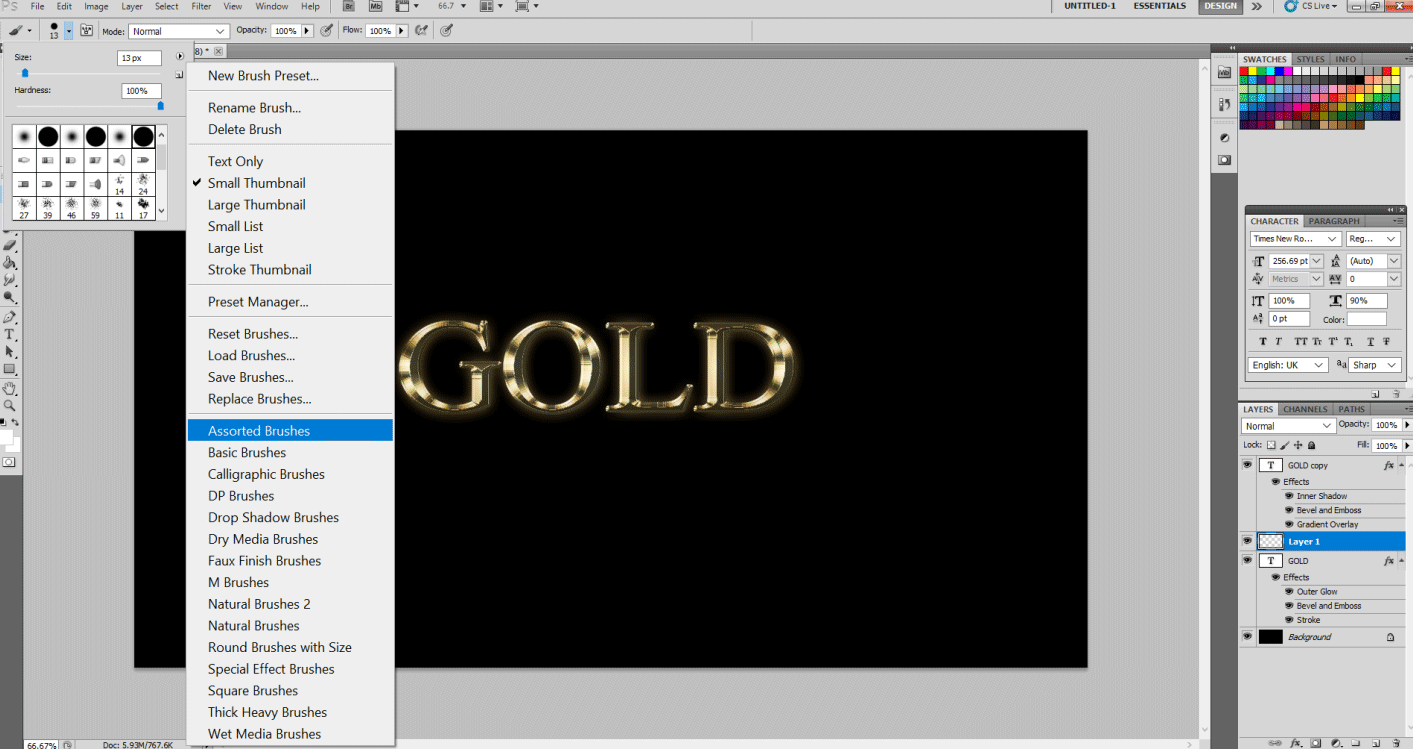
Step 12: Let’s add tiny sparkles to add shine to the effect. Select the brush tool, and in the brush size option, select the tiny arrow as shown in the image and hit Assorted Brushes from the drop-down menu.
Select the Append option in the dialog box. This will add a whole list of assorted brush types to your brush type list.
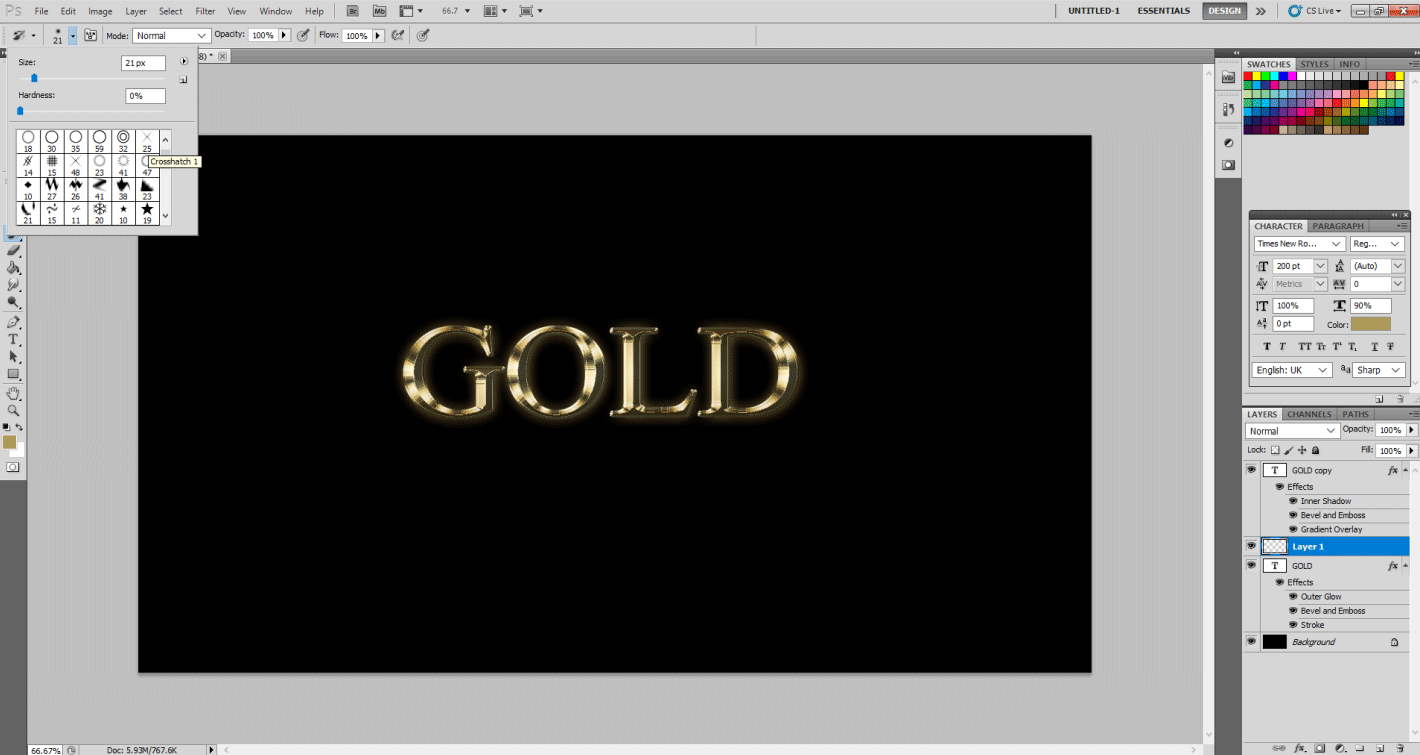
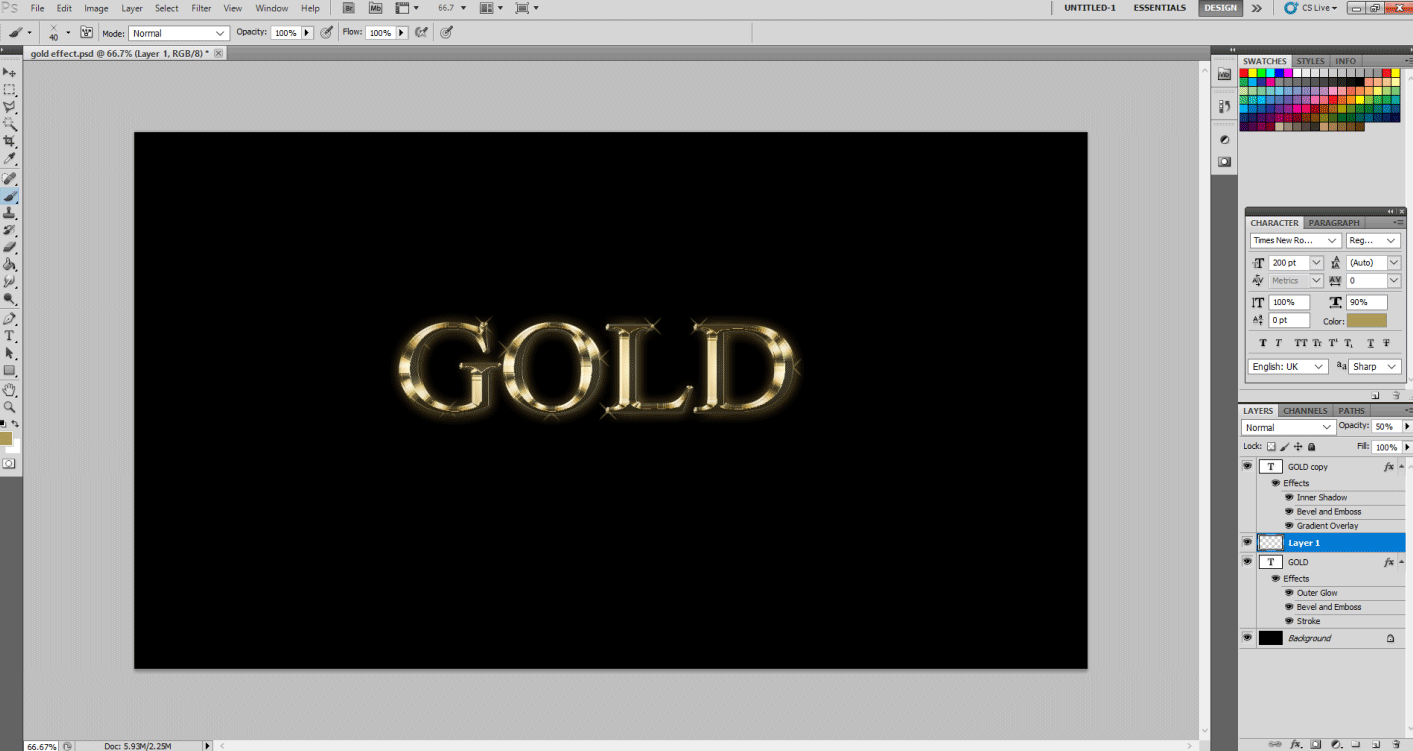
Step 13: Now hit the eyedropper tool and select the faint gold color from the text. This will select the brush color. Again select the Brush tool and select CrossHatch 1 style and give a few sparkles here and there give that glitz. This effect is truly gold!
Adding Golden Texture to The Text
This is a very simple method that is a quick fix for a lot of designers today.
Step 1: Select File > New. Select the preset that you wish. I kept it the same as Effect 1.
Step 2: Using Type tool-type Gold in your desired font style and font size.
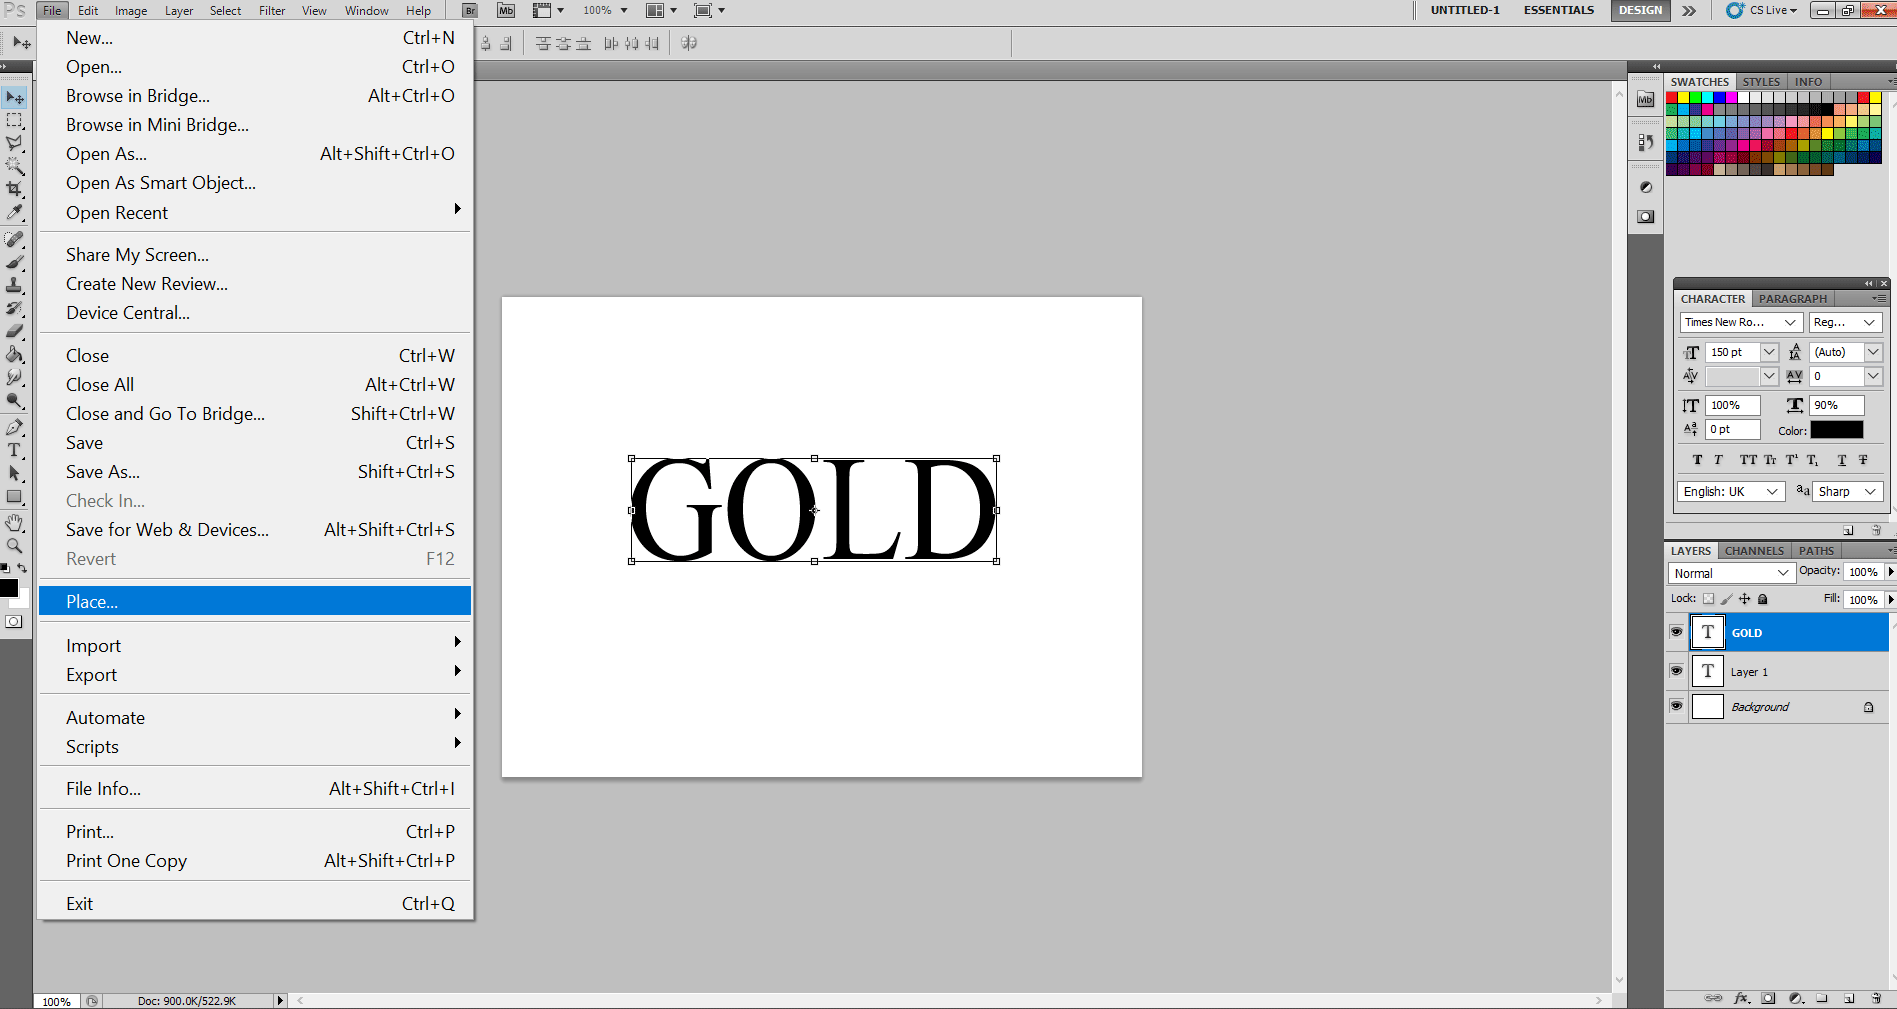
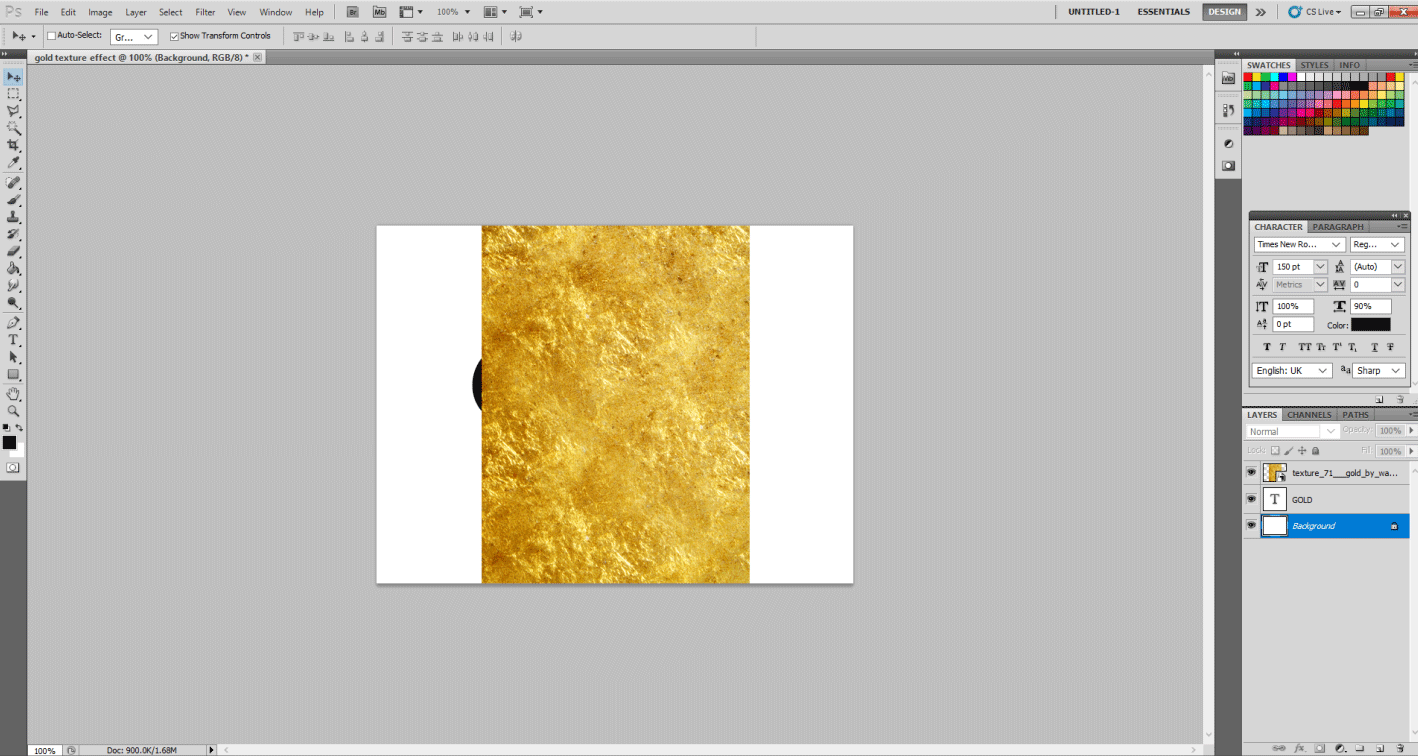
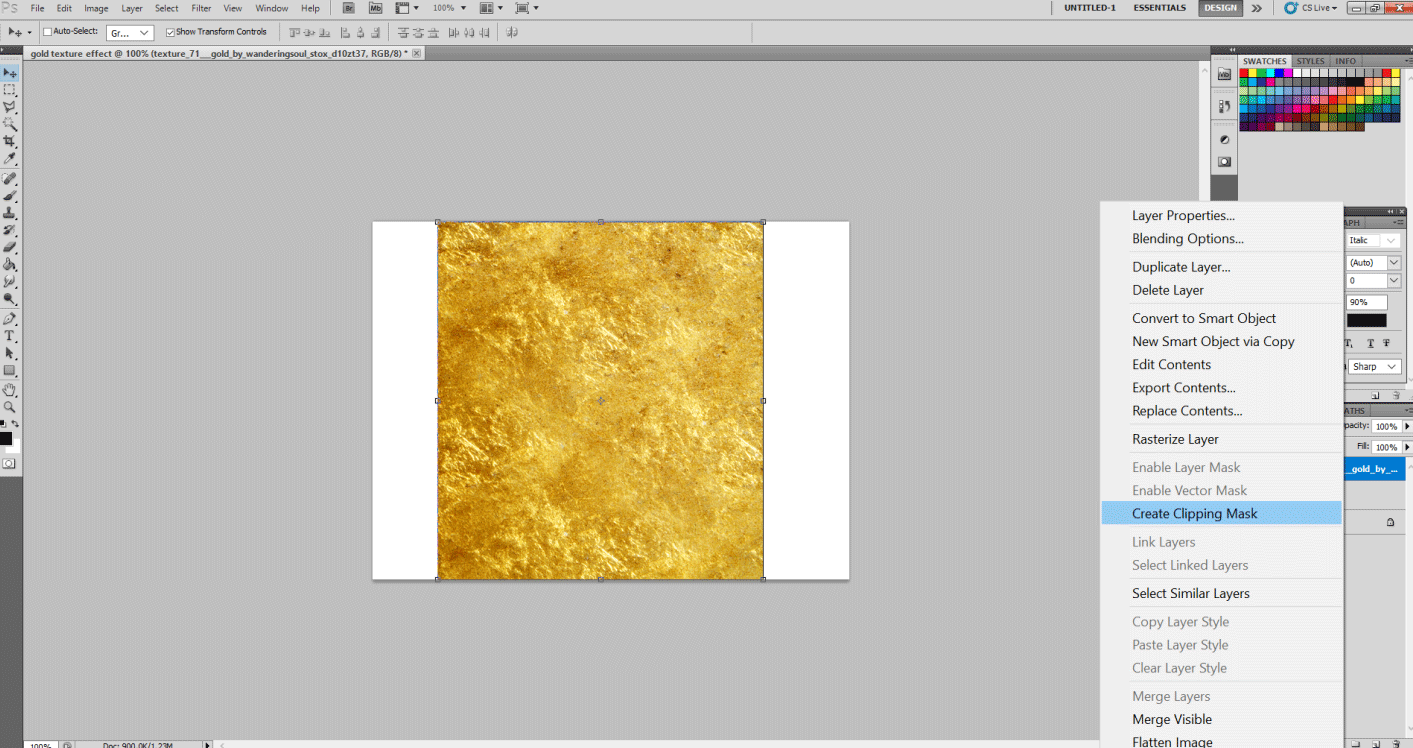
Step 3: Now, place the gold texture in this file picture using File > Place. You can download any golden texture you wish. After setting it on the text, hit Enter.
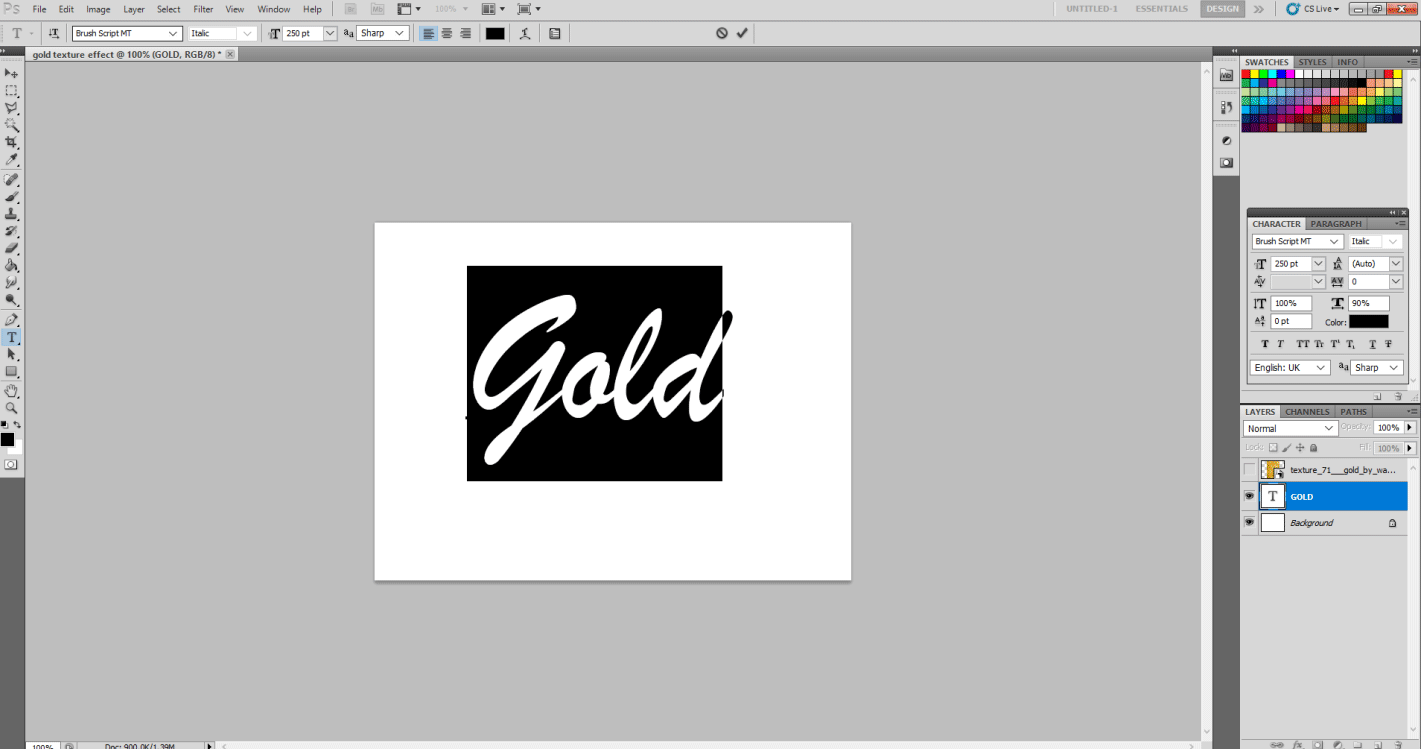
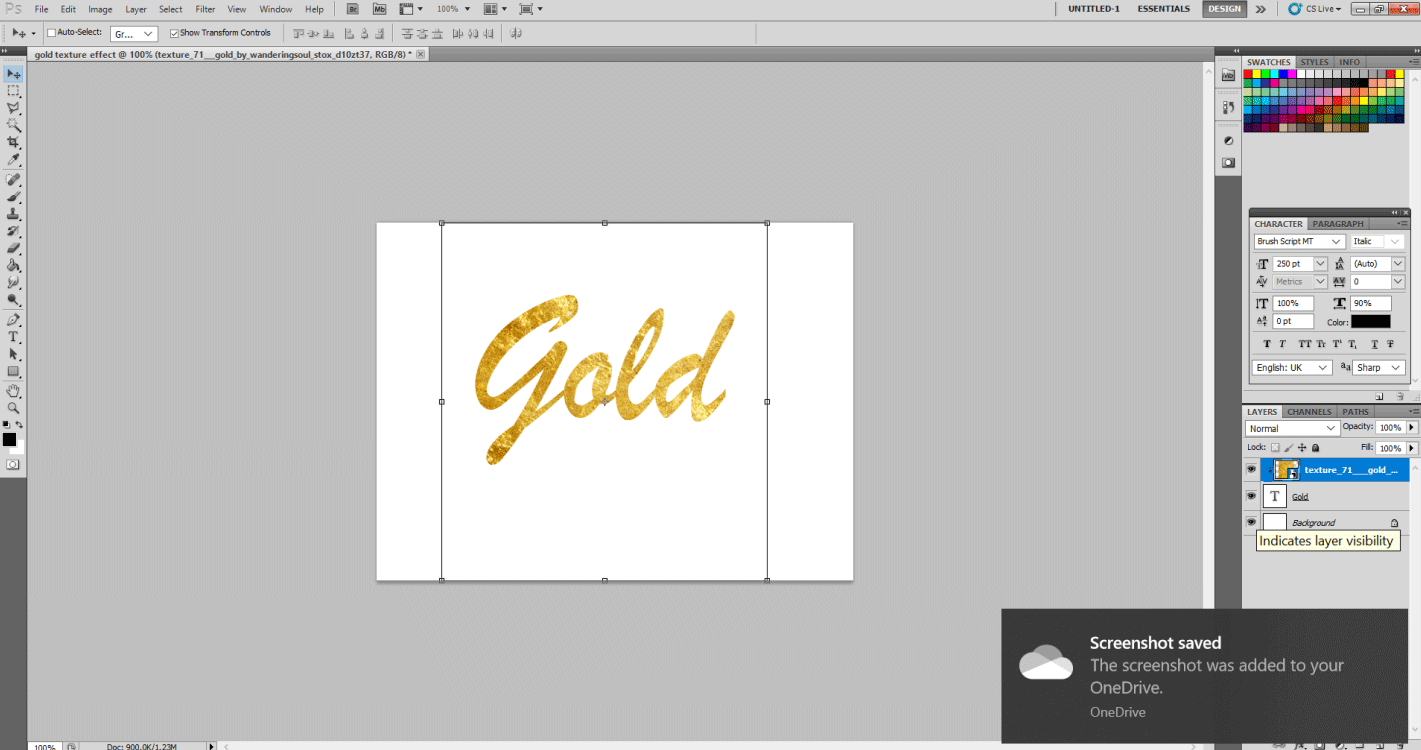
Step 4: Now, all you have to do is change the font style of your choice. I chose the following as shown. Select this texture layer to right-click on it and select the Create Clipping Mask option. And Viola…. You can see how your text got textured into Gold.
Hence in this manner, one can create a Gold text Effect.
Recommended Articles
This is a guide to Gold Text Effect in Photoshop. Here we discuss the Introduction to the gold text effect in photoshop along with 2 methods. You may also look at the following articles to learn more –

