Updated June 8, 2023

Introduction to CSS Inline Style
Cascading Style Sheet or CSS is a style sheet language that defines how an HTML page should be presented. It styles the presentation of a particular piece of markup language code. There are three ways to include CSS in any HTML code: External, Internal, and Inline. While we call the externally defined style sheet in our page in the External method, we define the style within <style /> in the same HTML code in the Internal method. It uses style attributes for styling elements. Internal CSS is included in the same HTML page, as it is used for styling the elements used in the code.
How Does CSS Inline Style Work?
In Inline style CSS, we style a particular element of the HTML code. In the case of Inline Style CSS, ‘style ‘is treated as an attribute of any specific element, which has various properties and is used for the unique styling of any HTML element. We will demonstrate the use of inline CSS through some examples:
1. Using Inline CSS for Styling a Single Element
- Code for a basic HTML page
- Include HTML, head, and body tags by the structure.
- Within <body> tag, define a paragraph tag <p> and use style attribute to style the paragraph. This can be done like:
<p style="color:blue; font-size:50px; font-style: italic;">This is test for Inline CSS</p>HTML Code:
<html>
<head>
<title>Inline CSS</title>
<h1>Demonstration Of CSS Inline Style</h1>
</head>
<body>
<p style="color:blue; font-size:50px; font-style: italic;">This is test for Inline CSS</p>
</body>
</html>
Output:
2. Using Inline CSS for Multiple Elements
- Similar to example 1, we will create an HTML page with basic HTML tags.
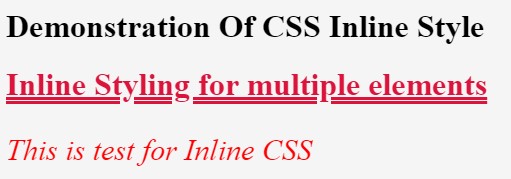
- We first define the heading tag within the body, i.e., <h1>. We style the <h1> tag using various properties like text-decoration, text-decoration-style, color, and font-weight.
<h1 style="text-decoration: underline;text-decoration-style:double; color: crimson; font-weight: 400px;">Inline Styling for multiple elements</h1>- Next, we style the paragraph tag, i.e., <p>, where we define the color, font size, and font style.
<p style="color:red; font-size:30px; font-style: italic;">This is test for Inline CSS</p>HTML Code:
<html>
<head>
<title>Inline CSS</title>
<h1>Demonstration Of CSS Inline Style</h1>
</head>
<body>
<h1 style="text-decoration: underline;text-decoration-style:double; color: crimson; font-weight: 400px;">Inline Styling for multiple elements</h1>
<p style="color:red; font-size:30px; font-style: italic;">This is test for Inline CSS</p>
</body>
</html>
Output:
3. Using Inline Style CSS for Styling a list in HTML
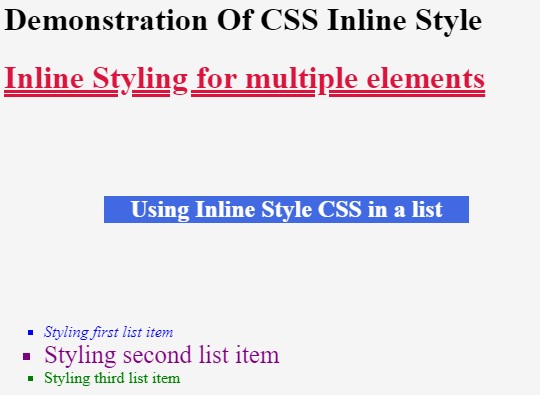
- In this example, we will style an unordered list and customize each list item to understand the inline style in CSS better.
- Once we have created a basic structure for an HTML page, we will create a list within the body. Since it is an unordered list, we will use the tag <ul>. By default, each list item in an unordered list appears as a round bullet point. We will style this to be a square bullet point:
<ul style="list-style:square;">- We will customize each list item, i.e., <li> tag. Please note that when trying the code, you can add more properties to each element to try out different styles.
<li style="color:blue; font-style: italic;">Styling first list item</li>
<li style="color: purple; font-size: 25px;">Styling second list item</li>
<li style="color: green; font-weight: 400px;">Styling third list item</li>
HTML Code:
<html>
<head>
<title>Inline CSS</title>
<h1>Demonstration Of CSS Inline Style</h1>
</head>
<body>
<h1 style="text-decoration: underline;text-decoration-style:double; color: crimson; font-weight: 400px;">Inline Styling for multiple elements</h1>
<h2 style="background: royalblue; color: white; font-size: 40 px; margin: 100px; text-align:center;">Using Inline Style CSS in a list</h2>
<ul style="list-style:square;">
<li style="color:blue; font-style: italic;">Styling first list item</li>
<li style="color: purple; font-size: 25px;">Styling second list item</li>
<li style="color: green; font-weight: 400px;">Styling third list item</li>
</ul>
</body>
</html>
Output:
4. Using Inline Style CSS for Styling an Image
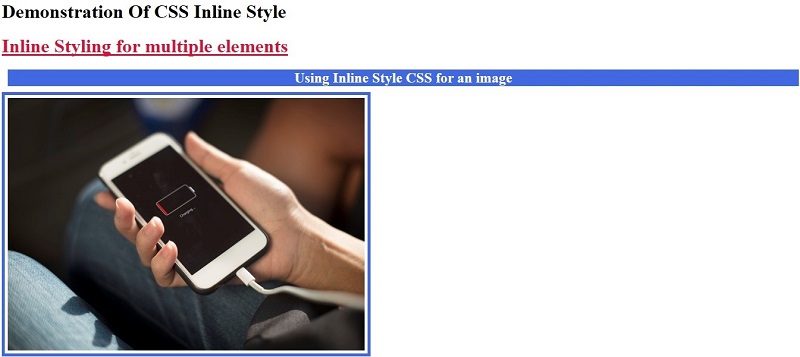
- We can set various properties for an image using inline style CSS.
- In this example, we will be setting a border for the image. While practicing, you can explore many more properties.
- After writing the basic elements of the HTML page, we will style<img> and use additional attributes to size the image according to our requirements.
<img style=" border: 5px solid royalblue; padding: 5px;" src="image.jpeg" height="425px" width="600px">HTML Code:
<html>
<head>
<title>Inline CSS</title>
<h1>Demonstration Of CSS Inline Style</h1>
</head>
<body>
<h1 style="text-decoration: underline;text-decoration-style:double; color: crimson; font-weight: 400px;">Inline Styling for multiple elements</h1>
<h2 style="background: royalblue; color: white; font-size: 40 px; margin: 10px; text-align:center;">Using Inline Style CSS for an image</h2>
<img style=" border: 5px solid royalblue; padding: 5px;" src="image.jpeg" height="425px" width="600px">
</body>
</html>
Output:
So, in this article, various examples were discussed, which show how inline style CSS can be worked into one’s HTML project. However, if the project is a high level and requires strict styling, it is recommended that one must use an external style sheet. That not only eases the work but also structures the project appropriately. Inline CSS can be used if the project is small and very few elements, which are not dynamic, require styling. Inline style CSS limits the local level change to only that specific element of the HTML page. Using External style sheets will be a better idea for defining styles on a global level.
Recommended Articles
We hope that this EDUCBA information on “CSS Inline Style” was beneficial to you. You can view EDUCBA’s recommended articles for more information.


