Updated March 21, 2023
Introduction to Java Swing Layout
Java Swing Layout is an outline in the form of a user interface that has a bunch of options for creating various applications with contemporary layout selections. ‘Swing’ is typically used for windows application development on Java as its platform to build. The types of layouts produced with the help of Java Swing Layout are Grid layout, Border layout, Group layout, Spring layout, Card layout, etc., which calls for the addition of basic java and other related packages.
How to Create a Swing Layout in Java?
We just need to import the required packages and basic java coding to create this. You refer to the example section with code to see how to implement different layouts.
Syntax:
To design layout in Java Swing programmatically, you should follow the basic syntax of java. Just import javax.swing.* package and java.awt .* packages.
Examples
This tutorial explains various JFrmae layouts with examples and use. Here are some of the following examples.
Example #1 – Border Layout
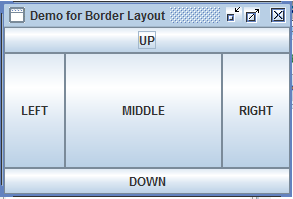
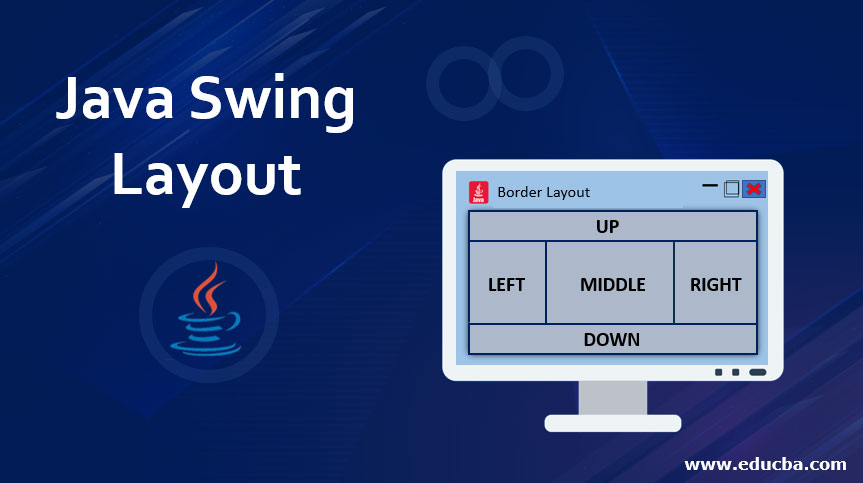
In this example, we will see how we can divide a frame in different borders or sectional layout. Here we will divide the frame into 5 different sections.
Code:
package borderLayoutDemo;
import javax.swing.JButton;
import javax.swing.JFrame;
import javax.swing.JPanel;
import java.awt.BorderLayout;
public class BorderLayoutDemo {
public static void main(String[] args) {
JFrame.setDefaultLookAndFeelDecorated(true);
JFrame fj = new JFrame("Demonstration of Border Layout");
fj.setDefaultCloseOperation(JFrame.EXIT_ON_CLOSE);
JButton jbtn1 = new JButton("UP");
JButton jbtn2 = new JButton("DOWN");
JButton jbtn3 = new JButton("LEFT");
JButton jbtn4 = new JButton("RIGHT");
JButton jbtn5 = new JButton("MIDDLE");
JPanel pnl = new JPanel();
pnl.setLayout(new BorderLayout());
pnl.add(jbtn1, BorderLayout.NORTH);
pnl.add(jbtn2, BorderLayout.SOUTH);
pnl.add(jbtn3, BorderLayout.WEST);
pnl.add(jbtn4, BorderLayout.EAST);
pnl.add(jbtn5, BorderLayout.CENTER);
fj.add(pnl);
fj.pack();
fj.setVisible(true);
}
}
Output:
Example #2 – Flow Layout
Here we will create a window inside which the components inside the frame are arranged in a direction: from left to right until the end till the frame ends. After that components will be automatically taking new rows and be aligned accordingly.
Code:
package flowLayoutDemo;
import javax.swing.JButton;
import javax.swing.JFrame;
import javax.swing.JPanel;
import java.awt.FlowLayout;
public class FlowLayoutDemo {
public static void main(String[] args) {
JFrame.setDefaultLookAndFeelDecorated(true);
JFrame fj = new JFrame("Demonstration of Flow Layout");
fj.setDefaultCloseOperation(JFrame.EXIT_ON_CLOSE);
// Define new buttons
JButton jbtn1 = new JButton("Button A");
JButton jbtn2 = new JButton("Button B");
JButton jbtn3 = new JButton("Button C");
JPanel pnl = new JPanel();
pnl.setLayout(new FlowLayout());
pnl.add(jbtn1);
pnl.add(jbtn2);
pnl.add(jbtn3);
fj.add(pnl);
fj.pack();
fj.setVisible(true);
}
}
Output:
Example #3 – Grid Layout
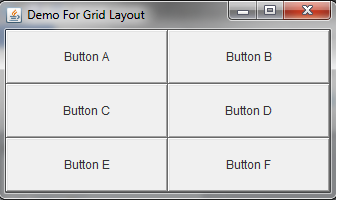
Let us take an example of the implementation of grid layout in the case of java Swing. In this example, we will see how we can align components in grid-like fashion using a grid layout.
Code:
package gridLayoutDemo;
import java.awt.Button;
import java.awt.GridLayout;
import javax.swing.JFrame;
public class GridLayoutDemo extends JFrame {
public static void main(String[] args) {
GridLayoutDemo gld = new GridLayoutDemo();
}
public GridLayoutDemo() {
setVisible(true);
setDefaultCloseOperation(EXIT_ON_CLOSE); //indicates terminate operation on close of window
GridLayout gl = new GridLayout(3, 2);//create grid layout frame
setLayout(gl);
setTitle("Demo For Grid Layout");
setSize(200, 200);
add(new Button("Button A"));
add(new Button("Button B"));
add(new Button("Button C"));
add(new Button("Button D"));
add(new Button("Button E"));
add(new Button("Button F"));
}
}
Output:
Example #4 – Grid Bag Layout
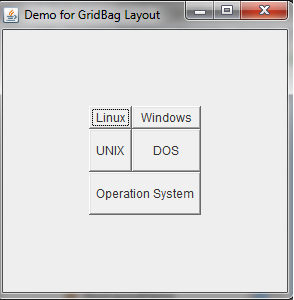
In this example, we will see how we can align components in a customized grid-like fashion using the grid bag layout.
Code:
package gridBagLayoutDemo;
import java.awt.Button;
import java.awt.CardLayout;
import java.awt.FlowLayout;
import java.awt.GridBagConstraints;
import java.awt.GridBagLayout;
import javax.swing.JFrame;
public class GridBagLayoutDemo extends JFrame {
public static void main(String[] args) {
GridBagLayoutDemo gbld = new GridBagLayoutDemo();
}
public GridBagLayoutDemo() {
setSize(300, 300);
setPreferredSize(getSize());
setVisible(true);
setDefaultCloseOperation(EXIT_ON_CLOSE);
GridBagLayout gbl = new GridBagLayout();
GridBagConstraints gbcnt = new GridBagConstraints();
setLayout(gbl);
setTitle("Demo for GridBag Layout");
GridBagLayout layout = new GridBagLayout(); //create grid bag layout
this.setLayout(layout);
//below code is customization of grid fashion
gbcnt.fill = GridBagConstraints.HORIZONTAL;
gbcnt.gridx = 1;
gbcnt.gridy = 0;
this.add(new Button("Linux"), gbcnt);
gbcnt.gridx = 2;
gbcnt.gridy = 0;
this.add(new Button("Windows"), gbcnt);
gbcnt.fill = GridBagConstraints.HORIZONTAL;
gbcnt.ipady = 20;
gbcnt.gridx = 1;
gbcnt.gridy = 1;
this.add(new Button("UNIX"), gbcnt);
gbcnt.gridx = 2;
gbcnt.gridy = 1;
this.add(new Button("DOS"), gbcnt);
gbcnt.gridx = 1;
gbcnt.gridy = 2;
gbcnt.fill = GridBagConstraints.HORIZONTAL;
gbcnt.gridwidth = 2;
this.add(new Button("Operation System"), gbcnt);
}
}
Output:
Example #5 – Group Layout
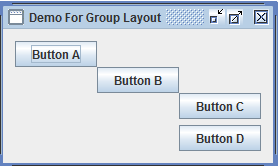
As the name suggests, group layouts different components and arranges them sequentially or in parallel. Here Button A, B, and C are in a sequential pattern, whereas Button C and D are grouped in parallel.
Code:
package groupLayoutDemo;
import javax.swing.GroupLayout;
import javax.swing.JButton;
import javax.swing.JFrame;
import javax.swing.JPanel;
public class GroupLayoutDemo {
public static void main(String[] args) {
JFrame.setDefaultLookAndFeelDecorated(true);
JFrame frame = new JFrame("Demo For Group Layout");
frame.setDefaultCloseOperation(JFrame.EXIT_ON_CLOSE);
JButton jbtn1 = new JButton("Button A");
JButton jbtn2 = new JButton("Button B");
JButton jbtn3 = new JButton("Button C");
JButton jbtn4 = new JButton("Button D");
JPanel pnl = new JPanel();
pnl.setSize(200, 200);
GroupLayout lyt = new GroupLayout(pnl);
lyt.setAutoCreateGaps(true);
lyt.setAutoCreateContainerGaps(true);
pnl.setLayout(lyt);
// Set for horizontal and vertical group
lyt.setHorizontalGroup(lyt.createSequentialGroup().addComponent(jbtn1).addComponent(jbtn2)
.addGroup(lyt.createSequentialGroup().addGroup(lyt
.createParallelGroup(GroupLayout.Alignment.LEADING).addComponent(jbtn3).addComponent(jbtn4))));
lyt.setVerticalGroup(
lyt.createSequentialGroup().addComponent(jbtn1).addComponent(jbtn2).addComponent(jbtn3).addComponent(jbtn4));
frame.add(pnl);
frame.pack();
frame.setVisible(true);
}
}
Output:
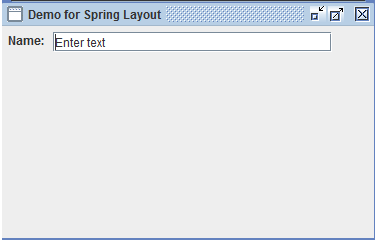
Example #6 – Spring Layout
Spring layout, as the name suggests, constrains the distance between the components.
Code:
package springLayoutDemo;
import javax.swing.JLabel;
import javax.swing.JTextField;
import javax.swing.JFrame;
import javax.swing.JPanel;
import javax.swing.SpringLayout;
public class SpringLayoutDemo {
public static void main(String[] args) {
JFrame.setDefaultLookAndFeelDecorated(true);
JFrame frme = new JFrame("Demo for Spring Layout");
frme.setDefaultCloseOperation(JFrame.EXIT_ON_CLOSE);
// Define the panel to hold the components
JPanel pnl = new JPanel();
SpringLayout lyt = new SpringLayout();
JLabel lbl = new JLabel("Name: ");
JTextField txt = new JTextField("Enter text", 25);
pnl.setSize(200, 200);
pnl.setLayout(lyt);
pnl.add(lbl);
pnl.add(txt);
// Put constraint on components
lyt.putConstraint(SpringLayout.WEST, lbl, 6, SpringLayout.WEST, pnl);
lyt.putConstraint(SpringLayout.NORTH, lbl, 6, SpringLayout.NORTH, pnl);
lyt.putConstraint(SpringLayout.WEST, txt, 6, SpringLayout.EAST, lbl);
lyt.putConstraint(SpringLayout.NORTH, txt, 6, SpringLayout.NORTH, pnl);
frme.add(pnl);
frme.pack();
frme.setVisible(true);
}
}
Output:
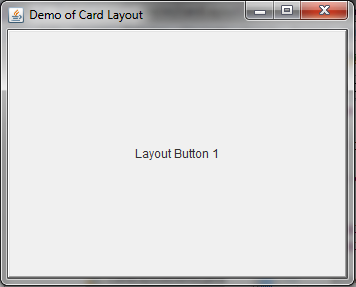
Example #7 – Card Layout
The card layout is not used as much nowadays. This layout basically stacks one component on other as a card. You can ignore the exception of code as anyway it will show you the output.
Code:
package cardLayoutDemo;
import java.awt.Button;
import java.awt.CardLayout;
import java.awt.Container;
import java.awt.event.ActionEvent;
import java.awt.event.ActionListener;
import javax.swing.JFrame;
public class CardLayoutDemo extends JFrame implements ActionListener {
public static CardLayout crd = new CardLayout(70, 60);
public static Container cn;
@Override
public void actionPerformed(ActionEvent e) {
crd.next(cn);
}
public static void main(String[] args) {
CardLayoutDemo cld = new CardLayoutDemo();
}
public CardLayoutDemo() {
setVisible(true);
setDefaultCloseOperation(EXIT_ON_CLOSE);
CardLayout cl = new CardLayout();
setLayout(cl);
setTitle("Demo of Card Layout");
setSize(200, 200);
add(new Button("Layout Button 1"));
add(new Button("Layout Button 2"));
add(new Button("Layout Button 3"));
add(new Button("Layout Button 4"));
add(new Button("Layout Button 5"));
add(new Button("Layout Button 6"));
}
}
Output:
Recommended Articles
This is a guide to Java Swing Layout. Here we discuss the basic concepts, how we can create a swing layout in java along with the examples and outputs. You can also go through our other suggested articles to learn more –

