Updated August 25, 2023
Introduction to Morphing in Photoshop
Morphing is a feature in Photoshop that can be utilized in animations and motion pictures to change or morph a single picture or form into another by adopting a flawless transition. This feature permits you to contort the objects on the image, or the whole image itself, to any form or shape you need. Morphing also has a huge demand in the printing industry like newspapers, magazines, movie banner, poster, etc., whether it is moral or not. Morphing can be done for the digital images to produce amusing, scaring or cartoon-like images with the use of Adobe Photoshop. This technique can be utilized to produce one of a kind expressions or disguised profile pictures.
How to Morph Pictures in Photoshop?
Below are the steps to create morphing in photoshop:
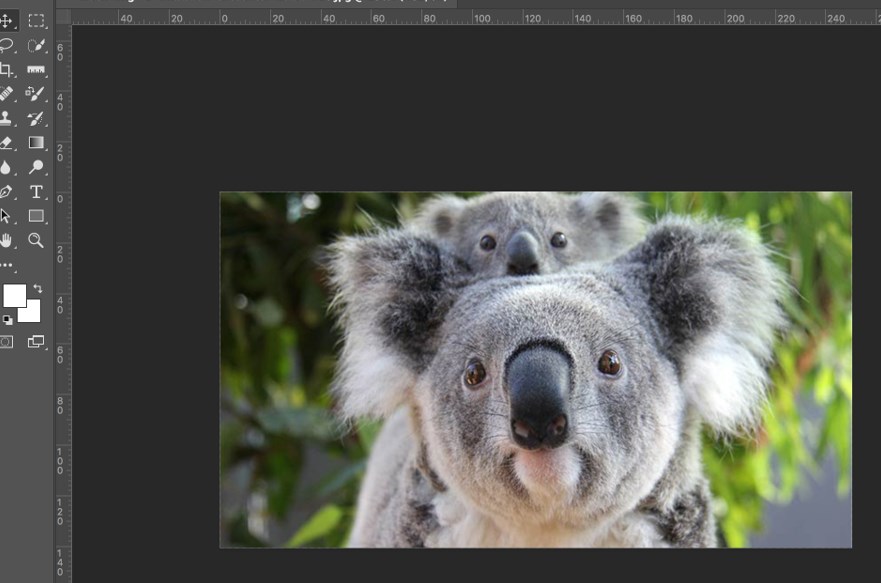
Step 1: Open your Adobe Photoshop. Select an image to work with. Here we will use the koala bear image.
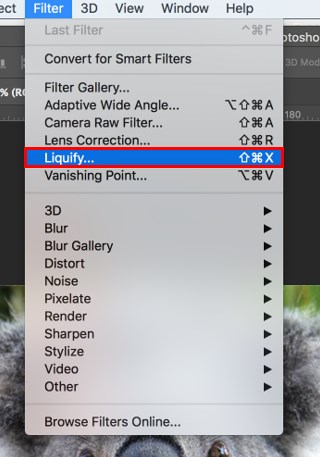
Step 2: The next step is to select the liquify tool from the menu bar. Click on Filter, then Liquify.
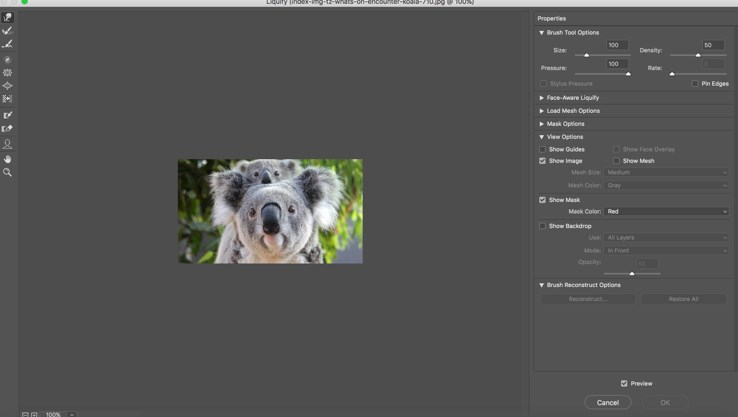
Step 3: Once you click on Liquify, you will get a liquify window, as shown below.
Step 4: Once you get the liquify window, left-click (now a circle cursor) on the areas you want to morph, the cursor can also be dragged across the image to morph the regions of the photo where the cursor goes through. Click on OK after you are done with morphing. The size of the circle cursor is adjustable. You can do it by hitting the left bracket ( [ ) to reduce the size and the right bracket ( ] ) to increase it.
How to Apply Face Morphing?
Face Morphing is popular nowadays in the entertainment industry. Face Morphing can signify blending and stitching some of the pixels of both the faces. So here we will use two images of football stars Wayne Rooney and Paul Scholes. Now to morph or swap faces in Photoshop, make sure both the faces are facing a similar direction and have a similar head tilt. Try to get the angles of both the faces as matching as possible so that it does not look fake.
Here we will be putting Wayne Rooney’s face on Paul Scholes’s. Below are the steps to morph faces in Photoshop:
Step 1: The first thing that we will do is select the lasso tool to make a selection around Wayne Rooney’s face. You can select the lasso tool by pressing L on the keyboard or by navigating to the toolbar.
Step 2: Make a selection of the face after you select the lasso tool.
Step 3: After the selection, press Ctrl + J for Windows and Command + J for Mac to duplicate the layer. Now we just have the face, and we will name it Face.
- Then click on V on the keyboard to select the move tool. Click and drag on the face and drag it over to the other tab where you have Paul Scholes’s image and release the layer there.
- It is a good idea to always work with a face that is larger than the face you are trying to swap out. You will have the advantage of distorting and scaling pixels and not have any pixelation.
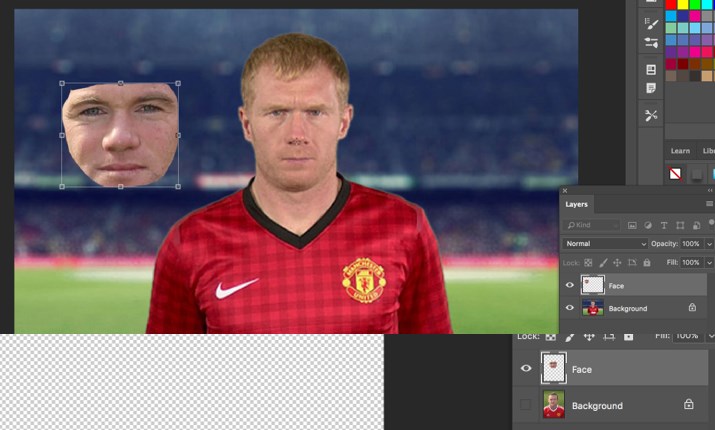
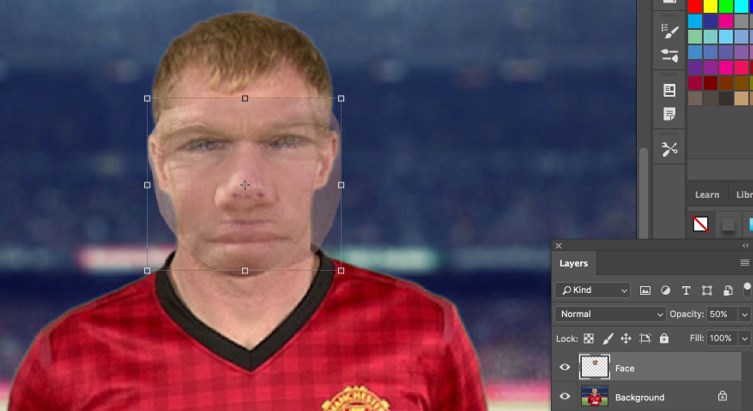
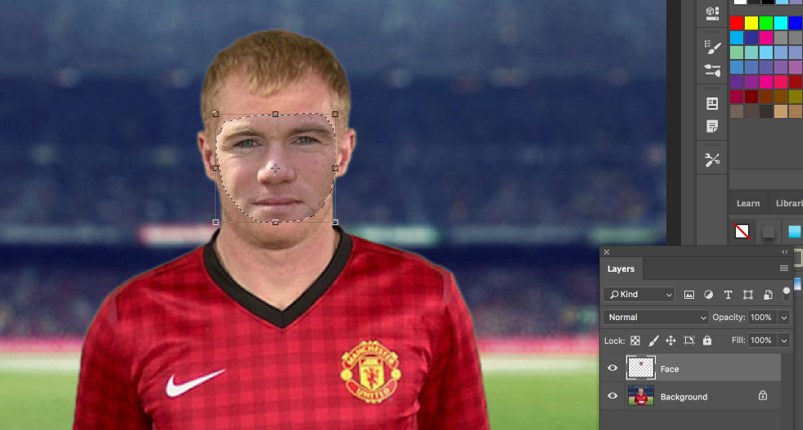
Step 4: The next step is to match the size of both faces. To do that, press Ctrl + T (Transform) for Windows and Command + T for Mac. We will bring the opacity to 50%, which is present on the layers panel and then bring it over Paul Scholes’s face, as shown below.
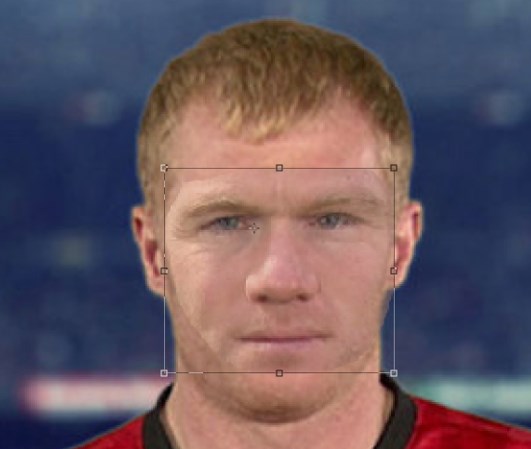
Step 5: Use the eyes to match the face. Match the corner of the eye with the face and use it as the scaling position. Hold Alt and then click the corner of the eye to make a new pivot point and then scale it to match the face by holding Shift + Alt + click.
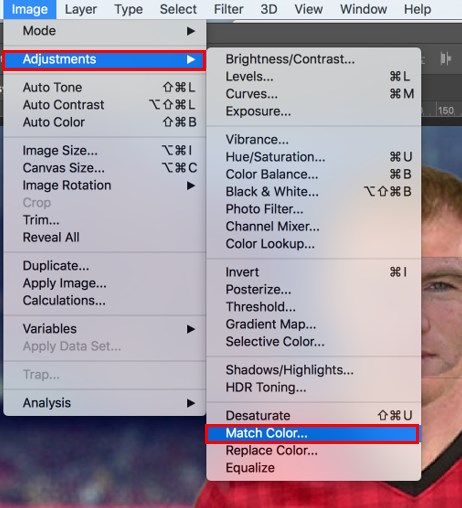
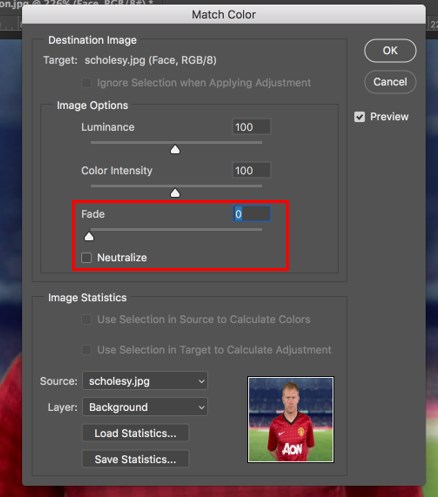
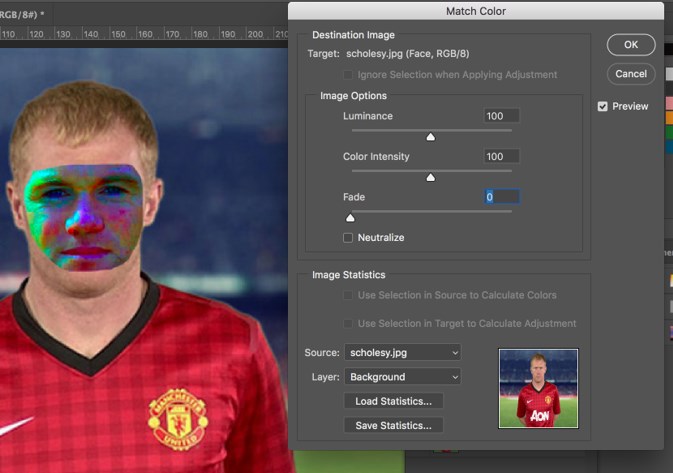
Step 6: If you are doing face morphing, it is always a good idea for both faces to have similar skin tone, color, etc., so when you merge the layers, it looks better. To do that, select the face, then click on Image, then Adjustments and Match Color. Select the Paul Scholes image as the source and layer as the background.
Step 7: This does not look good because the background has black, red, and green color that we don’t need; you only want the color that is on the face. So to select just the face hold Ctrl + Command and click on the face thumbnail in the layer section and select the pixels.
- Once the selection is done, repeat the same steps by clicking on Image > Adjustments > Match Color and selecting the source and layer as before and adding some fade to it. Add a little gaussian blur to match the skin tone.
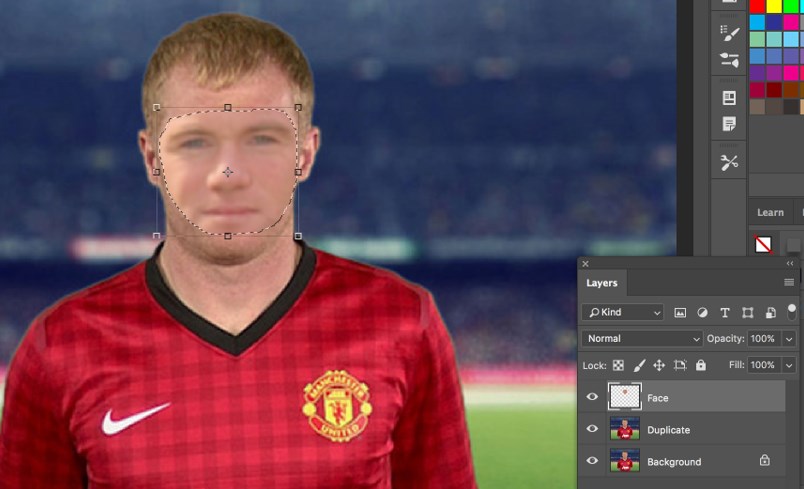
Step 8: Now press Ctrl + Command and click on the face layer thumbnail to make the selection. Also, create a duplicate layer of the background and name it as duplicate.
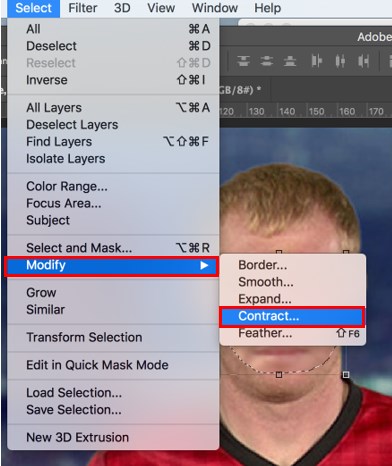
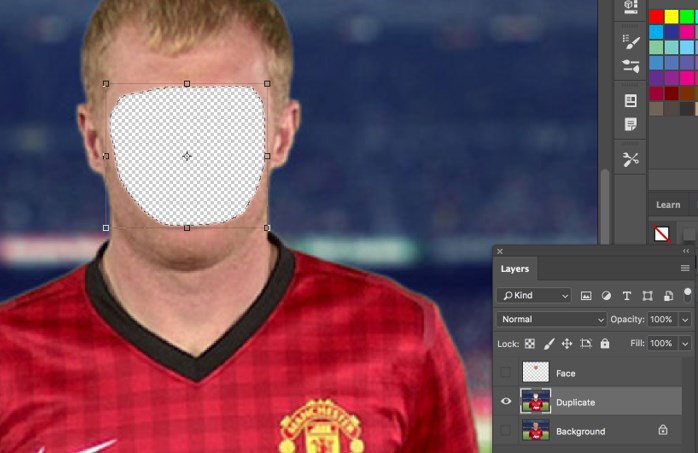
Step 9: Now select the duplicate layer, click on Select, then Modify and Contract and select 5 pixels.
Step 10: Then select the duplicate layer and hide the other layers, and press delete.
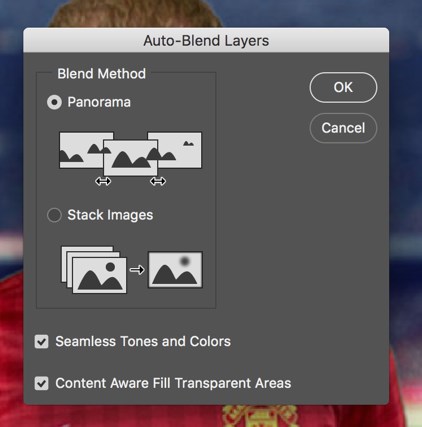
Step 11: Now unhide the face layer, hold shift and select both face and duplicate. Then go to Edit and Auto-Blend Layers, select the blend mode to be panorama and check both Seamless Tones and Colors and Content-Aware Fill Transparent Areas. By doing this, Photoshop automatically blends the tones and the colors, as shown below.
Step 12: Final Image.
In this way, you can morph two faces in Adobe Photoshop.
Conclusion
Morphing can find itself to be useful in blending two or more pictures into a new picture. It is substantially utilized in appending special effects in animation and motion pictures. It is also extensively utilized in interactive user interface designing and games. Morphing effects have become better from the days of their early utilization and are more propelled towards producing less apparent effects that seem to be more pragmatic.
Recommended Articles
This is a guide to Morphing in Photoshop. Here we discuss an Introduction, Liquify the image, and morph two faces in Adobe Photoshop, respectively. You can also go through our other related articles to learn more –

