Updated March 31, 2023

Introduction to Git Repository Setup
The following article provides an outine on Git Repository Setup. We all know Git is a version control tool for our Code. But here is our code stored. It must be stored at someplace? The place where the code is stored is called Git Repository. A Git Repository can be created online using websites which provide the service such as GitHub or on our local drive. GitHub is a paid service if the number of users are large.
Types of GIT Repository Setup
There are basically two types:
1. Bare Repository
Well as the name suggest Bare Repository is an empty Repository which has nothing but the files that are related to Git. Confused where does our Code goes if we only have the basic Git files. ? So let’s fire up Git and create our first Bare Repository on our local Drive.
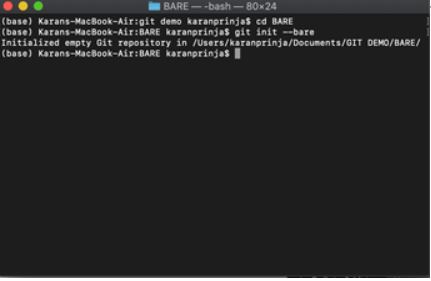
We can create a bare git repository by using the command:
git init —bareNavigate to the desired folder and run the command. Navigate to the folder BARE and run the Command.
If the command has been executed successfully you will get the message. Initialized empty Git Repository.
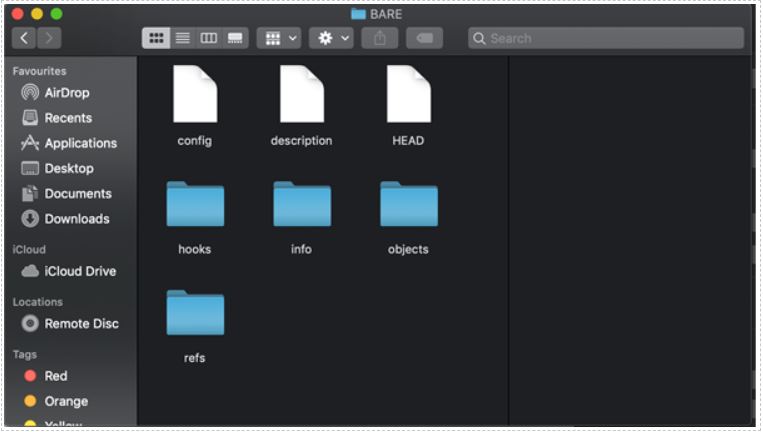
Now Navigate back to the folder which you have initialized as bare repository and you will see a set of files.
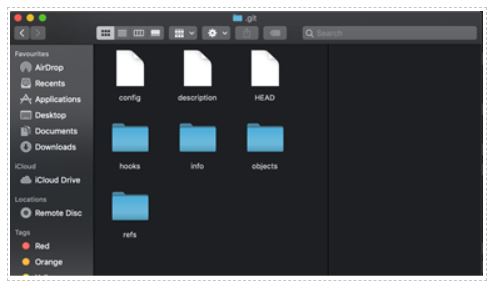
Given below are the set of files which are generated when you initialize the empty Git repository.
- config: This consist of basic information regarding the repository which we have.
- description: This consist of the name of the git repository. You can edit this file and name to your git repository
- HEAD: Now this is the main part of the git. The content of the file keeps on changing as we proceed further in commits. It points to the current point where we are present in our code
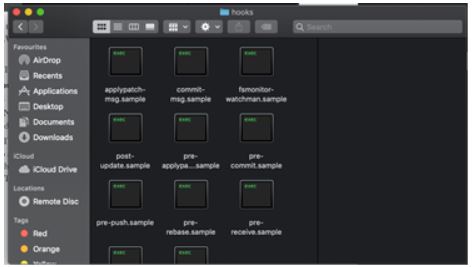
- hooks: These are the scripts which are excited when a certain event occurs. Say you made a commit to a code and you want to perform an activity after/before the occurrence of commit.
That is where hooks come in. You have some sample hooks script which are present in the folder.
These are shell scripts.
- info: If you have some files which you do not want to be part of version control we make use of info folder. Apart from that any additional information goes here.
- objects: This folder consist of all the objects of the commits we made. All the information goes into this folder. All the commits, tags, checkings go in this folder
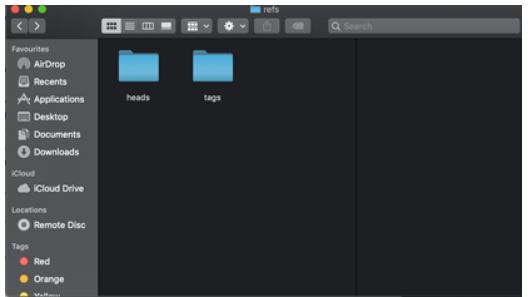
- ref: References are stored in the directories which are created in this folder.
Below is the ref folder.
From the above information you can see we only have the git related files in the bare repository. There is no working tree which is present in the git repository.
Our code is basically stored in form of BLOB in the bare repository.
2. Non-Bare Repository
We have seen what are bare repository in the above section and now we will see what a non-bare repository and how do we create it. The command which we use for creating a non-bare repository is as follows:
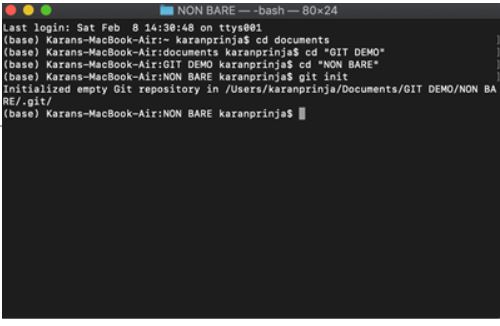
git initNotice on the above command we are not making use of the bare flag which we had used for creation of a non-bare repository.
Navigate to the folder where you want to create the repository and run the command.
Notice the difference in the message you get for creating a bare and non-bare repository. In the case for non-bare repository you get the message Initialized empty Git repository in <Path>/.git/. While in the case of non-bare repository you only get the message Initialized empty Git repository in <Path>.
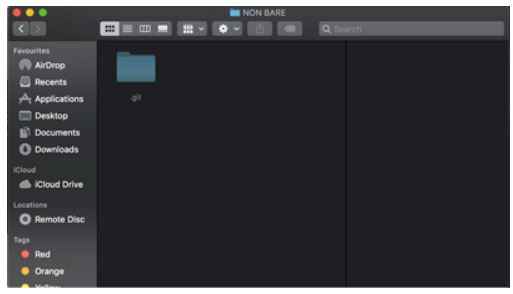
Now open the non-bare repository folder which you just created. At first you will notice nothing in the folder. To view the .git folder you have to enable the view hidden files and folder option. Once you have enabled the option you will be able to see the .git folder which will have to same git files.
The content of the .git folder is similar to the one we saw above in the bare git repository
Bare Repository vs Non Bare Repository
- Now the point arrives is when to use a bare repository and when to use a non-bare repository?
- Bare repository is completely empty it does not have your working tree. It is basically suited when you want to collaborate with other people from your team and don’t want to make use of services of GitHub etc. In short any shared repository should be a bare repository. If you want to perform both push and pull operation.
- While a non-bare repository makes sense only if you want to keep track of the change you are making on your computer. Another noticeable feature is that you cannot push your changes to the bare repository you have to make changes to the configuration file to achieve it.
Conclusion
In the above article we studied about different Git repositories and how to create them. Usage of the bare and non-bare repository is dependent on the use case for which you are creating the repository. If it is for your personal usage then you should go for non-bare repositories and if you are creating repositories for keeping track of your changes in the code or files make use of the bare repositories.
Recommended Articles
This is a guide to Git Repository Setup. Here we discuss the introduction, types and bare repository vs non bare repository. You may also have a look at the following articles to learn more –
