Updated April 14, 2023

Introduction to Python Pygame
Programming via gaming is a teaching tool nowadays. Gaming includes logics, physics, math and AI sometimes. Python language uses pygame to carry out the programming. Pygame is the best module so far, helping in game development. Pygame is a module used to build games that are usually 2D. Knowing Pygame proficiently can take you far in developing extreme ranges of games or big games.
Syntax and Parameters of Python Pygame
Below are the syntax and parameters:
Syntax
import pygame
from pygame.locals import *
Parameters
- importing pygame module followed by accessing key coordinates easily from locals
- From there, you write your game code where you want to insert objects movable, sizeable, etc.
Then initialize the pygame module.
Examples to Implement Python Pygame
Below are the examples:
1. initializing the pygame
pygame.init()
This is a function call. Before calling other pygame functions, we always call this first just after importing the pygame module. If you see an error that says font not initialized, go back and check if you forgot pygame.init() insertion at the very start.
2. Surface Object
pygame.display.set_mode((500, 500))
This function call returns the pygame.Surface object. The tuple within tells the pixel parameters about width and height. This creates an error if not done properly, which says argument 1 must be 2 items sequences, not int.
Code:
import pygame
from pygame.locals import *

pygame init()
display_window = pygame.display.set_mode((400, 300))
pygame.display.set_caption('Hello World!')
while True:
       for event in pygame.event.get():
             if event.type == QUIT:
                   pygame.quit()
                   sys.exit()
       pygame.display.update()
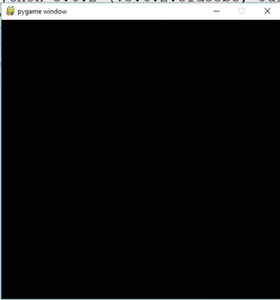
Output:
Code:
#Let’s make a character move on the screen.


import pygame
pygame.init()


win = pygame.display.set_mode((500, 500))
pygame.display.set_mode = ("First game")


x = 50
y = 50
width = 40
height = 60
vel = 5


run = True
while run:
  pygame.time.delay(100)


  for event in pygame.event.get():
    if event.type == pygame.QUIT:
      run = False

  keys = pygame.key.get_pressed()


  if keys[pygame.K_LEFT]:
    x -= vel
  if keys[pygame.K_RIGHT]:
    x += vel
  if keys[pygame.K_UP]:
    y -= vel
  if keys[pygame.K_DOWN]:
    y += vel

  win.fill ((0,0,0))
  pygame.draw.rect(win, (255, 0, 0),(x, y, widty, height))
  pygame.display.update()
pygame.quit()- First, we initialize the pygame module by importing it.
- Now, we give the parameters for the window size of the game we are constructing.
- Naming the game to the first game, which is the name of the window.
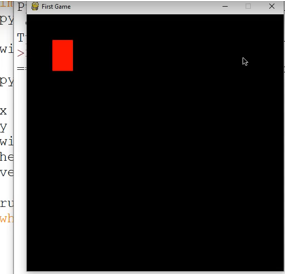
- Now, creating a character, it needs parameters. Let’s say we create a rectangle. A rectangle needs height, width, x and y coordinates to be placed in the window, the velocity with which it should move across the window.
Output: This is how the output seems for creating a character, that is, in this case, a rectangle.
- Then we need to start writing out the main loop, which considers the character movement. In this program, the main loop is going to check for its collision, its mouse events; it’s also going to check if you hit something. This is one of the simple ways to do it.
- Now we make a run variable. In the loop, we are going to check the collision. Giving the loop a time delay is going to help you by delaying the things that happen real quick in the window. This regards kind od a clock in pygame. You cannot normally import the clock in pygame, but this is the easy way to do it.
- For checking an event: Events in pygame are anything that the user causes. Like, moving the mouse in general, accessing the computer to create files. So, to check for the events, we happened to create a loop check for events.
- Then we draw a rectangle that is movable, which is a surface on the pygame window. All the colors in pygame are in RGB, so 255 is red and the giving in the defined parameters width, height, x, y coordinates. Then we update the window, which displays us a rectangle at those particular coordinates and parameters.
Now, to move the rectangle, we need to move it continuously. For that, I need to set up a list. We give in, down, left and right arrows. Then we quit the pygame, which closes the window for us.
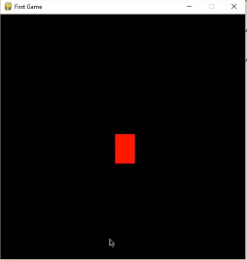
Output:
With the use of keys on the keyboard, one can move the rectangle. The output is shown like this. stop and play are used to play the sounds. The immediate recognition of play gives immediate hear of beep and stops when recognizes stop. We can even play background music time by uploading it. The file can be of type MP3, MIDI or WAV.
Code:
play_sound = pygame.mixer.Sound(‘beeps.wav’)
play_sound.play()
import time
time.sleep(5)#lets the sound play for 5 seconds.
play_sound.stop()
Conclusion
If one knows the basics of Python programming, he can learn the gaming modules on his own. Using loops, variables, if-else statements, the code interprets how the program behaves. You can make many such changes by inserting objects like fonts, clock object, pixel objects and coordinates, drawings, transparent colors, game loops and states, and many more.
Recommended Articles
We hope that this EDUCBA information on “Python Pygame” was beneficial to you. You can view EDUCBA’s recommended articles for more information.


