Updated April 11, 2023
Introduction to Laravel Cashier
Laravel is one of the most popular of all PHP frameworks. Laravel Cashier is an integral part of subscription management. Laravel Cashier not only gives you the basic functionalities but also coupons, cancellation of grace periods, swapping subscriptions. Laravel Cashier also generates invoices in PDFs. It handles the entire subscription code for billing and relieves the developer from some copious amount of coding. Laravel Cashier provides a seamless and fluent interface which enhances the functionalities of Stripe’s billing services.
As stated above, Laravel Cashier is the command set interface that helps streamline Braintree’s and Stripe’s billing for subscription services. It supports the various payment methods, coupon generating systems and helps the system with most subscription-based information. It also retrieves customer information, payment related queries and generates invoices. For payment systems, which rely on Stripe, it is a major enhancement and accelerates the entire process of billing.
Let us have a look at the various command sets and see how it works:
Why do we use Laravel Cashier?
The primary reason for Laravel Cashier being effectively streamlining the working of the Stripe billing system. Some of the tasks done by Laravel Cashier is:
Currency Configuration:
The default currency used in Laravel Cashier is United States Dollars (USD). However, to make it a global framework, a wide variety of currencies have been provided as options.
CASHIER_CURRENCY=eurTo make the invoice even more personalized, a locale option is added. This option provides the geographical area information from where the invoice was generated.
CASHIER_CURRENCY_LOCALE=nl_BECustomers:
Retrieving Customer details:
use Laravel\Cashier\Cashier;
$user = Cashier::findBillable($stripeId);
Creating Customers:
$stripeCustomer = $user->createAsStripeCustomer();If an option is added to the customer
$stripeCustomer=$user->createAsStripeCustomer($options);These options can range from adding subscriptions from the date the customer has been added to or at a later stage. Additional parameters can also be added to the specific customer name with the options command.
One of the reasons why Laravel Cashier is such a sought after command set is because of the sheer options it provides to the Stripe Billing service. Rarely has any other subscription management system been so seamless in its performance.
The Customer return command:
$stripeCustomer = $user->createOrGetStripeCustomer();Updating Customer
This command basically allows the user to update customer details with additional information.
$stripeCustomer = $user->updateStripeCustomer($options);Payment Method
Laravel Cashier has a host of command sets for the Stripe billing system related to payment. The kind of approach depends on the way one wishes to use the payment command line:
Payment method for subscriptions
While storing credit cards related to a customer for usage in the future, the Stripe Setup Intents API must be operated to gather the customer’s payment method details securely. A “Setup Intent” signals to Stripe the purpose to charge a customer’s payment method. Cashier’s Billable trait includes the query createSetupIntent to easily create a new Setup Intent. You should call this method from the route or controller that will render the form which collects your customer’s payment method details:
return view('update-payment-method', [
'intent' => $user->createSetupIntent()
]);
After you have been able to create the Setup Intent and conceded it to the view, you have to attach its secret to the element that will gather the payment method. As an example, consider this “update payment method” form:
<input id="card-holder-name" type="text">
<!-- Stripe Elements Placeholder -->
<div id="card-element"></div>
<button id="card-button" data-secret="{{ $intent->client_secret }}">
Update Payment Method
</button>
Now comes the role of the Stripe.js library. It will be used to attach an element from Stripe to the form and assist gather the customer’s payment details, securely.
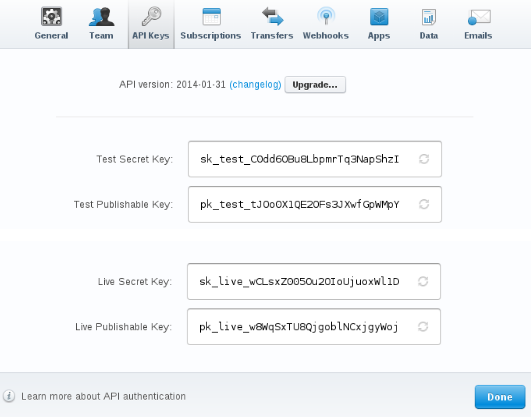
<script src="https://js.stripe.com/v3/"></script>
<script>
const stripe = Stripe('stripe-public-key');
const elements = stripe.elements();
constcardElement = elements.create('card');
cardElement.mount('#card-element');
</script>
The above code was a simple example of a payment method for the subscription. Likewise, through Laravel Cashier one can also create payment methods for single charges. The difference between the methods of payment basically highlights the limitation of Stripe. The customer, for a single charge, has to enter the name and other details before being able to initiate a payment request. These payment details will be typed in with the help of the Stripe.js library.
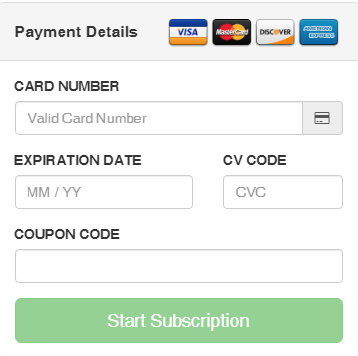
The form would look like this:
<input id="card-holder-name" type="text">
<!-- Stripe Elements Placeholder -->
<div id="card-element"></div>
<button id="card-button">
Process Payment
</button>
In the next step, the Stripe.js library will be used to attach an element from Stripe into the form and then help gather the customer’s payment details, securely.
<script src="https://js.stripe.com/v3/"></script>
<script>
const stripe = Stripe('stripe-public-key');
const elements = stripe.elements();
constcardElement = elements.create('card');
cardElement.mount('#card-element');
</script>
The following step is all about identifying the card details and a payment method identifier is retrieved securely. The form will, therefore, look like this:
constcardHolderName = document.getElementById('card-holder-name');
constcardButton = document.getElementById('card-button');
cardButton.addEventListener('click', async (e) => {
const{ paymentMethod, error } = await stripe.createPaymentMethod(
'card', cardElement, {
billing_details: { name: cardHolderName.value }
}
);
if (error) {
// Display "error.message" to the user...
} else {
// The card has been verified successfully...
}
});
Retrieving the Payment methods
The “paymentMethods” query on the Billable model instance returns a collection of instances:
$paymentMethods = $user->paymentMethods();To retrieve the default payment method, the default Payment Method method has to be used:
$paymentMethod = $user->defaultPaymentMethod();One can also recover a definite payment method that is maintained by the Billable model using the findPaymentMethod scheme:
$paymentMethod = $user->findPaymentMethod($paymentMethodId);Conclusion
Laravel Cashier is a combination of many components. The above was an example of a part of the component of Payment methods.
The other components of Laravel Cashier are:
- Subscriptions
- Single Charges
- Invoice
- Handling failed payments
- Strong Customer Authentication (SCA)
Laravel Cashier has been instrumental in creating a robust, error-free billing system within the Stripe framework. It has been helped, in no mean terms, by Laravel’s own robust command systems.
Recommended Articles
We hope that this EDUCBA information on “Laravel Cashier” was beneficial to you. You can view EDUCBA’s recommended articles for more information.

