Updated April 1, 2023
Introduction to jQuery Datepicker
- jQueryUI Datepicker is an easy way of entering the date into an input field by allowing the users to select a date or a range of dates from a pop up or an interactive inline calendar.
- The Datepicker is generally attached to a text box so as to move the selected date from the calendar to the text box.
- It is highly customizable to allow users to:
-
- customize the date format and language.
- restrict the selectable range of dates.
- Localize Calendar.
- easily add buttons and other options for navigation.
- jQueryUI offers a datepicker() method to create a datepicker and also change the HTML elements’ appearance by adding new CSS classes.
- A datepicker can easily attached to a text field or inline in an <div>, <span> or <input> controls with proper default settings.
- The interactive calendar opens up in a small overlay when the attached text field gains focus.
- For an inline calendar, the datepicker can be attached to a <div> or <span> element.
- After choosing a date, clicking anywhere on the page can enter the selected date to the attached text field.
- To close the popup, Close link can be clicked or clicking anywhere on the page can also do the same
Syntax:
There are two forms of the usage of the jQueryUI datepicker() method.
- $ (selector, context).datepicker (options) Method.
This method basically declares that an <input> element or <div> or <span> element should be managed as a datepicker.
where, options parameter refers to an object that specifies the behavior and appearance of datepicker elements.
One or more than one options can be provided as shown below.
- $ (selector, context).datepicker (“actions”, [params]) Method.
This method basically performs an action on the calendar such as selecting a new date.
where, action is the first argument of the method which is basically a jQuery method used in the form of a string. params can be one or more based on the given action.
Examples to Implement of jQuery Datepicker
Below are the examples of jQuery Datepicker:
Example #1
The following example illustrates how the datepicker functionality works without passing any parameter to the datepicker () method.
Code:
<!DOCTYPE html>
<head>
<title>jQuery UI Datepicker Example</title>
<link href="https://code.jquery.com/ui/1.10.4/themes/ui-lightness/jquery-ui.css" rel="stylesheet"/>
<script src="https://code.jquery.com/jquery-1.12.4.min.js"></script>
<script src="https://code.jquery.com/ui/1.10.4/jquery-ui.js"></script>
<script>
$(function () {
$("#datepick").datepicker();
});
</script>
<style>
#divstyle {
background-color: cadetblue;
width: 400px;
height: 300px;
margin-left: 100px;
padding-top: 30px;
padding-left: 30px;
}
</style>
</head>
<body>
<div id="divstyle">
<p style="font-weight: bold;">Date: <input type="text" id="datepick" /></p>
</div>
</body>
</html>
Output
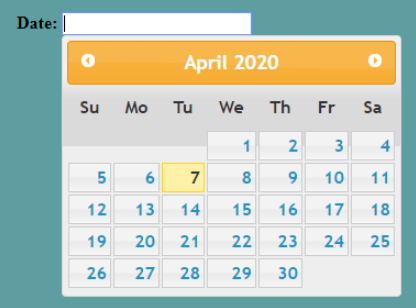
- The below screenshot is taken when the page is first loaded in the browser after the above code gets executed.
- By default, the system’s date remains selected in the calendar.
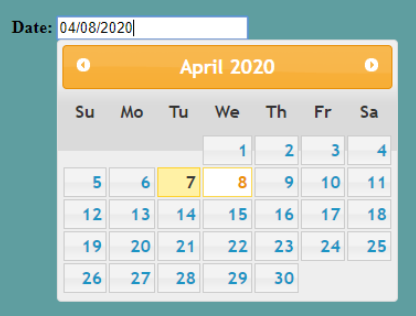
- This date can be changed by selecting a new date from the calendar as shown below in the screenshot.
- Once the date has been selected, you can click anywhere on the page to close the calendar pop up.
Example #2
The following example illustrates the inline datepicker functionality of jQueryUI.
Code:
<!DOCTYPE html>
<head>
<meta charset="utf-8" />
<title>jQuery UI Datepicker Example</title>
<link
href="https://code.jquery.com/ui/1.10.4/themes/ui-lightness/jquery-ui.css"
rel="stylesheet"
/>
<script src="https://code.jquery.com/jquery-1.12.4.min.js"></script>
<script src="https://code.jquery.com/ui/1.10.4/jquery-ui.js"></script>
<script>
$(function () {
$("#datepick").datepicker();
});
</script>
<style>
#divstyle {
background-color: cadetblue;
width: 350px;
height: 320px;
margin-left: 100px;
padding-top: 5px;
padding-left: 30px;
}
</style>
</head>
<body>
<div id="divstyle">
<p style="font-weight: bold;">Date</p>
<div id="datepick"></div>
</div>
</body>
</html>
Output
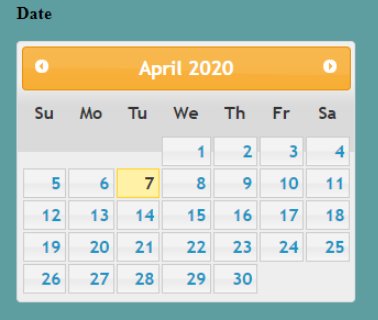
- The below screenshot is taken when the page first loads in the browser after the above code gets executed.
In this example, <div> element has been used to get the inline date picker.
Example #3
The following example illustrates the usage of the options, appendText, dateFormat, altField and altFormat with jQueryUI datepicker functionality.
Code:
<!DOCTYPE html>
<head>
<title>jQuery UI Datepicker Example</title>
<link
href="https://code.jquery.com/ui/1.10.4/themes/ui-lightness/jquery-ui.css"
rel="stylesheet"
/>
<script src="https://code.jquery.com/jquery-1.12.4.min.js"></script>
<script src="https://code.jquery.com/ui/1.10.4/jquery-ui.js"></script>
<script>
$(function () {
$("#datepick").datepicker({
dateFormat: "dd-mm-yy",
altField: "#datepick_1",
altFormat: "DD, d MM, yy",
});
});
</script>
<style>
#divstyle {
background-color: cadetblue;
width: 350px;
height: 200px;
margin-left: 100px;
padding-top: 5px;
padding-left: 30px;
}
</style>
</head>
<body>
<div id="divstyle">
<p style="font-weight: bold;">Date(dd-mm-yy): <input type="text" id="datepick" /></p>
<p style="font-weight: bold;">Alternate Date:   <input type="text" id="datepick_1" /></p>
</div>
</body>
</html>
Output
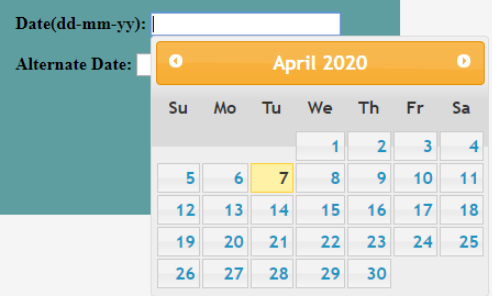
- Below screenshot displays the page when the page is first loaded in the browser once the above code is executed.
- Once the date is selected from the calendar, the date is entered in the text field in the dd-mm-yy format.
- The date displayed in the second text field is the same date but in format “DD, d MM, yy”.
Example #4
Following example illustrates the usage of the options, prevText, nextText, show Other Months and select Other Months with jQueryUI datepicker functionality.
Code:
<!DOCTYPE html>
<head>
<title>jQuery UI Datepicker Example</title>
<link
href="https://code.jquery.com/ui/1.10.4/themes/ui-lightness/jquery-ui.css"
rel="stylesheet"
/>
<script src="https://code.jquery.com/jquery-1.10.2.js"></script>
<script src="https://code.jquery.com/ui/1.10.4/jquery-ui.js"></script>
<script>
$(function () {
$("#datepick").datepicker({
prevText: "click for previous months",
nextText: "click for next months",
showOtherMonths: true,
selectOtherMonths: false,
});
$("#datepick_1").datepicker({
prevText: "click for previous months",
nextText: "click for next months",
showOtherMonths: true,
selectOtherMonths: true,
});
});
</script>
<style>
#divstyle {
background-color: cadetblue;
width: 300px;
height: 200px;
margin-left: 100px;
padding-top: 5px;
padding-left: 30px;
}
</style>
</head>
<body>
<div id="divstyle">
<p style="font-weight: bold; text-align: center;">Enter Date Range</p>
<p style="font-weight: bold;">
Start Date: <input type="text" id="datepick" />
</p>
<p style="font-weight: bold;">
End Date: <input type="text" id="datepick_1" />
</p>
</div>
</body>
</html>
Output
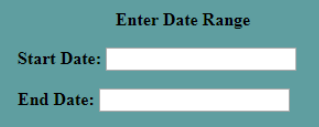
- Below screenshot is taken when the page is first loaded in thr browser after the above code gets executed.
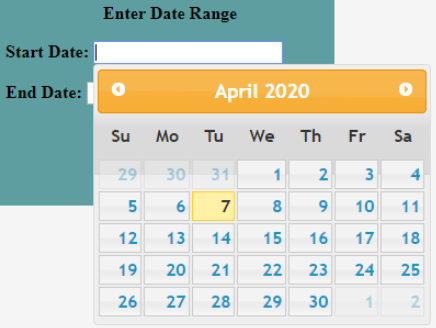
- Now, you can select and enter the date in the text field and change the selections as well.
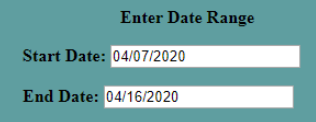
- After making selections, the page looks like as shown below.
Conclusion
- In this article, we have discussed about the jQueryUI datepicker functionality which is an easier way of selecting and entering the data in an input field by using the inline calendar.
- This method provides options for customizing the date format, restricting the date range, selecting the date range, etc.
Recommended Articles
This is a guide to jQuery Datepicker. Here we discuss the jQueryUI Datepicker functionality and its Examples along with its Code Implementation. You can also go through our other suggested articles to learn more –

