Introduction to Twixtor in After Effects
Twixtor is one of the plugin software of After Effects software used to make slow-motion effects of any video footage by using its exciting parameters. Here in this article, we will understand ‘what is Twixtor in After Effects Software’ and ‘why it is used for in this software’. We also learn about ‘how we can handle its parameters for getting the best result for our working composition in After Effects software.
How to Use Twixtor in After Effects?
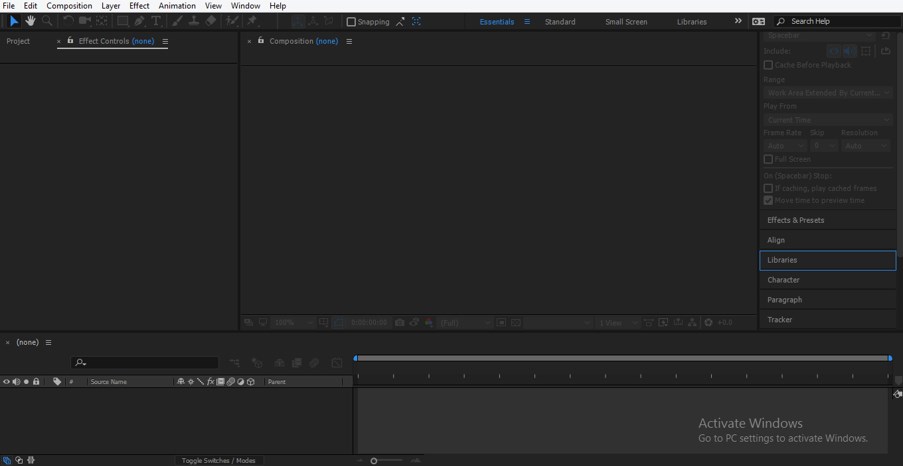
Twixtor is a very useful plugin of After Effects software which helps us in making slow-motion effects of any video footage. We will understand it through an example in this article. Before starting our learning, let us get introduced to the working screen of this software so that we can easily understand this article throughout our learning of the Twixtor plugin.
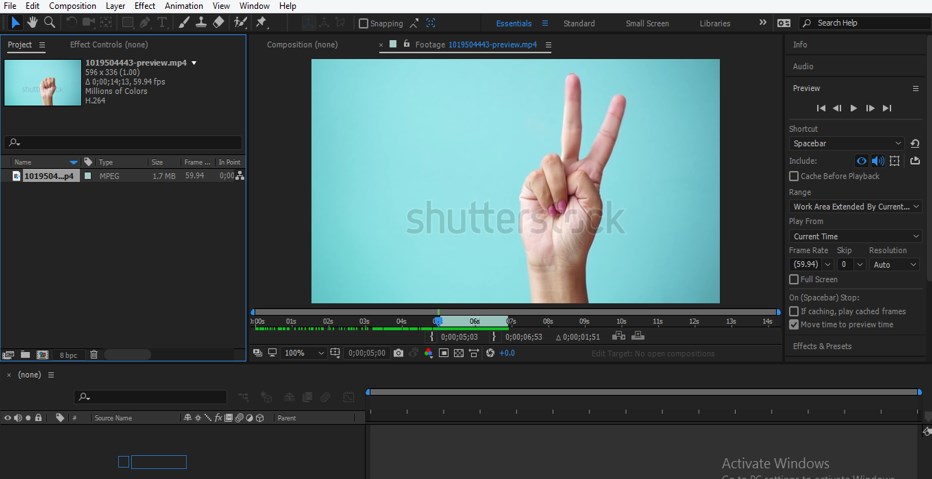
Step 1: At the top of the working screen, two ribbons are the Menu bar and Tool panel along with the properties panel of the active tool; at the middle of the working screen, three sections are Project panel at the left side of this section, Composition window at the center of this section and Parameters panel at the right side of this section, at the end of the working screen two sections are Layer panel at the left side of this section and Timeline panel at the right side of this section. You can make your working screen by adjusting the panel at your desired place on the working screen of this software.
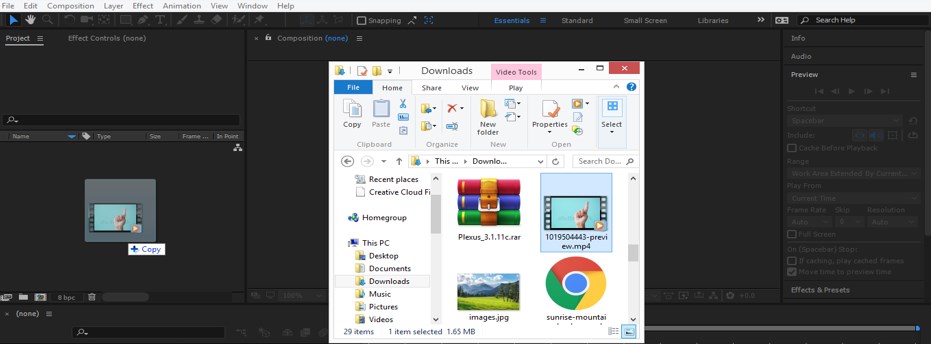
Step 2: Now, let us import video footage in this software for making the slow-motion of that video footage by using the Twixtor plugin. You can use your video footage or download it from the internet for your learning. I will download video footage from the internet. For placing this video footage in After Effects software, go to that folder of your personal computer where you have saved it and place it in the Project panel section of this software by using the pick and drop method from that folder.
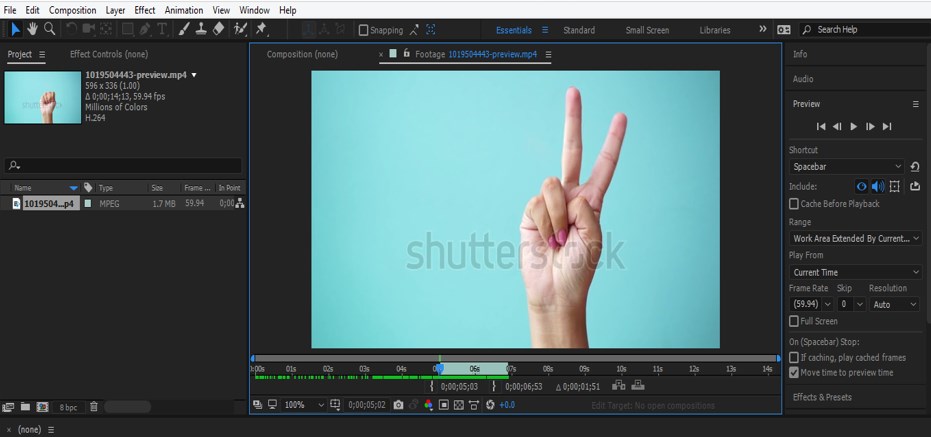
Step 3: Now make double click on video footage; a Footage frame setting window will be open in the composition window section.
Step 4: Now adjust the size of video footage from where and up to where you want to apply slow motion on your video footage. Now take this video footage from the Project panel section to the Layer section in this software by dragging it with the help of the mouse left button.
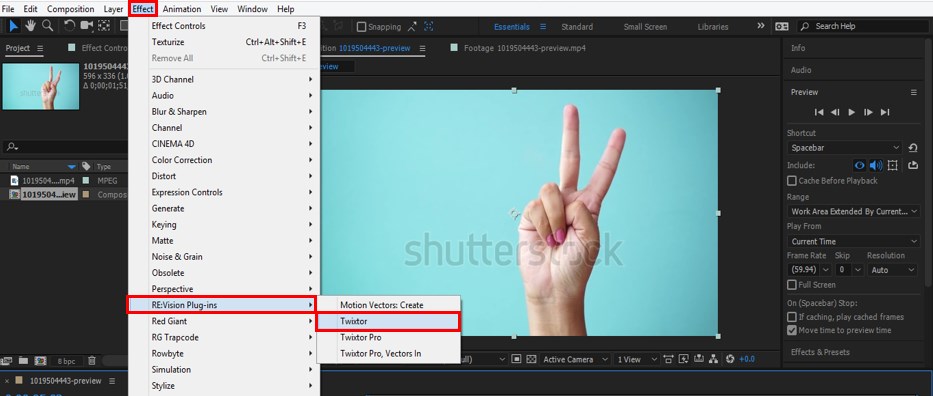
Step 5: Now go to Effect Menu of Menu bar at the top of the working screen. Then go to RE: Vision Plug-ins option of the drop-down list and then click on the Twixtor option of the new drop-down list. If you have not a Twixtor plugin on your computer, then you can download it from the internet.
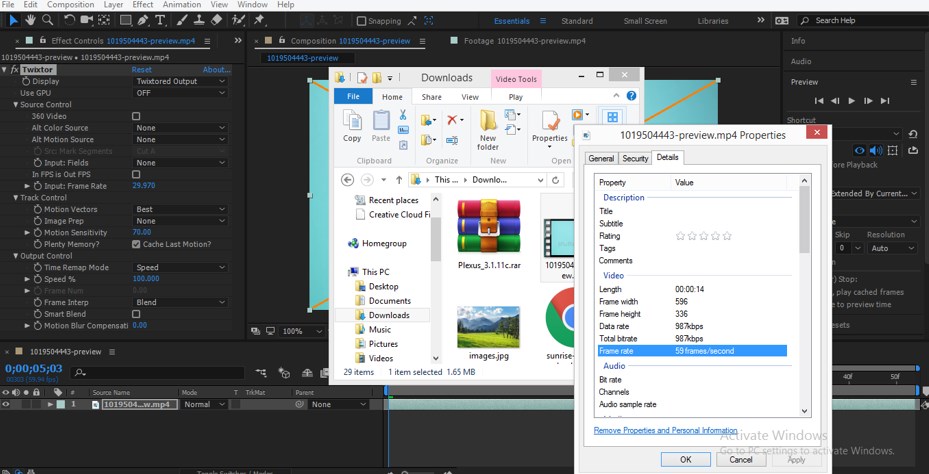
Step 6: Now, let us check the frame rate of our video footage. For checking the frame rate of our video footage, go on that folder of personal computer where you have saved it and make right-click with the mouse button on the icon of this video footage. A drop-down box will be open; click on the Details tab of this box. In details, you can check the frame rate.
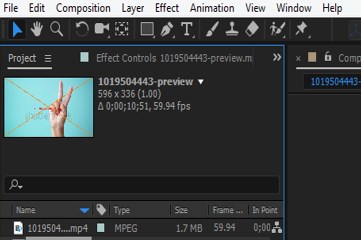
Step 7: Or you can check the frame rate from the icon of this video footage which is on top of the Project panel of this software.
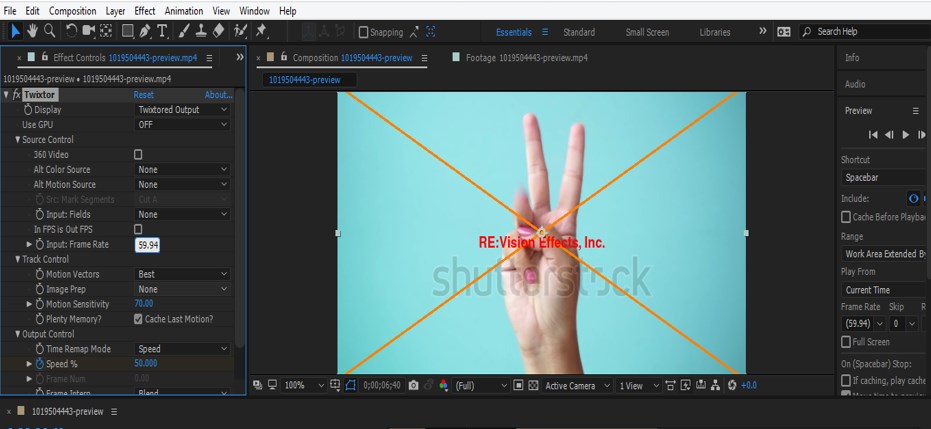
Step 8: Now, set the frame rate the same as the frame rate of our video footage in the Input Frame rate option of parameters of twixtor option, which is at the Effects Controls panel, which is along with the Project Panel section of this software.
Step 9: Now make click on the small arrow icon of this layer. A list of properties of this layer will be open, now click on a small arrow icon of the Effects option of this layer again make click on the small arrow icon of the Tiwxtor option of Effects option.
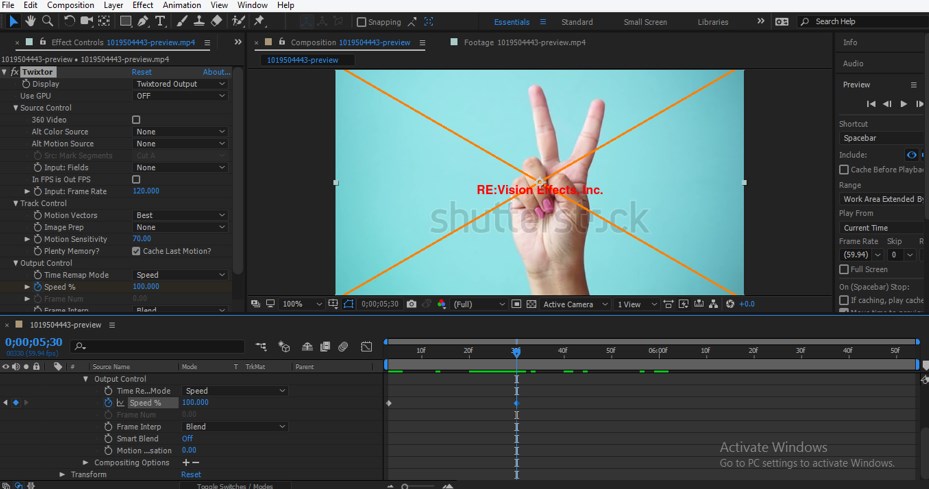
Step 10: Now, let us animate the Speed option of the Twixtor option of this layer; for animating this, click on the small clock icon of this speed property and place the keyframe play head at the starting of the timeline section.
Step 11: Now, place the keyframe head at some distance in the keyframe timeline panel and add a new key in the keyframe section by click on the key icon of this speed property option of the tiwxtor option.
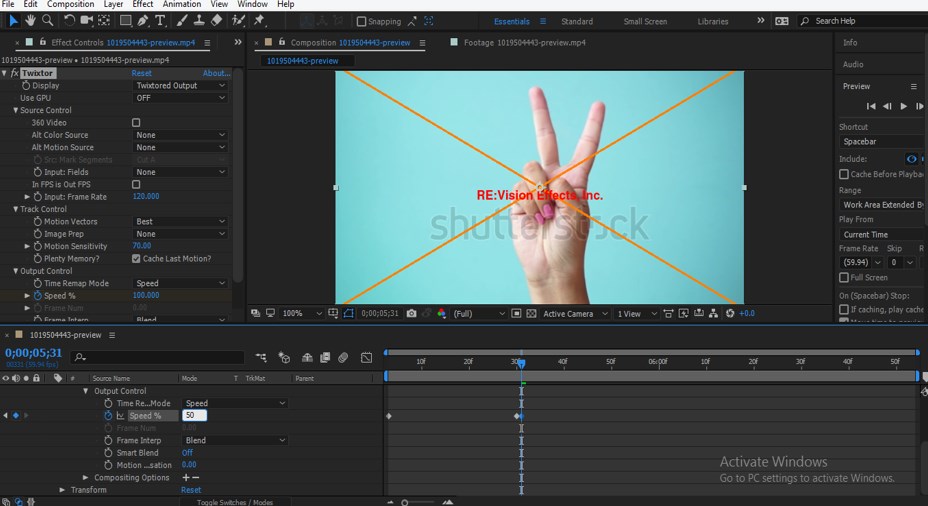
Step 12: Now place keyframe head forward in keyframe timeline section at some distance and add another key at this and decrease the speed of video footage by changing the value of the Speed option of Twixtor from the layer section of this software.
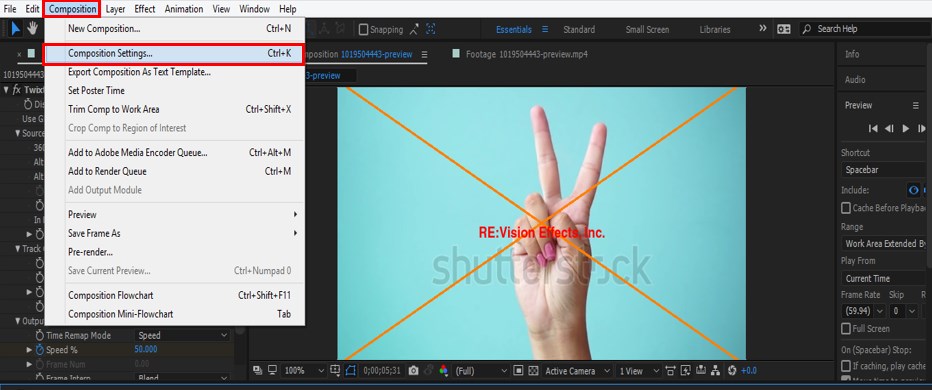
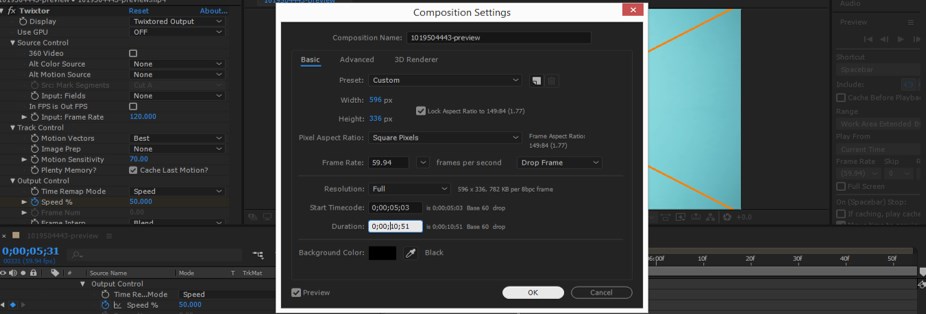
Step 13: Now increase the duration of video footage from composition settings. For composition, settings go to the Composition menu of the Menu bar, which is at the top of the working screen of this software on the top ribbon. Now click on Composition settings of a drop-down list, or you can simply press the Ctrl + K button from the keyboard as a short cut key for opening the Composition settings box.
Step 14: A composition settings box will be open, change the value of the duration of animation from the Duration option of this dialog box and now press the Ok button of this dialog box with the mouse left key for applying this setting.
- Now you can add a new key in speed option of this footage layer with the decreased value of speed in each key up to which you want to make a slow motion.
- In this way, you can use the Twitter plugin in After Effects without any problem and can enjoy it in your working.
Conclusion
After going through this article, you can understand ‘what Twxitor is in the context of After Effects software’ and ‘how you can use it to make the highly professional slow-motion effect of any video footage’. You can make a different type of variation in video footage by using this plugin software.
Recommended Articles
This is a guide to Twixtor in After Effects. Here we discuss an Introduction, how to use Twixtor in After Effects in a step by step manner. You can also go through our other related articles to learn more –

