Updated March 4, 2023

Introduction to Matlab Class
Classes are used in object-oriented programming to create many objects which are similar to each other and share common characteristics, like dog breeds, geometric figures, employee records, nationality, etc. For example, the car models; we can be assured that cars of the same kind of model are similar & it can help us in creating a blueprint for all these cars. In this topic, we are going to learn about Matlab Class.
Description
In MATLAB we use the class to define an object in the following terms:
1. The data that the object contains; referred to as properties
Types of properties:
- AbortSet
- Abstract
- Access
- Constant
- Dependent
- GetAccess
2. The methods or functions implemented on data
Types of methods:
- Ordinary
- Destructor
- Constructor
- Static
- Abstract
- Conversion
Let us now learn how to create a class in MATLAB. For our understanding, we will create a class that will be used to calculate the area of a rectangle.
Syntax
Here are the following syntax mention below
Step #1 – Defining the Class
In MATLAB, we use the ‘classdef ‘method to define a class. Using this method, we define the name of our class, properties, or data values of an object in our class, and methods or functions which we want to be implemented on the objects.
For our class ‘Rectangle’, ‘rectangle’ will be an object. To define our object ‘rectangle’, we will be defining the following 2 parameters:
1. Properties or data values for our object. Properties for ‘rectangle’ object will include:
- Color of rectangle
- Height of rectangle
- Width of rectangle
2. Action to be performed on the properties or data in the above step. In our example, action will compute the area
Code:
classdef Rectangle

[Defining the class ‘Rectangle’ using ‘classdef’ method]
properties

[Defining the properties of the class ‘Rectangle’]
Colour

[This will define the colour of the rectangle]
Height

[This will define height of the rectangle]
Width

[This will define width of the rectangle]
end

end
For a class, we can check the properties using ‘properties’ command as below:
properties (Rectangle)
Please note that the class created must be stored in a file with ‘.m’ extension and the name of this file must be the same as the name of the class. So, for our example, the name of the file will be ‘Rectangle.m’
Input:
class def Rectangle

properties

Colour

Height

Width

end

end
Output:
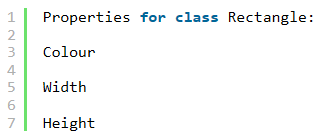
As we can see in the output, we have obtained the properties of our class ‘Rectangle’.
Please observe the name of the file in the Input. As stated before, it is the same as the name of the class created by us.
Step #2
Next, we will define the function to be implemented on the data collected above:
Function to be implemented is defined using a ‘methods’ block.
Code:
methods

[Initializing the ‘methods’ block]
function Area = getArea (newRectangle)

[Using the ‘getArea’ function to calculate the area of the rectangle and creating the object ‘newRectangle’]
Area = newRectangle.Height * newRectangle.Width;

[Using our newly created object to access the Height and Width of the Rectangle from the properties]
end

end
Step #3
Next, we will create an object by specifying the object as a member of the class.
For this, we will create an instance of a particular rectangle object. An object can also be created using constructors. Let us learn both techniques one by one.
Specifying the object as a member of the class:
Code:
RectObject = Rectangle

[‘RectObject’ Instance is created for a particular rectangle object]
Output:
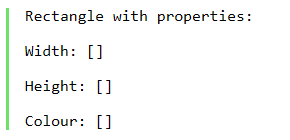
As we can see in the output, an object is created with properties the same as the properties of the class Rectangle. Since we have not passed any values yet, the object is created with empty values.
Step #4
Next, we will assign values to the object RectObject:
Code:
RectObject.Width = 5;

[Assigning the value to the ‘Width’ property]
RectObject.Height = 7;

[Assigning the value to the ‘Height property]
RectObject.Colour = 'green';

[Assigning the value to the ‘Colour property]
RectObject

[To display the properties of object]
Output:
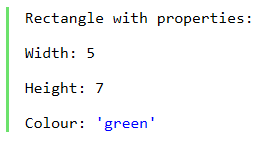
As we can see in the output, all the values are now assigned to the object RectObject.
Using the Constructor function to create an object of the class:
Code:
function newRectangle = Rectangle (colour, width, height)

[Assigning class name with properties to the name of the constructor]
if nargin ==3

newRectangle.Colour = colour;

newRectangle.Width = width;

newRectangle.Height = height;

end

end

RectObject = Rectangle('green', 5, 7)
Output:
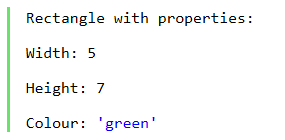
As we can see in the output, all the properties are assigned to the object RectObject.
Step #5
Finally, to calculate the area of the rectangle simply call ‘getArea’ method of the class ‘Rectangle’ using the object created:
Code:
getArea(RectObject)

[Calling the ‘getArea’ method using the object ‘RectObject’]
Output:
Conclusion – Matlab Class
We use Class to define an instance of an object that carries data & the methods to be implemented on that data. Steps to using a class:
- Use the .m file to save the class
- The name of the file must be the same as that of the class
- Create an object
- Access the properties of the class to assign data
- Call the methods defined to perform operations on the data.
Recommended Articles
This is a guide to Matlab Class. Here we discuss the introduction to Matlab Class along with the description, steps and respective examples. You may also have a look at the following articles to learn more –


