Updated August 25, 2023
Introduction to Photoshop Color Match
Color Match is a technique in Photoshop which allows you to make changes in the color tone of any pasted object (which you cut from other image and want to blend with new background) which matches with the color tone of the background image. Here this article will give you knowledge of the adjustment layer of layer panel, the graph of color curves & its parameters, and some important tools which will include in the steps of performing color match features of this software. So let us analyze these steps and find out key features for applying this technique to our project work. In this topic, we are going to learn about Photoshop Color Match.
How to do Color Match in Photoshop?
Color match is nothing but processes through which we can match the background image’s color tone with other objects taken from the different color tone background image. Color match helps photographs in the maintenance of equal color tone and effect of their different environments’ photoshoots when they combine them in one photo.
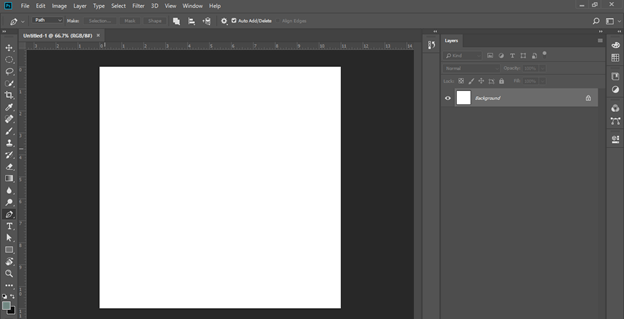
I think we should have a quick look at the User interface of this software to easily connect with the terms of this software that we use throughout this article. Starting from the top, there is a Menu bar with File Menu, Edit Menu, Image Menu, and some others. Below this bar, you will find a Property bar that helps during the use of active tools or active images. Below the property bar, the user interface is divided into three major parts in which at the left side, you will find the Toolbar of this software, at the center Documents display window is there, and the last one is on the right side there are some tabs just like Layer panel, Color, and some others enabled by you from the window menu. Don’t worry about the adjustment of these sections on the working screen. You can create your own working screen by enabling your desired sections from the Window menu and place them at your desired area of the user screen.
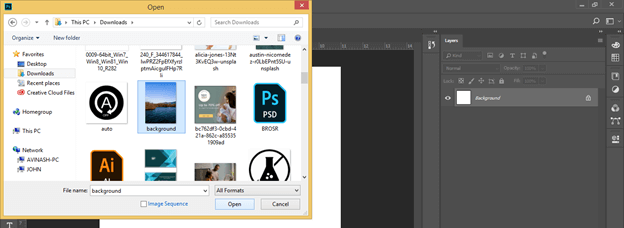
Now we will move to have an image for starting learning about this topic. So go to the File menu of the menu bar, then click on it. Once you click, a popup list will be scroll down. Click the Open option or press the Ctrl + O button of the keyboard as a shortcut key.
Now choose your desired image or photo from the opened dialog box. I will choose this image which is named ‘background,’ then click on the Open button of this dialog box.
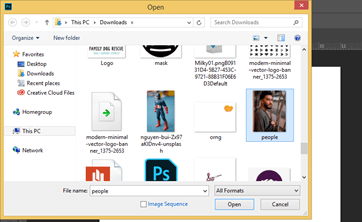
Now I want one more image. So again, use the Open command of this software and choose your desired image. I will choose this image which is named ‘People,’ then hit the Open button of this dialog box.
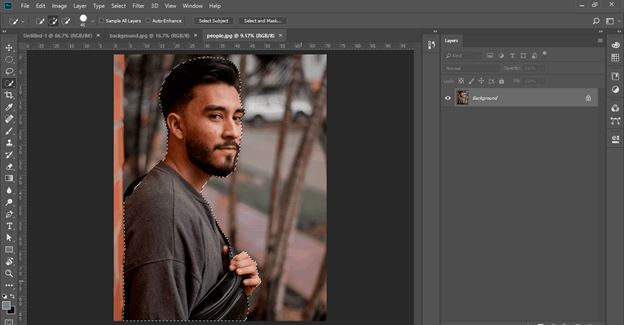
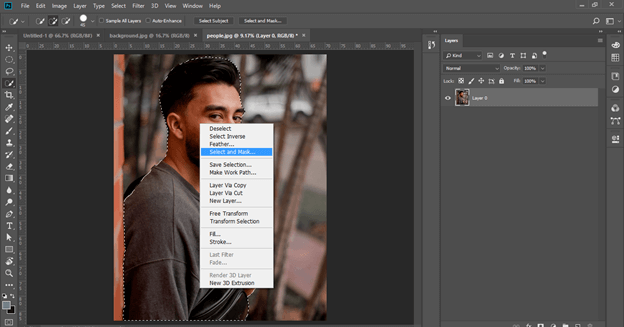
Now I cut this man from this image. For this purpose, you can go with any ‘separating object from background’ process. Here I will use a quick section tool and make a selection like this around this object.
Now make right-click after selection, then click on the Select and Mask option of scroll down list.
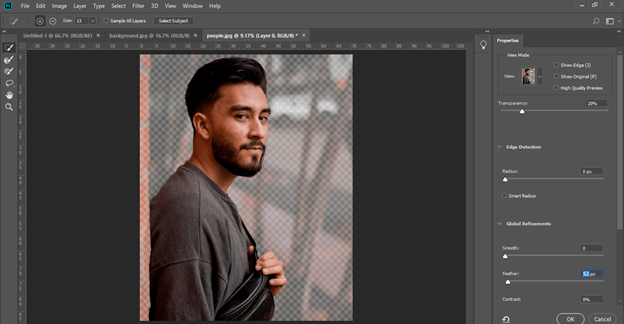
Add some feathers on the selection and adjust other selection parameters, then hit the Ok button.
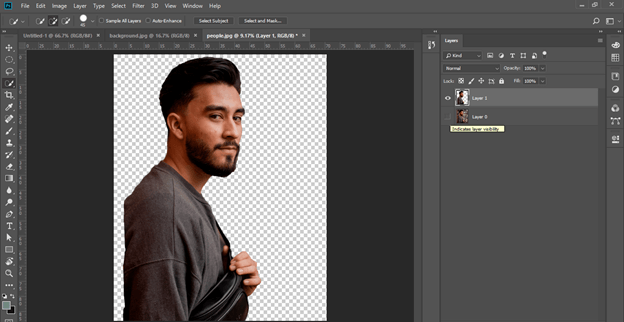
Now press the Ctrl+ J button on the keyboard to separate this object from its background.
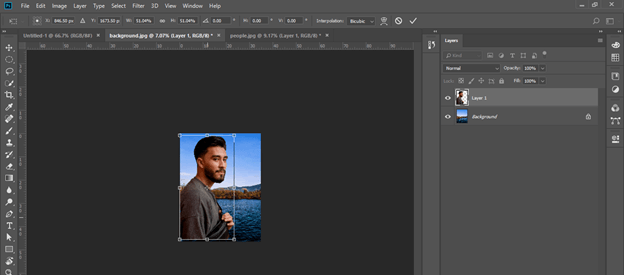
Now drag this object to the background window tab with the help of the mouse left button and release the mouse button on the document area of the background window. If the image is very large, press the Ctrl + T button to transform the bonding box and adjust the object’s size as per your choice.
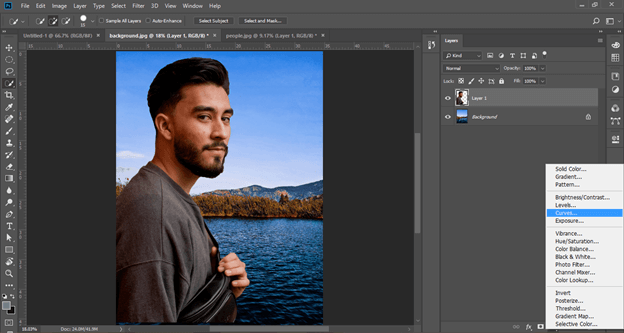
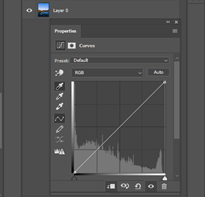
Now let us move to the real twist of this article. What is that? This is color matching. So for color matching, go to the Adjustment layer button. You will find this button at the bottom of the layer panel of this software with some other important button of the layer panel. Make a click on this adjustment layer button, and a scroll-up list will open. Click on Curve’s option on this list.
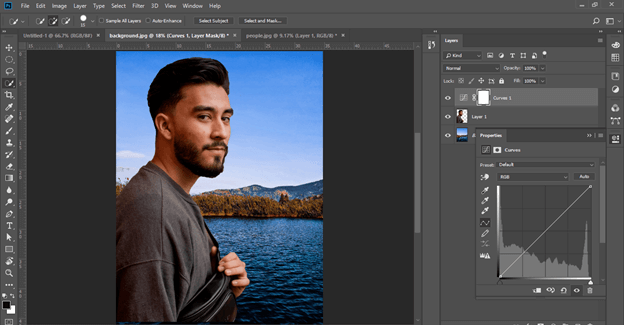
Once you click, you will have two things: a curve adjustment layer that will add to the layer panel, and a dialog box of curves will open like this.
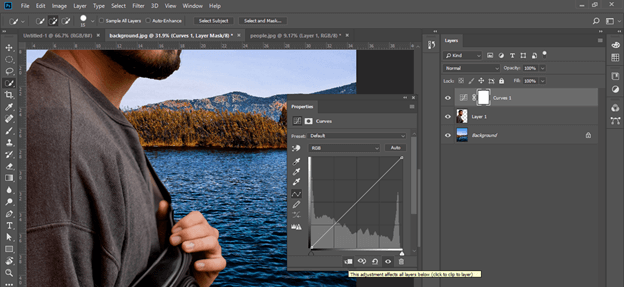
Now we want to match the color tone of this object with the background image that means we are using this curve adjustment layer on the object. So make a click on this clipping layer button, and it will clip this adjustment layer with the object layer.
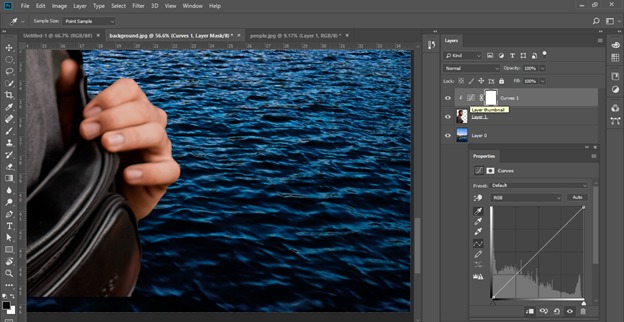
Make sure to make changes in color curves and select the first icon(graph icon) of this layer, not the white icon.
Now hold the Alt button on the keyboard and make click on the Auto button of this box.
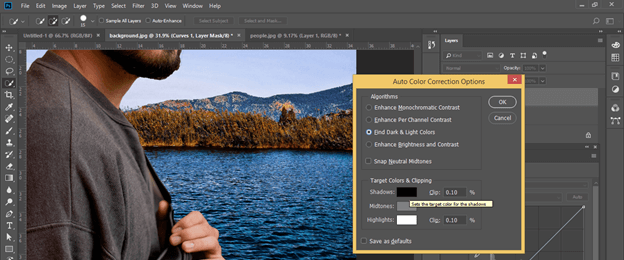
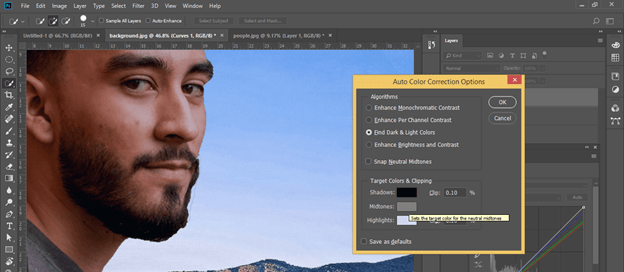
Once you make a click, an Auto Color Correction dialog box will be open. Make a click on the ‘Find Dark and Light Colors’ radio button.
Now click on the Shadow color box of the shadow button.
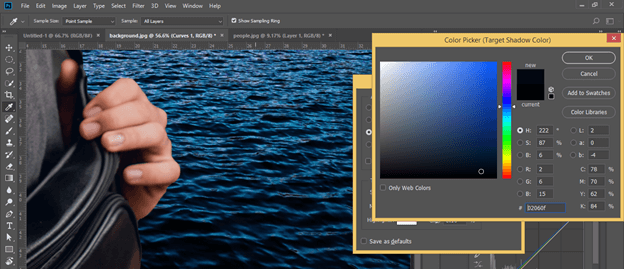
Now choose the darkest color from the background image with the color picker tool. Once you choose the darkest color, it will show your chosen color on the color scale box. Now hit Ok.
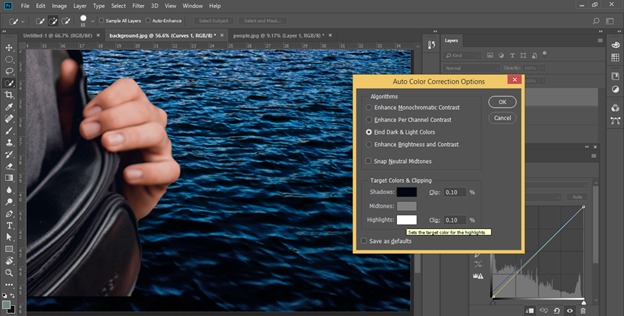
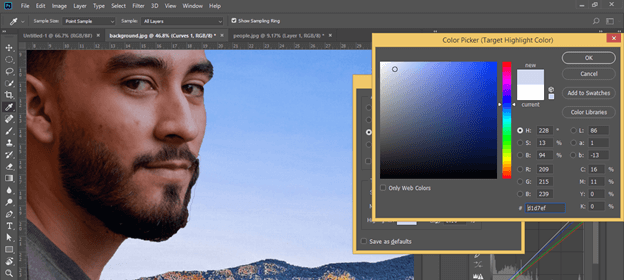
Now click on the Highlights color box button to choose the brightest color from the background image.
Now I will choose the brightest color from the sky area with a color picker tool, and my chosen color will come on a color scale box.
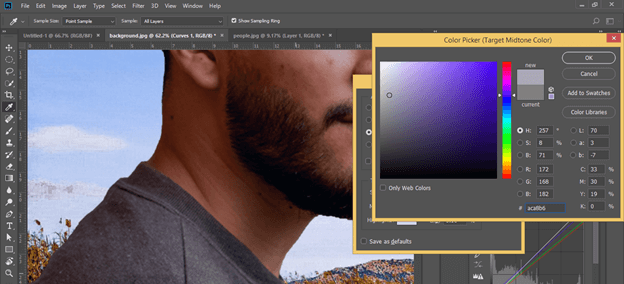
Now click on the Mid-tone color box button.
Choose the color nearest to the grey color from the background and click on the Ok button of this dialog box.
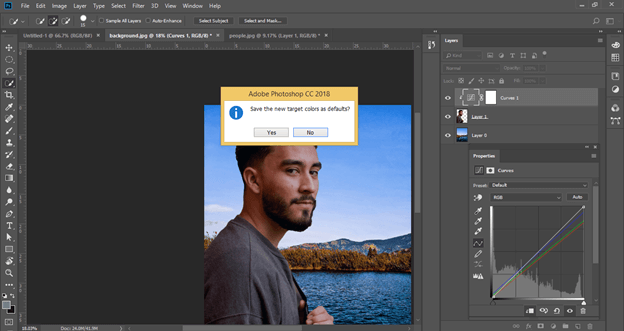
Once you make a click, a dialog box will be open, which asks you if you want to save these colors as default colors of the curves adjustment layer or not. Hit Yes or No as per your choice.
Now you can see the difference between images after color match property and before color match property.
This is a very effective way through which you can do Color matches in Photoshop.
Conclusion
Now you can definitely say that this article helped you get knowledge about the Color Match technique of Photoshop software. You can easily play with this technique & its parameters for having your desired color tone result regarding your photos of professional works.
Recommended Articles
This is a guide to Photoshop Color Match. Here we discuss How to do Color Match in Photoshop to get knowledge about the Color Match technique of Photoshop software. You may also have a look at the following articles to learn more –


