Introduction to CorelDRAW fonts
In this article, we are going to learn how to use CorelDRAW fonts. We will be using Corel Font Manager, which is installed with the CorelDRAW graphics suite. It is available on both Windows and Mac platforms, and it also works in the same way. Corel Font Manager is an application that works with CorelDRAW and photo paint to search, filter, and organize fonts and includes various font-related features. It helps to keep the workflow streamlined with its font management features. It is one place for all the fonts and no more sorting through thousands of fonts to find the one you need.
Steps of CorelDRAW fonts
The following steps are mention below:
Step #1
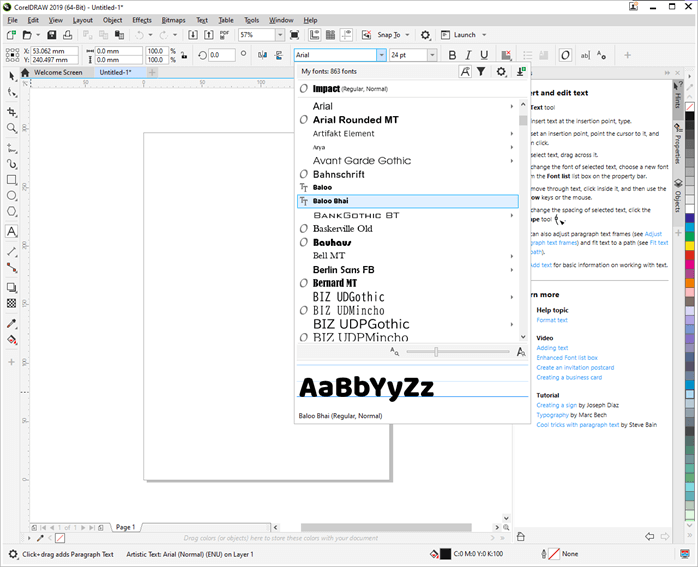
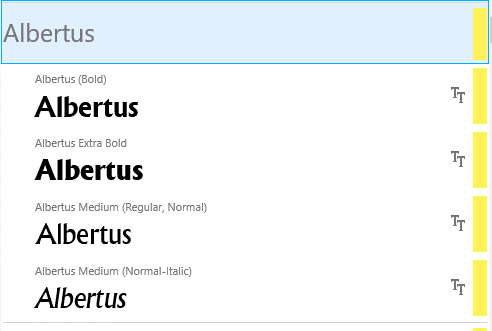
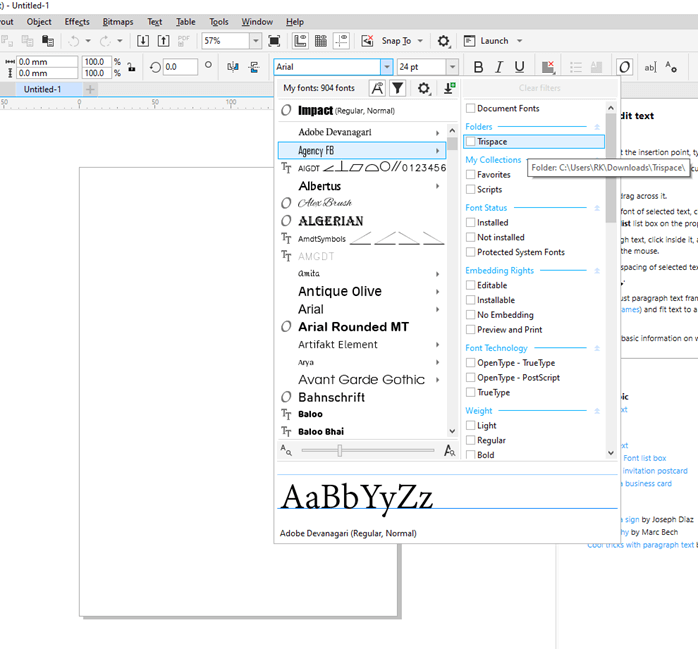
First, let’s see how the font list can also be accessed from the main CorelDraw application while using the text tool in the property bar. The current count of the font is shown. Some fonts are from windows, and the remaining are from the watched folders.
Step #2
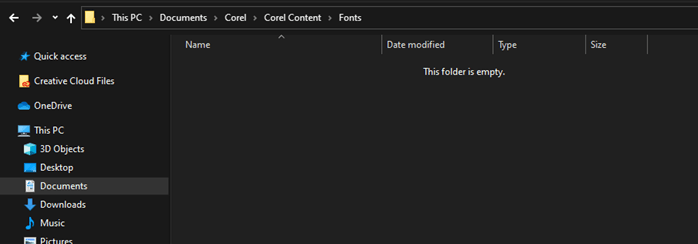
By default, the watched folder is in Document -> Corel -> Corel Content -> Fonts
Step #3
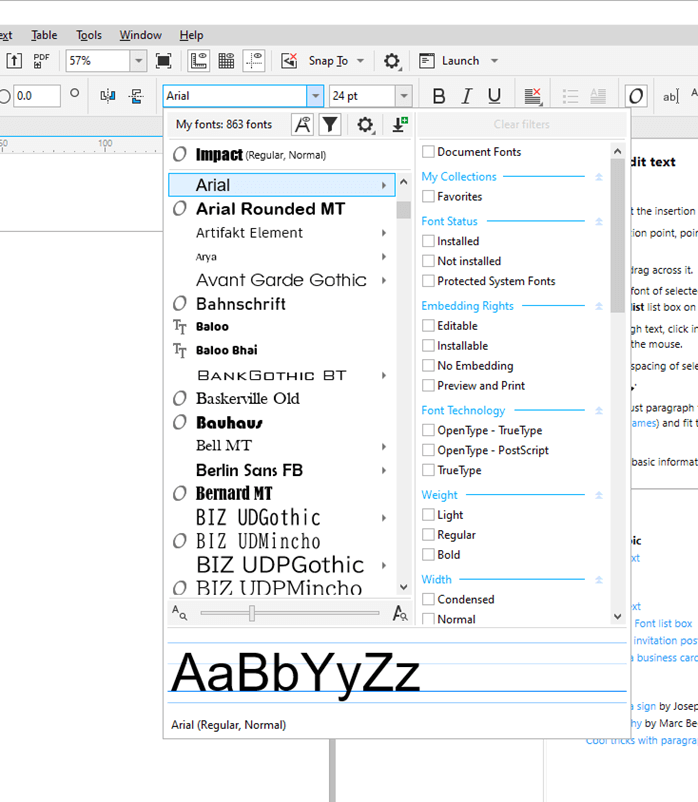
There is an option to even filter the fonts according to different criteria
Step #4
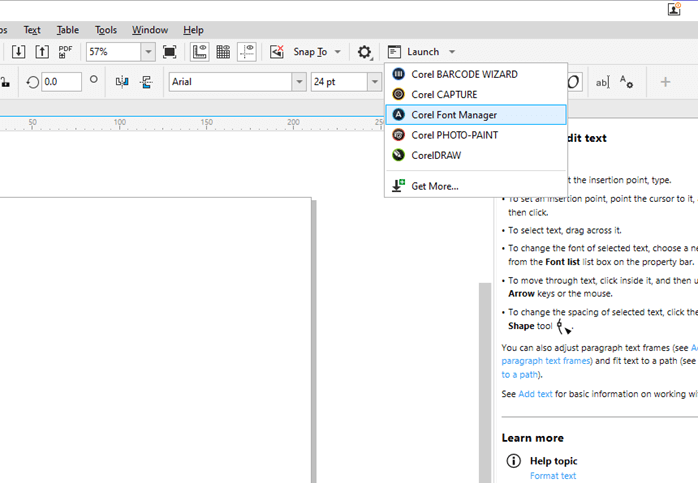
Let’s start with opening Corel Font Manager. You can open using the icon on the desktop, or for Windows users, there is an option to launch it from the Corel photo paint or CorelDRAW toolbar, which is the application launcher.
Step #5
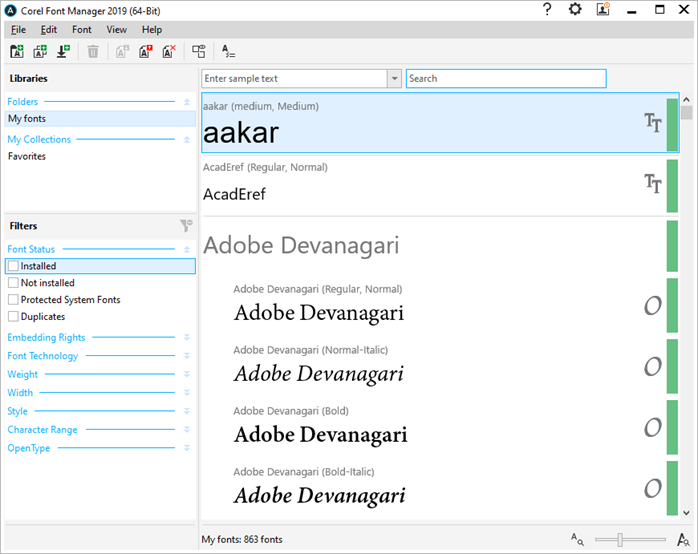
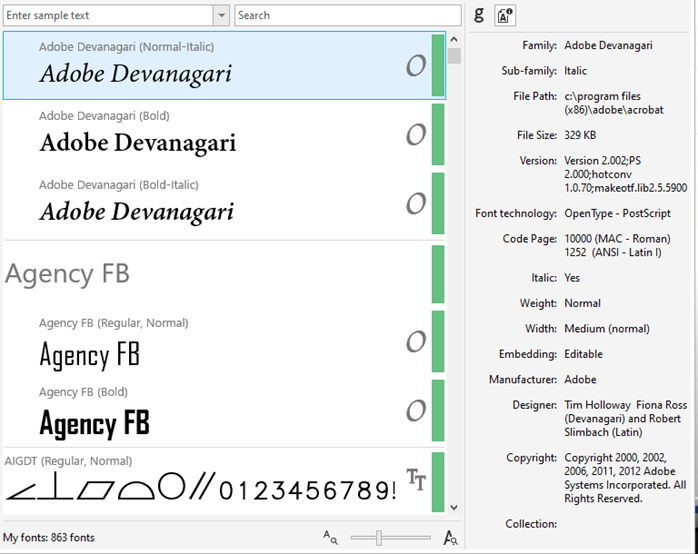
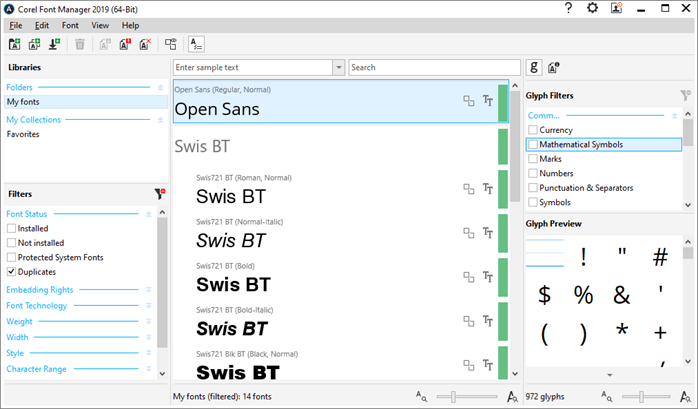
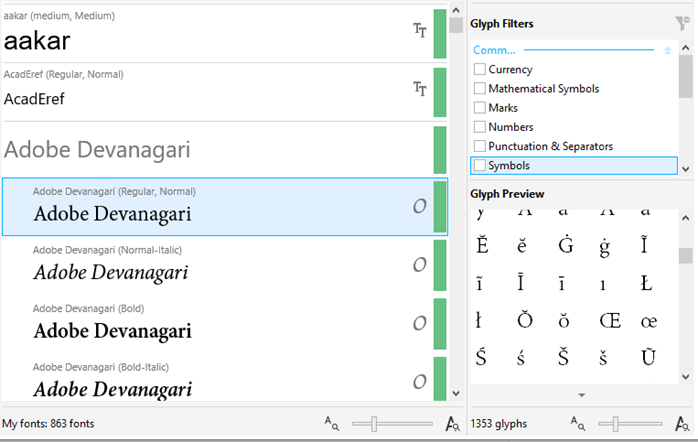
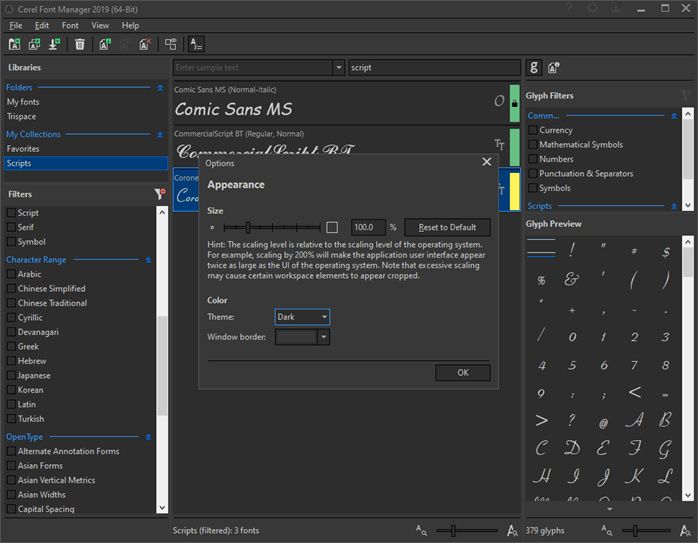
After opening, we can see the number of fonts at the bottom, which matches the font list in Corel draw. But when we use this standalone application, we get much more information about the font themselves.
Step #6
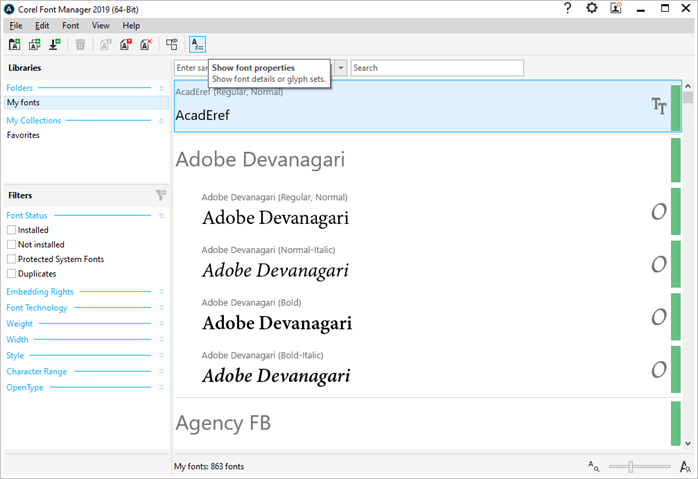
Enable the show font properties from the toolbar, which will give us more information about the fonts.
Step #7
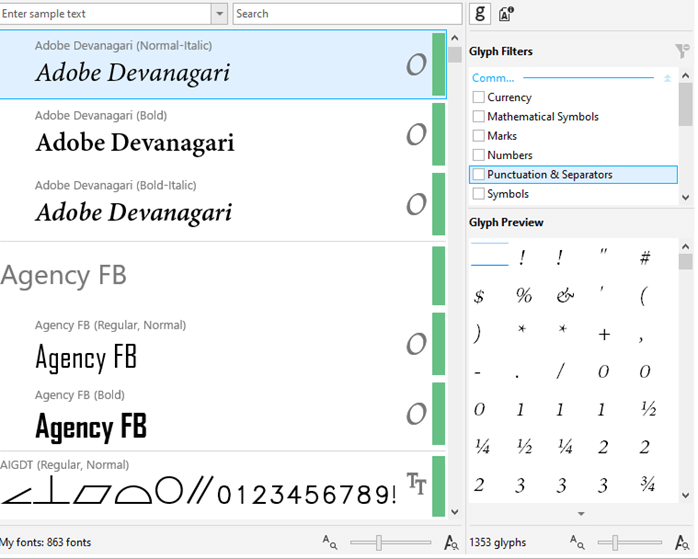
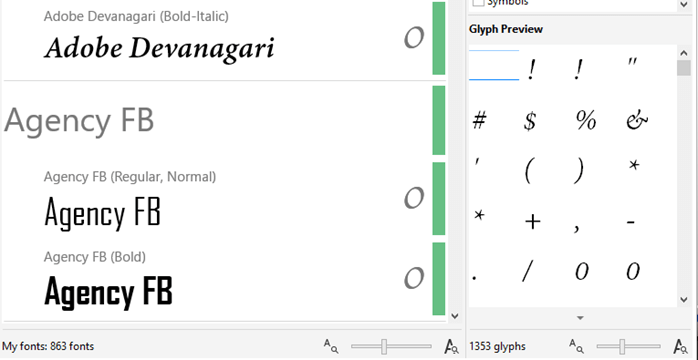
By default, you will get the glyph preview when you select any font in the preview pane. We will look at glyph later in detail.
Step #8
By clicking on the details icon, you will get more information about the font like its family, file path, size, version, font technology, italic, weight, width, embedding, manufacturer, designers, copyright, and also whether it is in a collection.
Step #9
There is an option at the bottom to adjust the font preview size and adjust the size of the glyphs.
Step #10
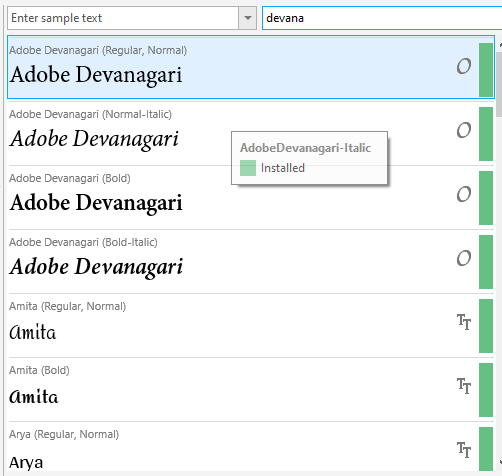
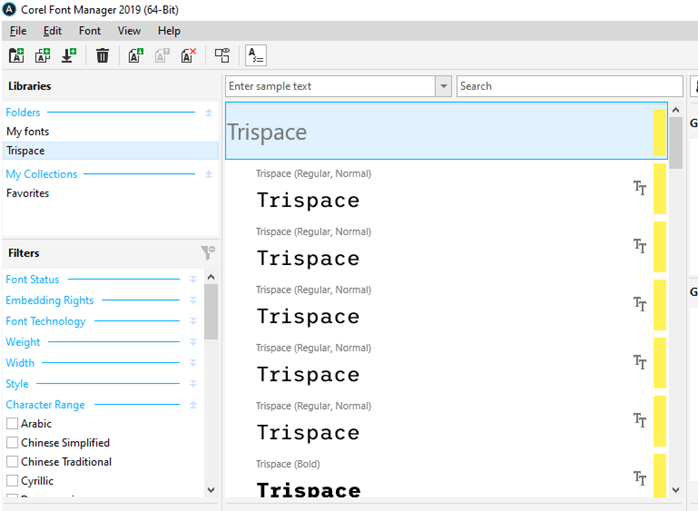
The green bar on the right indicates that the fonts are installed.
Step #11
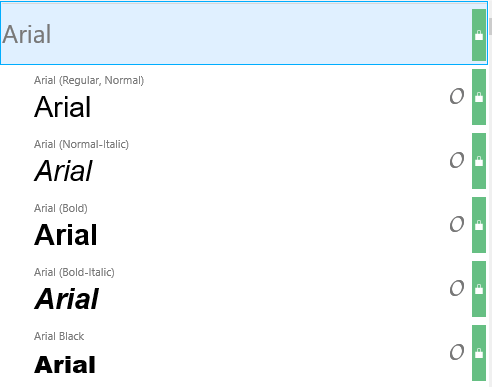
Protected System Font is also shown by a green bar but with a lock icon.
Step #12
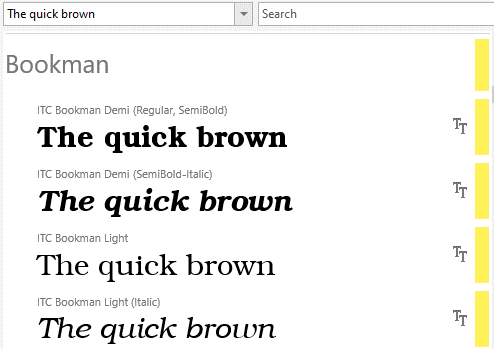
Fonts which are available in CorelDraw only and are not installed are shown with a yellow bar.
Step #13
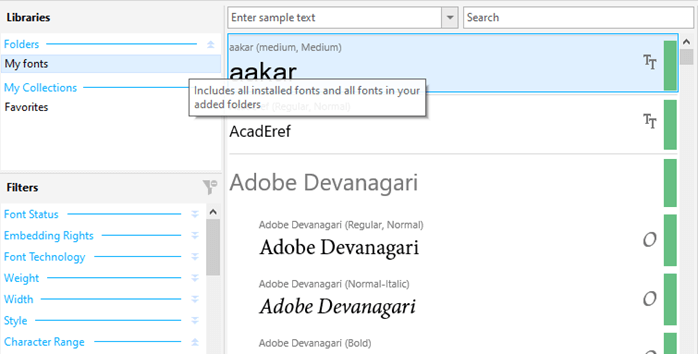
Filters can be applied if you want to see a specific type of fonts from the libraries pane.
Step #14
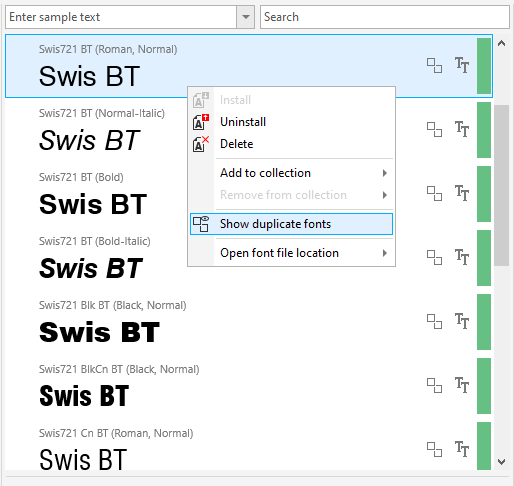
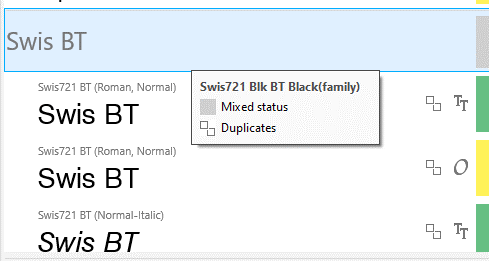
We can right-click a font to show duplicates
Step #15
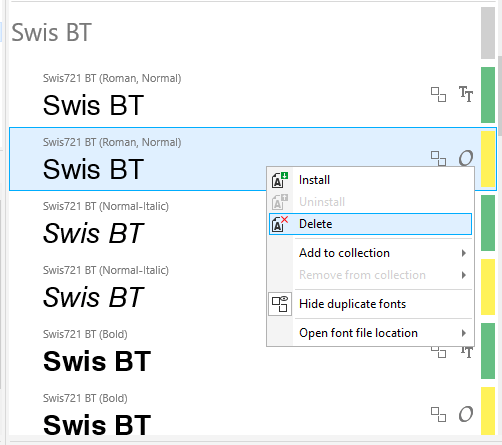
Then right-click again to show duplicates.
Step #16
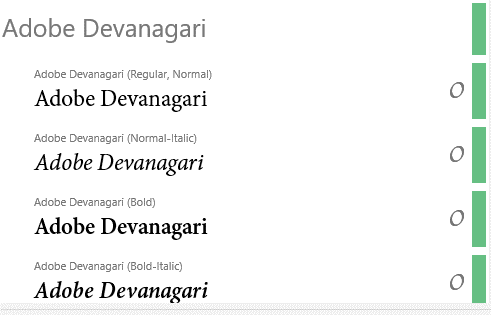
If the header of the font is Gray in color, then the family contains both installed and non installed fonts.
Step #17
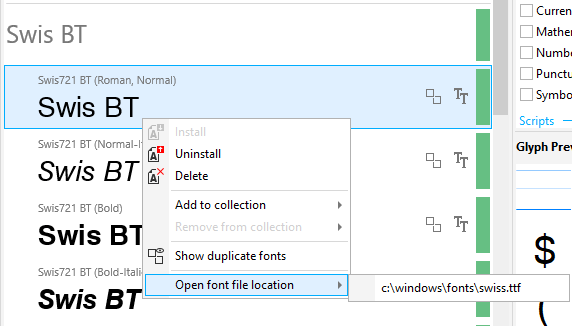
You can also right-click any font to open the location of the font where it is installed.
Step #18
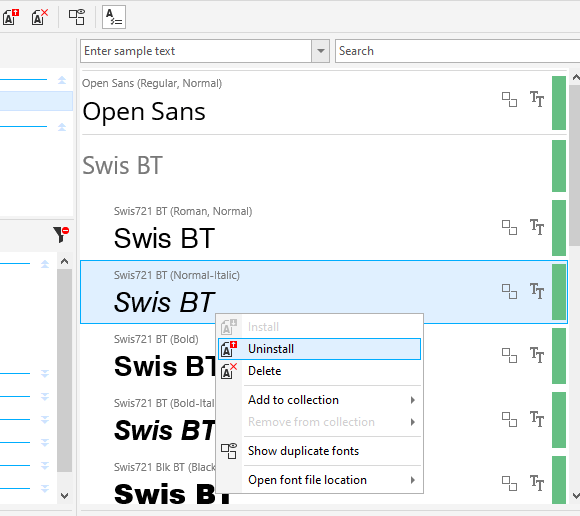
You can uninstall any installed font by right-clicking or from the toolbar, which will then can only be accessed from CorelDraw and not from any other application.
Step #19
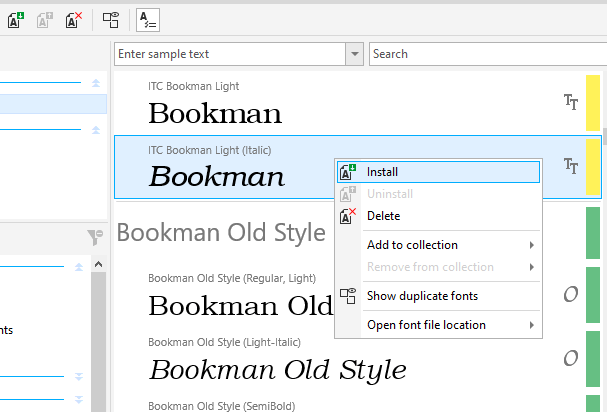
Similarly, if the font is not installed as indicated by the yellow bar, then right-click to install or install from the toolbar.
Step #20
You can enter sample text to see how the font looks than the rather default font name. Clearing the sample text field will give the default font name preview.
Step #21
A specific font name can also be searched from the search field.
Step #22
The letters on the side indicate the type of font. T indicates true type font, and O indicated open type font.
Step #23
When a font is selected, we get the glyph preview on the properties panel, and there are various filters. The filters are divided into categories like common, scripts, OpenType if the font is of that type.
Step #24
In the library panel, some folders contain fonts. If you want to add a folder, you can browse to the folder to add those fonts.
Step #25
As we can see, we have added a folder with the fonts using either the file menu or from the toolbar.
Step #26
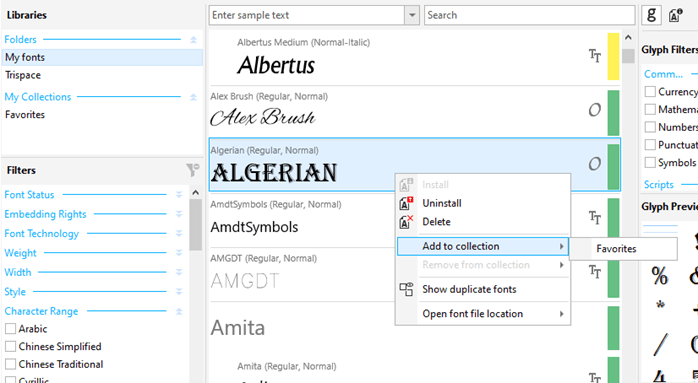
Then there is My collection which has a collection called Favourites. We can right-click the font and add it to the collection or can drag it in the font inside the folder.
Step #27
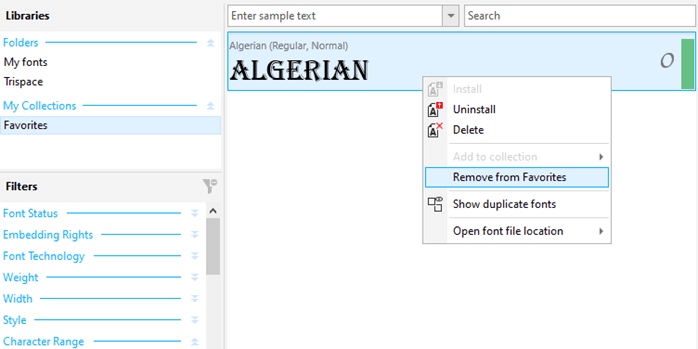
We can also remove from Favorites by right-clicking inside the collection. This will not delete or uninstall it.
Step #28
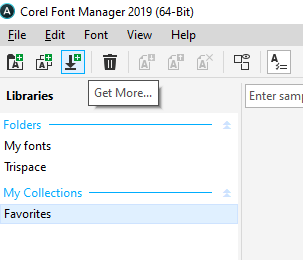
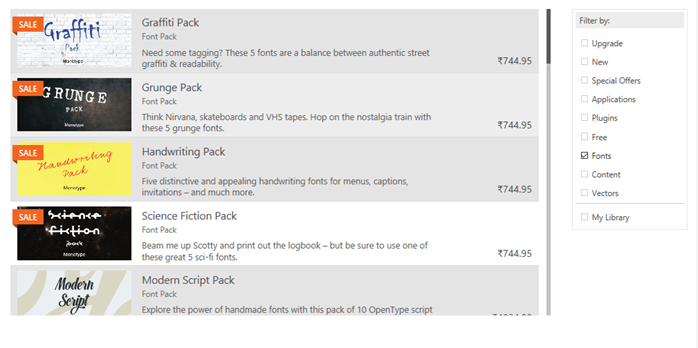
Click Get More… to get more fonts from the CorelDRAW font packs, which you can buy.
Step #29
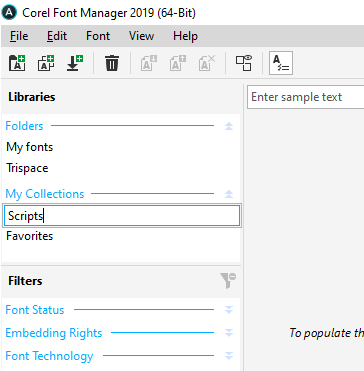
Then let’s add a collection from the toolbar or the file menu. We have added a collection called scripts.
Step #30
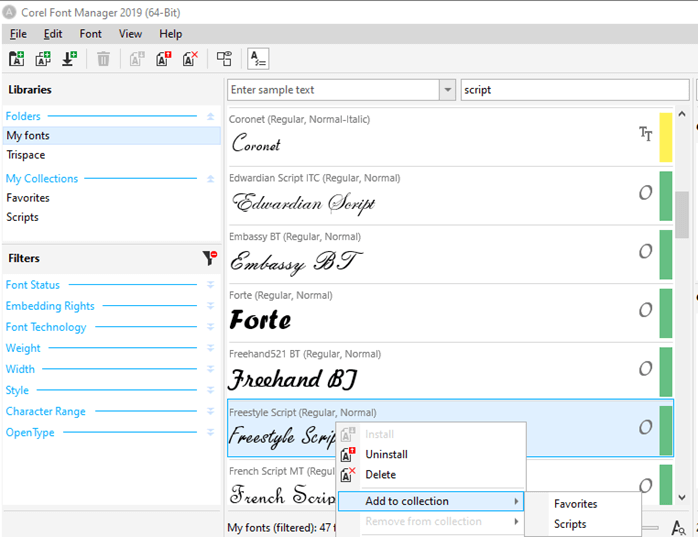
Now go to my fonts and search for the script and then either drag to the Scripts folder or right-click and add to script collection.
Step #31
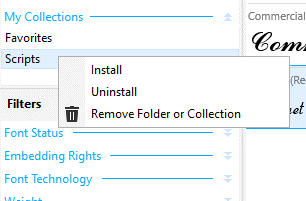
Then when you right-click a collection, you have the option to install or uninstall fonts. And also an option to remove the folder.
Step #32
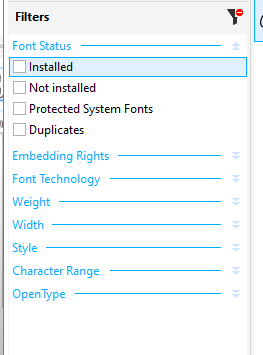
Then there are various filters for the fonts, which include font status, embedding rights, font technology, weight, width, style, character range, and OpenType
Step #33
Then there is some user interface customization from the settings icon on the top right, like changing the theme from light, medium, dark, black. Also, the windows border color can be tweaked. The size of the window can be changed to scale according to the display.
Step #34
Back in the main CorelDraw application, we can find the folder we have created and the script collection.
Conclusion
In this article, we have seen how Corel font manager works in the CorelDRAW graphics suite ecosystem. We have seen how to manage fonts and organize them to understand the system fonts and the installed fonts, and the fonts that are only available in the CorelDRAW application. Apart from that, we have looked at filters, collections, and glyph.
Recommended Articles
This is a guide to CorelDRAW fonts. Here we discuss how Corel font manager works in the CorelDRAW graphics suite ecosystem. You may also have a look at the following articles to learn more –
