Introduction to Inkscape Background color
Inkscape background color can be understood as a color of the background of display window area of Inkscape software and in this software, you can adjust the color of the background by managing some of the features and parameters of Preferences options as well as Document settings option of File menu of menu bar. You can have any color as your background color as per your choice and today we will discuss magical steps for having these settings in your own Inkscape desktop software. So let us start our discussion in step by step manner which will helpful for you.
How to set the Background color in Inkscape?
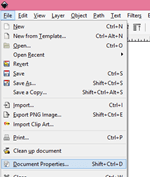
We have white color as default user interface in the older versions but you can change it to dark theme from preferences menu of menu bar. We will go with this white user interface because today our concern is about how to set background color of user interface. So first of all you have to go File menu of menu bar which is at the top of this User interface and click on it.
A drop down list will be open. Now click on Documents Properties option of this list or you can press Shift + Ctrl + D as short cut key of this option of file menu.
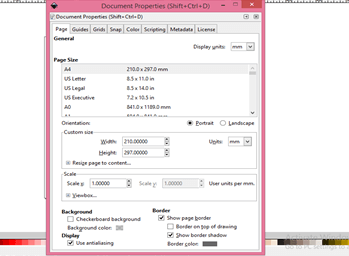
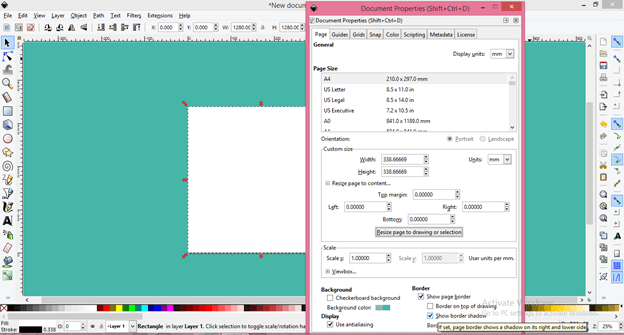
Once you click on this option you will have ‘Document Properties’ dialog box like this.
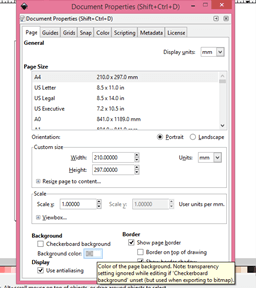
Here at the bottom of this dialog box we have option for changing background color of working window area so click on small square box of this Background color option.
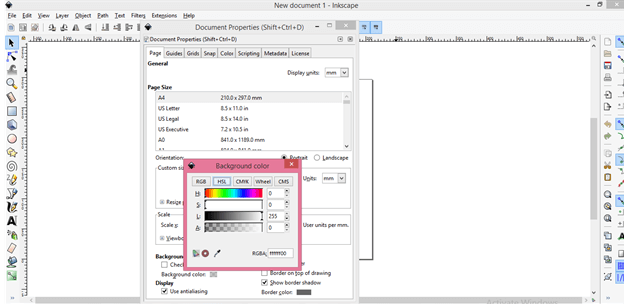
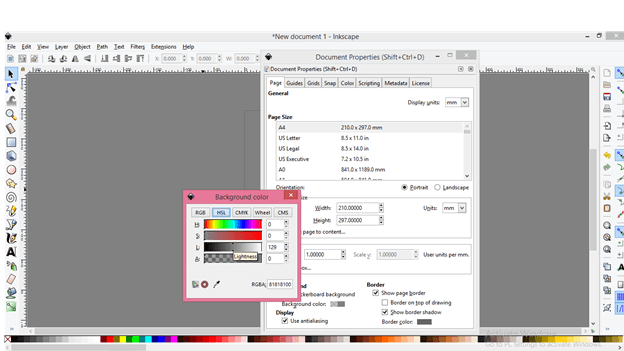
Once you click a new dialog box will be open which is ‘Background color’ dialog box. Here if you want gray color for your background then click on HSL tab of this box which is Hue, Saturation and Lightness.
When you move slider of Lightness scale of L option the color of background of user interface will change. Set the slider point at your desired color of gray scale on slider scale and close both of the dialog boxs after setting it.
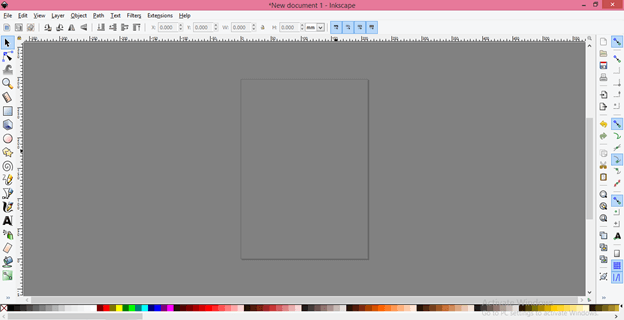
Your background will be ready with your chosen color like this.
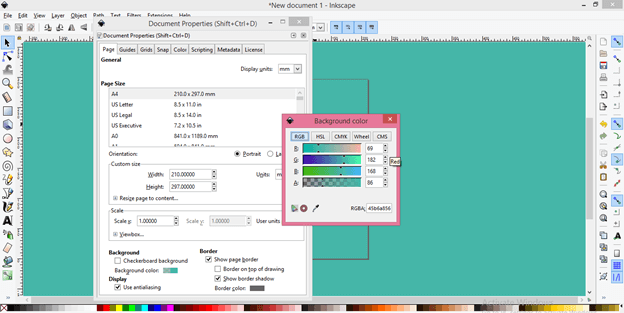
You can also choose any color from RGB tab of background color dialog box. Click on RGB tab and just set sliders of red, green, blue color of this tab and choose your desired color. I will choose this color and then close all dialog box s when i will be satisfied with chosen color.
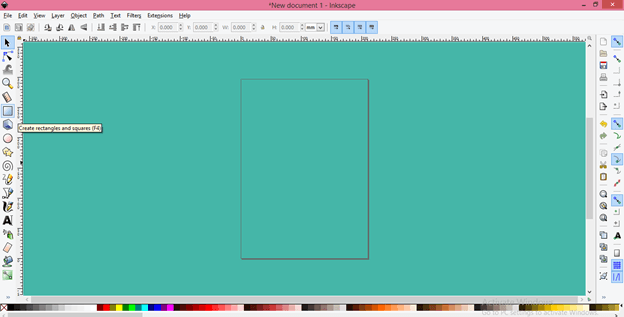
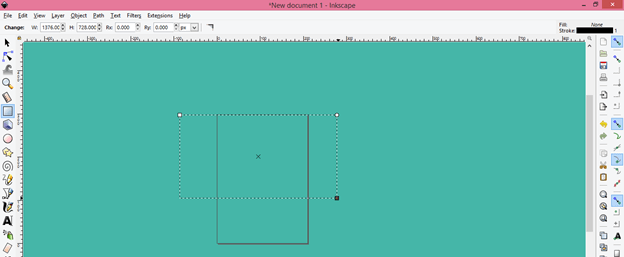
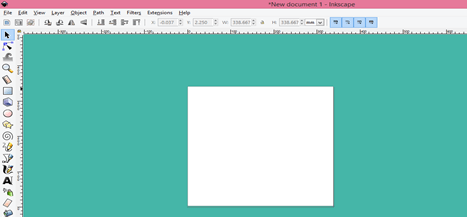
But you can see the art board is also has same color as background. You can change its color to white which is user friendly art board color. So take Rectangle or Square tool from tool panel or press F4 for short cut key of it.
Now draw a rectangle like this.
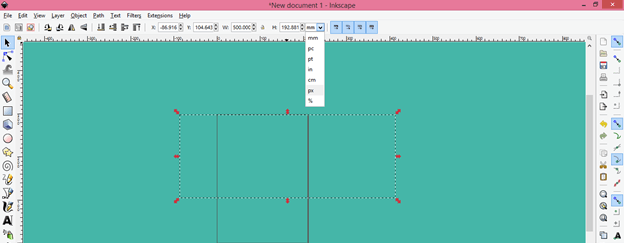
Now choose size for your art board and for this purpose select this rectangle with selection tool of tool panel and change unit according to your requirement. I will change it in px.
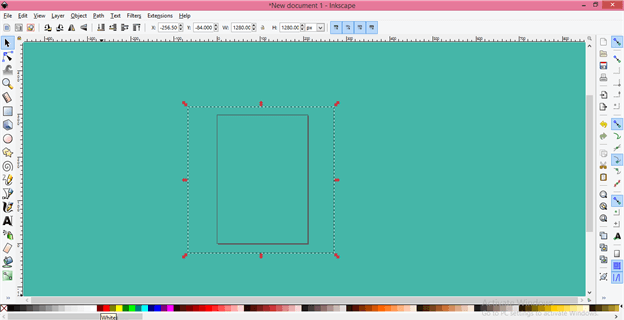
Now set width and height of this rectangle from properties bar of this rectangle. I will take its size as 1280 x 1280 px and this will be size of our art board.
Now fill white color in this rectangle from color pallet by click on white color box which is at the bottom of this user interface.
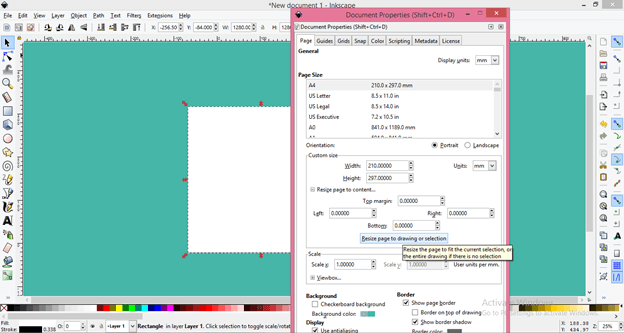
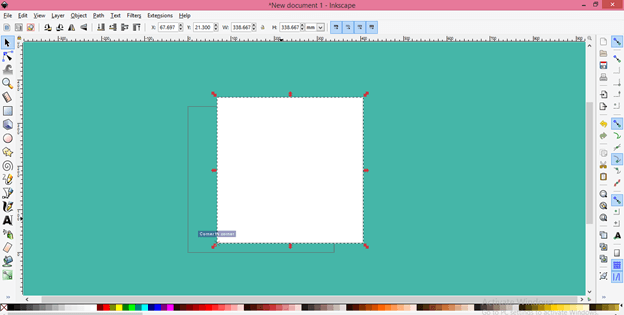
Again open Document Properties dialog box from File menu of menu bar and click on ‘Resize page to drawing or selection’ option of it. It will resize our art board which will be same as the size of this rectangle that means we have 1280 x 1280 size of art board.
Make ‘Show border shadow’ option enable so that there will be no shadow of this document and close this dialog box.
You can move this rectangle around the user window any time but it will creates problem during our working.
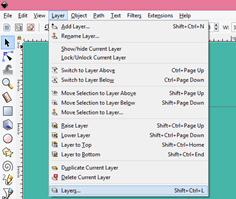
So for solutions of this problem go to Layers panel which you can open from Layers menu of menu bar or you can press Shift + Ctrl + L from keyboard as short cut key.
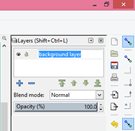
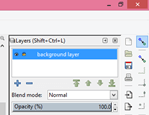
A layers panel will be open at the right side of user interface by default and in the layers panel name this layer as Background layer. For naming it make double click on this layer then type your desired name here.
And lock it by click on lock icon of this layer.
Now this layer will work as unmovable background layer.
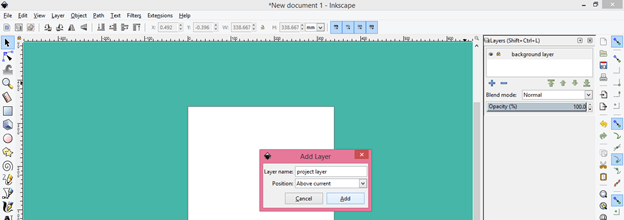
Now create a new layer by clicking on Create new layer button. When you click on this button you will have this dialog box. Here name this layer as project layer on which you will work then click on Add button of this dialog box.
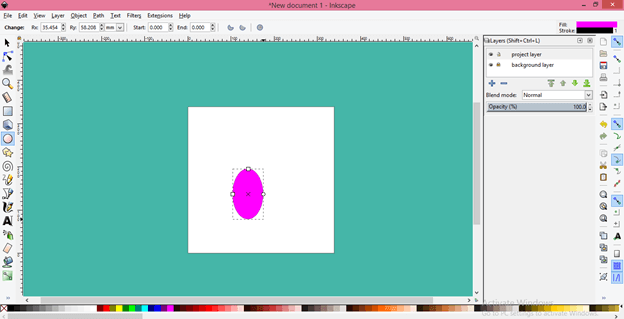
Now you can work on this layer. Take ellipse tool from tool panel and draw an ellipse like this.
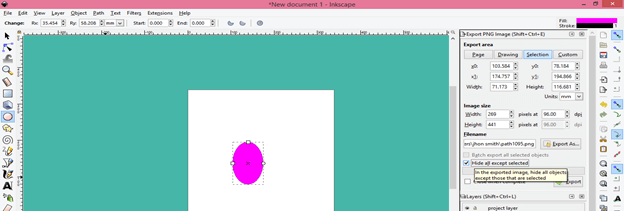
Now the problem with this white background which we make manually is that if you save this ellipse as PNG file then the area of bonding box also save with it because Inkscape consider this white background as an white object but we have solution for this also.
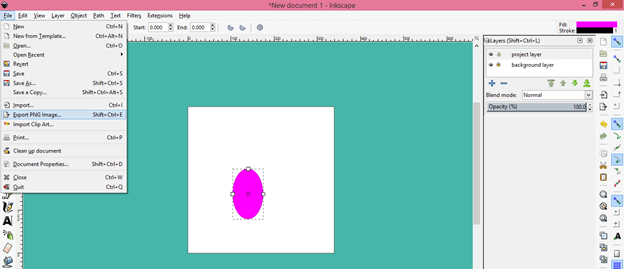
Now go to Export PNG image option of scroll down list of File menu of menu bar.
And enable this ‘Hide all except selected’ option so that it will export only this ellipse not area of bounding box.
You can change color of this background any time. Just unlock its layer and fill your desired color in it from color pallet.
We have made a good approach for giving you information about what is background color in Inkscape and how you can manage the color of it according to you.
Conclusion
Now you have good knowledge about the background color of this software and you can easily play with the parameters of this feature for manipulating it as per your choice. You can set your created template as the default template in the latest version and enjoy your favorite user interface background in your work.
Recommended Articles
This is a guide to Inkscape background color. Here we discuss How to set the Background color in Inkscape along with the parameters of this feature. You may also have a look at the following articles to learn more –

