Updated April 7, 2023

Definition of Spring Boot JPA
In Spring boot we have JPA which makes the mapping of Java object to the relational database. By the use of it, we can perform so many operations on the database and get the desired result we want. Spring boot framework gives us starter JPA dependency which contains all the required things, by the help of this we can able to perform and connect to the database easily. JPA is a set of interface which follows the ORM approach which stands for object -relation mapping, By the help of JPA we are able to persist and access the data or java object between the application and relational database. As the database is a very important part when it comes to storage of data and performed the transaction on those data. In the coming section of the tutorial, we will see how we can configure the JPA in the spring boot application to interact with the relation database and see the usage as well for better understating.
Syntax:
As we know that to access the JPA we need to make some configuration in our application, the most command used annotation in spring boot is mention below, it is a basic configuration that we need, let’s take a closer look at the syntax for better understating to see below;
@SpringBootApplication
@EnableJpaRepositories
public class name_Application{}
As you can see we have used @EnableJpaRepositories to enable the JPA use inside the project. Also, we will have to look at the practice syntax to make use of JPA in, see below;
e.g. :
@SpringBootApplication
@EnableJpaRepositories
public class DemoApplication{}
In the coming section of the tutorial, we will what are the other configurations which need to in place in order to run the spring boot application in JPA easily and without error.
How Spring boot JPA works?
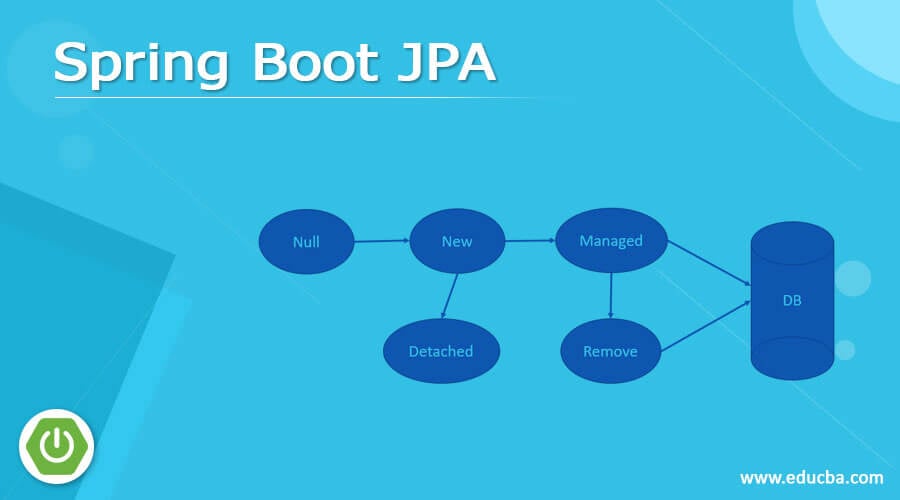
As we already know that in order to make the JPA work, we have to make some configuration also we need to add the dependency as well. JPA is basically used to have the interaction between the java classes and the database. By the use of this, we are able to store the values inside the database and fetch them when needed. First, let’s start with the lifecycle of the JPA by the steps which are described below;
1) NULL: First the object is in the null state, which means it is not associate with entityManager, Reference see below code:
e.g. :
Demo demo = null;2) NEW: This is the second stage for the JPA object when we create the object using the new operator, but still entityManager does not exist.
e.g:
Demo demo = new Demo();3) Managed: In this stage, the object we have created will be managed by the entityManager, so we will do some coding to register it inside the entityManager, by using the following code;
e.g.:
entityManager.getTransaction().begin();
Demo demo = new Demo();
entityManager.persist(demo);
entityManager.getTransaction().commit();
Here we have configured our object to entityManager now the entityManager will manage the object for us.
4) Detached: This state detaches means to remove the object from the entityManager. For reference see below;
e.g. :
entityManager.detach(demo);5) Remove: This stage will help us to remove the object from the database.
e.g.:
entityManager.removed(myObject);Below see the flow chart diagram for the life cycle stage of the JPA for better understanding;
Examples
1. In this example, we will see the saving of a simple object inside the database. For that we have created the entity, service, repository to store the object, also we have added the dependency inside the pom.xml as well.
Example:
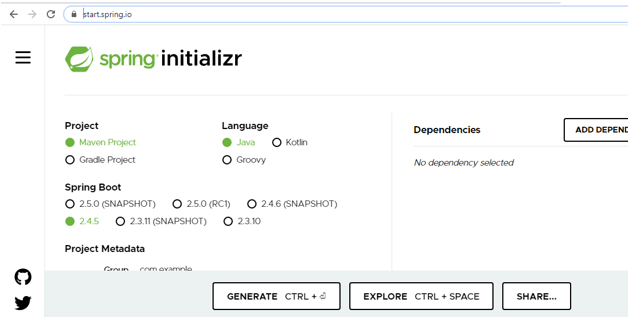
a) create the project from the scratch by using the spring initializer link mention below;
b) Add the below dependency also while creating the JPA example: without his, we will not be able to use the JPA features inside our application so it is required. You can directly type this name in the spring initializer and it will add this dependency for you.
e.g:
<dependency>
<groupId>org.springframework.boot</groupId>
<artifactId>spring-boot-starter-data-jpa</artifactId>
</dependency>
c) Create the entity class like below; this will be the entity class that is going to store in the db., also later we can perform many operations on it like, fetch, delete, update, etc. based on the requirement.
@Entity
@Table(name = "STUDENT")
public class Student implements Serializable {
@Id
@GeneratedValue(strategy = GenerationType.IDENTITY)
@Column(name = "ID")
private Long id;
@Column(name = "name")
private String name;
@Column(name = "city")
private String city;
}
d) now create the JPA repository to save the student object inside it, this is an interface and very important because through this only all the transactions will take place. @Repository annotation is required here, so we can autowired it later to make use of it.
e.g.:
import org.springframework.data.jpa.repository.JpaRepository;
import org.springframework.data.jpa.repository.Modifying;
import org.springframework.data.jpa.repository.Query;
import org.springframework.data.repository.query.Param;
import org.springframework.stereotype.Repository;
import java. time.LocalDateTime;
import java.util.List;
@Repository
public interface StudentRepository extends JpaRepository<Student, String> {
}
e) Now one method inside the service class and auto wired the repository inside it to call the JPA methods to save the object.
e.g.:
import org.springframework.beans.factory.annotation.Autowired;
import org.springframework.stereotype.Service;
import java. time.LocalDateTime;
import java.util.List;
@Service
public class StudentService {
@Autowired
private StudentRepository studentRepository;
public void create(Student student){
studentRepository.save(student);
}
}
f) Now final step to make the configuration work, in the main application class of the project see below for reference;
e.g.:
package com. test.Traders;
import org.springframework.boot.SpringApplication;
import org.springframework.boot.autoconfigure.SpringBootApplication;
import org.springframework.context.ConfigurableApplicationContext;
import org.springframework.context.annotation.Bean;
import org.springframework.data.jpa.repository.config.EnableJpaRepositories;
import org.springframework.web.client.RestTemplate;
@SpringBootApplication
@EnableJpaRepositories
public class StudentApplication{
public static void main(String[] args){
}SpringApplication.run(StudentApplication.class, args);
}
g) Now run the above code and you will see below output; if the JPA is configured properly in the application and try to save object using any rest client, for that ad the controller as well, with a simple endpoint.
Output:
Conclusion
JPA is very easy to use and handle because spring boot makes this simple for us. We just need to do the little configuration after that we can use it, to store and retrieve our entity object from the database, we can follow the above steps to make this work in the spring boot application.
Recommended Articles
This is a guide to Spring Boot JPA. Here we discuss Definition, syntax, How Spring boot JPA works? examples with code implementation. You may also have a look at the following articles to learn more –


