Introduction to ADOBE FLASH CS6
Adobe Flash CS6 is graphic and multimedia software used for creating 2D animations, video games for mobile and web, GIF files, and motion graphic animations. The program can create multimedia content using both raster and vector images both. Adobe Flash Professional CS6 is also now commonly referred to as Adobe Animate which is used to publish files in HTML5 language as well. Mostly used by software developers, website designers and 2D animators Adobe Flash CS6 is a professional program that can be used for multiple purposes.
Adobe Flash Cs6 Professional Overview
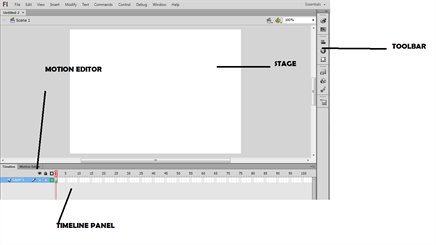
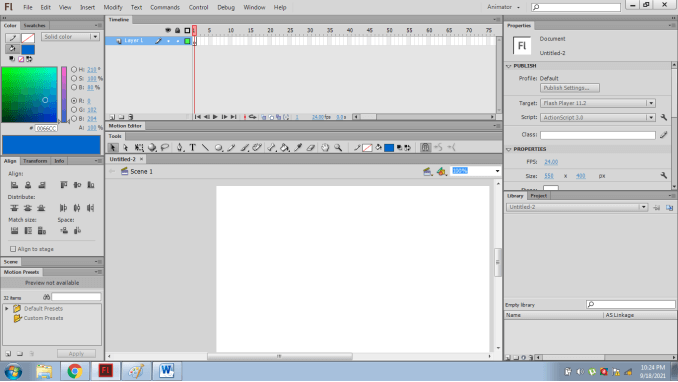
To understand the overview of Adobe Flash CS6 Professional, the user must comprehend the fundamentals of the user interface of the program. In the below image, we see the workspace and interface of the program.
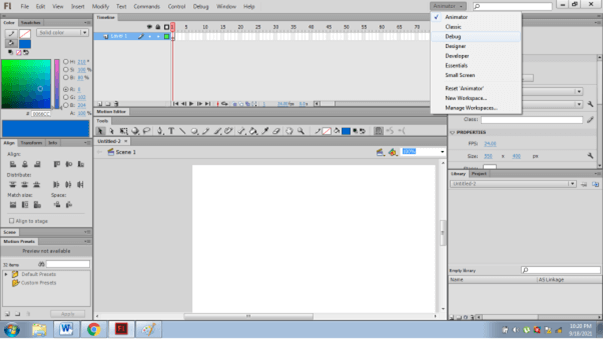
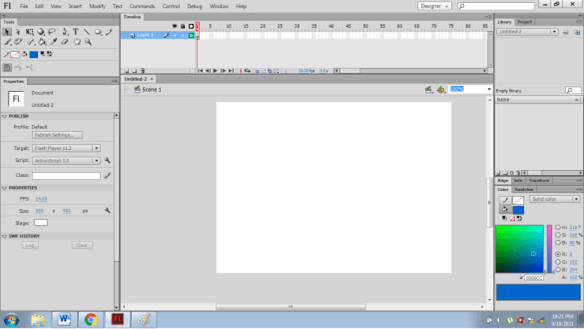
In the workspace, we have different panels for Timeline, tools, properties panel, motion editor, and library. The user can change the working space according to their requirements as shown below.
In the tools panel, we have the Selection, Smooth, Free Transform, Gradient Transform, 3D Transition Tool, Text Tool, Pen Tool, and Brush Tool. To create a proper sequence of animation, the most important panel is the Timeline panel. Here, we create the animation sequence with the help of layers, frames, components, and play head buttons.
With the help of this program, the user can create characters as well as motion graphic animations. Adobe Flash CS6 has some remarkable advantages over other animation programs; such as-
- The program has an inbuilt device simulation that helps a lot of mobile and web developers to compile and create content according to a specific medium.
- There are frequent software updates from the developers of the software.
- The new and updated version of CS6 flash has an Autosave option that helps in saving the data and files automatically in case of unexpected crashes and collapse of the software.
Other Features
Some very important and significant attributes of Adobe Flash CS6 Professional are as follows-
- Most of the 2D games are created on Adobe Flash. With Earlier versions of Adobe Flash, the user created several sprites manually in order to create a proper animation game on Flash. But, with the introduction of Adobe Flash CS6 Professional, the user can generate Sprite sheets with just one click. The symbols and sequences can easily be exported using the Sprite sheets that enhance the overall experience and workflow of creating games on the software.
- Users who use this version of the program can easily access their files on any device with the help of AIR integration with Flash CS6. For example; the users can use and see the flash files on mobile devices or tablets with the Adobe AIR program that can be accessed anytime.
- The users can also export the data on flash files to HTML and JavaScript that will help the users in creating individual and independent content irrespective of the origin of the program
- The users can also create their own preferred language codes and extensions that are not aided by Adobe AIR to decrease the gap between the flash files and other programs
- Adobe AIR intervention with Adobe Flash CS6 helps the user in solving a lot of debugging issues with AIR Debug Launcher. This helps in viewing the data and files on any device without even installing the AIR program.
How to Create Animation in Adobe Flash Cs6?
To create a simple animation sequence on Adobe Flash CS6, we need to learn the basics of animations such as Timeline tools, Tool panel, creating frames and symbols, and using Layers panel. There are five methods of animations that can be used to animate any image or artwork.
- Frame by Frame Animation
- Classic tweens
- Shape tweens
- Inverse kinematic process
- Motion tweens
The user must understand the approach of each animation process and use the subsequent procedure to create animation sequences.
In the below example we will learn a simple method of creating and applying classic tweens and motion tweens.
- Launch the Adobe Flash program
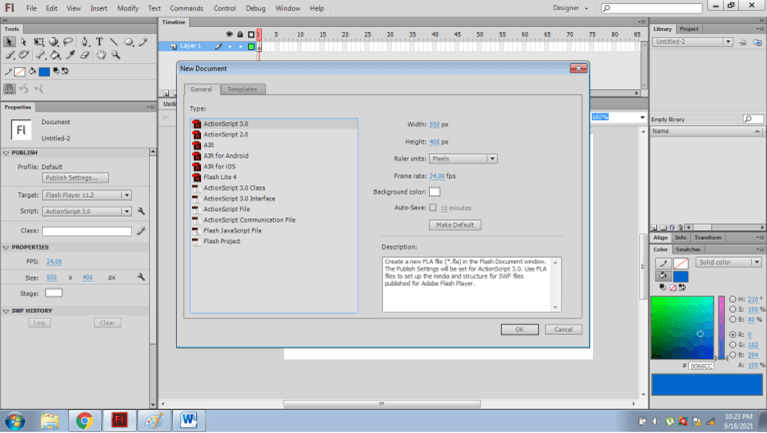
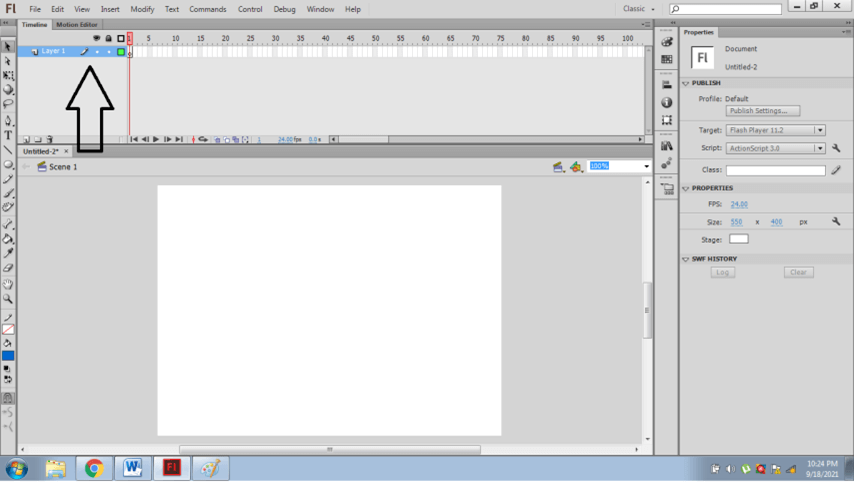
- Create a new document as shown below
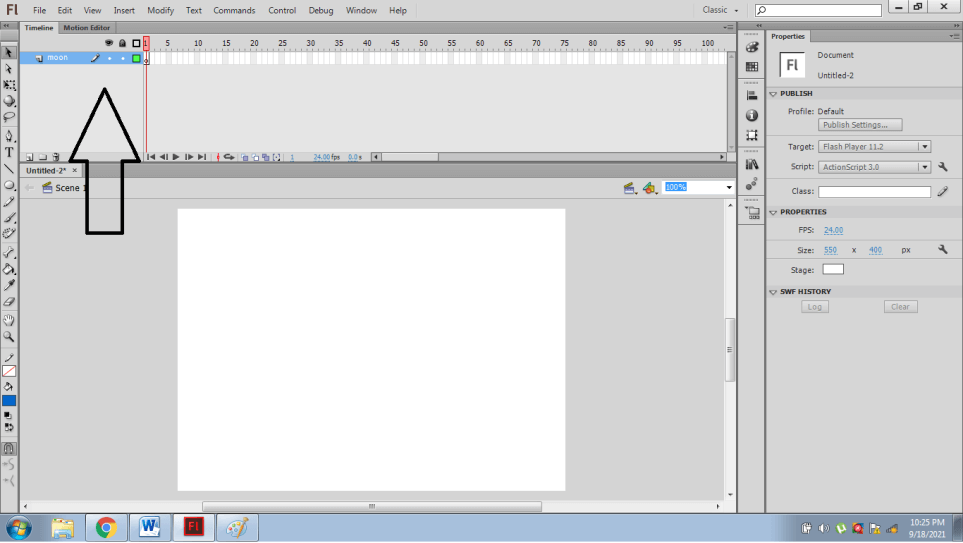
- In the timeline, the panel create a new layer as shown below
- Now, Name this layer Moon
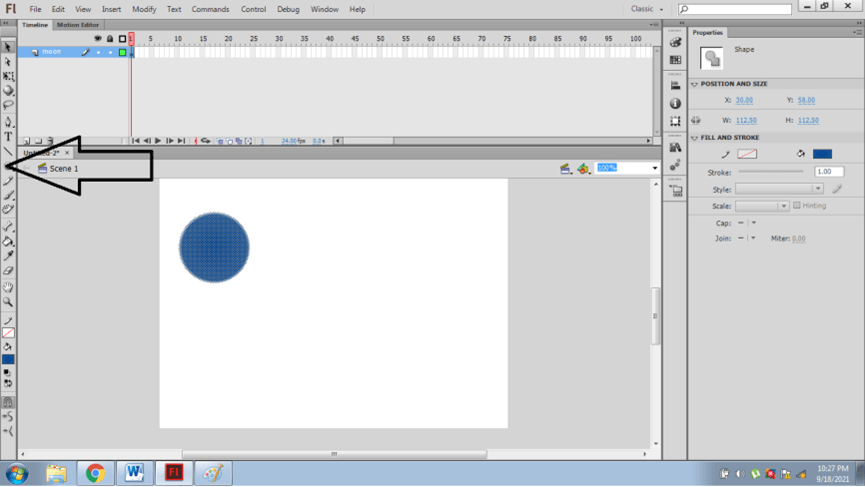
- Create a moon with the help of symbols and tools as shown below on this layer
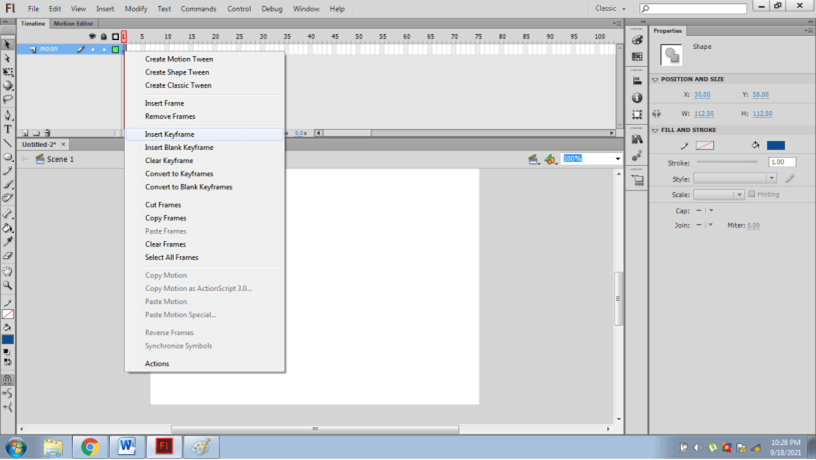
- Create a keyframe on the timeline on this layer.
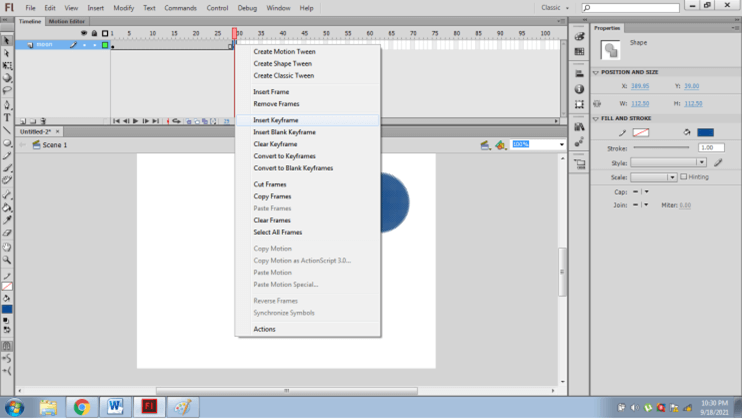
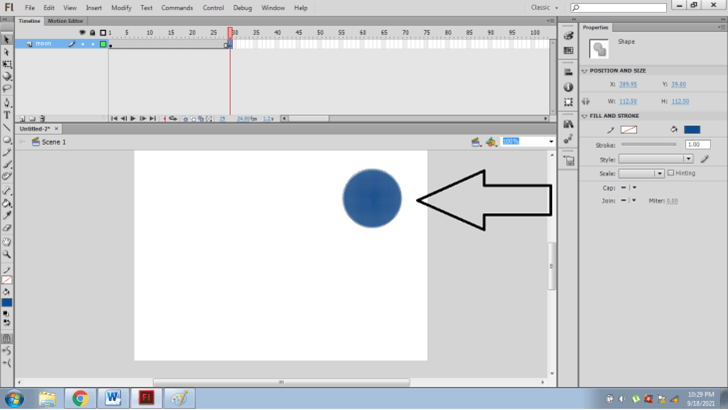
- Next, after few seconds move the moon and create a keyframe again.
- Change the position of the moon in the last frame as shown below
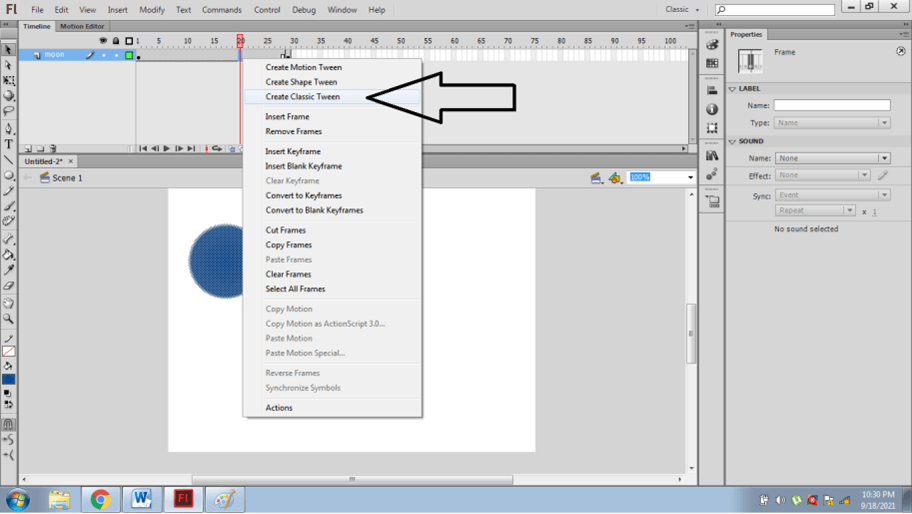
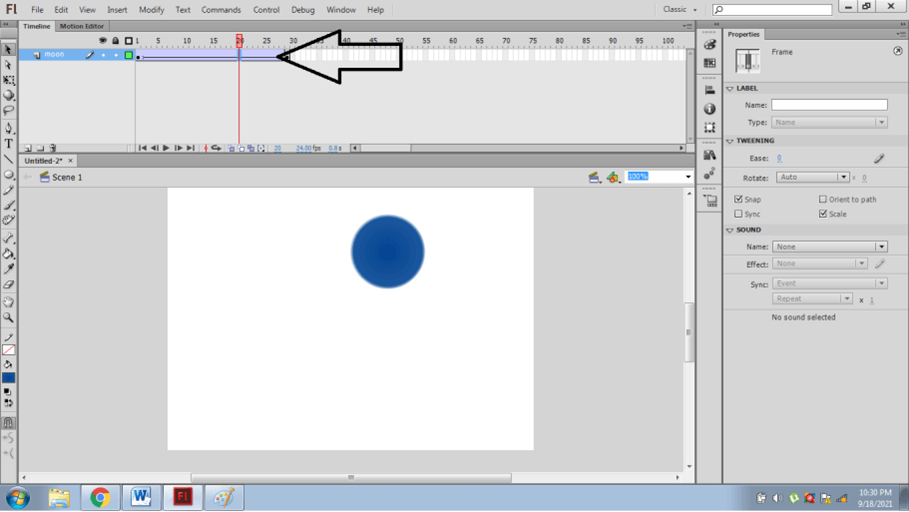
- Now right click on the timeline and select the Classic Tween option as shown below
- This will create an animation of the moon.
- Similarly, we can create simple animations using shape and motion tweens.
Frame by Frame animation is used for character animation sequences. In this method, we create and edit each frame one by one while moving the character ahead in the sequence. We use the ONION SKIN TECHNIQUE to create each frame ahead.
This function helps in viewing the sketch of the last designed frame as a source point. This type of animation is complex yet very accurate and precise. Also, the user should have the knowledge of FPS (frame per second) term. This term is the measure or the rate of frames that are played in one second. The default FPS in any document is 24fps.
Conclusion
In the above article, we studied the core features of Adobe Flash CS6 professionals in detail. We also learned the fundamentals and basics of creating a proper animation sequence. This article will help a lot of beginners & fresher in the field of 2D animations and multimedia. Having a sound understanding of the program is very important to create a conventional and appropriate animation clip.
Recommended Articles
This is a guide to ADOBE FLASH CS6. Here we discuss the help of a lot of beginners & fresher in the field of 2D animations and multimedia. You may also have a look at the following articles to learn more –

