Updated April 13, 2023
Introduction to GitLab YAML Validator
The following article provides an outline for GitLab YAML Validator. The declarative configuration is done with YAML, which is widely used in the business perspectives, and as long as we understand the rules and restrictions of the YAML offers, which have the freedom and simplicity to Know the best practices in the YAML settings and also a transferable skill set for the cloud-native environment hence the YAML is one of the platform-independent for to configure the project pipelines.
What is GitLab YAML Validator?
The GitLab recognizes the GitLab-ci. yml file in the repository and a program called GitLab Runner runs the scripts indicated already in the jobs schedule. The build-code-job is the job that runs in the build stage first and once in this case. First, it prints the Ruby version, which is used by the job, then executes and rakes into the generated project files that have already been deployed in the GitLab environment.
How to Use GitLab YAML Validator?
Generally, the GitLab YAML is one of the data serialization languages commonly used to create configuration files. And also, YAML stands for another markup language, a recursive meaning for YAML that is not a markup language that depends on what we needed in the project. It is also underlined with the YAML validator for data-related and other areas not included in the documents. For more about project configuration, the GitLab CI(Continuous Integration) will need a config file-like YAML file (.GitLab-ci.yml). Then another thing, the config file is located in the GitLab repository for the root directory, which contains more information about the project’s Pipelines, Jobs, and other specified Environments. The YAML file, which defines a set of jobs that must be run at the specific times with the Amplify DX YML file, was created later at the time specifically for running the CI processes using the specific recommended for the branching strategy.
It mainly offers jobs for integrating with third-party software. The YML file begins by using the naming for a custom Docker image that will be used to perform the jobs. Within a single Linux instance, Docker allows running the jobs in separate “containers.” This allows us to make the utility web applications like curl and Nodes available to the jobs without leaking the project-specific data in GitLab. A simple text file called GitLab-ci.yml is stored in the code repository, and it follows the project set up during the whole process; hence it is normally produced with it. We can alter and develop this config file in various manners once it has been produced to meet the project’s demands.
GitLab YAML Validator Examples
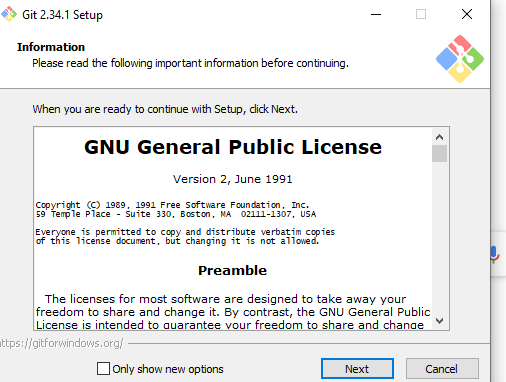
When we want to create a GitLab YAML file example first, we need to install the Git on our local machine, like the below screenshot,
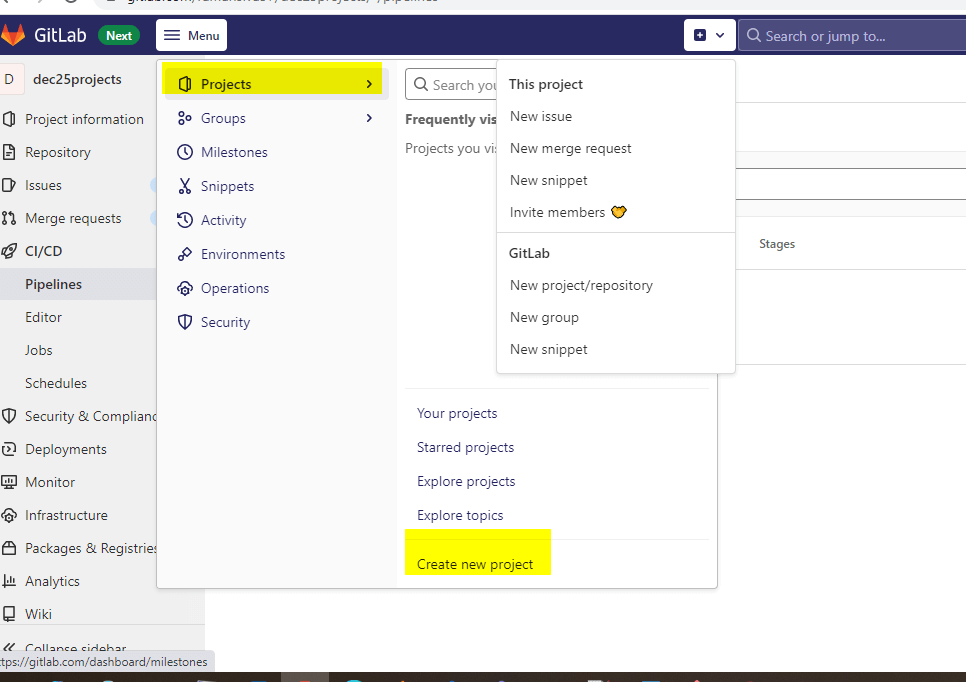
After installation of the GitLab setup, we need to create the first project in the GitLab environment,
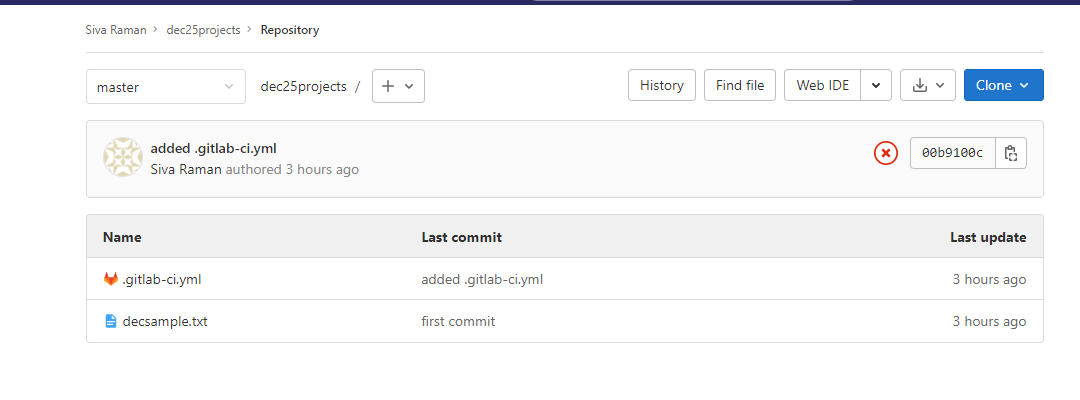
Once we create a new project, we must create a local folder in the machine to commit and push the file changes from our local machine to the GitLab repository,
In the above screenshot, I already committed and pushed the file changes from my local machine to the GitLab repository; here, I used one text file and . a GitLab-ci.yml file to create changes from my machine and push the same to the repository,
Example #1
.GitLab-ci.yml:
demo_job_december:
tags:
- ci
script:
- "echo Welcome To My Domain"
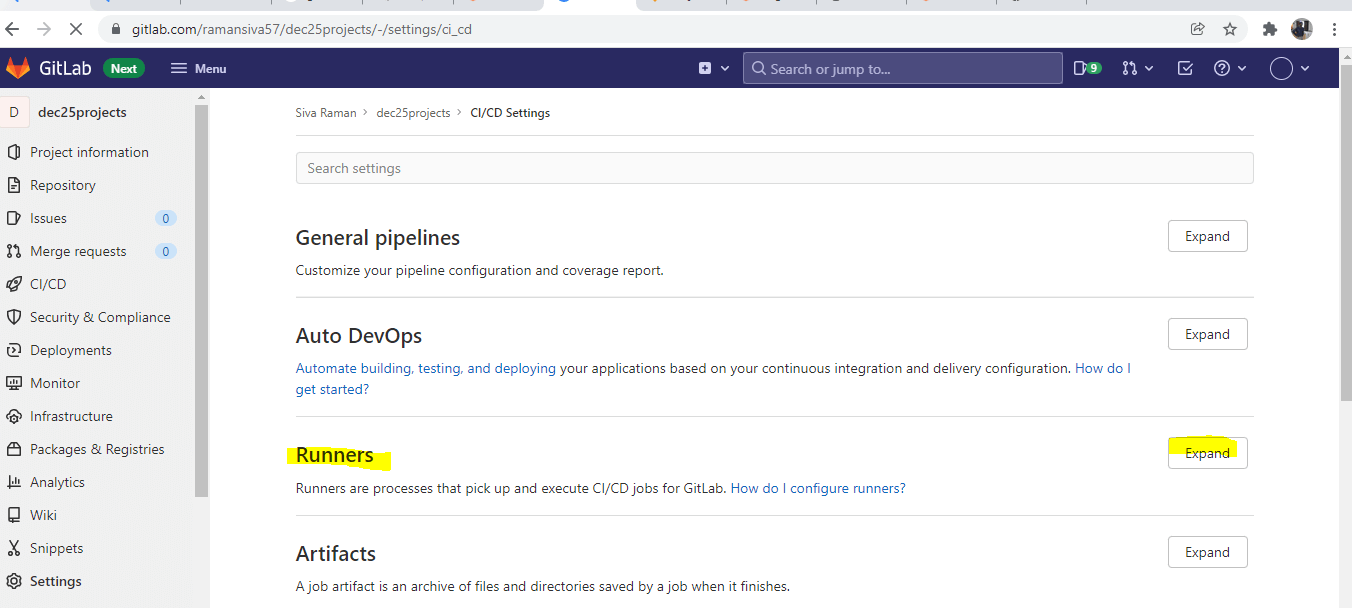
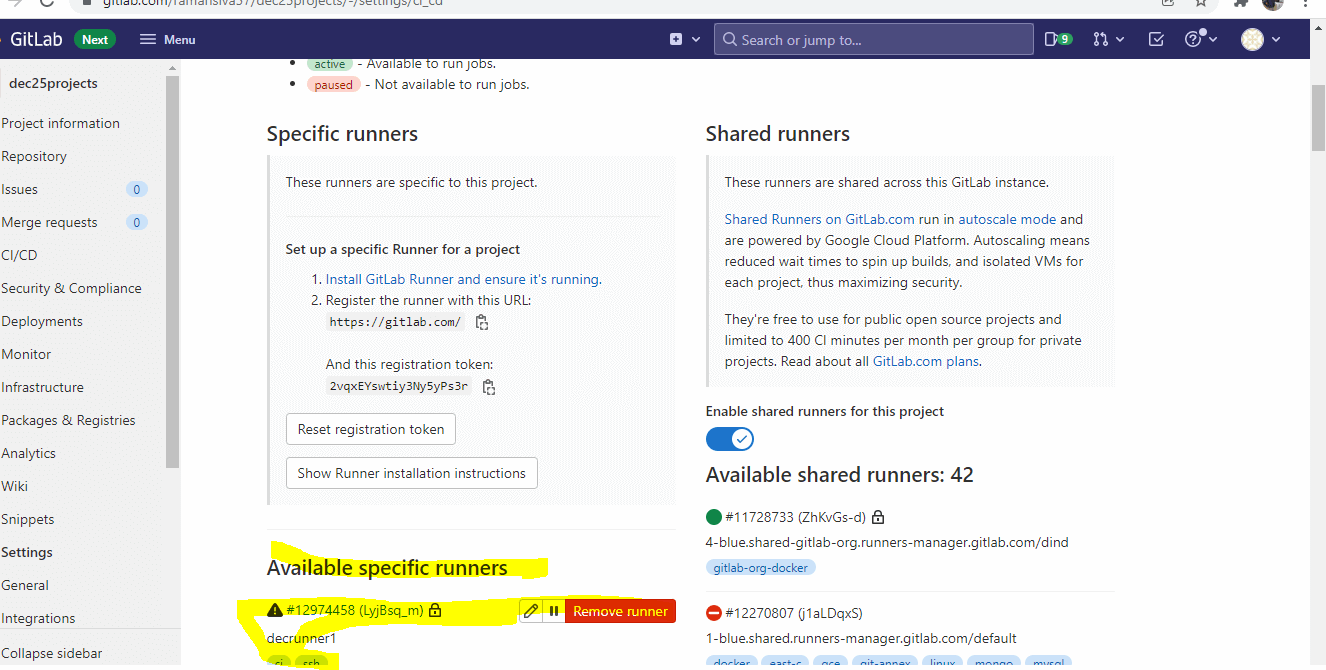
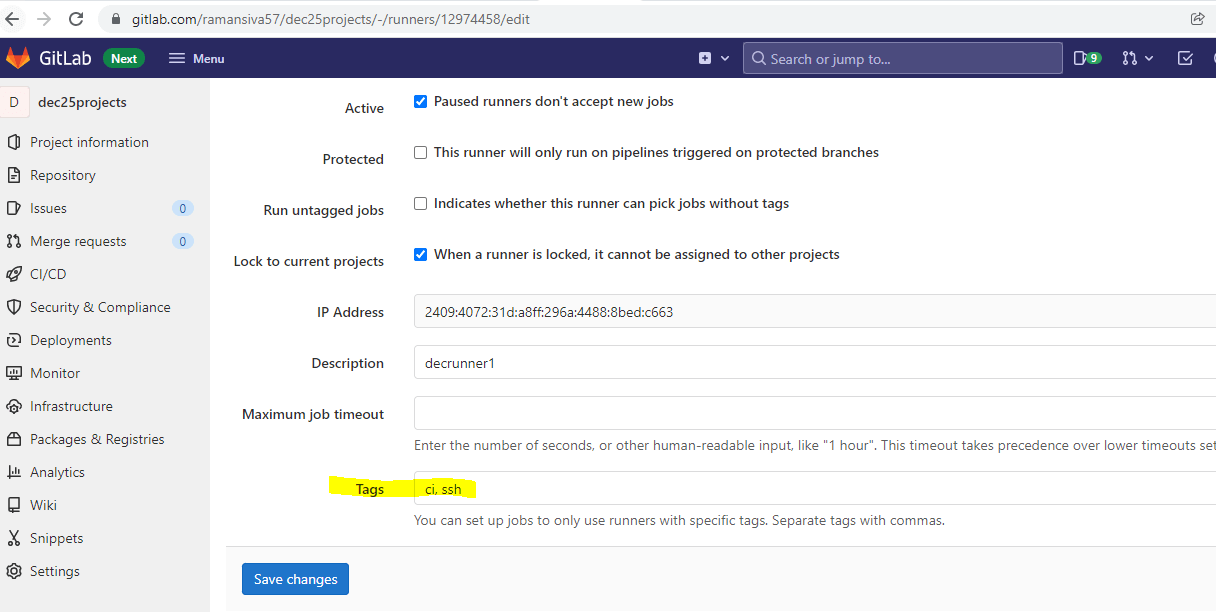
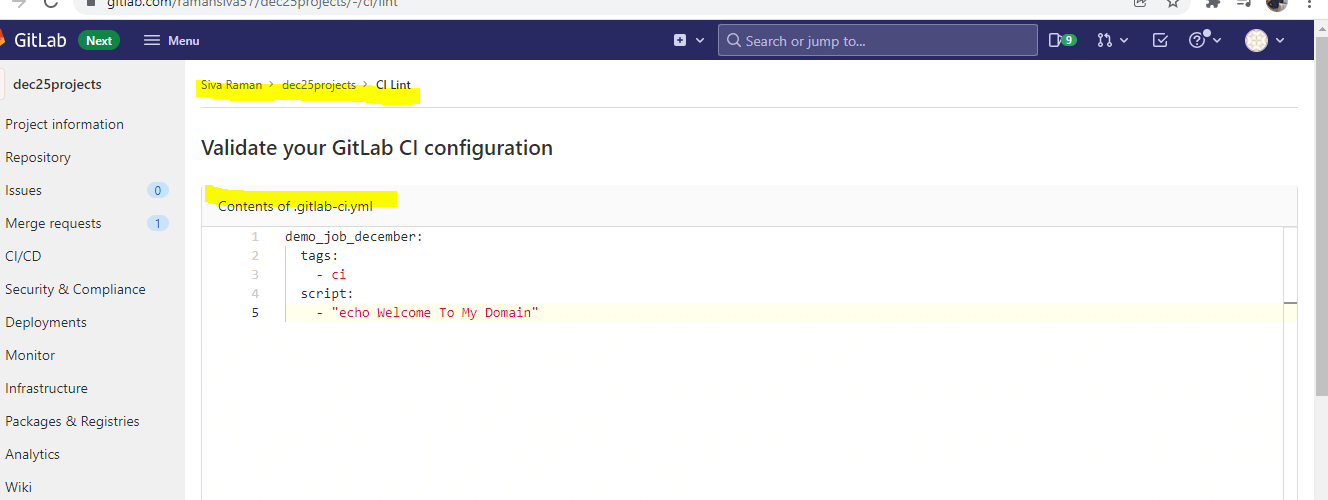
I have written the above sample code to execute the script in the YML file format. In the first line, we can use any names like demo_job_december to create and run using the GitLab-runner, which is already installed and configured from our local machine to the GitLab repository. Then the next tag is the -ci which is used in the tags section; it’s more important if we use -ci it’s the same as we declared in the GitLab-runner settings also; please see the below screenshot for reference,
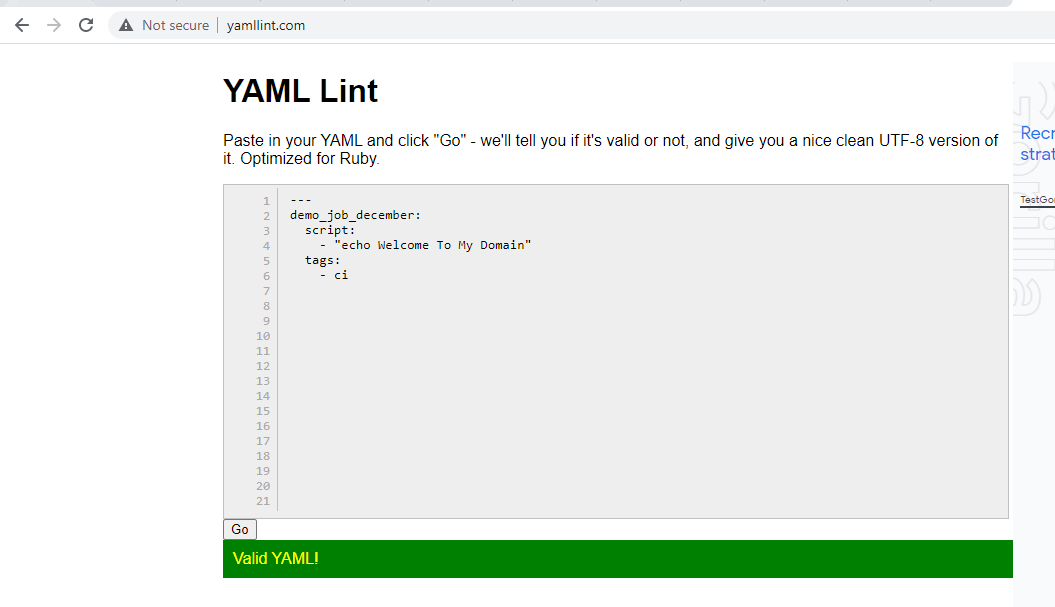
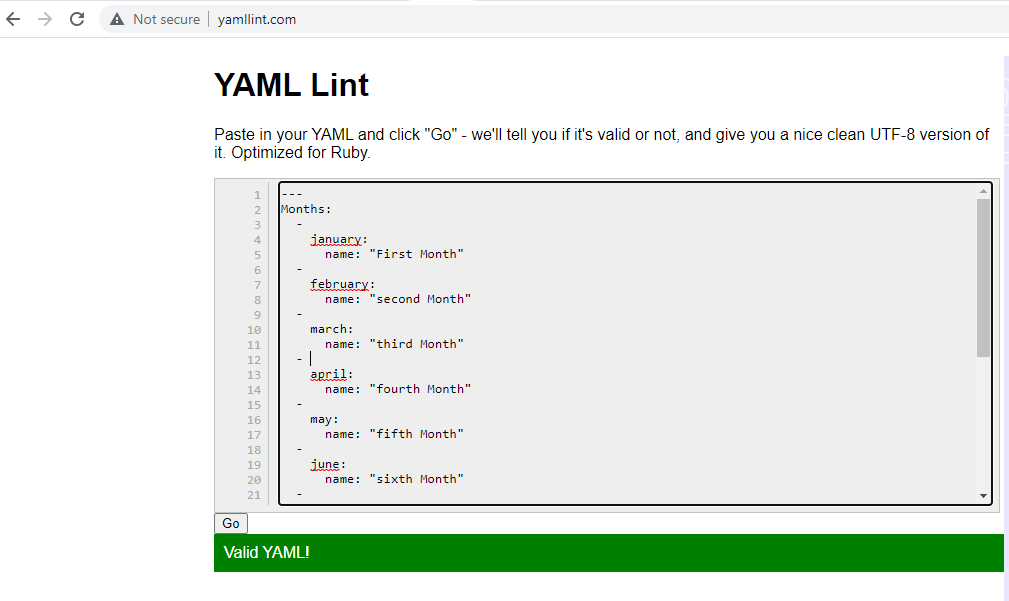
The tags should be more important for declaring it on the YML file. Then we used normally <script> tag like HTML here, we used a simple script: — “echo Welcome To My Domain” Just I entered normal print line after saving the file as .GitLab-ci.yml. We can commit and push the same to the repository. Before that, we can also validate whether the above file is correct by using online tools like https://www.yamllint.com/; like that, we used different YAML file validator tools.
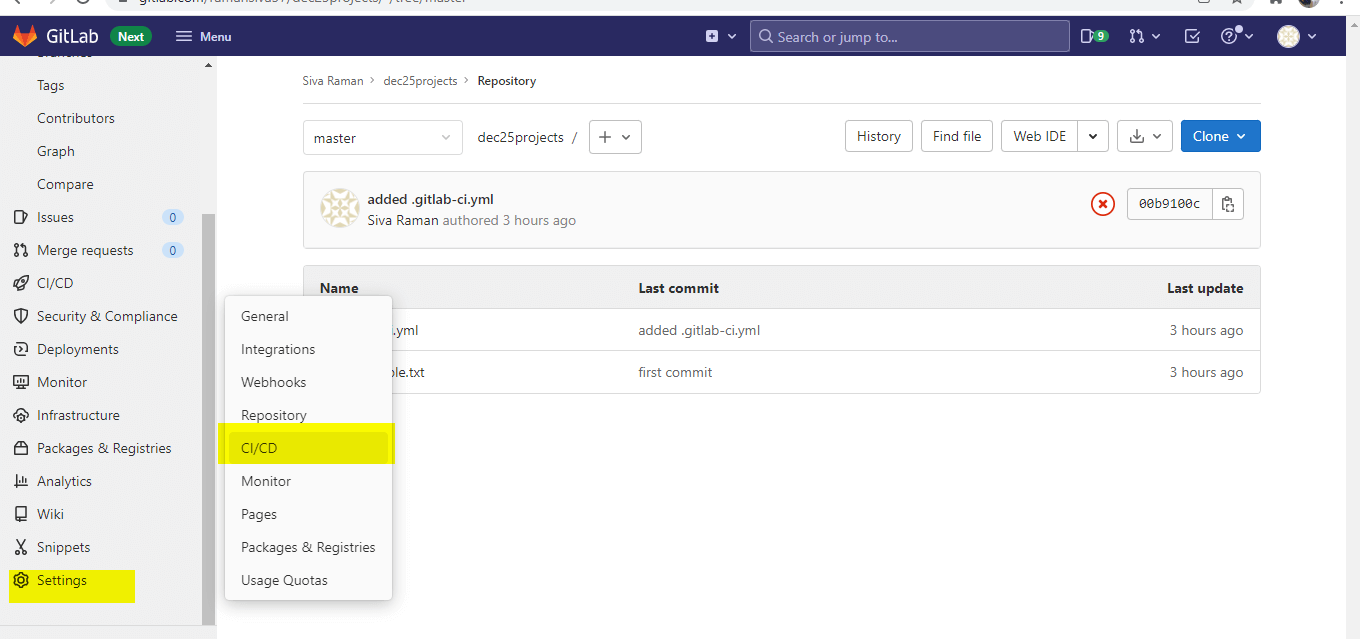
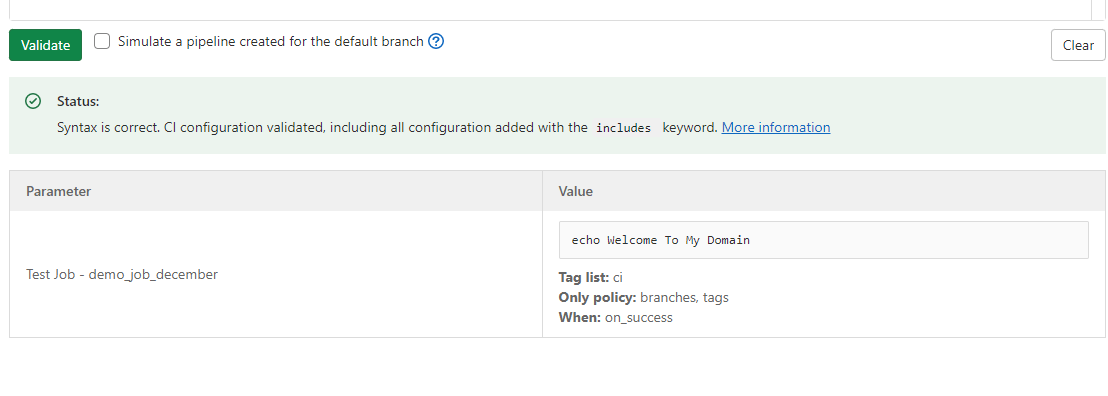
The above tool is the free open source web tool to validate the YAML file examples. And also, we can validate the yml codes in the CI/CD section using CI Lint.
The above screenshot shows for to validate the yml codes in the default GitLab environment tools once we pass an input parameter that can get to the Continuous Integration(CI) so it passes the status like Syntax is correct. CI configuration validated, including all the configuration added with the included keyword values. The output values are shown like “Welcome To My domain,” the Tag list: ci, Only policy, and When:on_success
Example #2
# An Inputs record
Months:
- january:
name: First Month
- february:
name: second Month
- march:
name: third Month
- april:
name: fourth Month
- may:
name: fifth Month
- june:
name: sixth Month
- july:
name: seventh Month
- august:
name: eigth Month
- september:
name: ninth Month
- october:
name: tenth Month
- november:
name: eleventh Month
- december:
name: twelth Month
The above code is the human-readable code in the YML file, and we can validate the code using the browser tool below,
Conclusion
The GitLab is the developer’s open-source and most likely tool while we utilized it in the Continuous Integration and Continuous Deployment(CI/CD). In that yml is the file format we can utilize in the configuration file for the GitLab projects like .GitLab-ci.yml validate using the tools.
Recommended Articles
We hope that this EDUCBA information on “GitLab YAML Validator” was beneficial to you. You can view EDUCBA’s recommended articles for more information.

