Updated June 12, 2023
Introduction To Mudbox software
Digital sculpting is a platform that gives you the ability to create anything and everything out of your imagination. And Mudbox software is a powerful application that helps you to model, paint, sculpt, create environments in an easy and engrossing way like never before. The software has its set of pros and cons when compared with its market rival ZBrush. But, the Mudbox software interface is easily accessible and enjoys powerful compatibility and workflow with Maya.
This article is intended to give an overall idea about the important elements of Mudbox software. Beginners and wannabe digital sculptors will make use of this article to choose how to start their journey will Mudbox software. We hope this writing will fuel your interest in learning Mudbox software and digital sculpting.
Getting Started in Mudbox software
Lets get started with mudbox software.
1. Hardware and Software requirements for Autodesk Mudbox software
- Video Card
It is one of the comprehensive 3D and Digital sculpting platforms. To meet the requirement of the software, your computer should have a proper configuration. An updated copy of the configuration list for is available on Autodesk website.
It is necessary to have a certified video card to use it, as the software uses OpenGL as its rendering engine. A certified Nvidia Quadro or any model over that will help you accelerate your machine’s performance.
- Memory
The next important aspect that dictates the performance of your machine is memory. It works on complex 3D objects on subdivision modes. It is important your machine should save the data on its memory while working on live sculpting and high-res 3D models. Though the requirement may mention 2GB, for the enhanced experience it is recommended to have a memory anywhere between 4GB to 16 GB.
Another important requirement you should carefully look into is the ample hard disk space to handle the high file size. Finally, you may need a tablet-like a Wacom to improve your sculpting details.
2. Mudbox tools Workflow
It is put to use in various stages of the production pipeline. It is used for speed sculpting concept designing, painting and designing characters and properties, sculpting blend shapes for animations, and much more.
It can also be used as a standalone application, with which you can start working on the primitive designs to the advanced rendering of the sculptures. However, many studios are using the software within the production pipeline for sculpting and painting requirements.
3. Mudbox User Interface
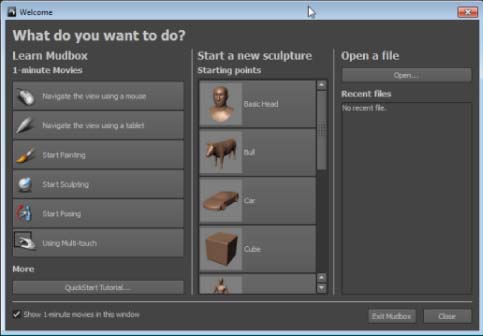
It is popular for it’s easy to access interface that is encouraging to accustom and also eases for a faster workflow. The moment you open the software, you will find the welcome screen arranged with various elements for your use. The purpose of this welcome screen varies as per the proficiency level of the user. If you are a beginner, there are one-minute tutorial movies to familiarize you with the fundamentals of the software. If you have previous experience in Maya or 3DS Max software, you will be familiar with some of the basics of Mudbox tools.
It is recommended for beginners to go through the list of movies Mudbox has for you. For others, the welcome board is useful for quick navigation across the files you are already working on.
4. Main Viewport
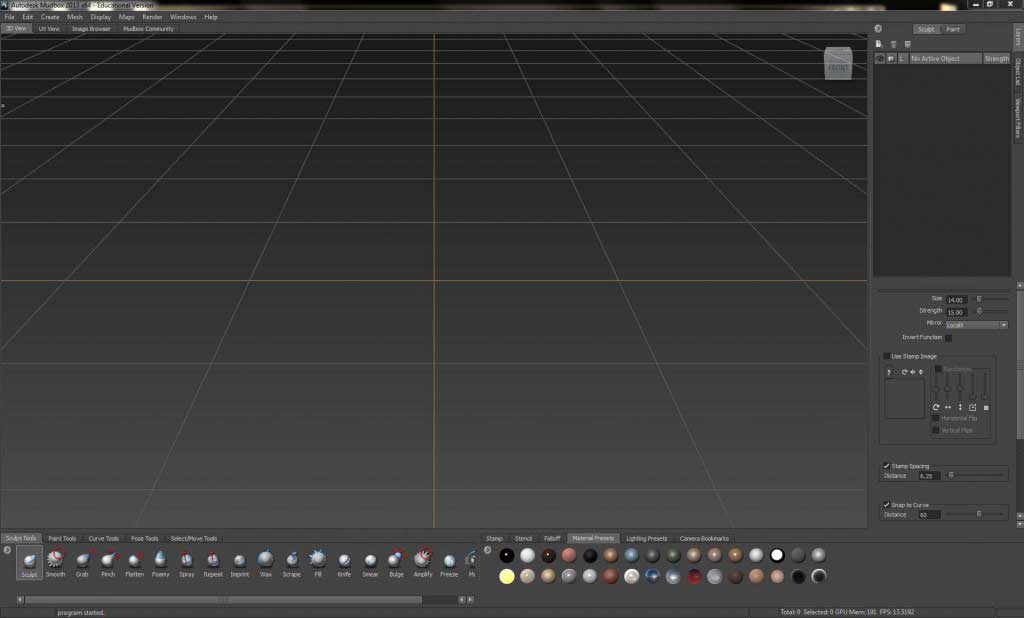
Once you are through the movies and either chose to start your project with a new file or opened an existing file, you will reach the main viewport where the rest of the work will be carried on.
As usual, the menu bar is located at the top of the screen where you will access every function and tool in the software. The status bar is located at the bottom of the screen through which you will find the information about the scene, current action, tool, and error messages.
The viewport can be further adjusted into several modes as Heads-up Display, 3D View, and much more. Every view has its equal importance while working on a specific task. For example, if you are working on a model from scratch or started sculpting an imported model. You may like to work on a 3D View as it offers maximum space for the designing usage and reduces the confusion of sharing the screen space with other tools. However, it will take more time for beginners to accommodate with the 3D viewport as they must master working with the hotkeys on this screen.
5. East Frame Window
The East Frame Window plays an important role in smoothing the workflow in Mudbox tools. It is divided into two sections, in which the sections are further divided into multiple tabs.
The top section of the East Frame Window is divided into
- Layers tab: This is used to create and manage both paint and sculpt layers.
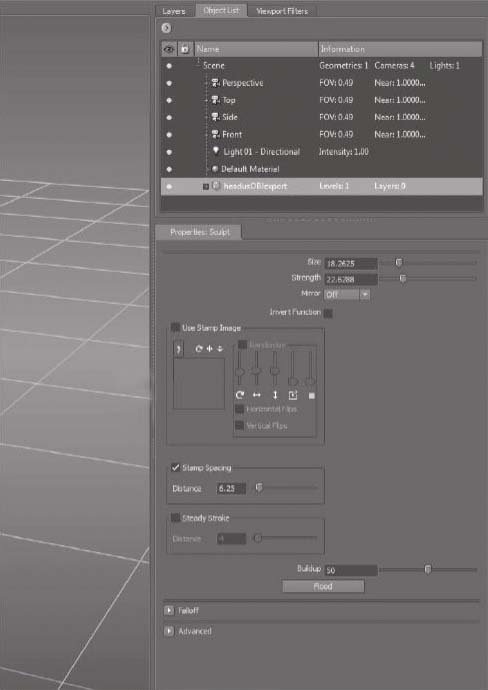
- Objects list tab: It contains the list of every object in your scene starting from the 3D objects, material, lights, and cameras. You can easily select and manage the tools without confusion from this list.
- Viewport filters tab: It controls the rendered look of the 3D View.
The bottom section of the East Frame window has the properties windows, which displays the properties of the selected object or tool.
6. South Frame Tray
It contains the presets, bookmarks, tools, stamps, stencils which are useful while sculpting and designing an object. By default, it ships with many items in the tray. But it is also possible to create your own list of items by adding and omitting them.
The existing items on the tray can be rearranged by dragging them while pressing the middle mouse button or in case you are using a stylus-use the back button.
The South Frame is once again sub-divided into two sections. On its left, you will find your tools and on the right, there are stencil libraries. You can easily manage the space between both the sections by moving the separator in all four directions.
- Tools tray: You can access Sculpt tools, Paint tools, Pose tools, Select move tools from here
- Libraries tray: You can access Stamp, Stencil, Falloff, Material Presets, Lighting Presets, Camera Bookmarks from this section.
7. Mudbox Preferences
The dialog box is another important part that is used to transform the way your Mudbox software looks and behaves. It is essential to look deep into the preferences dialog if you have the habit of converting the software according to your convenience.
You can customize how your viewport should look, what is the level of wireframe you want to have by default, change color settings, Paint, Render, and many more through preferences.
8. Sculpting
Whatever may be the level of sculpting you are about to learn in Mudbox tools. You should start from a base mesh either you create in Mudbox or you import it from some other 3D Software. The polygon base mesh is usually considered the best model for sculpting and animating. And the following tools will help you with what are the tools you should learn to create a good 3D object in Mudbox.
Base Mesh
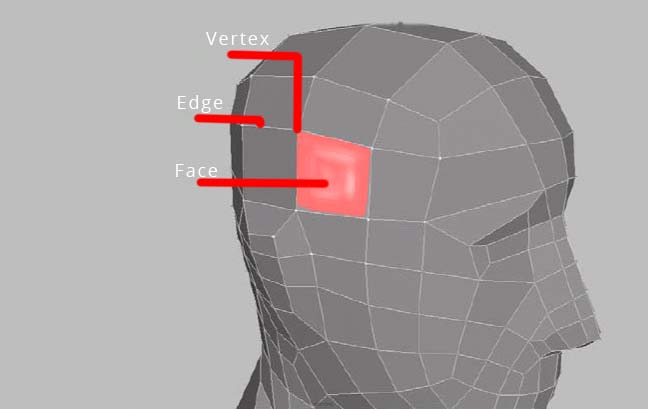
The basic components of a mesh start from a simple vertex, which forms into an edge by connecting to another vertex. Such edges connect with each other to form faces. And these faces can have a minimum of three edges and go up to a maximum of 16 edges in Mudbox tools.
Mudbox tools can handle mesh models of all types as Triangles, Quads, Poles, N-gons. But, it is always recommended to create a four-edged face (Quad) mesh that supports clean sub-divisions and easier workflow process under every stage of the pipeline.
9. UV Layouts
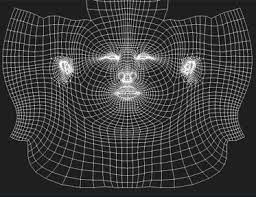
U, V are the names of the points arranged on the Two Dimensional coordinates of the polygon. It is used to attach the texture map or paint the 3D objects.
The UV coordinates from a complex polygon model are extracted and unfolded into flat UV maps. One should make sure there are no overlapping sections within the mesh while extracting the UV coordinates. Then the vertexes should be unwrapped and cut as per the texturing requirement.
The 3D sculpting software can paint directly on the mesh without extracting the UV’s at this level. The maps can be created later by importing into Maya or other 3D software applications.
10. Naming and Organizing your Models
3D production pipeline is an enormous process that involves numerous stages and hundreds and of people. Whatever be the level of the pipeline you are working on, it is crucial for you to create your part of the model in a way that other departments can easily identify the elements of your model. Above that, naming and properly organizing your model helps you to save ample time and makes your job easy.
In this, you can easily name your objects by double-clicking on the name of geometry in the object list and give it a new name. If you are importing an existing mesh from Maya software, you can choose to import the names you gave to the model into Mudbox software.
Select the Groups On option from Maya in the File > Export Selection Options.
11. Texture Painting
Photoshop has been the leading texture painting software for many years. It provides a wide range of brushes, effects, and masking features that help to attain ultra-realistic and high-quality texture effects.
But the problem with the process is that artists have to shift from a 3D platform to a 2D platform to get the results. Over that the workflow is not a seamless experience as you have to save and check the update on the 3D model between Photoshop and the 3D software again and again. Though the software is sophisticated, the workflow has been a problem.
Mudbox provides an advantage to painting the textures on the 3D objects directly. Apart from the high-end digital sculpting features, it also equips an extremely useful texture painting capabilities.
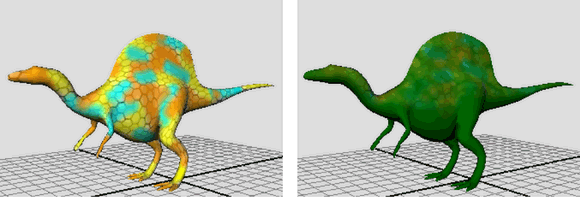
Without the need for UV mapping and painting software like Photoshop, you can directly start painting the model on your model across the UV seams. The process is live and you can see the results instantly as you paint on the model. It is a huge time-saver and gives great control and creative edge to the artists.-
12. Material Shader
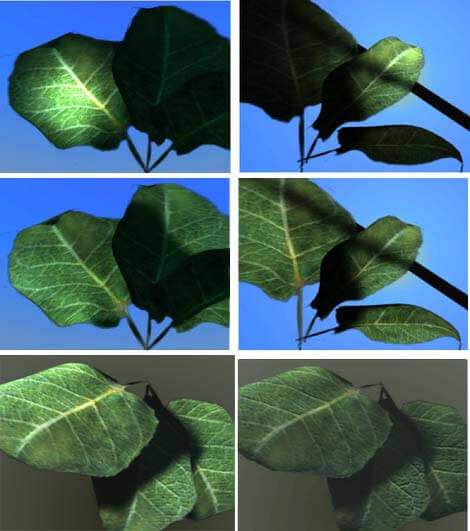
Every object in the world has a material shade. A marble, wood, glass, human skin everything has its unique shading materials with its properties. 3D software develops shaders based on mathematical algorithms. And in most cases it allows the user to create new shaders using the existing base shades.
Similarly, Mudbox has four shaders that users can apply to the materials. They are the Mudbox Material, Simple Blinn, CgFX, Lit Sphere. As Mudbox is not a high-end texturing and shading software, you cannot create complex shading networks neither it comes with highly sophisticated loaded shaders. But Mudbox Material shader can be used on almost every object to make it look good. Another advantage of the software is to display the shading results in real-time.
13. Digital Sculpting
Understand Digital Sculpting
Digital sculpting pushed the scope of reality in the 3D Industry to the next level. To achieve mind-blowing results, you should have a high-end computer which we discussed at the beginning of this article. Along with that, you can gain a proper understanding of digital sculpting by having knowledge in the below aspects
- A background from fine art
- Observation on Human and Animal anatomy
- Sculpting or Clay Sculpting
If you do not know any one of the above, you may choose to start your research or take some classes online or from art colleges. The impact of these studies will sure show their effect on your digital sculpting and eventually shows through your quality work.
Plan before your Sculpt
Sometimes, you may directly hit the computer and find a nice idea to design and sculpt your character. But it is a rarity and you cannot expect that to happen every time. Creativity needs more feeding to get better. Equally, you should feed your brain with more research information before starting working on a model. Check game characters, photographs, read books for inspiration and ideas, draw sketches, watch movies and do anything you think can help you and inspire you.
14. Important tools and Properties
Sculpting in Mudbox is a procedure that involves a lot of tools, features, brushes, and methods. As it is impossible to practically list out every tool you can use in Digital Sculpting, we give you a list of tools and properties you should concentrate to master the process.
- Size and Strength
- Invert Function
- Keyboard Shortcuts
- Falloff Curve
- Mirroring Geometry
- Stamp Image and Stamp Spacing
- Steady Stroke
- Buildup and Flood
- Update Plane and Whole Stroke
- Sculpting Tools
This brings us to the conclusion of this article. We tried to introduce you the sophisticated digital sculpting software and gave our sincere efforts to take you through the most important parts which can help you to start learning Mudbox software.
Recommended Articles
This has been a guide to Mudbox Software. Here we have discussed the basic concept, with 14 important elements in Mudbox Software with detail explanation. You may also look at the following articles to learn more –

