Updated May 22, 2023
Introduction to Django Database
Django uses SQL, a Structured Query Language, to perform different operation crud operations. Typically SQL contains the complex query for creating, updating, and deleting data. Django supports databases such as Oracle, MySQL, SQLite, PostgreSQL, and MariaDB; we can use anyone per our requirements. On the other hand, Django supports many other features of all types of databases. For example, Django usually has an ORM feature, Object Relational Mapper; it allows the developer to map the data between the Django application model and database without any SQL queries; the ORM uses the model classes to interact with data.
Overview of Django Database
The Django structure is a free, open-source system that fosters web applications. This Python-based structure comprises verification, content administration, and data set communications that you can use to make any web application.
Django’s most impressive and valuable highlight is its Object-Relational Mapper (ORM). The ORM allows designers to plan information between application models and data sets without composing SQL questions. For example, the Object-Relational Mapper will plan object credits characterized in Django model classes to the comparing fields in the data set and communicate with the information as essential from a given data set. This allows engineers to quickly foster their applications, eliminating the need to compose separate SQL questions for information base exchanges.
The Django system Model-View-Template (MVT) engineering is planned so designers can change the frontend visual construction of an application without influencing the fundamental backend rationale. This is particularly valuable while connecting with information bases. When a Django web application is designed, an SQLite information base is naturally made.
How to Connect Django Database?
Now let’s see how we can connect the Django database as follow:
We know that Django supports different types of databases; here, we will see how we can connect Django with MySQL as follows:
First, we need to consider the following prerequisites as follows:
- Installation of MySQL server with 5.7 + version
- Installation of Python 3.0+ version
Here consider we already installed MySQL and Python and follow the below steps as follows:
First, we need to create a virtual environment with the help of the below command as follows:
Code:
mkdir stud_management
cd stud_management
After that, we need to set the virtual environment for the newly created project, so we need to install the virtual environment using the below command.
Code:
pip install virtualenv
virtualenv env
Now we have a virtual environment, so start the Django project using the below command.
Code:
django-admin startproject stud_management
cd stud_management
django-admin startapp student
Now we can check the setting.py file of our application, as shown below code.
Code:
INSTALLED_APPS = [
  'django.contrib.admin',
  'django.contrib.auth',
  'django.contrib.contenttypes',
  'django.contrib.sessions',
  'django.contrib.messages',
  'django.contrib.staticfiles',
  ' student ',
]
Now we need to run the server with the help of the below command as follows.
Code:
python manage.py runserverAfter executing the above command, we get an IP address on the terminal, as shown below screenshot.
Output:
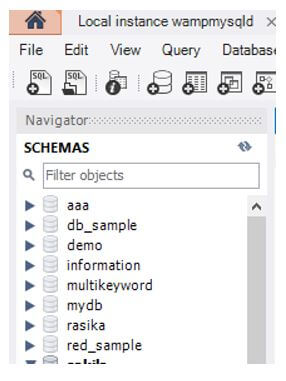
Next, we need to create a new database in MySQL workbench, or we can use the shell for creating a database.
After logging into MySQL, we will get the following screenshot below.
Here we need to create the database using SQL queries per our requirement and update the setting.py file afterward.
Creating Django Database
Now let’s see how we can create a database in Django as follows:
Here we will see the MySQL database in different steps as follows:
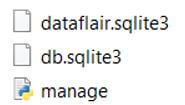
Of course, when we made our first application and began the server, you probably saw another record in your task registry named ‘db.sqlite3’. The record is an information base document where every one of the information that you will create will be put away as shown below screenshot as follows.
This database file was automatically created when we created the Django application, and it has a default setting of the data set to the SQLite, which is albeit fine for testing and gives loads of highlights; however, if you maintain that your site should be versatile, you want to transform it to some other proficient data set.
First, we need to make some changes in the setting.py file as follows:
Code:
DATABASE = {
  'deafult': {
    'ENGINE':django.db.backends.sqlite3, 'NAME':os.path.join(DIR,'db,sqlite3'),
    }
    }
Explanation:
In the above example, we can see how to establish a database connection; here, we have two different terms as follows:
- ENGINE: It determines the library used when associated with a specific site. In the end, we need to put the record, “Django.db.backends.sqlite3”, which is the Python library for the sqlite3 data set and will make an interpretation of your Python code to the data set language.
- NAME: Here, you will have the name of the information base you are utilizing and the area of your data set. This boundary changes as indicated by the information base you are using. Here you can explore different avenues regarding the information base document.
Now we need to execute the below command as follows:
Code:
python manage.py migrate
python manage.py runserver
Explanation:
- After executing the above command, we see a new database was created, as shown in the screenshot below.
This is the first and straightforward way to create a database; now, let’s see another method for MySQL as follows.
First, we need to open MySQL on the terminal and connect with the server, as shown in the below screenshot.
Now here, we need to create a new database with the help of the below screenshot as follows:
Code:
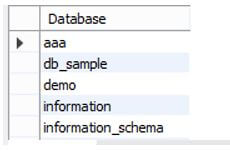
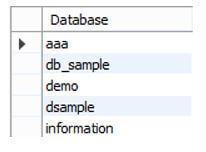
create database dsample;Explanation:
- After execution of the above query, we can see the newly created database as shown below screenshot as follows:
Now we need to update the setting.py file as follows:
Code:
DATABASES = {
  'default': {
   'ENGINE': 'django.db.backends.mysql',
   'NAME': 'dsample',
   'USER': 'root',
   'PASSWORD': '******',
   'HOST': '127.0.0.1',
   'PORT': '8080',
  }
}
After that, we need to install mysqlclient packages with the below command as follows:
Code:
pip install mysqlclientNow run the migration command.
Finally, change the database as per our requirements.
Conclusion
With the help of the above article, we saw about the Django database. From this article, we saw basic things about the Django database and the features and installation of the Django database, and how we use it in the Django database.
Recommended Articles
We hope that this EDUCBA information on “Django Database” was beneficial to you. You can view EDUCBA’s recommended articles for more information.

