Updated February 17, 2023
Introduction to Servlet web.xml
Servlet web.xml is an application deployment descriptor that describes the classes, configuration, and resources for a web server application that uses server web requests. When the web server receives an application request, it contains the deployment descriptor for mapping the URL for the request code, which was used to handle the request. It will be located in the web-inf directory of the apps war.
The servlet web.xml file provides the deployment and configuration information for the components of the web which is used to comprise the application of the web. The servlet specification of java will define the descriptor of the web.xml file in terms of the document of xml schema. For compatibility backward, any web.xml file will be written in 2.2. The web.xml file will contain information about external dependencies and the structure of web components in the module which was defined at run time.
The web.xml file is used to configure the web container for java API for restful API services application. At the time of using servlet, we can define the servlet path into the web.xml file which was appended by using the base URL. We are configuring the web.xml file for our web applications for enabling the mode of JAX-RS.
Key Takeaways
- For web-based applications, the dispatcher servlet will serve as the front controller. The web.xml file is the application descriptor file in a spring web application.
- This file contains an XML document that defines all information about our application, such as the context path that was assigned to it.
How to Use Servlet web.xml?
For using it first we are creating a new project.
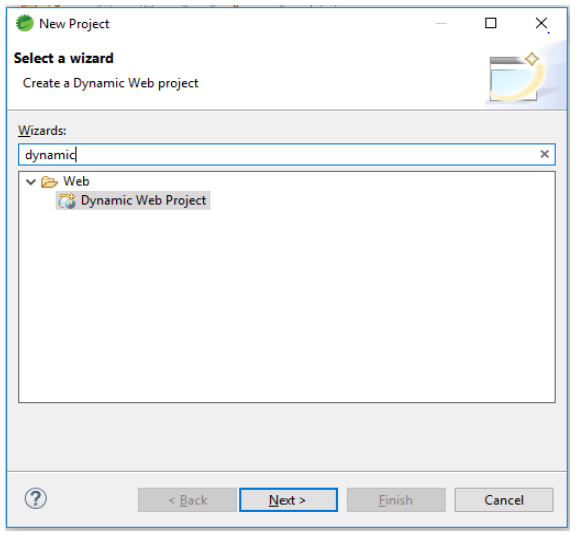
1. In the first step we are opening the tab of a new project, after opening the new project tab we are selecting the dynamic web project as follows.
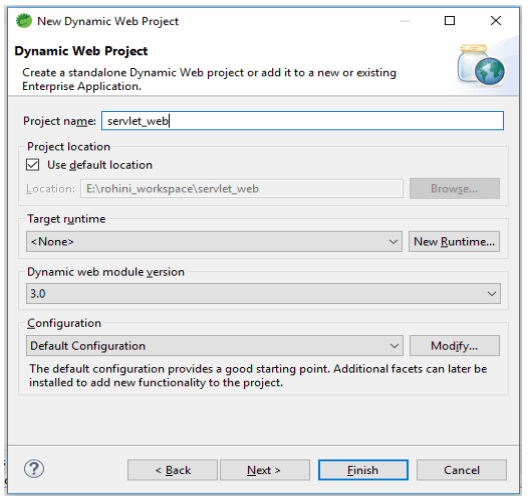
2. After selecting the dynamic web project now in this step, we are giving the name to the project and select the default configuration of the project.
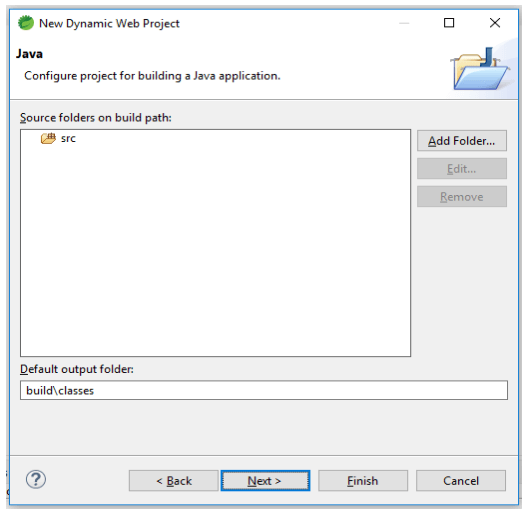
3. After giving the name of the project now we are defining the build path of the source folder as follows.
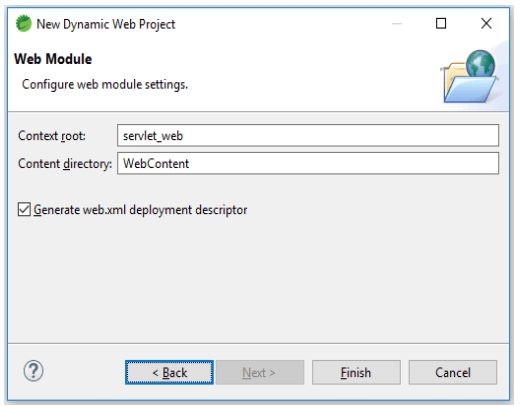
4. After defining the build path of the source folder now we are selecting to generate the web.xml deployment descriptor as follows.
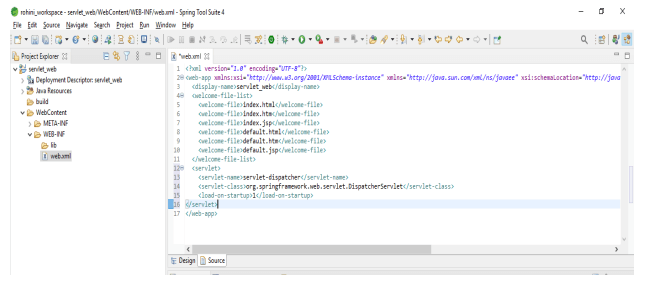
5. After creating the project now in this step, we are creating the web.xml file in the WEB_INF folder as follows.
Code:
<web-app ..... version="3.0">
<display-name> servlet_web </display-name>
<welcome-file-list>
<welcome-file> index.html </welcome-file>
<welcome-file> index.htm </welcome-file>
<welcome-file> index.jsp </welcome-file>
<welcome-file> default.html </welcome-file>
<welcome-file> default.htm </welcome-file>
<welcome-file> default.jsp </welcome-file>
</welcome-file-list>
</web-app>
<servlet>
<servlet-name> servlet-dispatcher </servlet-name>
<servlet-class> … </servlet-class>
<load-on-startup> 1 </load-on-startup>
</servlet>
Output:
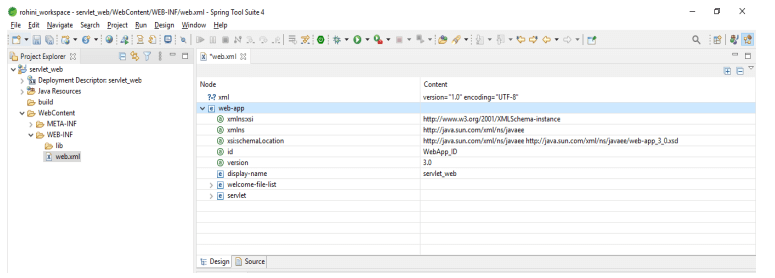
6. We can also check the design of the web.xml file. The below example shows the design of the web.xml file as follows.
Servlet web.xml Configuration
We are defining the servlet as a part of a web application for several entries which was defined in standard web application deployment. Basically, the web.xml file was located in the WEB-INF directory. The first entry into the web.xml file will define the servlet name which was specifying the compiled class which was used to execute the server. The element of the servlet contains the attributes initializations and roles of security for the servlet.
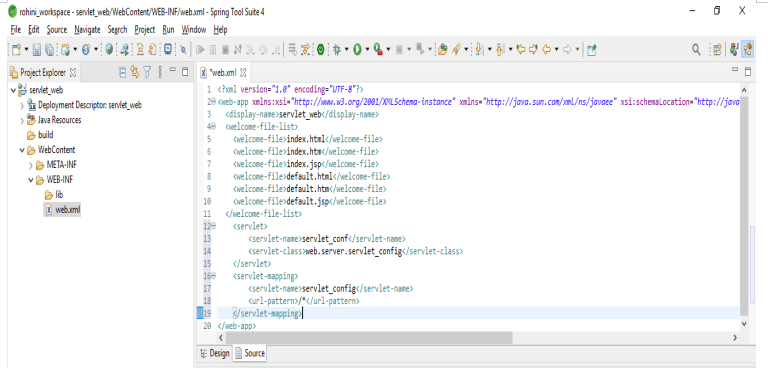
Servlet mapping is controlling how we are accessing the servlet. Following example shows how we can configure the web.xml file by using servlet mapping as follows:
Code:
<web-app ..... version="3.0">
<display-name> servlet_web </display-name>
<welcome-file-list>
<welcome-file> index.html </welcome-file>
<welcome-file> index.htm </welcome-file>
<welcome-file> index.jsp </welcome-file>
<welcome-file> default.html </welcome-file>
<welcome-file> default.htm </welcome-file>
<welcome-file> default.jsp </welcome-file>
</welcome-file-list>
<servlet>
<servlet-name> servlet_conf </servlet-name>
<servlet-class> web.server.servlet_config </servlet-class>
</servlet>
<servlet-mapping>
<servlet-name> servlet_config </servlet-name>
<url-pattern> /* </url-pattern>
</servlet-mapping>
</web-app>
Output:
It defines a mapping between the URL path and the servlet that handles requests from the specified paths. The web server uses those configurations to identify the servlet responsible for handling the specified request. We can also call the class method that corresponds to the request method.
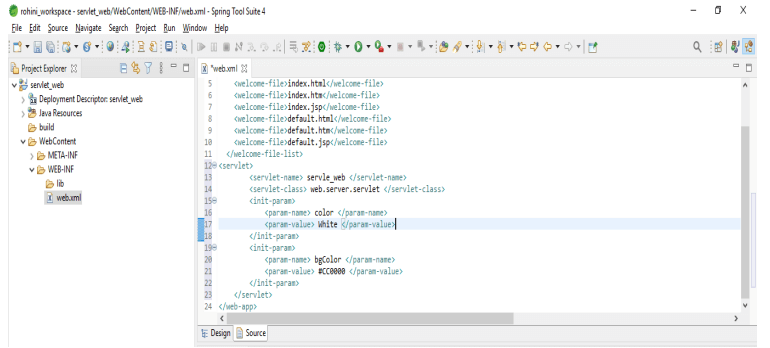
We are declaring the servlet element to map the URL of the servlet. Below example shows the web.xml configuration with url path as follows:
Code:
<web-app ..... version="3.0">
<display-name> servlet_web </display-name>
<welcome-file-list>
<welcome-file> index.html </welcome-file>
<welcome-file> index.htm </welcome-file>
<welcome-file> index.jsp </welcome-file>
<welcome-file> default.html </welcome-file>
<welcome-file> default.htm </welcome-file>
<welcome-file> default.jsp </welcome-file>
</welcome-file-list>
<servlet>
<servlet-name> servle_web </servlet-name>
<servlet-class> web.server.servlet </servlet-class>
<init-param>
<param-name> color </param-name>
<param-value> White </param-value>
</init-param>
<init-param>
<param-name> bgColor </param-name>
<param-value> #CC0000 </param-value>
</init-param>
</servlet>
</web-app>
Output:
Servlet web.xml Filters
A filter is a class that acts on requests in the same way that a servlet does, but it allows us to handle the request before continuing with the other servlet filter. Before calling the servlet, the servlet filters perform authentication checks for request annotation. Filters will allow us to compose the deployment descriptor processing task.
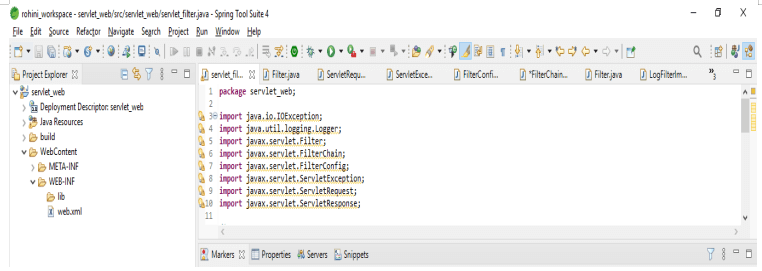
The filter class will implement the filter interface. Below is the implementation of the filter class as follows:
Code:
public class servlet_filter implements Filter
{
private FilterConfig fconf;
private static final Logger log ();
public void doFilter()
throws IOException, ServletException
{
log.warning ("Filter log");
filterChain.doFilter (request, response);
}
public FilterConfig getFilterConfig ()
{
return fconf;
}
public void init(FilterConfig fconf)
{
this.fconf = fconf;
}
public void destroy() {}
}
Output:
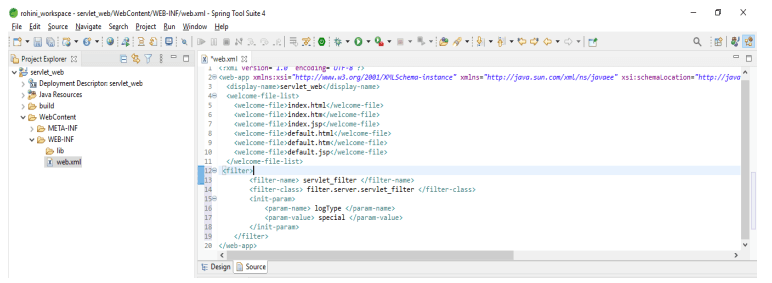
After creating the class now in this step we are adding the filter in the web.xml file as follows.
Code:
<web-app ..... version="3.0">
<display-name> servlet_web </display-name>
<welcome-file-list>
<welcome-file> index.html </welcome-file>
<welcome-file> index.htm </welcome-file>
<welcome-file> index.jsp </welcome-file>
<welcome-file> default.html </welcome-file>
<welcome-file> default.htm </welcome-file>
<welcome-file> default.jsp </welcome-file>
</welcome-file-list>
<filter>
<filter-name> servlet_filter </filter-name>
<filter-class> filter.server.servlet_filter </filter-class>
<init-param>
<param-name> logType </param-name>
<param-value> special </param-value>
</init-param>
</filter>
</web-app>
Output:
Examples
Given below are the examples mentioned:
Example #1
In the below example, we are creating a servlet demo file as follows.
Code:
{
res.setContentType ("text");
PrintWriter pw=res.getWriter();
pw.println("html");
pw.println("servlet");
pw.println("body");
pw.close();
} }
Output:
Example #2
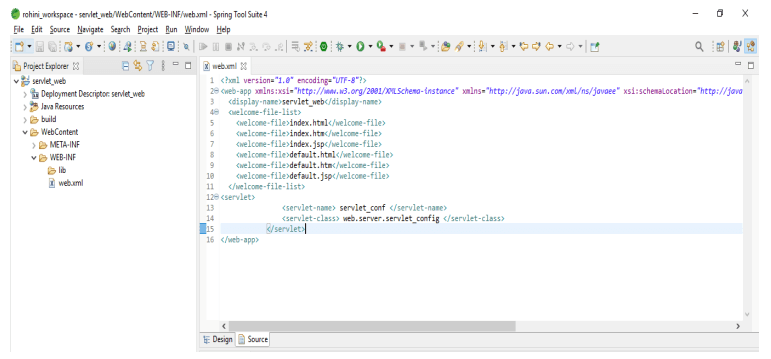
After creating the servlet demo file now in the below example, we are adding the servlet code into the web.xml file as follows.
Code:
<web-app ..... version="3.0">
<display-name> servlet_web </display-name>
<welcome-file-list>
<welcome-file> index.html </welcome-file>
<welcome-file> index.htm </welcome-file>
<welcome-file> index.jsp </welcome-file>
<welcome-file> default.html </welcome-file>
<welcome-file> default.htm </welcome-file>
<welcome-file> default.jsp </welcome-file>
</welcome-file-list>
<servlet>
<servlet-name> servlet_conf </servlet-name>
<servlet-class> web.server.servlet_config </servlet-class>
</servlet>
</web-app>
Output:
Example #3
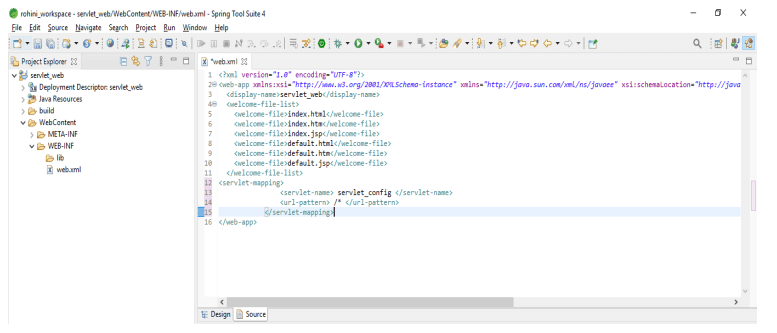
In the below example, we are adding the code of servlet mapping as follows. We are adding the same in the web.xml file.
Code:
<web-app ..... version="3.0">
<display-name> servlet_web </display-name>
<welcome-file-list>
<welcome-file> index.html </welcome-file>
<welcome-file> index.htm </welcome-file>
<welcome-file> index.jsp </welcome-file>
<welcome-file> default.html </welcome-file>
<welcome-file> default.htm </welcome-file>
<welcome-file> default.jsp </welcome-file>
</welcome-file-list>
<servlet-mapping>
<servlet-name> servlet_config </servlet-name>
<url-pattern> /* </url-pattern>
</servlet-mapping>
</web-app>
Output:
FAQ
Given below are the FAQs mentioned:
Q1. What is the use of servlet web.xml file?
Answer: The web.xml file in servlet is used to define the info about the applications. File is used for deploying the java application at runtime.
Q2. What is the use of deployment descriptors in servlet web.xml?
Answer: The deployment descriptor describes the resources, classes, and application configuration, as well as how the web server will serve web requests.
Q3. What is the use of filters in servlet web.xml?
Answer: A filter in server web.xml is simply a class that acts as a servlet request and allows you to handle requests.
Conclusion
Servlet web.xml provides deployment and configuration information for web components that were used to build a web application. It is an application deployment descriptor that describes the classes, configuration, and resources for a web server application that uses server web requests.
Recommended Articles
This is a guide to Servlet web.xml. Here we discuss the introduction, servlet web.xml configuration, filters, examples and FAQ. You may also have a look at the following articles to learn more –

