Introduction to vscode on Ubuntu
Visual Studio Code (VS Code) is a powerful, open-source code editor developed by Microsoft. It’s known for its versatility and support in various programming languages and frameworks. With its user-friendly interface, VS Code offers debugging, syntax highlighting, intelligent code completion, snippets, and code refactoring. It also provides an extensive extension marketplace that allows developers to customize the coding environment to their needs. Installing VS Code on Ubuntu, a widespread Linux distribution, enhances productivity by combining the robustness of Linux with the efficiency of VS Code, making it a preferred choice for developers worldwide.
Table of Contents
Prerequisites
- Ubuntu Version: Ubuntu 16.04 LTS (Xenial) or newer
- System Privileges: You must have administrator privileges.
- Hardware Requirements: While VS Code is lightweight, the recommended hardware for a smooth experience includes:
- A 1.6 GHz or faster processor
- At least 1 GB of RAM
- Minimum 2 GB of disk space for a complete installation
Installing VScode on Ubuntu
1. Using Ubuntu Software Center (GUI)
- Launch the Ubuntu Software Center:
- Click on the Show Applications button at the bottom-left of your screen or press the Super key (key with the Windows logo).
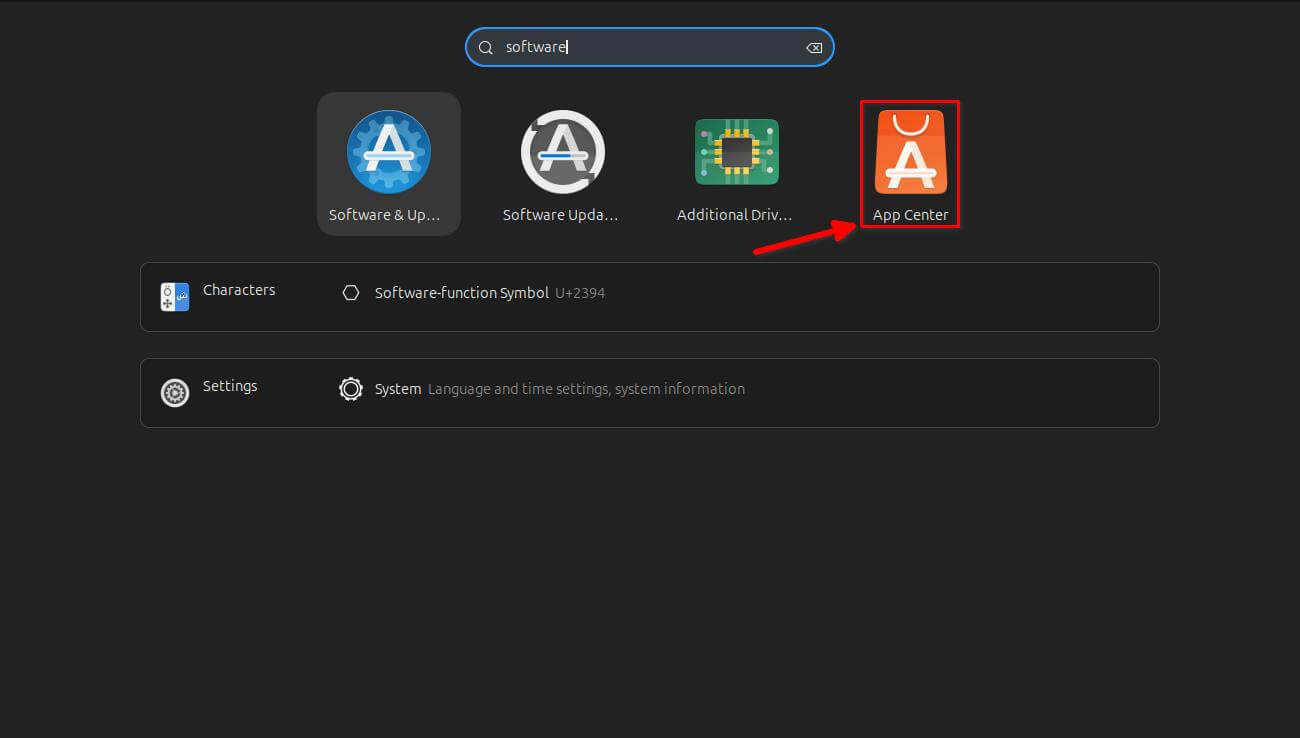
- Type “Software” in the search bar that appears.
- Click on the App Center icon to open the application.
- Once the Ubuntu Software Center is open, click on the search icon (magnifying glass) at the top.
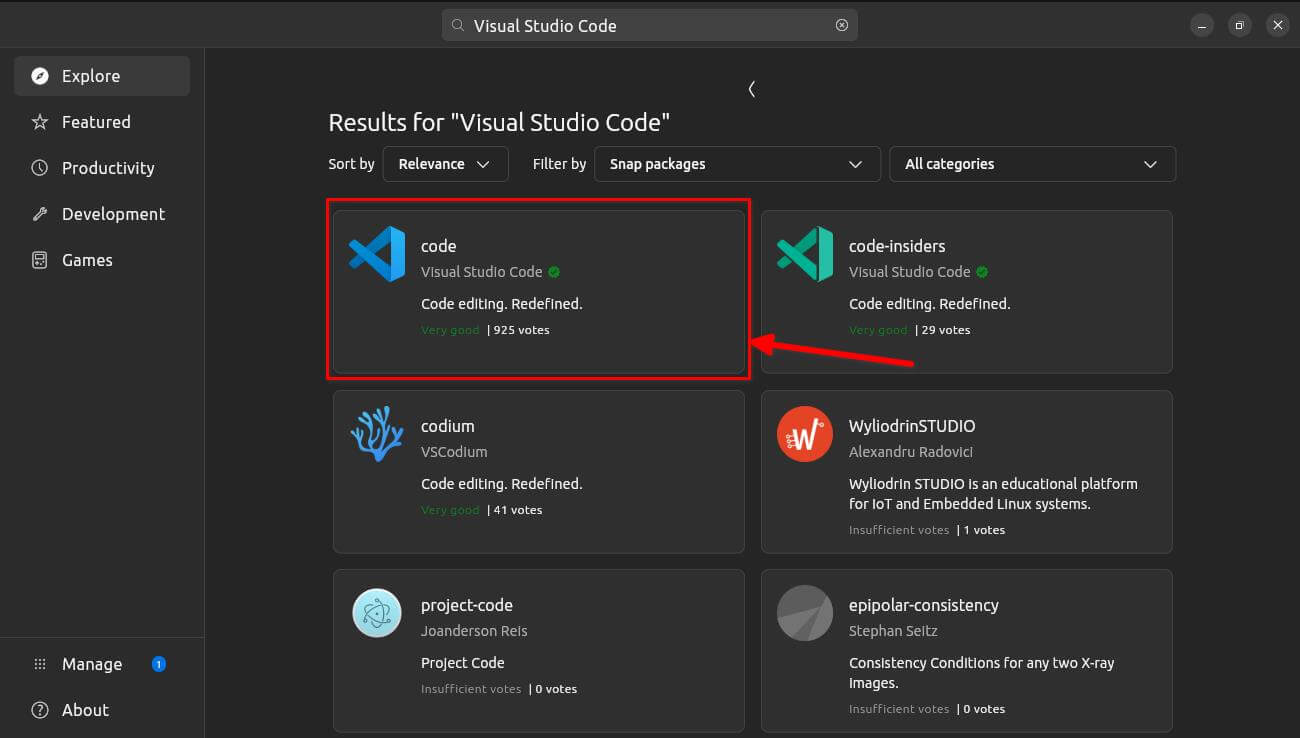
- Type “Visual Studio Code” in search bar and press Enter.
- You should see “code” published by Visual Studio Code in the search results.
- Click on the code entry to view more details.
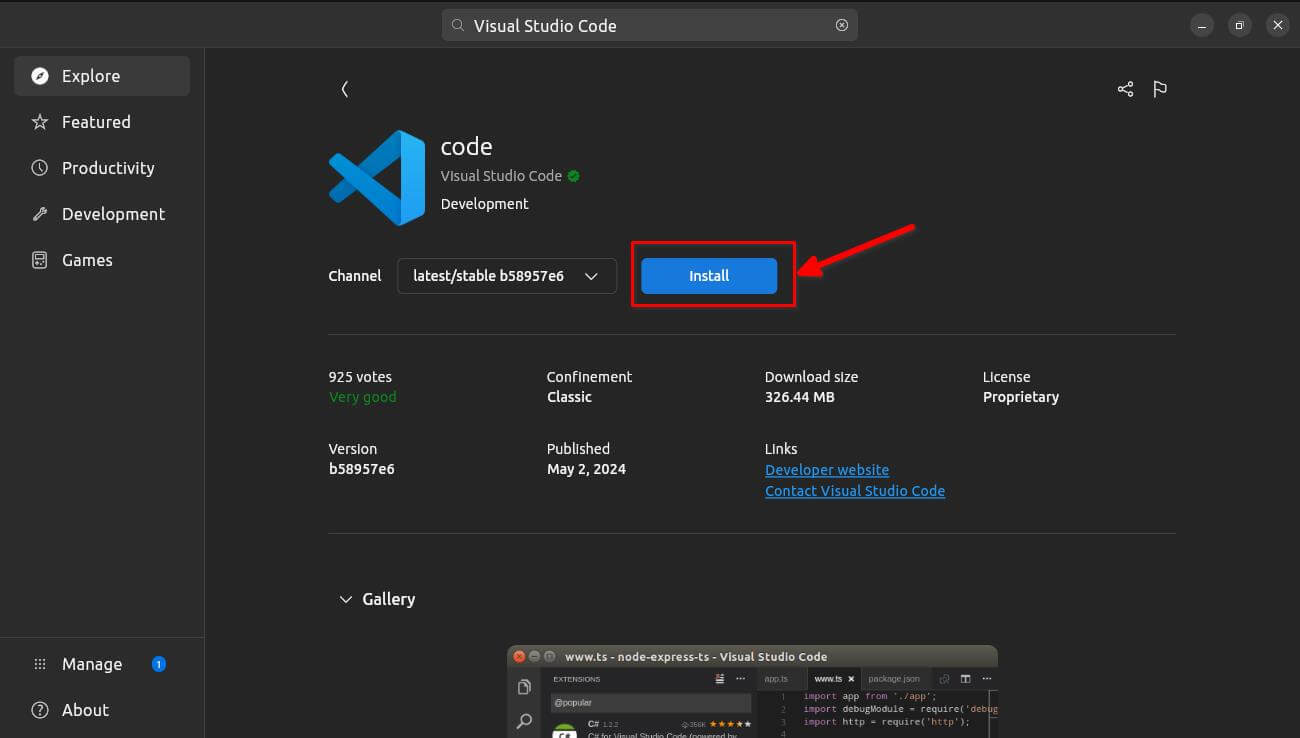
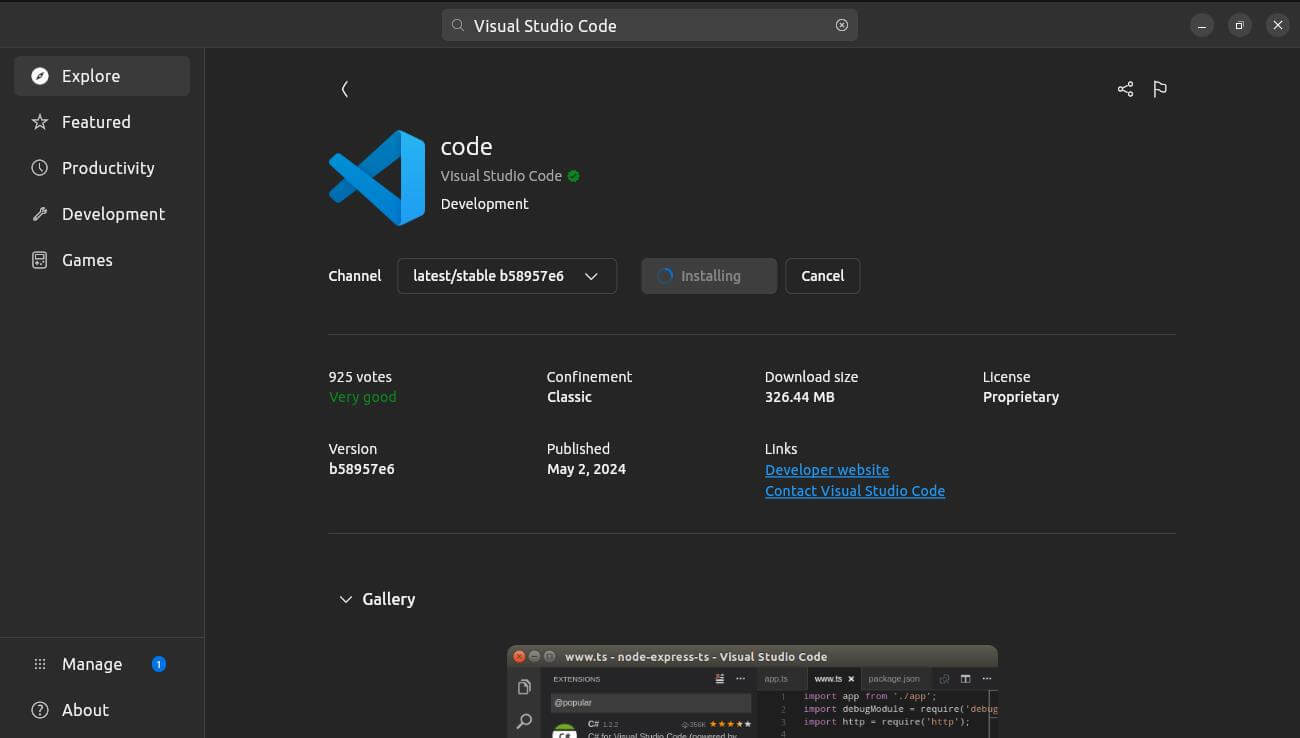
- Click the “Install”
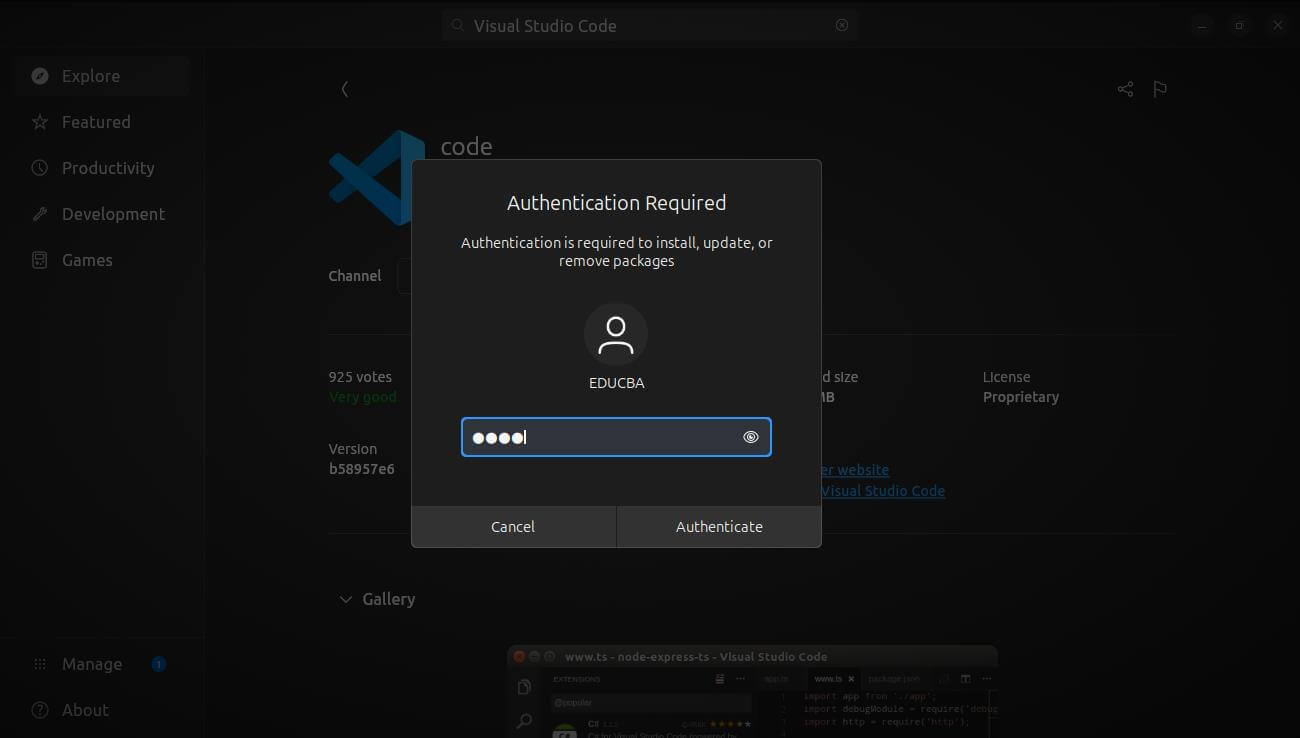
- The installation will prompt you to enter your password to authorize it.
- Wait for the installation process to complete.
2. Using apt package manager (Terminal)
The apt package manager, short for Advanced Package Tool, is a free and user-friendly tool designed to handle software installation, updating, and removal on Debian-based systems like Ubuntu. It simplifies managing software packages, ensuring that your system has the latest versions and that all dependencies are satisfied.
- Update Package Repositories: Open the terminal and run the following command to update the list of available packages and their versions:
- sudo apt update
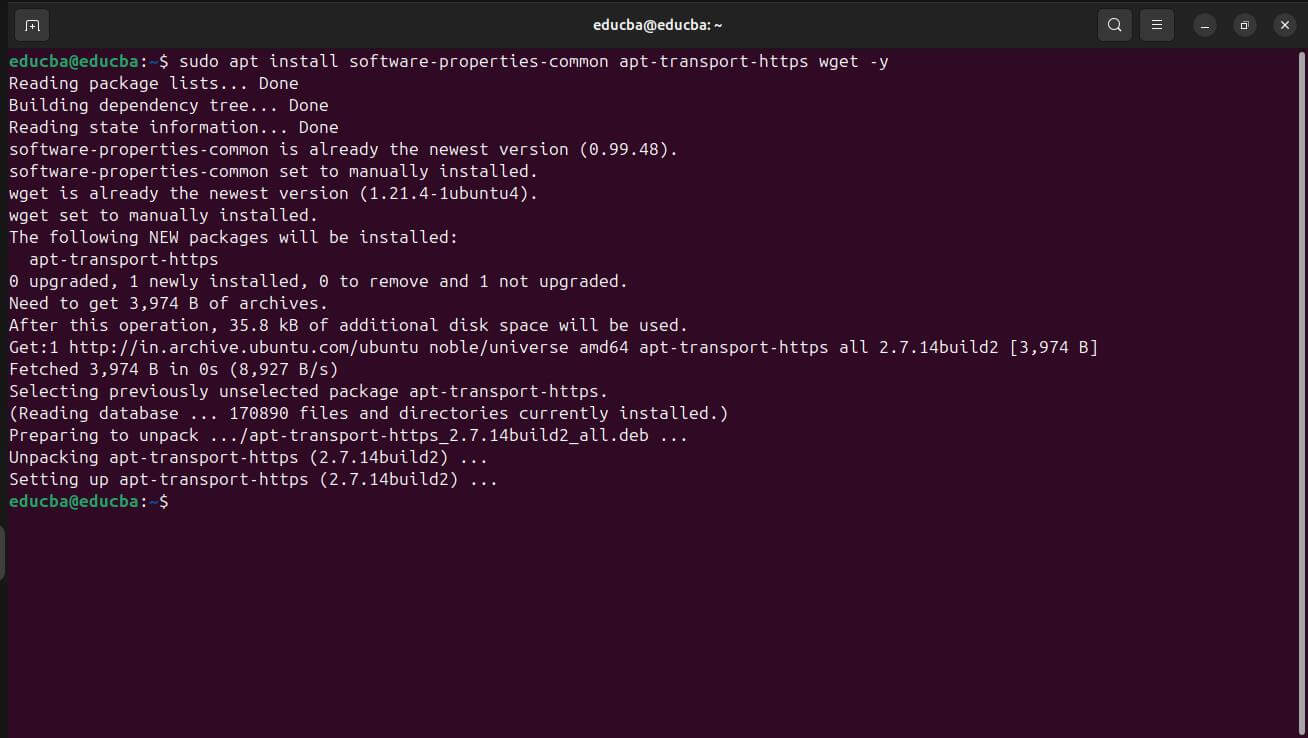
- Install Required Dependencies: Before adding the Microsoft repository, you need to install dependencies that allow apt to use packages over HTTPS:
- sudo apt install software-properties-common apt-transport-https wget -y && sudo apt-get install wget gpg
- Add the Microsoft Repository GPG Key: Import the Microsoft GPG key to verify VS Code package’s legitimacy:
- wget -qO- https://packages.microsoft.com/keys/microsoft.asc | gpg –dearmor > packages.microsoft.gpg && sudo install -D -o root -g root -m 644 packages.microsoft.gpg /etc/apt/keyrings/packages.microsoft.gpg
- echo “deb [arch=amd64,arm64,armhf signed-by=/etc/apt/keyrings/packages.microsoft.gpg] https://packages.microsoft.com/repos/code stable main” |sudo tee /etc/apt/sources.list.d/vscode.list > /dev/null && rm -f packages.microsoft.gpg
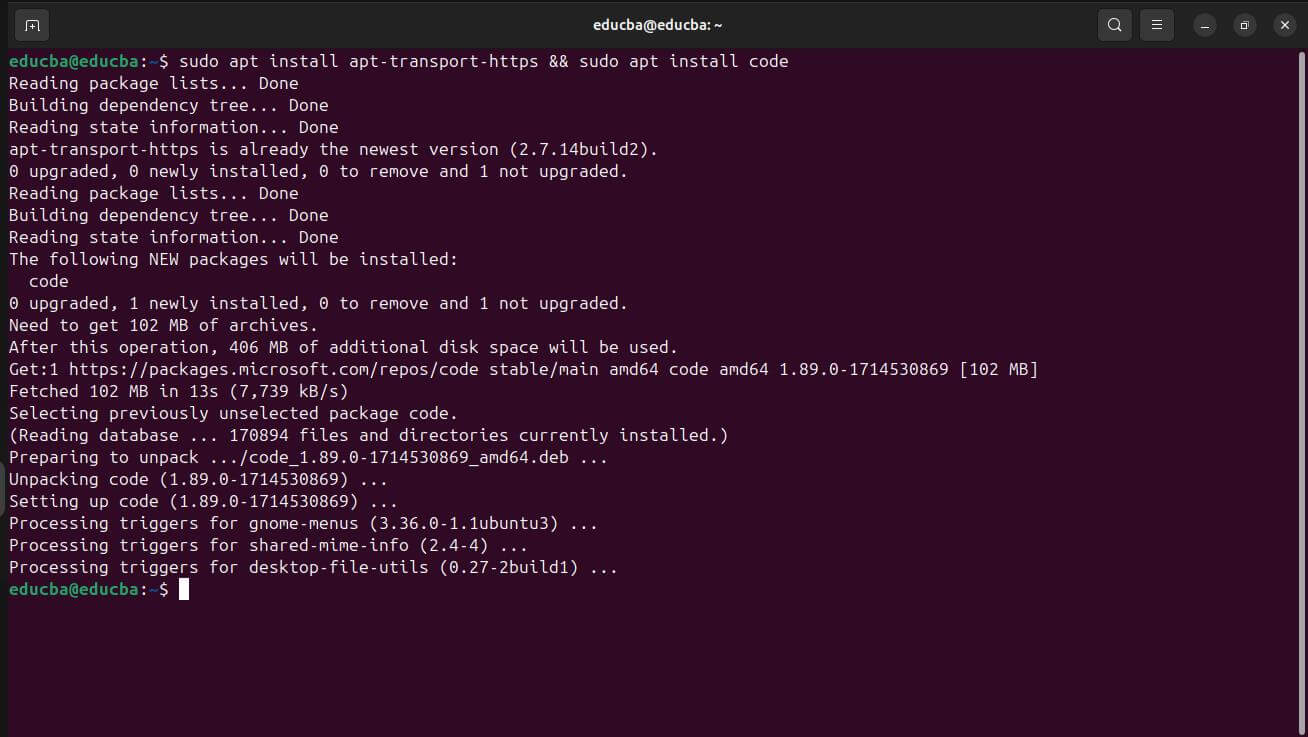
- Install VS Code: Update the package cache once again after adding the new repository, and then install VS Code:
- sudo apt install apt-transport-https && sudo apt update && sudo apt install code
3. Using Snap package (Terminal)
Snap packages are a modern form of software packaging and distribution developed by Canonical, the company behind Ubuntu. They encapsulate an application and all its dependencies in a single package, making it easy to install on any Linux distribution that supports Snap packages. This guarantees that the program functions uniformly on various systems. Snaps are also automatically updated and offer better security through sandboxing, which isolates them from the rest of the system.
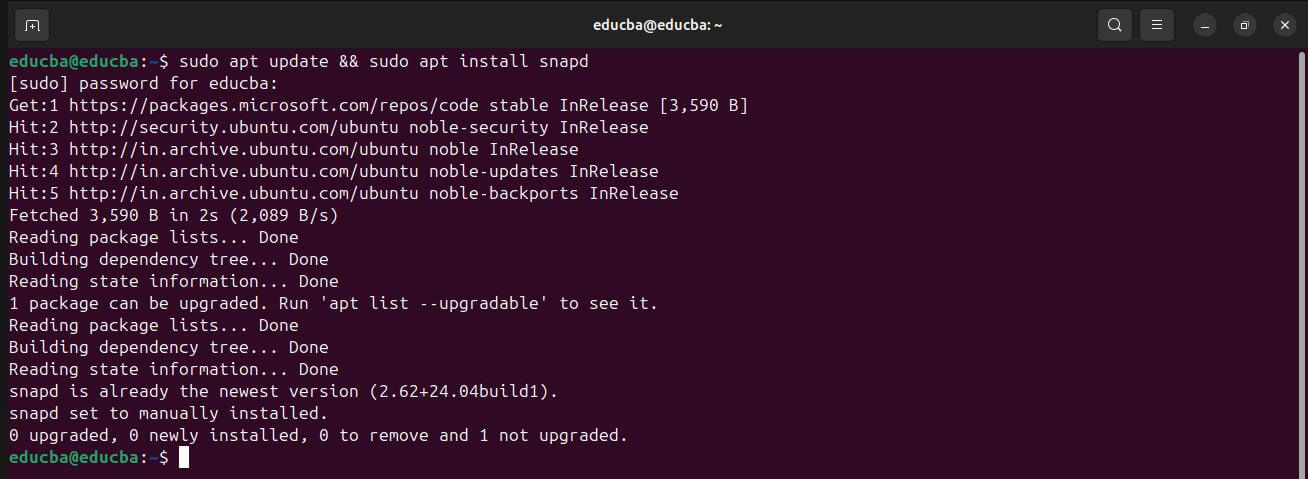
- Installing the snapd Tool: If snapd is not already installed on your Ubuntu system, Use the following command in the terminal to install it:
- sudo apt update && sudo apt install snapd
- Installing VS Code Using Snap: With snapd installed, you can now install Visual Studio Code by running the following command in the terminal:
- sudo snap install –classic code
- To install VS Code, you must use the –classic flag because it requires access to system files and resources outside the typical Snap package sandbox. Once you install it, snapd will manage VS Code and provide automatic background.
Verifying Installation
- From the Application Menu:
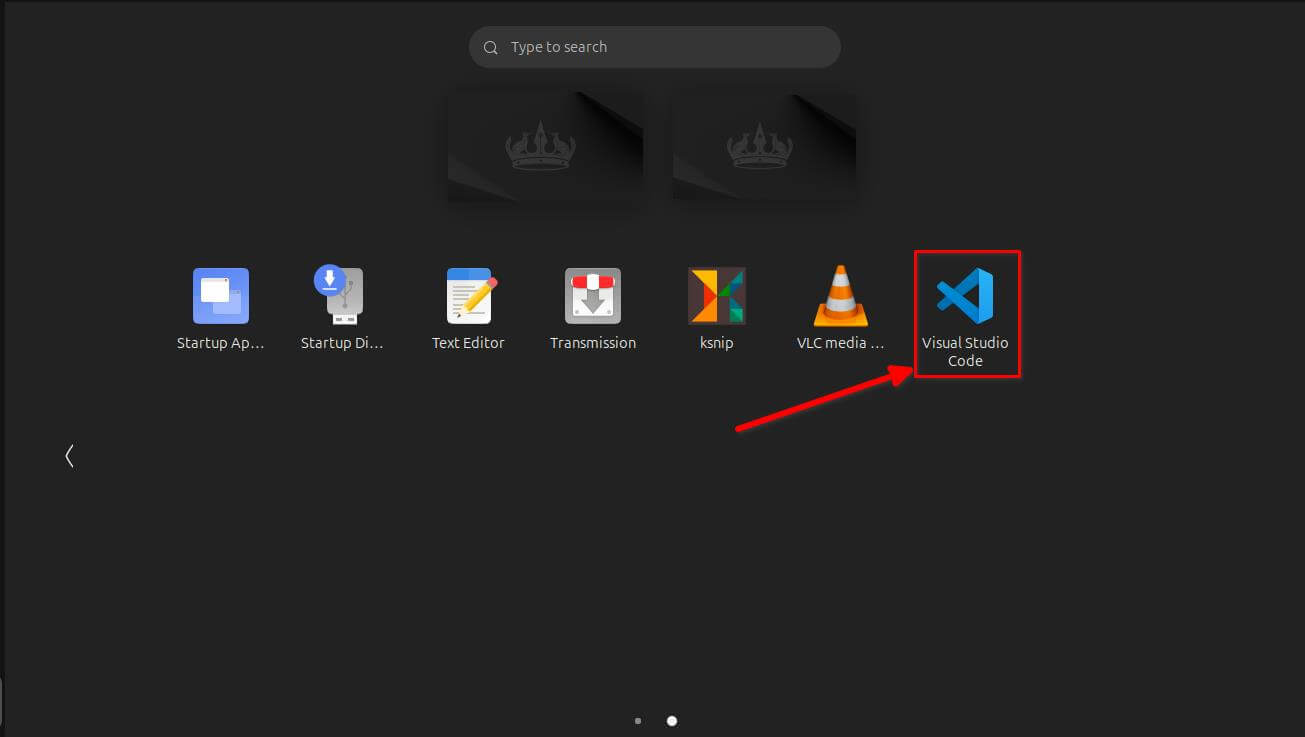
- To launch Visual Studio Code from the application menu, click on the “Show Applications” icon in the bottom-left corner of the Ubuntu desktop.
- Find and click on the icon named “Visual Studio Code”.
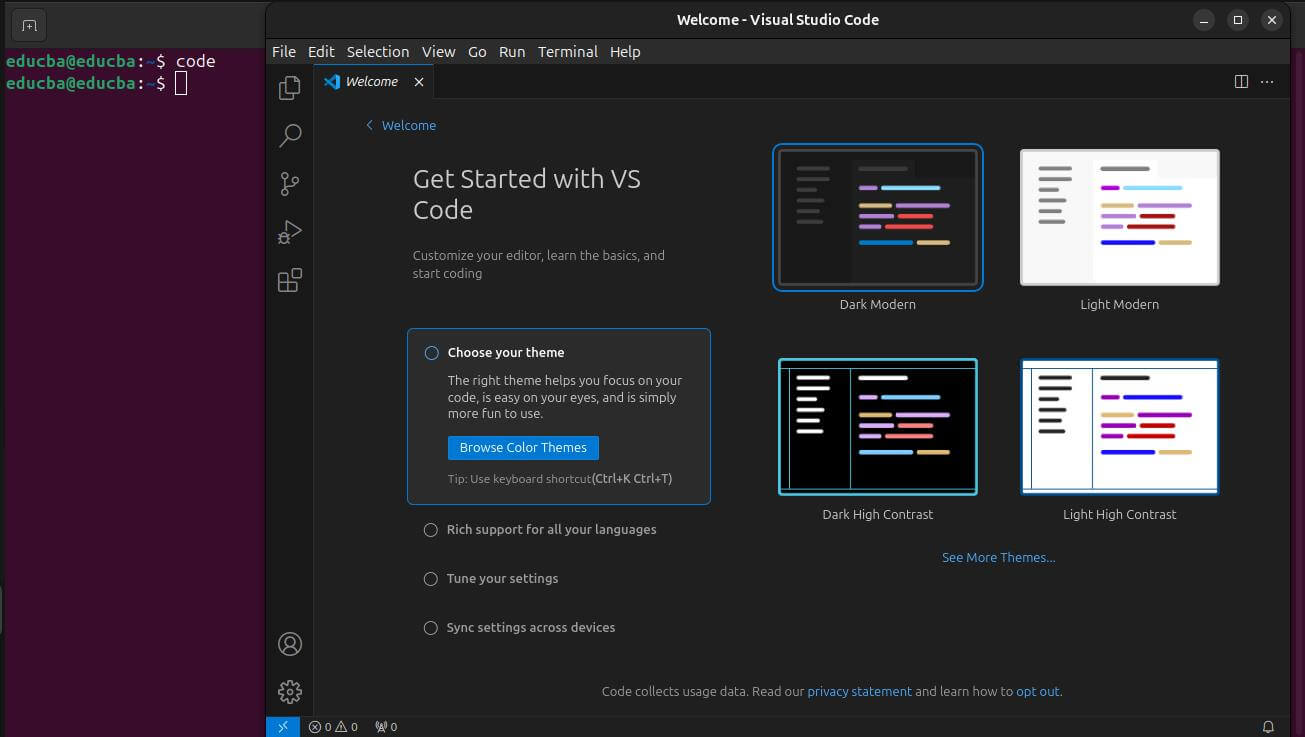
From the Terminal:
- Open the terminal.
- Type code and press Enter.
Post-Installation Steps
Installing Popular Extensions: Extensions enhance the functionality of VScode on Ubuntu. Here are some popular ones for different programming languages:
- Python: Microsoft’s Python extension provides IntelliSense, linting, debugging, code navigation, code formatting, Jupyter Notebook support, refactoring, variable explorer, test explorer, and more.
- JavaScript/TypeScript: ESLint helps you find and fix problems in your JavaScript/TypeScript codePrettier is an opinionated code formatter that parses your code and reprints it using its own rules, enforcing consistency in style.
- C/C++: Microsoft’s C/C++ extension includes IntelliSense, debugging, and code browsing.
- Java: Java Extension Pack by Microsoft bundles popular extensions for Java development, including language support, debugging, testing, and Maven project support.
- HTML/CSS: Live Server launches a local development server with a live reload feature for static and dynamic pages.
- Git: GitLens supercharges the Git capabilities built into VS Code. allows you to quickly see who wrote the code using Git blame annotations and code lens, navigate seamlessly and investigate Git repositories, learn insightful things with strong comparison commands, and much more.
To install an extension:
- Click on the Extensions view icon on the Sidebar or press Ctrl+Shift+X.
- Search for extension you want to install.
- Click Install.
Troubleshooting Common Issues
- Installation Fails Due to Package Dependency Issues: This can sometimes happen if there are conflicts with existing packages or missing dependencies. Run the following command in the terminal to update package lists and attempt to resolve dependencies:
- sudo apt update && sudo apt –fix-broken install
- code” Command Not Working in Terminal: If the code command isn’t working after installation, it might be a path issue. Try restarting your terminal session or opening a new one. Alternatively, you can launch VS Code from the Applications menu and check if the terminal within VS Code recognizes the code.
- Slow Performance: Users may experience sluggish performance or freezing issues with Visual Studio Code, especially on older hardware. Please disable unnecessary extensions or themes that may be causing performance issues. Additionally, consider optimizing your system resources by terminating other running applications in the background.
Completely Uninstall Visual Studio Code
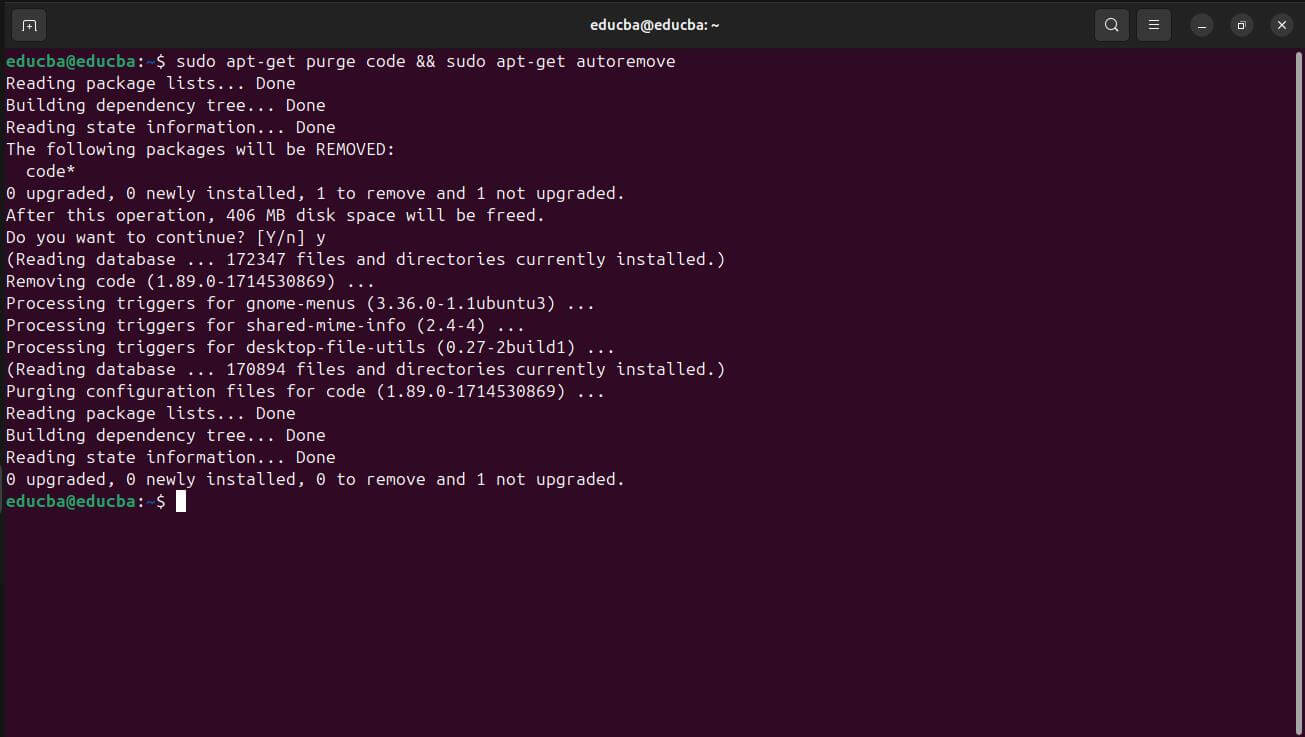
- If you installed VS Code using apt, run the following commands in the terminal:
- sudo apt-get purge code && sudo apt-get autoremove
- If you installed VS Code using snap, use this command instead:
- snap remove code
- Remove Configuration Files: After uninstalling VS Code, remove the configuration files to clean up all user data. Run these commands:
- rm -rf ~/.config/Code && rm -rf ~/.vscode
Conclusion
Installing Visual Studio Code on Ubuntu offers developers a powerful and versatile tool for coding across various programming languages. It provides a user-friendly interface, extensive customization options, and an ecosystem of extensions to enhance productivity and streamline development workflow. While its installation is straightforward, it provides a gateway to many features and extensions tailored to improve productivity.
Frequently Asked Questions (FAQs)
Q1. What method do you recommend for installation?
Answer: For beginners, The Ubuntu Software Center method offers a user-friendly graphical interface for a straightforward installation. For more control, the apt package manager method provides more control over the installation process and allows for easier updates in the future. For self-contained packages, the snap package method offers easy installation and automatic updates but might have slightly slower startup times.
Q2. How do I update VS Code after installation?
Answer: To update, run this command in the terminal: sudo apt update && sudo apt upgrade code. For snap installations: Snapd automatically updates VS Code snap packages in the background. For Software Center installations: The Software Center will notify you about available updates for VS Code. You can also check for updates within the VS Code application itself.
Q3. Can I install VS Code on a server without a graphical interface?
Answer: Yes, you can install VS Code on a headless Ubuntu server using the apt method from the terminal. The steps are similar to those mentioned in the guide, but you won’t be able to launch VS Code directly through the graphical interface. You can still manage VS Code and launch it remotely using tools like SSH.
Q4. Can I collaborate with others using Visual Studio Code on Ubuntu?
Answer: Yes, Visual Studio Code supports collaboration features through extensions like Live Share. These allow multiple developers to edit and debug code in real-time, regardless of their operating system.

