Introduction
Dual-booting is a powerful process that allows you to install two operating systems (OS) on a single computer, allowing you to choose which one to boot into. It’s like having two separate computers in one, each with its unique strengths. This setup is beneficial for users who need the reliability and extensive software library of Windows 10 while also enjoying the flexibility and open-source nature of Ubuntu 24.04. By dual-booting, you can leverage the strengths of both platforms, whether it’s for software development, testing, or to enjoy a broader range of applications and games. It also serves as a safety net; you can still boot into the other if one system fails, giving you peace of mind.
Table of Contents
Preparation
Check system requirements
To ensure a smooth installation, your system should meet the following requirements:
- RAM: At least 4 GB
- Processor: 2 GHz dual-core or better
- Storage: At least 128 GB of hard drive space
- USB Drive: A USB drive with at least 8 GB of storage
Backup your data
Dual-booting requires adjusting disk partitions, which carries a minor risk of data loss. Therefore, backing up your data before starting the installation process is essential. You can do this by:
- Copying files to an external hard drive or cloud storage.
- Creating a system image for a complete backup.
- Ensuring you have a recovery option in case any issues arise during the installation.
Download the Ubuntu 24.04 ISO file.
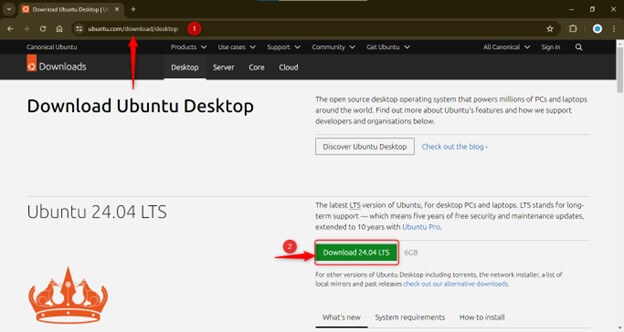
Head over to the official Ubuntu website ubuntu/download/desktop and download the latest ISO file for Ubuntu 24.04.
Create a bootable USB drive.
To create a bootable USB drive for Ubuntu 24.04, you can use specific tools like Rufus (for Windows) or Etcher (for macOS and Linux). These tools have been designed to simplify the process and ensure a successful bootable drive creation.
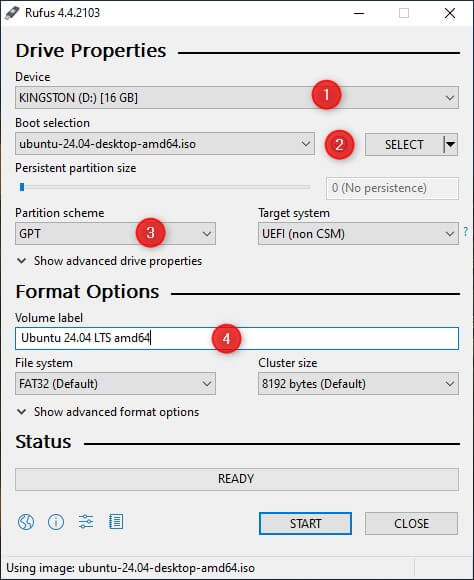
We’ll be using Rufus to create a bootable USB drive.
- Plug in your USB and open Rufus.
This is your bootable USB drive.
- Click on “Select” and choose the downloaded Ubuntu ISO file.
- Set the partition scheme to GPT (GUID Partition Table).
- The volume label is optional, but you can name it.
- Click on “START” to initiate creating a bootable USB drive.
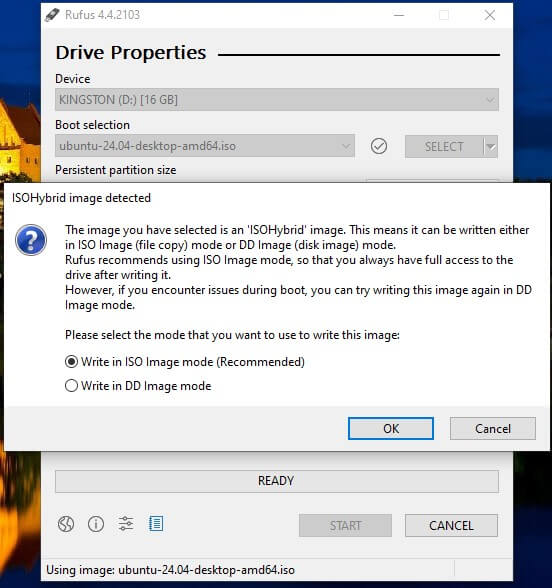
- Select “Write in ISO Image mode” and click OK.
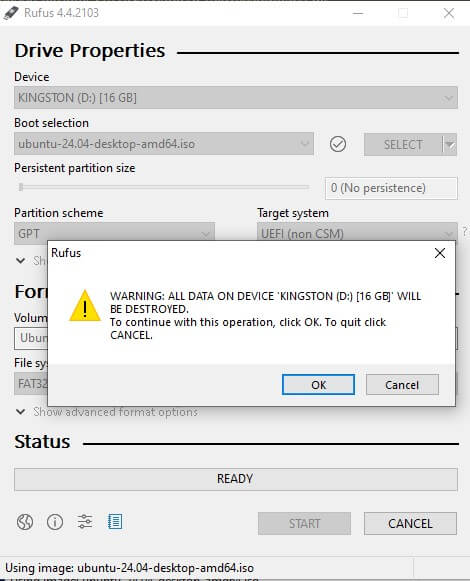
- You will receive a warning indicating that all data on the USB drive will be erased. Click “OK” to proceed.
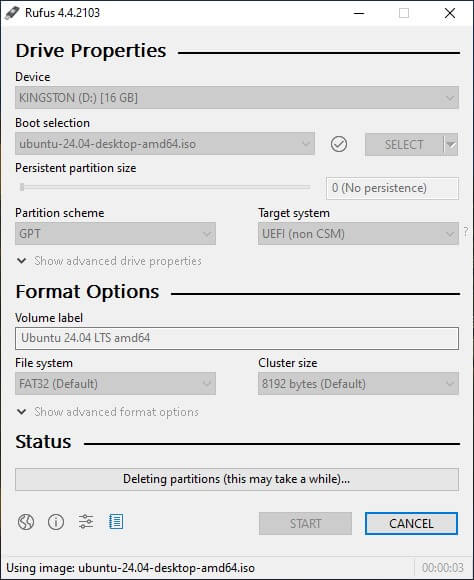
- The process will begin and may take some time to complete, depending on the speed of your USB drive.
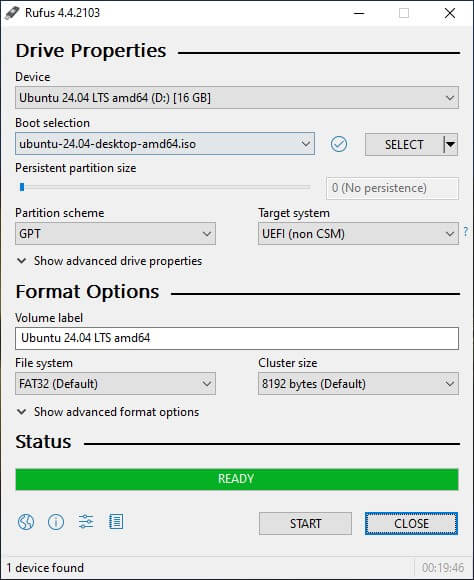
- Rufus will display “READY” if the creation of the USB bootable drive was successful.
Ensuring UEFI is enabled
To ensure UEFI is enabled for dual-booting, follow these steps:
- Access your system’s UEFI/BIOS settings during startup by pressing a key like F2, Del, or Esc.
- Disable ‘Legacy Boot’ and enable ‘UEFI Mode.’
- If you encounter issues during the Linux installation, ensure ‘Secure Boot’ is disabled, as it may prevent unauthorized operating systems from booting.
Partitioning
Let’s Understand disk partitioning
Comprehending disk partitioning entails dividing your hard drive into distinct sections, referred to as partitions, each capable of independent formatting and utilization. When setting up a dual-boot system with Windows 10 and Ubuntu 24.04, it’s imperative to allocate space for both operating systems on your hard drive. A grasp of disk partitioning enables efficient storage management and minimizes the risk of data loss during installation.
Shrink Windows partition
Before installing Ubuntu, you need to shrink the existing Windows partition to create free space for Ubuntu. To avoid potential issues, it is best to use the Windows Disk Management tool.
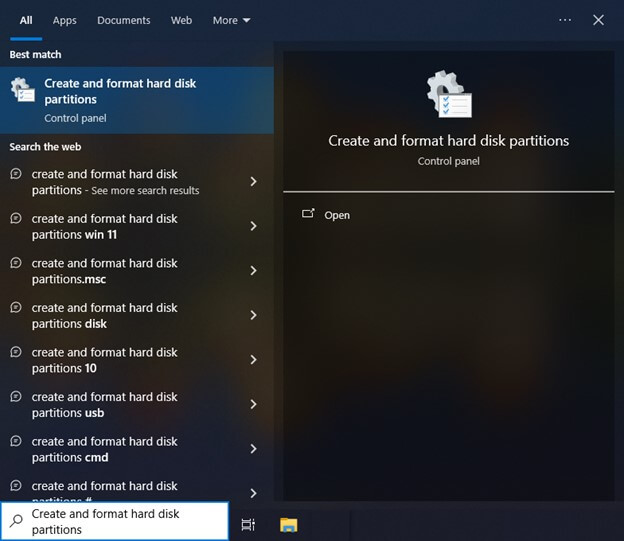
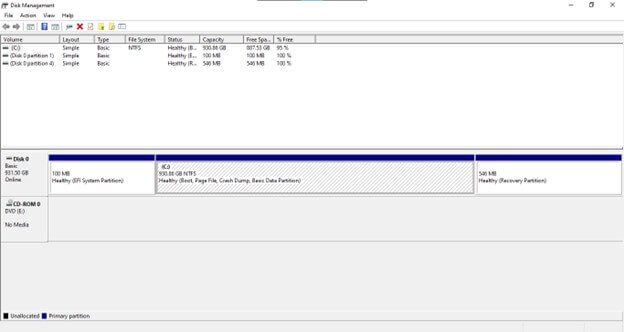
- To access Disk Management in Windows, search for “create and format hard disk partitions.”
- Opening the “create and format hard disk partitions” tool will launch the Disk Management window.
- To create unallocated space for Ubuntu, follow these steps:
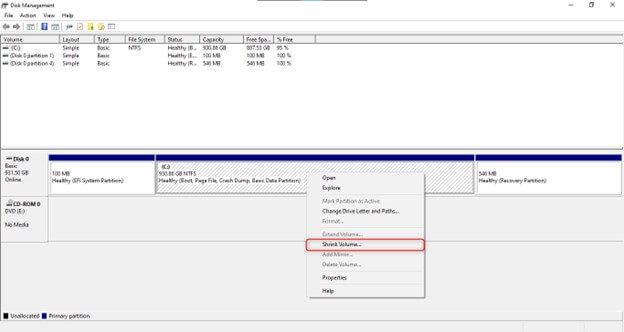
- Right-click on the Windows partition (usually C:) and select ‘Shrink Volume.’ This action will commence the process of resizing the partition to free up space for Ubuntu.
- Remember, the objective is to create sufficient unallocated space to accommodate Ubuntu without compromising the performance of your Windows system.
- You can shrink any volume on your disk to create the necessary unallocated space for Ubuntu. The primary aim is to generate space specifically designated for Ubuntu’s installation.
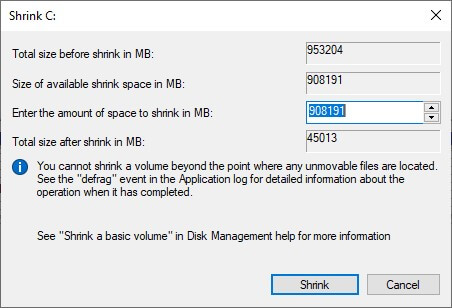
- When you click “Shrink Volume,” a new popup window will appear
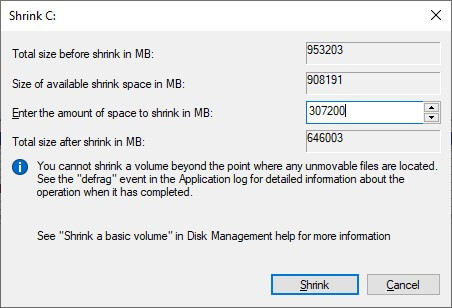
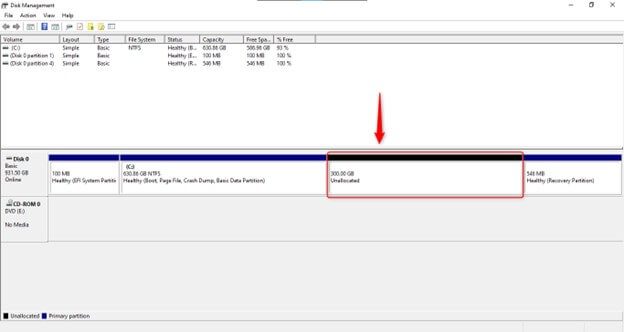
- To allocate 300GB for Ubuntu, follow these steps:
- Convert 300GB to MB: 1 GB = 1024 MB, so 300 GB = 307200 MB.
- Subtract 307200 MB from the total available space on the partition, typically shown in MB. For example, if you have 953204 MB available, subtract 307200 MB from it.
- The resulting value will be the amount of space you shrink from the partition. This will become an ‘Unallocated’ space, which you can then use to install Ubuntu.
- Shrink the volume to proceed.
- We are to leave the space unallocated because Windows uses NTFS (New Technology File System), and Ubuntu uses EXT4 (fourth extended file system). When you install Ubuntu, it will automatically format the unallocated drive into the EXT4 file system.
BIOS/UEFI Settings
Accessing BIOS/UEFI Settings:
Using Windows Settings:
- Go to Settings > Update & Security > Recovery.
- Under “Advanced startup,” click the Restart Now button.
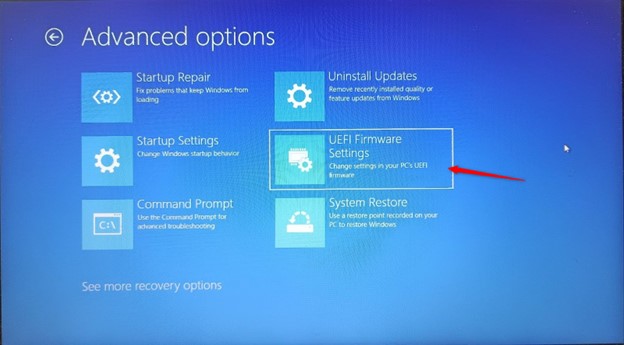
- Once the system restarts, go to Troubleshoot > Advanced Options > UEFI Firmware Settings.
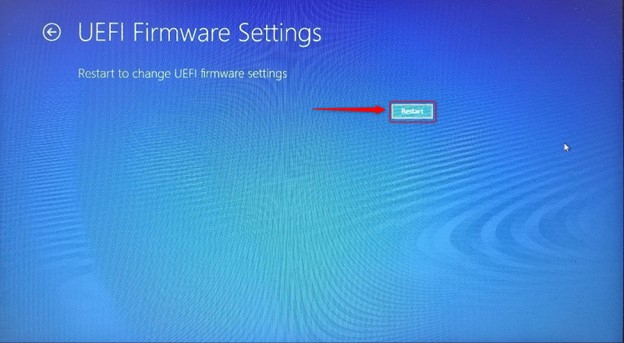
- Click on “Restart” to enter the BIOS/UEFI settings.
Using Boot Key:
Restart your computer and repeatedly press the “Del” key to enter the BIOS/UEFI. This key is often displayed during the boot process and can be Esc, Delete, or one of the Function keys (F1, F2, F10).
To change the boot order:
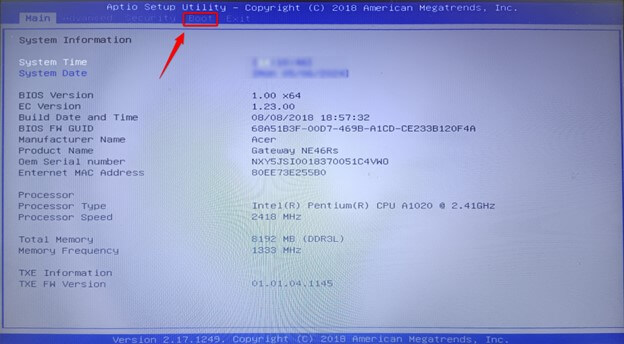
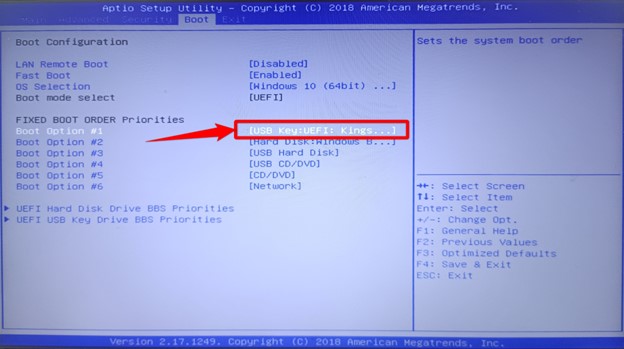
- Look for the Boot tab or menu once you’re in the BIOS/UEFI settings.
- Navigate to the Boot section using the arrow keys.
- You will see a list of bootable devices. Use the + or – keys, or follow on-screen instructions, to adjust the order of the devices.
- Place the USB drive or DVD containing Ubuntu 24.04 at the top of the list to prioritize booting from it.
- Save changes and exit the BIOS/UEFI by pressing the F10 key, then selecting Yes to confirm.
Installing Ubuntu
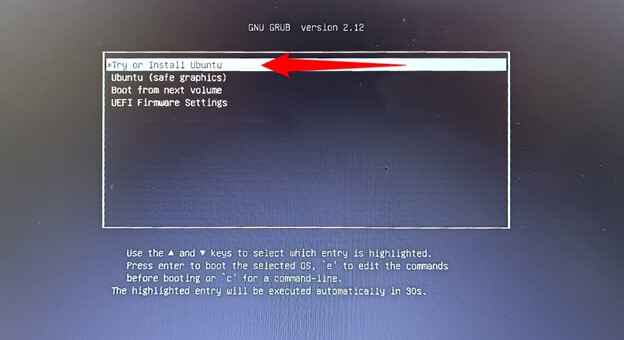
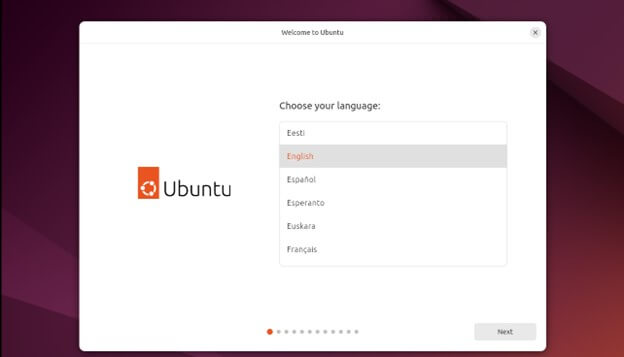
- Upon booting from the USB, the Ubuntu installation wizard will welcome you.
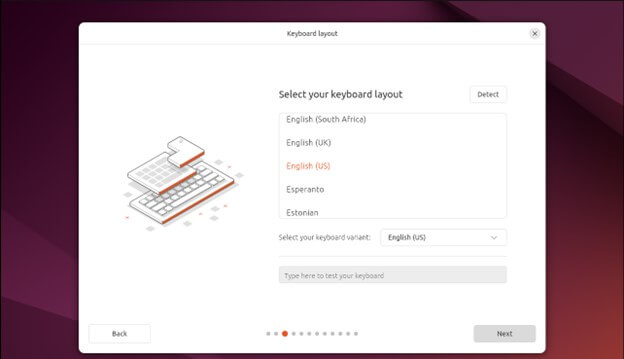
- Choose the installation language and keyboard layout.
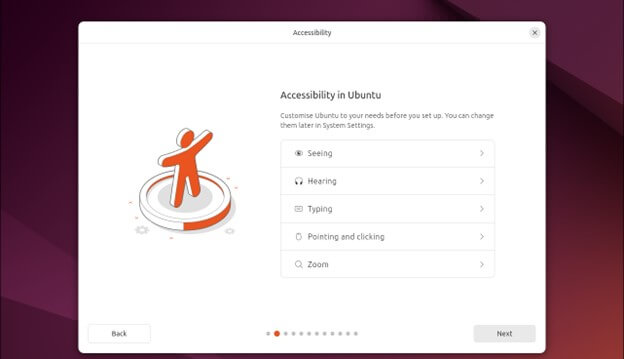
- Ubuntu 24.04 has introduced new accessibility options with improved accessibility features, addressing a community request for easier access.
- Choose the keyboard layout that suits your preferences.
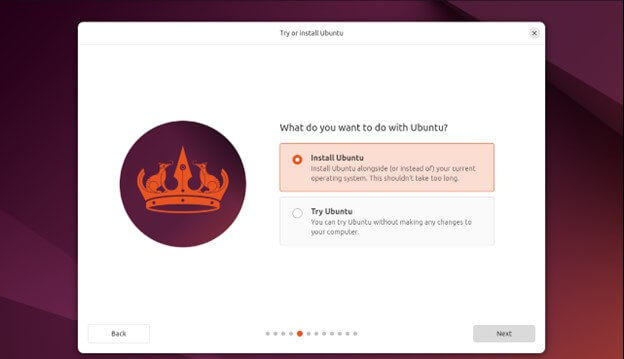
- Welcome screen options
- Try Ubuntu: This option enables you to run Ubuntu directly from the USB drive without installing it. It’s useful for testing Ubuntu or accessing files on your computer before committing to an installation.
- Install Ubuntu: Choose this option to initiate the installation process. It will guide you through installing Ubuntu 24.04 on your computer’s hard drive.
Click on Install Ubuntu
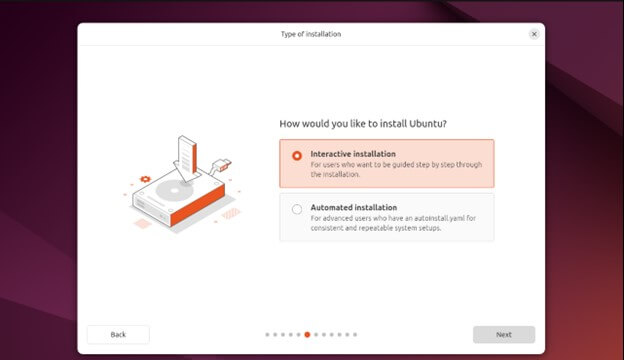
- Type of installation
- Interactive Installation: This traditional method involves the installer guiding you through each step, simplifying the setup process for Ubuntu.
- Automated Installation: This method utilizes a pre-configured file (YAML) to automate the installation without user interaction. It’s ideal for deploying Ubuntu on multiple machines with identical configurations rapidly.
Select Interactive Installation
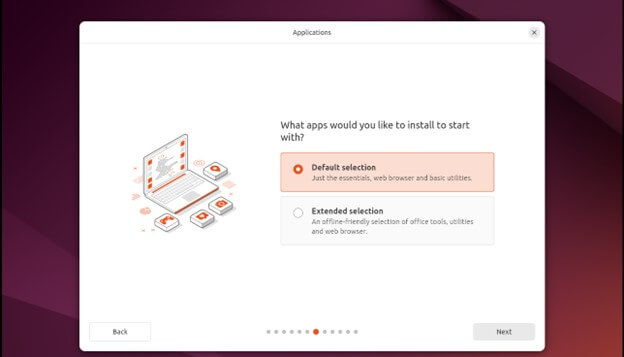
- Applications
- Default selection (previously Minimal): This option provides a leaner installation, perfect for users who prefer a base system with minimal overhead.
- Extended selection (previously Normal): This option offers a more comprehensive installation tailored for everyday use. It includes commonly used applications such as LibreOffice (office suite), Thunderbird (email client), and essential utilities.
Click Extended Selection
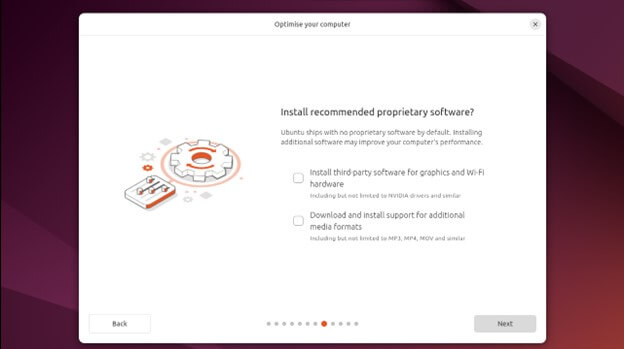
- Check both options and click “Next” to proceed.
- Select “Install alongside Windows Boot Manager” from the installation options. This choice will automatically utilize the unallocated partition on your hard drive to install Ubuntu 24.04 alongside Windows.
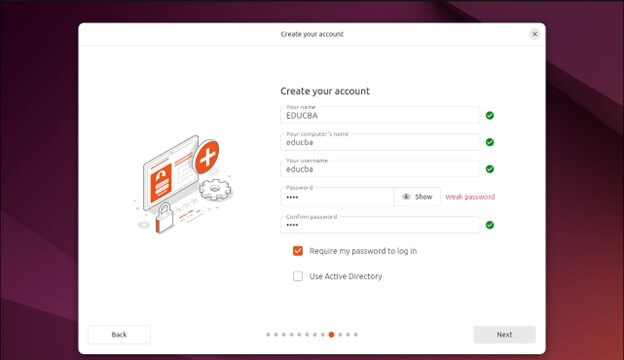
Next, you’ll need to create a user account:
-
- Your Name: Enter your full name or a desired username for your account.
- Choose a computer name: This will be your computer’s name on the network.
- Pick a password: Create a strong password for your account.
- Click “Next” to proceed.
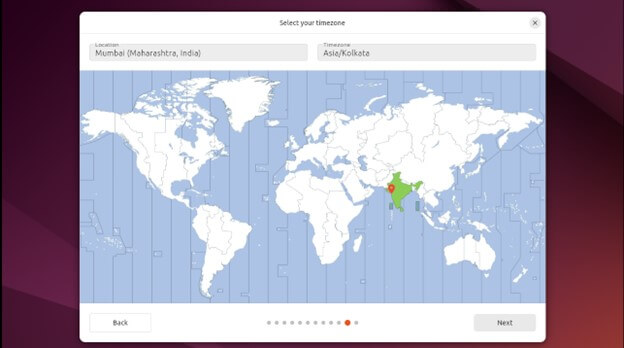
- Finally, select the timezone.
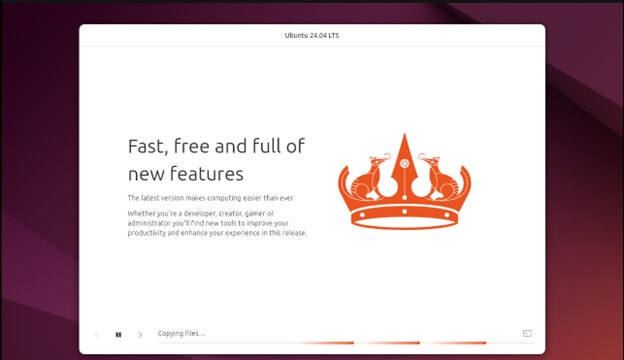
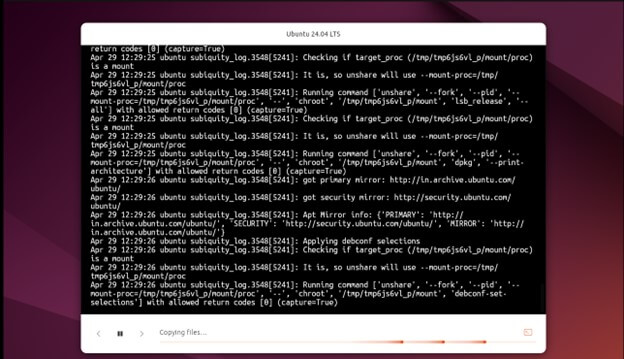
- Click “Next” to commence the installation process.
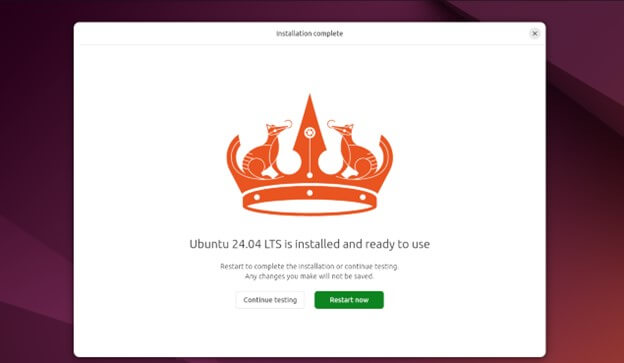
- Once the installation is complete, you need to restart the system.
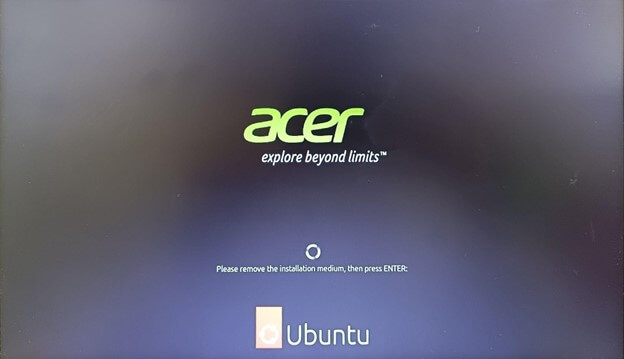
- Remove the installation media (USB drive) and press Enter when prompted.
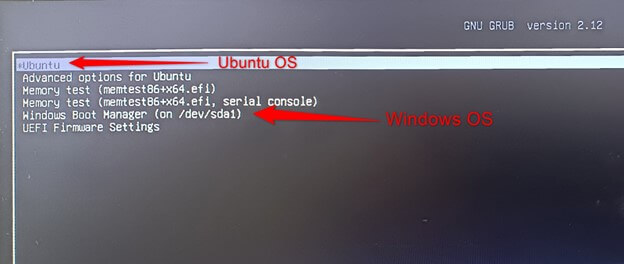
- Your system will reboot, and you should see the GRUB menu, which enables you to choose between Ubuntu and Windows.
To boot into Ubuntu:
- In the GRUB menu, select Ubuntu.
- Press Enter to initiate the boot process into your new Ubuntu installation.
Please note that the system may take longer to set up during the first boot.
Post-Installation
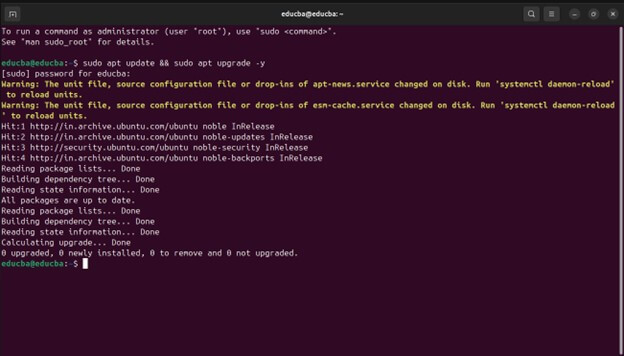
- After logging in, it’s advisable to check for updates and install drivers if necessary. Open the Terminal in Ubuntu and enter the following command:
- sudo apt update && sudo apt upgrade -y
This command will update your system and install any available updates.
- sudo apt update && sudo apt upgrade -y
Grub Boot Loader
The GRUB (GRand Unified Bootloader) is a crucial component in a dual-boot system.
- What is GRUB? GRUB is the bootloader that Ubuntu uses to manage the dual-boot process. It’s the first screen you see after the BIOS/UEFI handoff, and it lets you choose which OS to boot into.
- Why GRUB?: It’s highly customizable and supports multiple operating systems, making it ideal for dual-boot setups.
Configuring Grub Settings
- Accessing GRUB: In Ubuntu, GRUB settings can normally be accessed and modified through the /etc/default/grub file.
- Editing GRUB: To edit this file, you should use text editors like nano or vi with root permissions, for example:
- sudo nano /etc/default/grub
Customizing Grub
- Customizing GRUB: You can set the default OS, change the menu timeout, and add custom boot parameters.
- Updating GRUB: After making changes, you need to update GRUB for them to take effect:
- sudo update-grub
Testing Boot Options for Windows and Ubuntu
- Reboot your system to apply the changes.
- Upon reboot, the GRUB menu should appear, displaying the list of available operating systems.
- Use the arrow keys to navigate and select either Windows or Ubuntu.
- Press Enter to boot into the selected operating system.
- Verify that both operating systems boot correctly without encountering any errors.
Tips for Switching Between Operating Systems Smoothly
- Fast Startup: Disable Windows’ Fast Startup feature, as it can interfere with the ability to mount Windows partitions in Ubuntu.
- Time Sync: Ensure that you set both OSs to the same time zone and configure Ubuntu to use local time if Windows not set to UTC.
- System Updates: Keep both systems updated to avoid security issues and ensure compatibility.
- Shared Data: Use a separate NTFS partition for data you want to access from both operating systems.
Conclusion
Dual-booting Windows 10 and Ubuntu 24.04 provides a versatile computing environment suitable for various needs. Whether for development, security, or educational purposes, this setup enables users to harness the strengths of both operating systems. By following the step-by-step process outlined for preparing, partitioning, and installing both operating systems, along with troubleshooting common issues, users can create a flexible and efficient computing environment tailored to their requirements.
Frequently Asked Questions (FAQs)
Q1. Will dual-booting affect the performance of my computer?
Answer: When properly configured, dual-booting typically does not significantly impact system performance. However, it’s essential to allocate sufficient resources and disk space to each operating system to ensure optimal performance.
Q2. Can I resize partitions after dual-booting Windows and Ubuntu?
Answer: Yes, you can resize partitions after dual-booting to allocate more space to the operating system or create additional partitions for data storage.
Q3. Can one of the operating systems be removed after dual-booting?
Answer: Yes, you can remove one of the operating systems from a dual-boot setup by deleting its partition and modifying the bootloader configuration accordingly. However, this process may result in data loss, so it’s crucial to back up your data before proceeding.
Q4. What if I run out of space on my hard drive?
Answer: If you underestimated the disk space needed for Ubuntu, you can try expanding the Ubuntu partition using a partition editor (Gparted), but only if there’s unallocated space available on your drive. Shrinking existing partitions to make space is riskier and should be done with caution and backups in place.
Recommended Article
We hope that this EDUCBA information on “How to dual boot Windows 10 Ubuntu 24.04” was beneficial to you. You can view EDUCBA’s recommended articles for more information.

