Integration of Jira and Salesforce
Integrating Jira and Salesforce is a game-changer for businesses aiming to improve collaboration and streamline workflows. Jira, widely used by development teams for project tracking, and Salesforce, a leading CRM platform, often operate in silos, causing inefficiencies. By connecting these two powerful platforms, teams can ensure seamless data flow, reduce manual efforts, and enhance cross-functional collaboration. For example, issues logged in Salesforce can instantly create tasks in Jira, enabling faster resolution and improved customer satisfaction. This guide will take you through the process of setting up a Jira Salesforce integration, highlighting its benefits, use cases, and advanced features to help you optimize efficiency.
Why Integrate Jira and Salesforce?
You might wonder why connecting Jira and Salesforce is important. Let us break it down:
- Jira: Popular for tracking bugs, especially among software teams.
- Salesforce: A CRM tool loved by sales teams for managing customer interactions.
Both tools are great on their own, but integrating them takes them to the next level. When they talk to each other, they streamline workflows across teams.
Example Use Case
Imagine your sales team logs customer issues and feedback in Salesforce. With a Jira salesforce integration, all those issues can flow into Jira for the development team to fix. Your teams stay aligned, and you address customer issues faster.
Benefits of Jira Salesforce Integration
Here are the key perks:
- Better Teamwork: Teams collaborate more effectively and get work done faster.
- Smarter Processes: Automation reduces manual data entry and keeps everything organized.
- Insightful Reports: Merging data from both platforms provides clearer insights into customer needs and project progress.
- Instant Updates: One platform reflects changes made on the other in real-time.
- Boosted Efficiency: The system eliminates redundant data entry and administrative headaches.
Use Cases for Jira Salesforce Integration
Here are a few examples where integrating Jira and Salesforce can be beneficial:
- Sales and Development Teams: When a customer reports an issue or requests a new feature in Salesforce, the system automatically creates it as a Jira issue for the development team to address. This ensures sales teams stay updated on the progress.
- Services and Marketing Teams: To improve customer experiences, the services team can manage customer cases in Salesforce and direct marketing campaigns in Jira.
- Front-End and Back-End Teams: Track hours and services in Salesforce and create invoices in Jira without switching between platforms.
Choosing the Right Integration Tool
There are built-in ways to connect Jira and Salesforce, but sometimes they come with strings attached. Third-party tools like Exalate offer a more flexible and powerful solution. Exalate allows you to sync Jira and Salesforce even for complex use cases. You can always consult with Exalate’s experts to find the best integration setup for your needs.
Steps for Setting Up Your Jira Salesforce Integration
Setting up a Jira Salesforce integration can transform your workflow, creating seamless data synchronization and boosting team collaboration. Here are the steps to get you started.
#1. Install Exalate on Salesforce & Jira
You can install Exalate on Salesforce through the Exalate integrations page. On that page, choose Jira or Salesforce and follow the steps. The integration wizard is pretty straightforward. You can also choose to install it via the Atlassian and AppExchange marketplaces.
#2. Connect Jira and Salesforce
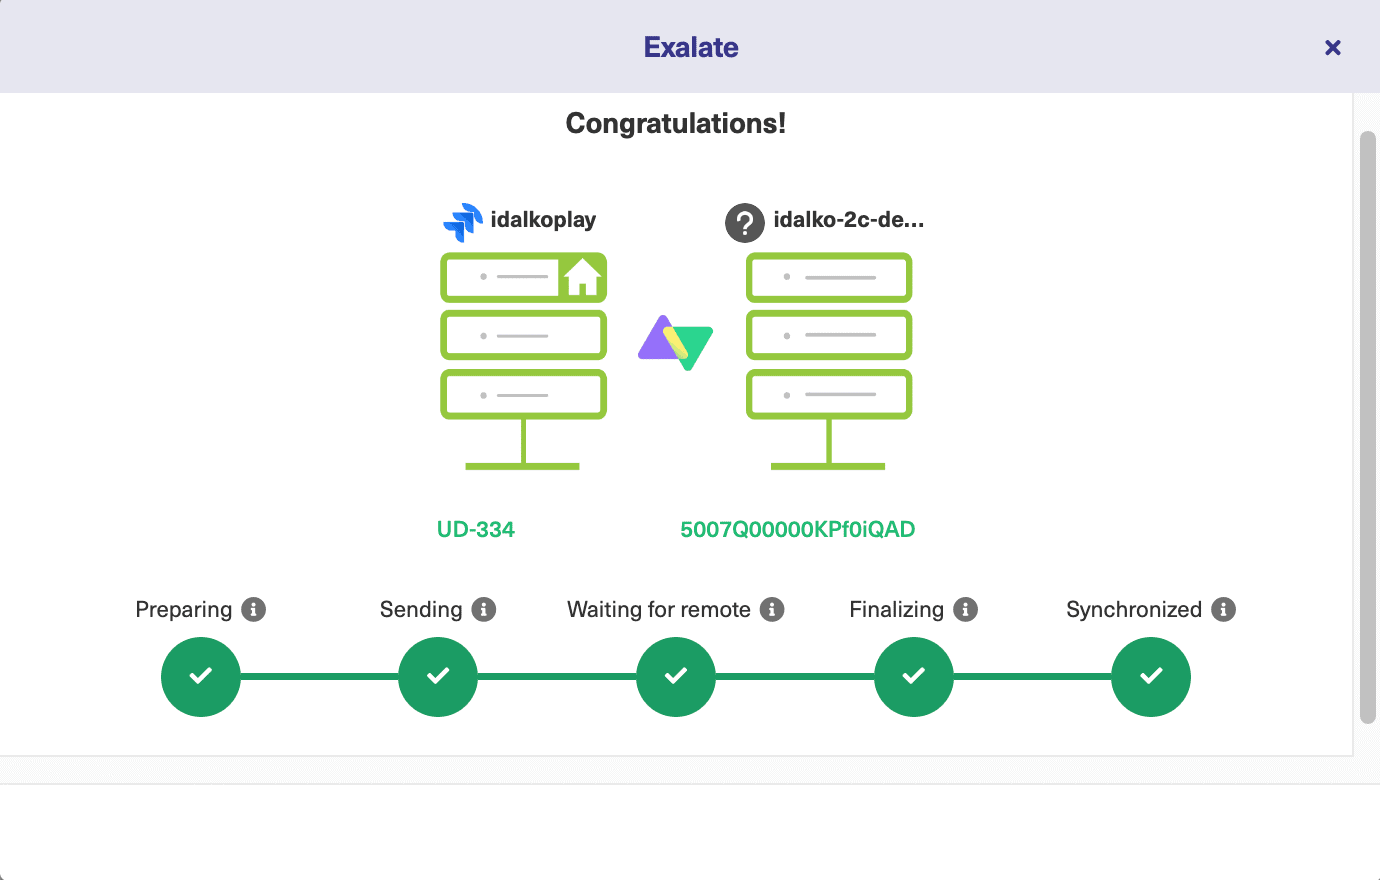
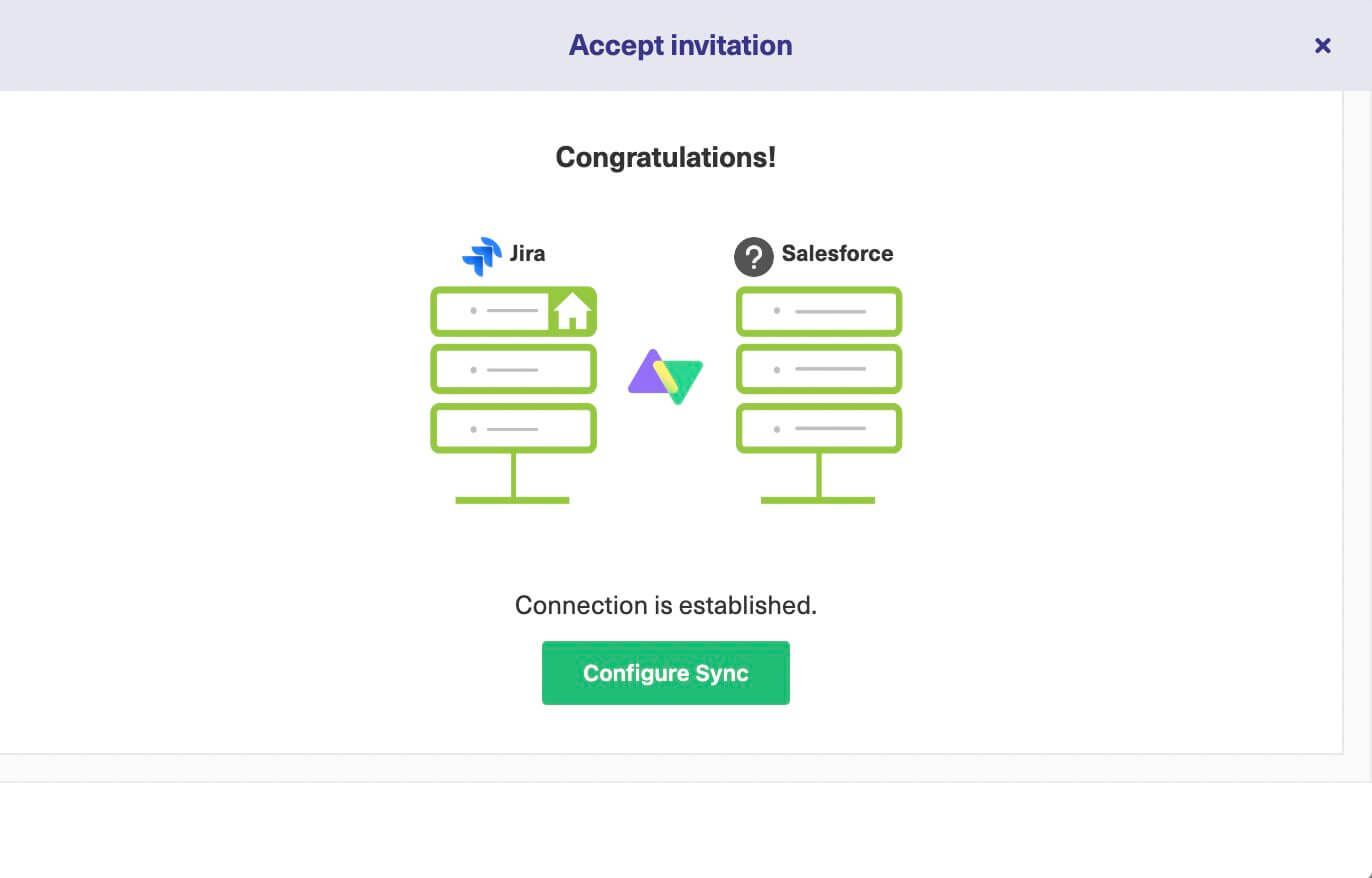
Next, you need to connect your Jira and Salesforce instances. Create the connection on one side and then have the other accept it. The process is pretty similar regardless of which platform you start from.
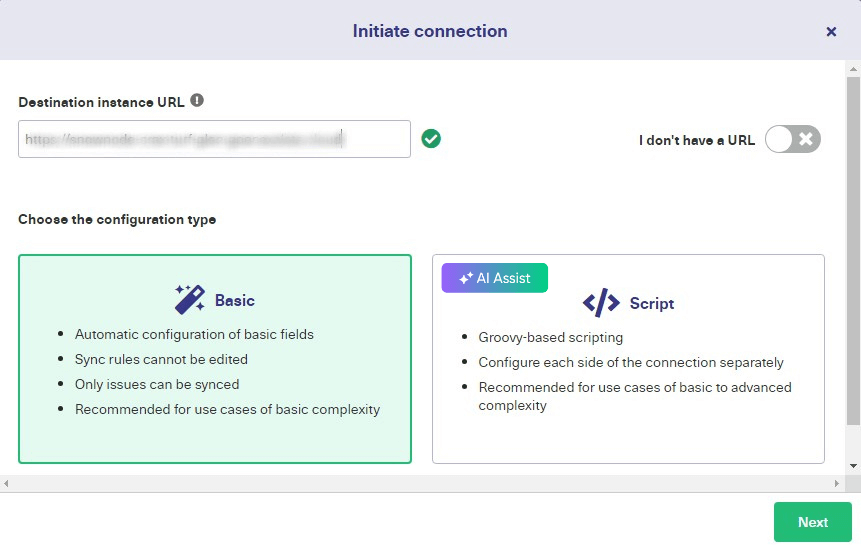
While setting up the connection, you must choose between Basic Mode and Script Mode. Basic mode configures things automatically, while Script mode allows you to configure your integration using Groovy scripting.
- Basic mode: If you select the basic mode in the above step, you can directly sync a Jira issue or a Salesforce case. You cannot map any fields in this mode. You can create triggers and also sync entities in bulk in this mode.
- AI-powered Script mode: Script mode generates an invitation code you must paste in the other instance. To do this, simply follow the wizard. After a while, your connection is ready!
The system will provide some optional configuration steps, as described below. You can return to these later by finding your connection and clicking the edit button. Alternatively, you can start configuring your sync immediately by clicking the “Configure Sync” button.
#3. Configure Your Connection
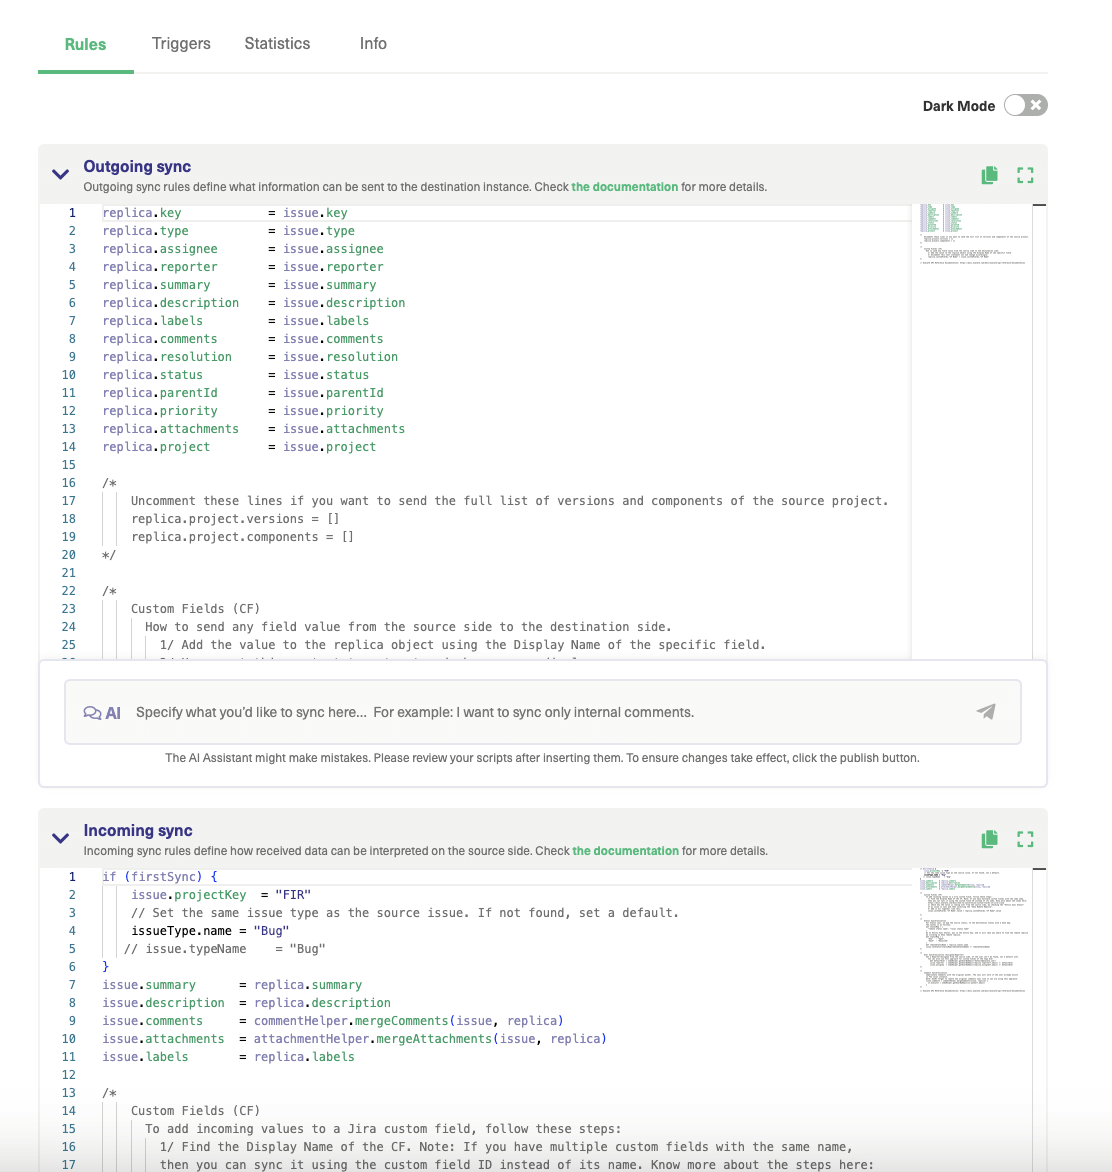
There are several tabs for editing your connection. For this step, go to the “Rules” tab. These rules allow you to choose what to share, map fields to one another, and create advanced conditions for filtering them.
The outgoing sync controls how the platform shares items with the other platform.
- The incoming sync refers to data incoming from the other platform and defines how that data gets mapped to items on the current system. If you want a field not to be shared, delete it or comment it out, while if you want to map fields to other fields, change them accordingly.
- There are advanced ‘script helpers’ to help you with the more complex processing. If you are already into coding, you are probably already thinking of advanced ways to control data. If not, start with basic challenges and see what you come up with.
Using Exalate, you can sync any data between Jira and Salesforce. However, you can use AI Assist with this mode to make things simpler and smarter. Enter what you want to sync between Jira and Salesforce into the AI text box. The system will automatically generate the output sync script.
#4. Set Up Triggers
- So, now we get to triggers, which control when items are synchronized.
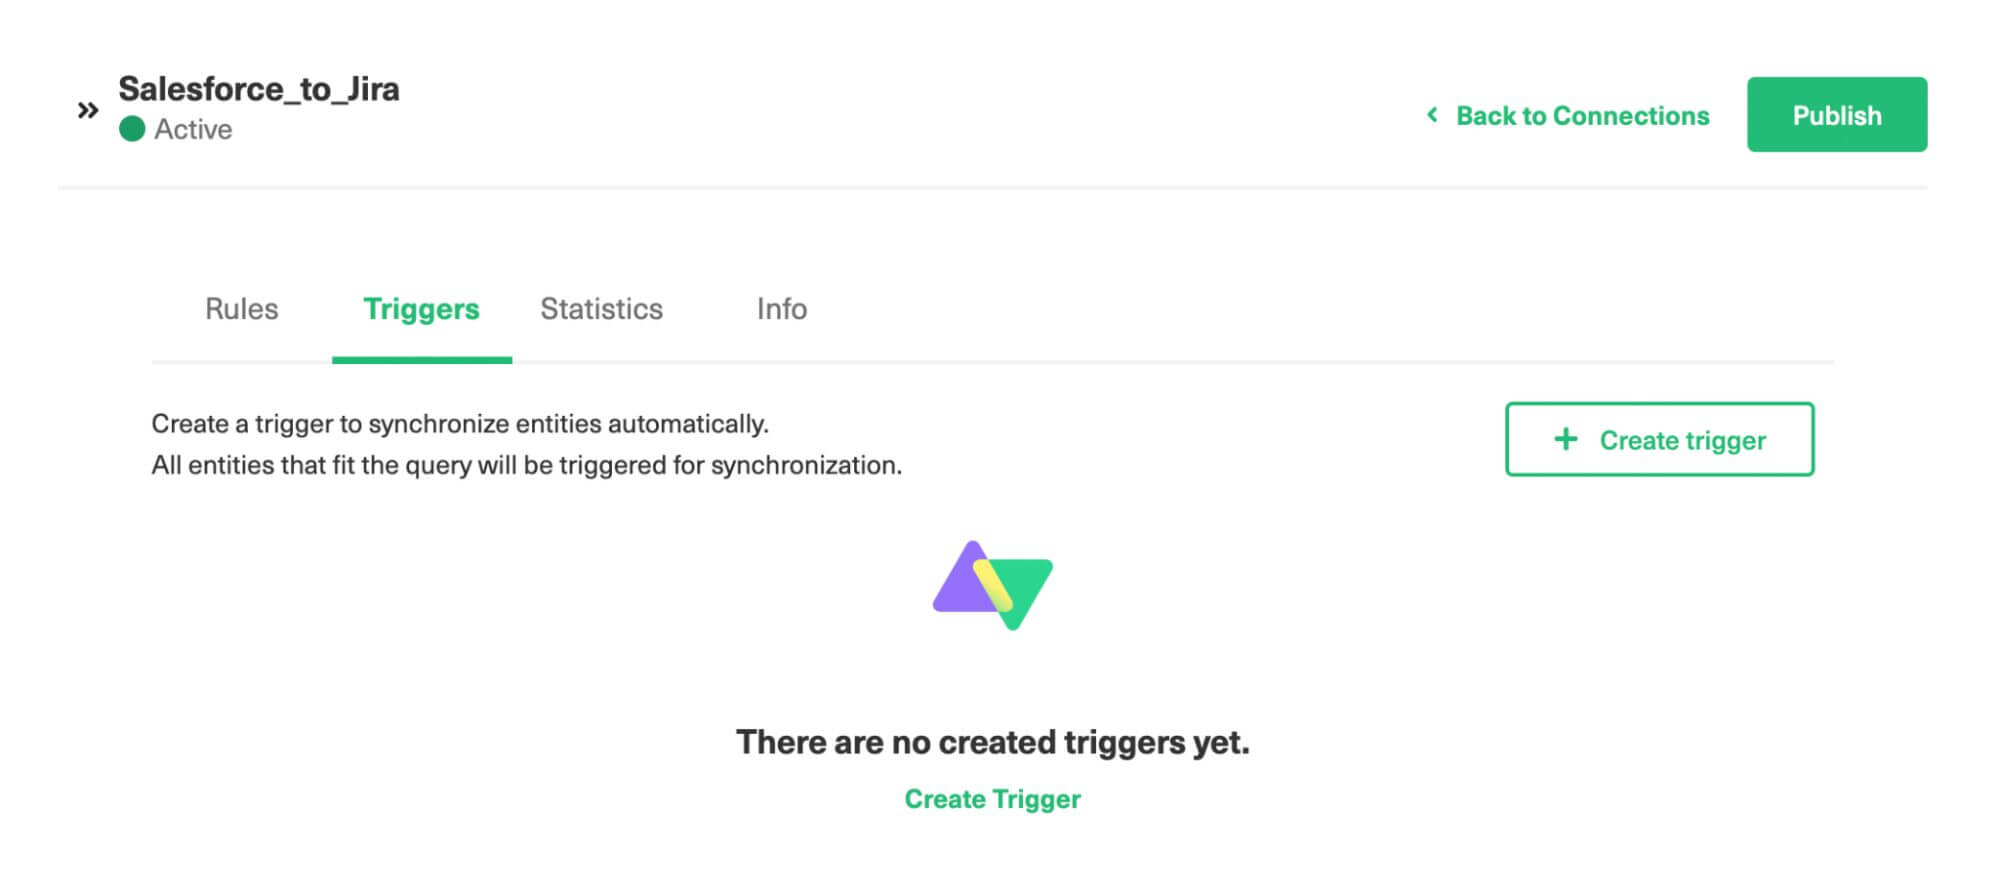
- Go to the “Triggers” tab on the edit connection screen to work with them. You can create more than one trigger for each connection.
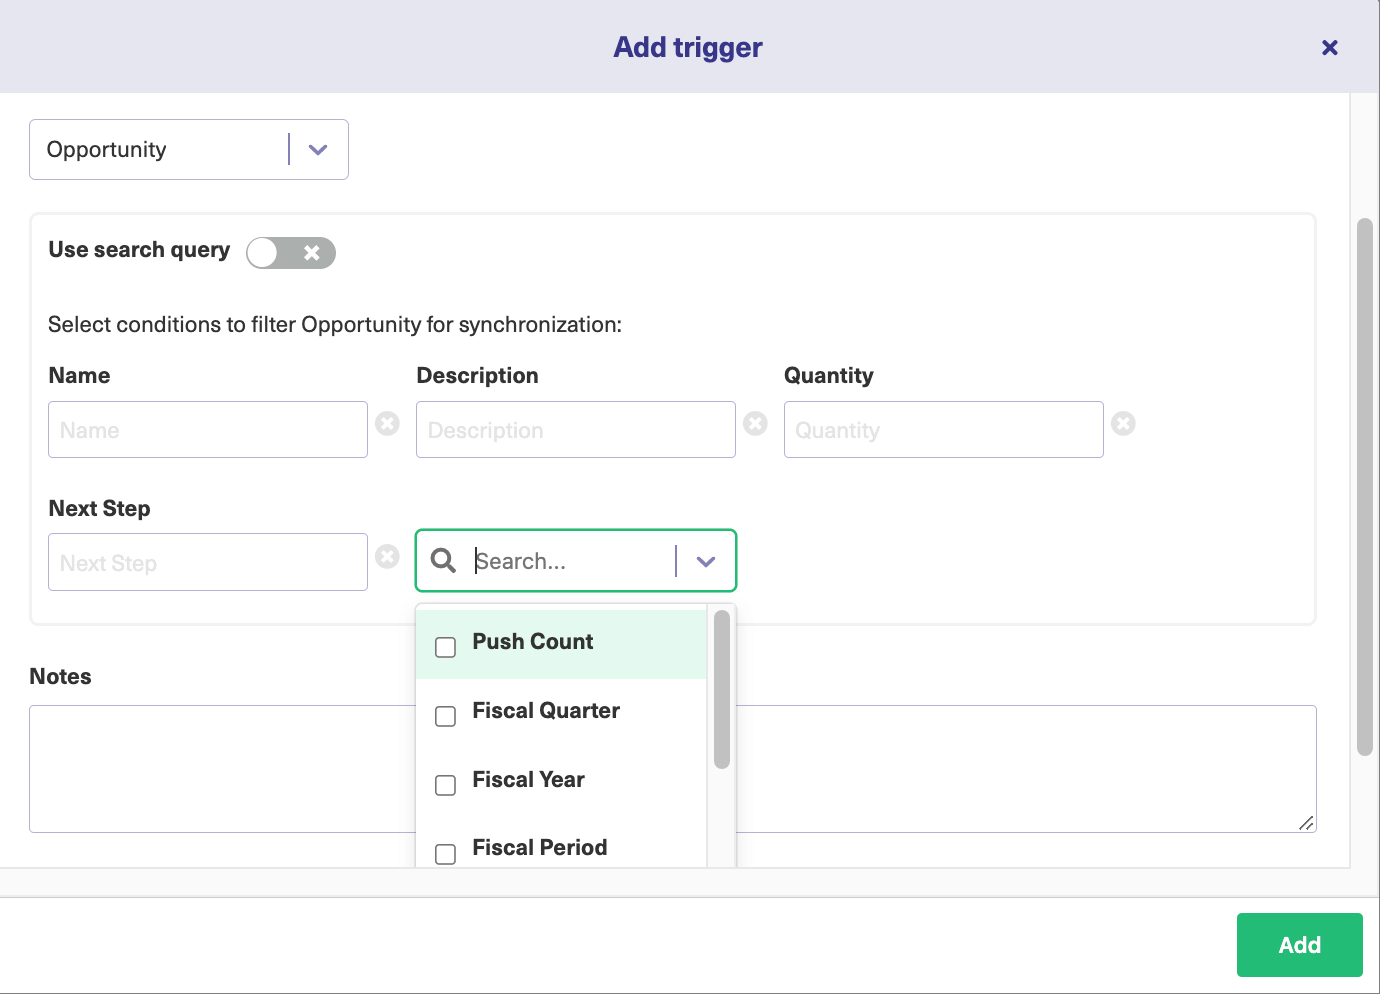
- Begin by clicking the “Create trigger” button. On the next screen, select the type of entity to which your trigger applies and whether to use a search query.
- If you choose not to, the easy way to do things is to enter the values into specific fields so you can find matching items.
- Search queries are platform-native. Each platform uses a different language: Jira uses JQL (Jira Query Language), while Salesforce uses SOQL (Salesforce Object Query Language).
- You enter code into the “If*” field to filter matching queries.
- A notes section helps explain your code to others. Lastly, there is a checkbox to turn your trigger on and off. When you finish, click the green “Add” button.
- The trigger you created will appear in the Triggers section. With the “Bulk Exalate” option, you can sync all items that fulfill the trigger condition.
#5. Start Syncing Data
- Your platforms are now connected, and the data will sync automatically. The syncs will occur regularly but not instantly.
- Closely monitor things when you first start to ensure everything works properly.
- You can start tuning your sync rules as you improve your understanding of how it works and its advanced features.
Advanced Use Cases
Once you have got the basics down, you can explore advanced integration options:
- Mapping and syncing custom fields between Salesforce and Jira.
- Syncing comments and user mentions between the two platforms.
- Linking multiple related Salesforce objects (e.g., contacts and accounts) to a Jira issue.
- Updating Salesforce accounts from Jira custom fields.
Final Thoughts
A Jira Salesforce integration can transform the way your teams collaborate. Syncing the two platforms will streamline workflows, automate tasks, and improve efficiency. Whether you are handling customer feedback, managing sales opportunities, or tracking development issues, integrating Jira and Salesforce opens up endless possibilities for better teamwork and smarter decision-making.
Recommended Articles
We hope this guide on Jira Salesforce integration helps you understand how combining these powerful tools can streamline project management and enhance customer relationship workflows. Check out these recommended articles for more insights on improving business operations with seamless tool integration.

