Introduction to Affinity Photo Filters
Affinity photo filters can understand as using several adjustments on our images in just one click on another word we can say filters are a package of different effects that we can apply by just using that one filter. Here in this software, we have a number of filters that we can use for applying effects to our images and it gives different look to our image. We can apply more than one filter as per our requirements. Apart from the inbuilt filter of this software, we can also use filter plugins of other compatible software in affinity photo. So let us start our discussion about the filters of this software.
Overview of Affinity Photo Filters
Before we go through how we can use affinity photo let me give you an overview about Affinity photo filters.
When we import any raw or manipulated photos in affinity photo we need to do more essentials changes in them so for that we go with filters in place of doing that change in several steps. I am sure now your excited to know how you can use filter on your photos for seeing it’s effect. So what are you waiting for let us discuss it.
How to Use Affinity Photo Filters?
To start using filters on your images you just have to follow instructions given below.
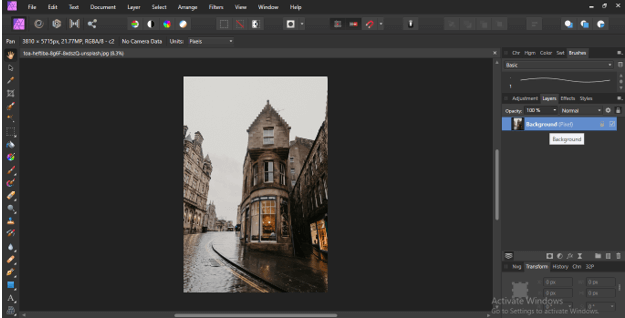
I will open a photo on first which I want to apply filters. So for that go to File menu of menu bar and click on it. In the drop down list of it click on Open option or you can press Ctrl + O button of keyboard as it short cut key.
Once you click on it a dialog box will be open to choose your desired photo. I have downloaded this one from internet. You can work on your own image.
Make sure you have selected layer of that image on which you want to apply filter. So go to layers’ panel which se right side of working screen and select your desired layer.
Then go to Menu bar of this software which is at the top of working window. Here in the list of menu bar we have Filters menu so click on it. Here we have number of filters in list.
I will go with Distort filter and here in the new drop-down list we have other filters. I will go with Perspective option. You can try any of the filter from the list.
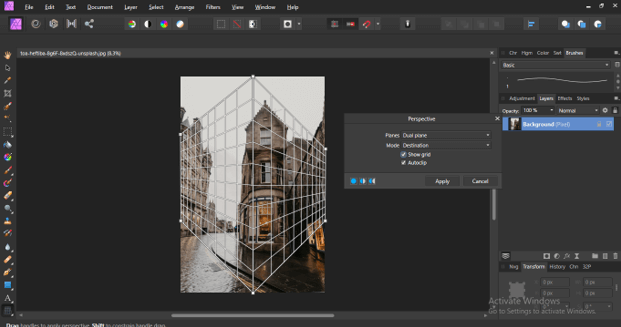
Once we click on it we will have a parameter settings box of chosen filter. With Perspective filter we will have anchor point box around our selected image for making changes in perspective of image. I will change it like this. You can change according to perspective of your photos.
There is double plane option also for changing perspective from both side.
Once you choose this option you will have anchor points like this.
You can also work with grids for better perspective view. Once you satisfy with your desired settings click on Apply button of this dialog box to apply all settings.
And it will apply like this.
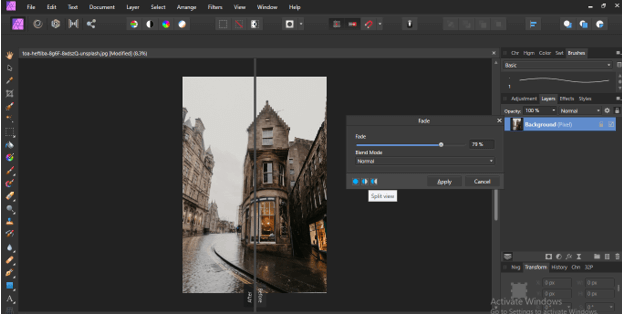
Now if you want to do any change in your applied filter then you can go to Layer menu of menu bar and click on it. Choose Fade Perspective option from the drop down list or you can press Ctrl + Shift + F as it’s short cut key.
Once you choose this option a Fade dialog box will be open. Here you can increase or decrease effect of filters on image in the form of percentage.
There is split-view option so you can change to this mode for seeing changing effect.
There are many more filters in this software which you can use by the same way.
Affinity Photo Filters Plugin
Now let us discuss how we can use external filters in the form of plugins.
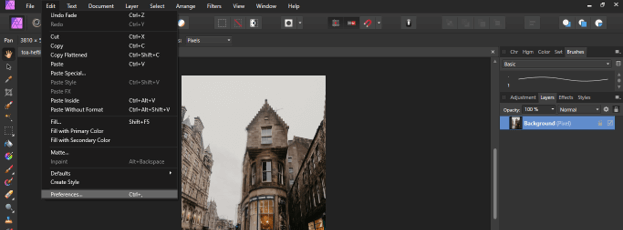
Here I will tell you how you can use Photoshop filters plugin in affinity photo. So for that go to Edit menu of menu bar and click on it. Choose Preferences option from drop down list of it or press Ctrl + , button of keyboard as it’s shortcut key.
Once you click on it Preference dialog box will be open. Here choose Photoshop Plugins option.
Once you click on it a new dialog box will be open like this. Here we will add a path for Photoshop Plugins. For adding path click on Add button of the ‘Plugin Search Folders’ option of this dialog box.
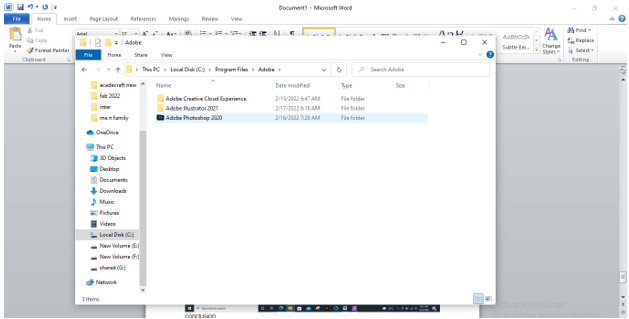
Once you click on this button a dialog box will open to assigning path for Photoshop filters’ folder. First of all, go to Program Files folder of C drive of your computer system.
Then go to Adobe folder.
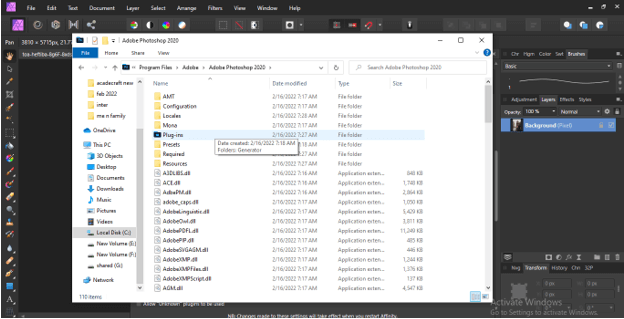
Then Adobe Photoshop 2020 folder. Go to folder of your version such as 2018, 2019, 2021. My version is 2020.
Now in the folder you will find Plug-ins folder. Open it.
Here you will find installed filters of Photoshop. Choose that filter folder.
Once you done path of Photoshop filter will add in affinity photo like this.Same way you and add more filters folder here. Now click on Ok button if this dialog box.
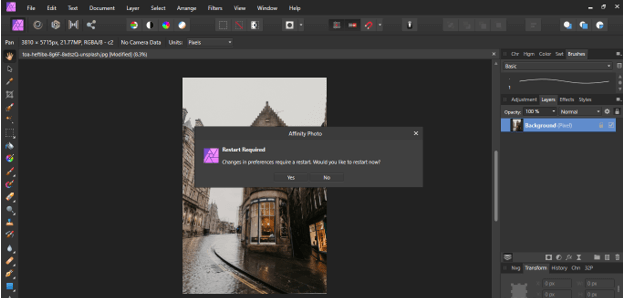
Once you close dialog box affinity photo will ask you to restart software.
Once it start go to Filter menu of menu bar and at the end of the drop-down list, you will have Plugins option. If you have filter file in selected Photoshop folder then you will have new drop-down list in Plugins option. I have no external filters in my Photoshop that is why it is not showing new drop-down filters’ list.
Conclusion
I think you enjoyed this topic during learning about filters of affinity photo and now you can try different filters for adding several effects as well as for manipulating your photos. Now You have knowledge not only about how to use inbuilt filters but also how to use external filter for having your desired result.
Recommended Articles
This is a guide to Affinity Photo Filters. Here we discuss the Introduction, overview, How to use affinity photo filters?. You may also look at the following articles to learn more-


