Introduction to After Effects Particles
After Effects is famous for the video editing software that Adobe Systems developed; we have different effects in this software for making our graphics design more effective. Particle is also part of the effects features in this software. We can understand particle as a type of effect in which we animate effect for any composition of any project work in this software by using particle shapes. Here in this article, you will understand the Particle thoroughly with an example and also learn how to handle the parameters of the Particle for getting the best result.
How to Use Particle in After Effects Software?
We will understand Particle in After Effects software with some examples without any problem but before starting our discussion, let us get introduced to the User interface of After Effects software for our better understanding throughout this article.
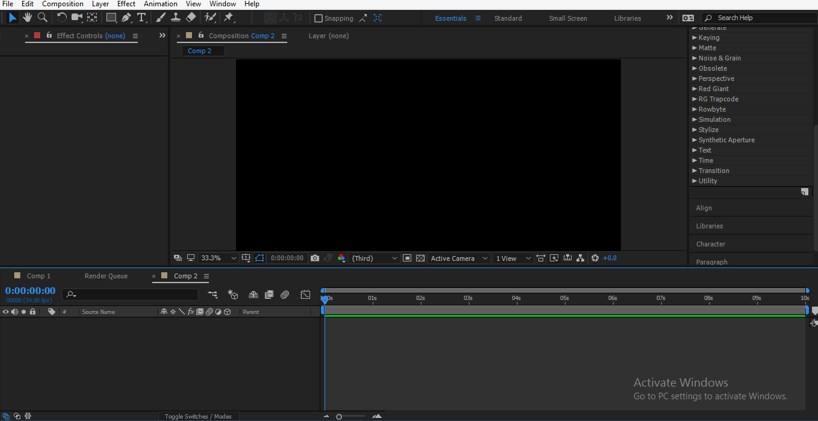
Step 1: Let us start on top of the working screen. At the top of the working screen, two sections are the Menu bar and Tool Panel, below this, three sections are Project panel at the left along with Effect Control panel, Composition window at center, Parameter panels at the right side, at the bottom of the working screen there are two sections that are Layer panel at left side and Timeline panel at the right side.
Step 2: Now, first of all, let us take a new composition for our work. For new composition, go to the Menu bar and click on File Menu, then click on the New Composition option of the drop-down list.
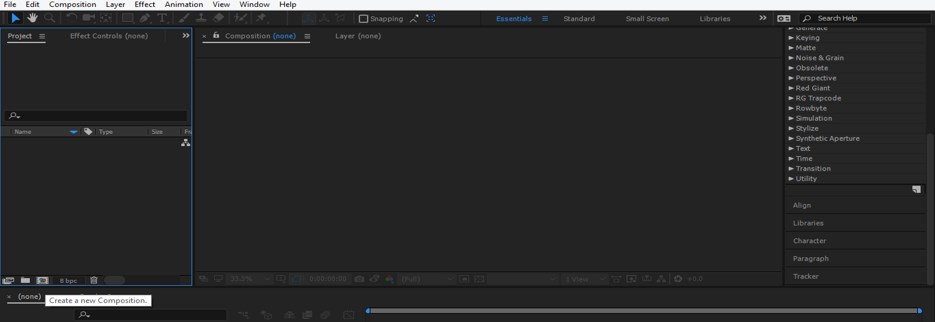
Step 3: Or you can go to the Project panel of this software and click on this small icon of the ‘Create a new composition’ tab for a new composition.
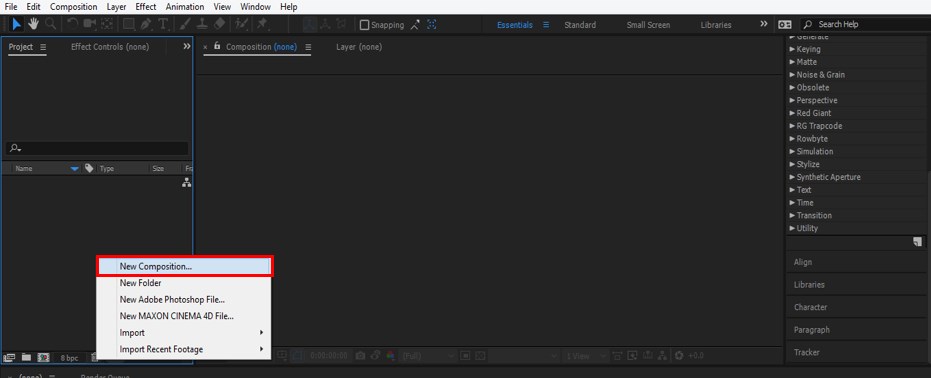
Step 4: Or you can make right-click anywhere in the Project panel with the mouse right button. A drop-down list will be open. Choose the New Composition option from this list.
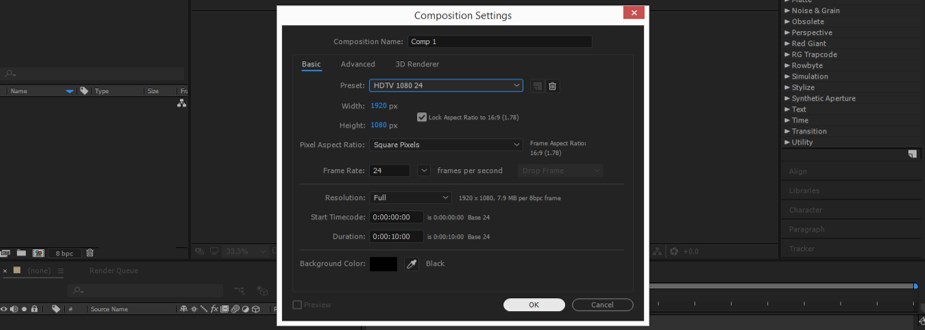
Step 5: Now, a composition setting box will be open. Make your desired composition setting here and press the Ok button of this dialog box for applying the settings.
Step 6: Now go to Layer Menu of Menu bar, which is top of the working screen. A drop-down list will be open, go to the ‘New’ option and choose the Null object option from the new drop-down list.
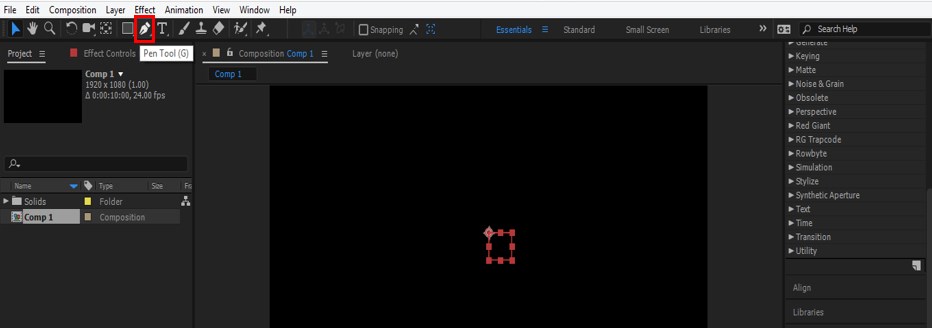
Step 7: Now go to the Toolbar of this software below the Menu bar and select Pen tool by clicking on it.
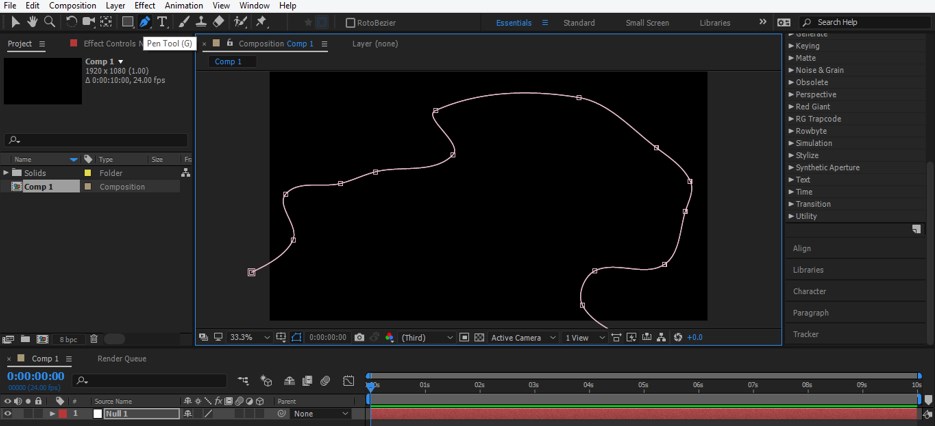
Step 8: Now, make a path in the Composition window area with the help of the Pen tool according to you.
Step 9: Now go to the Layer panel of this software and click on the small arrow icon of the Null 1 layer. The list of properties of this layer will be open, now click on the small arrow icon of Masks and again click on the small arrow icon of Mask 1. Mask 1 properties will be open, click on the Mask Path property and press the Ctrl + C button to copy the path of the mask.
Step 10: Now unfold the small arrow icon on the Null 1 layer and press the P button from the keyboard for the Position property of the Null object.
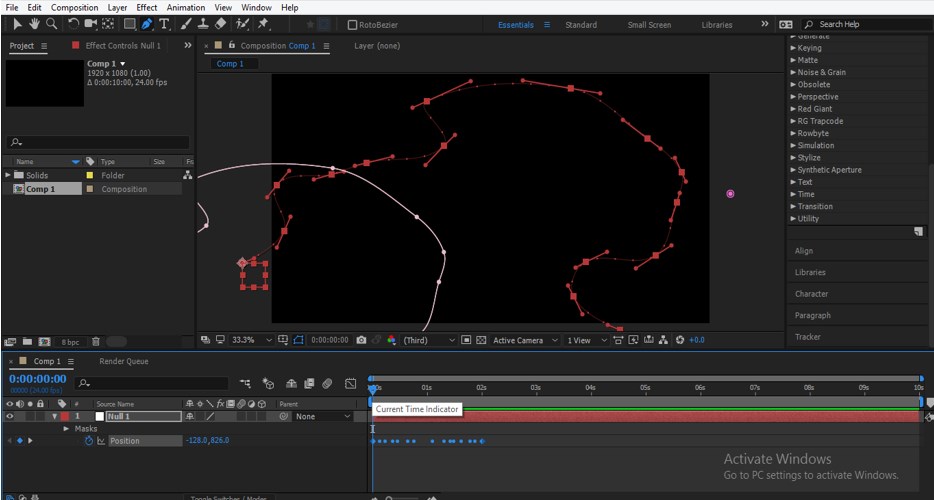
Step 11: Now paste the mask path on the Position property of Null 1 by pressing Ctrl + V button from the keyboard.
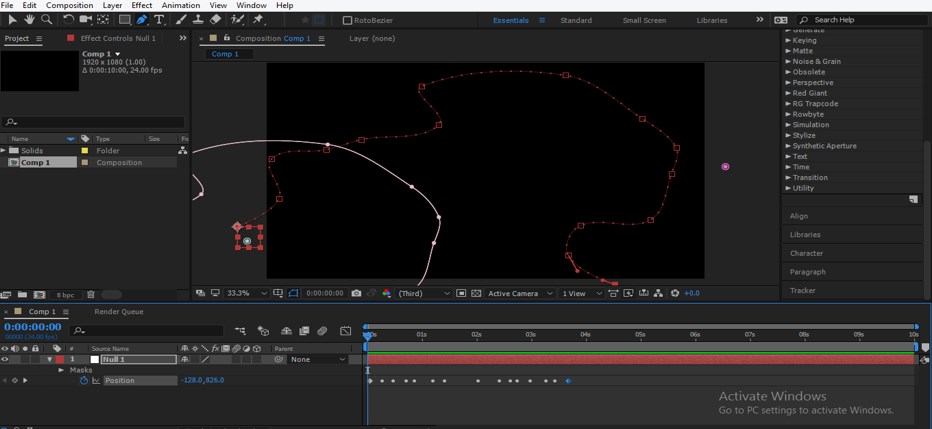
Step 12: Keys of mask path will be generated on the Position of Null 1 object. You can adjust the path of the Null 1 object by adjusting the keys in keyframe sections.
Step 13: Now go to the Layer menu of the menu bar for the solid layer. A drop-down list will be open, go to the ‘New’ option and choose Solid for a new drop-down list.
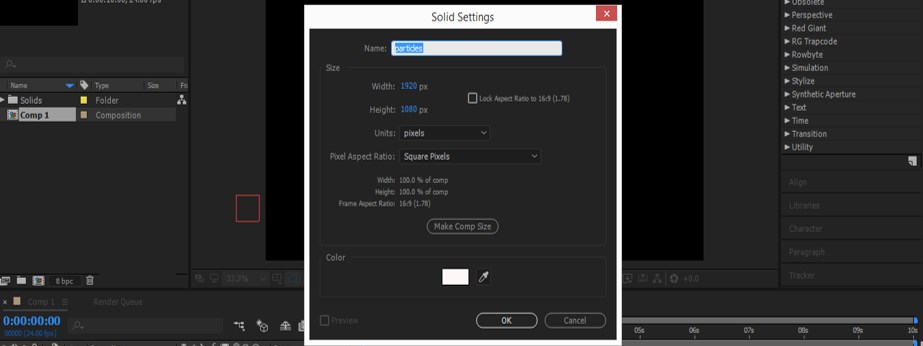
Step 14: Once you click on Solid, a Solid layer settings box will be open. Make your desired settings here and name them as Particles.
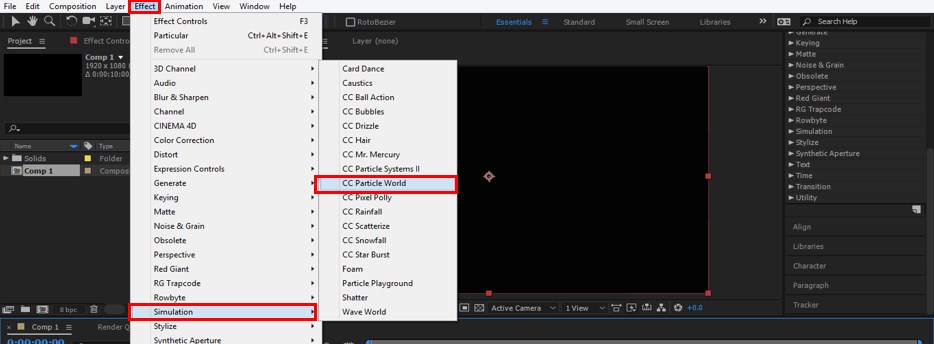
Step 15: Now go to the Effect menu of the Menu bar. A drop-down list will be open, go to the Simulation option of this list and click the CC Particle World option of the new drop-down list.
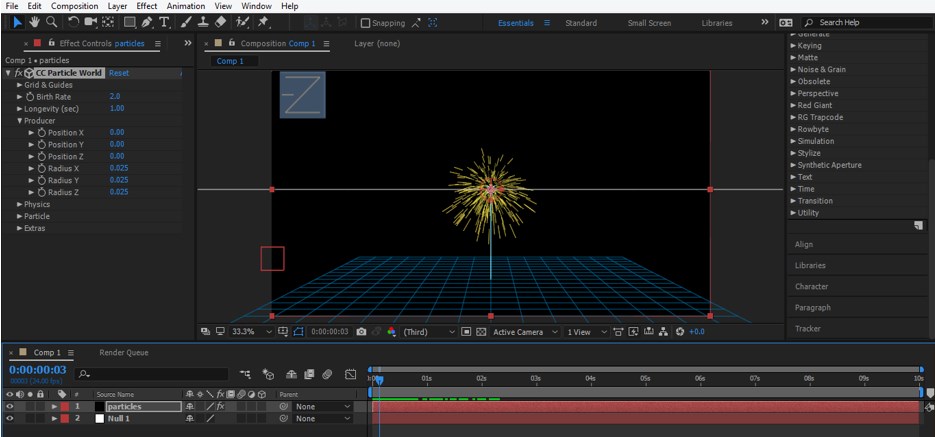
Step 16: Parameters of the Particle effect will be open in the Effect control panel next to the Project Panel of this software.
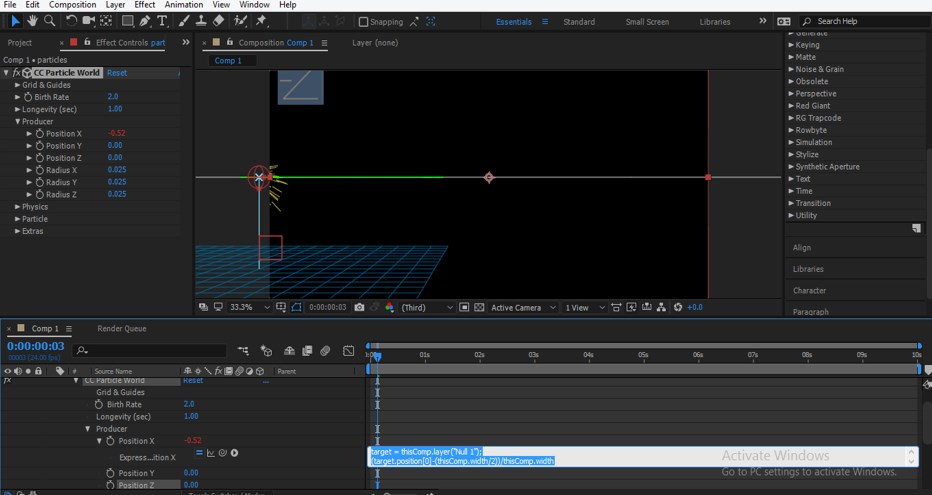
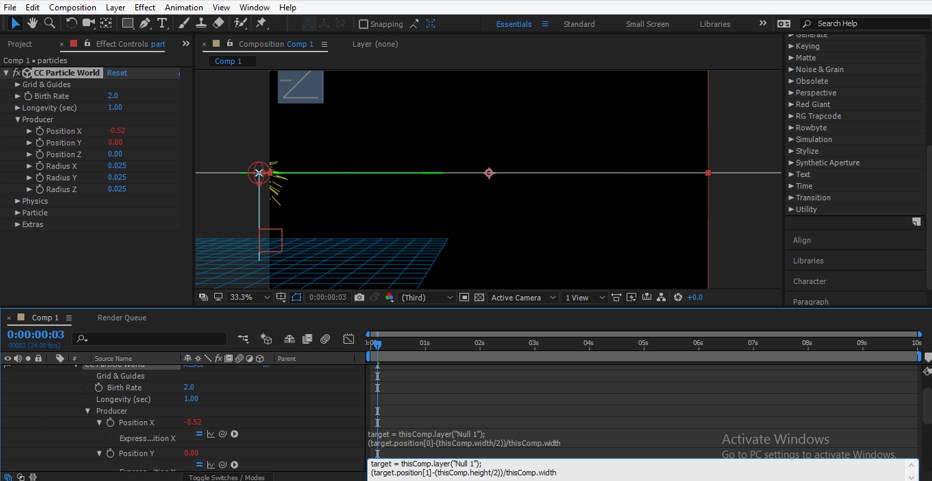
Step 17: Now, we will animate the positions of these particles. Click on a small clock watch icon of the Position X option by holding the Alt button of the keyboard for getting the expression box. Now type this expression in the expression box of this property for deciding the place of particles in the X-direction.
Step 18: Now click on a small clock watch icon of the Position Y option by holding the Alt button of the keyboard for getting the expression box. Now type this expression in the expression box of this property for deciding the place of particles in the Y direction.
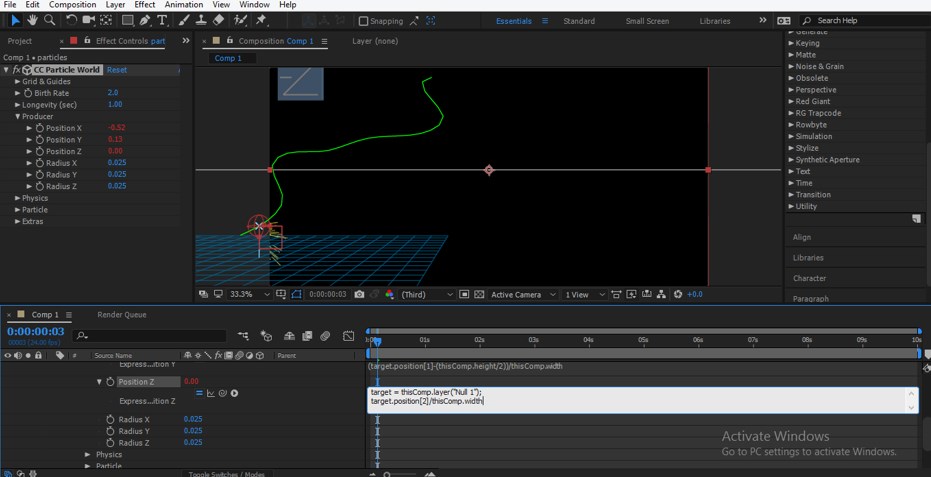
Step 19: Now click on a small clock watch icon of the Position Z option by holding the Alt button of the keyboard for getting the expression box. Now type this expression in the expression box of this property for deciding the place of particles in the Z direction.
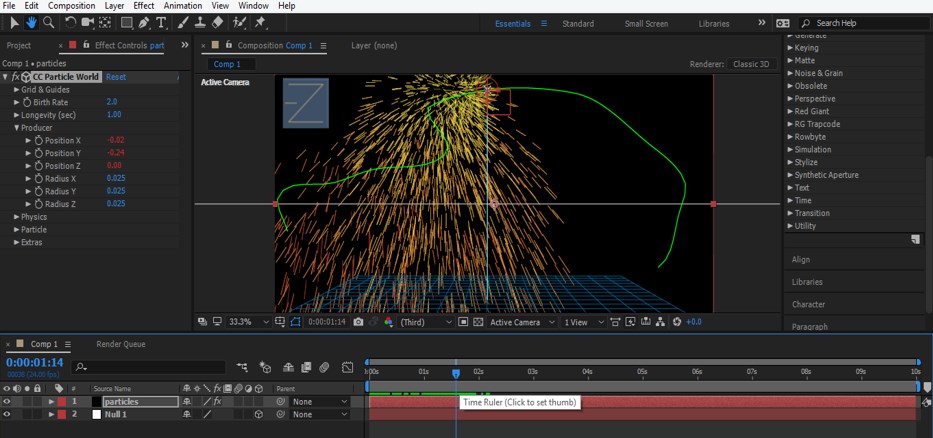
Step 20: Now, when you play the animation by pressing the keyboard’s space bar, your animation of the particle will look like this.
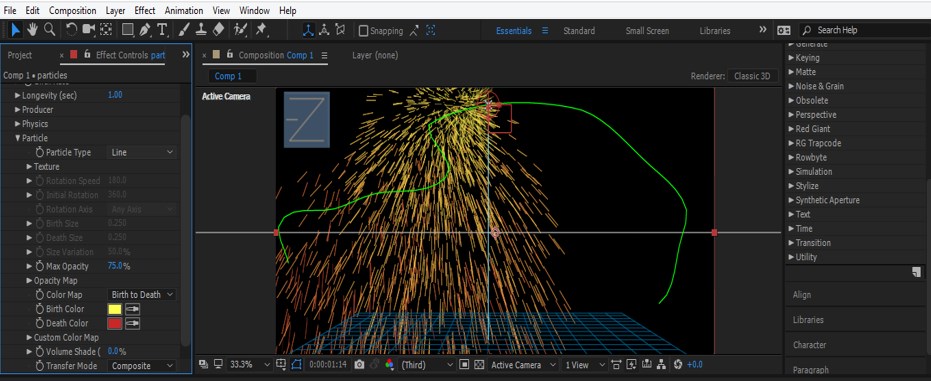
Step 21: Now click on the small arrow icon of the Particle option of Particle effect in the Effect control panel.
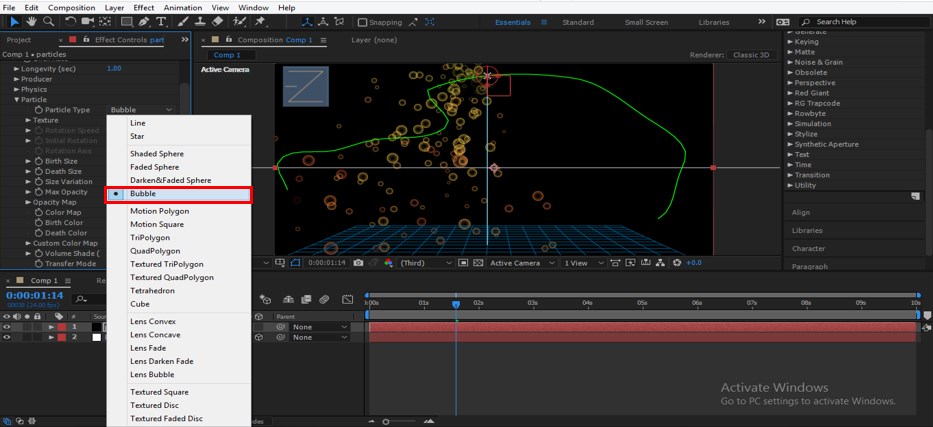
Step 22: Here, you can choose a different type of particle shape from this list.
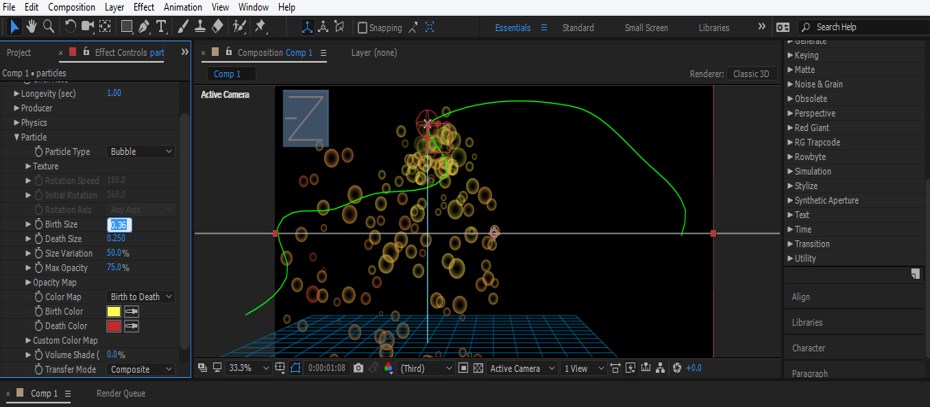
Step 23: You can also increase and decrease the size of the particle from Birth size and Death size options
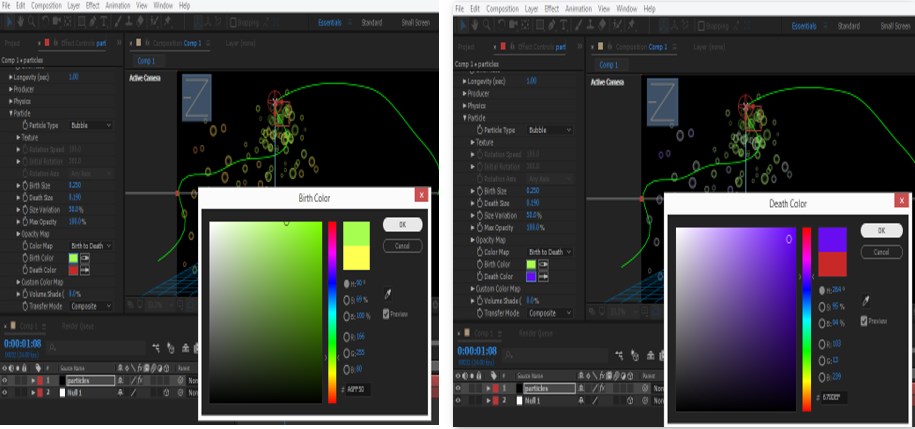
Step 24: You can also change the color of the particle on a Birth size and Death size basis. For changing the color, just click on the small color box of this option. A color panel dialog box will be open, choose your desired color from here, and press the boxes’ OK button.
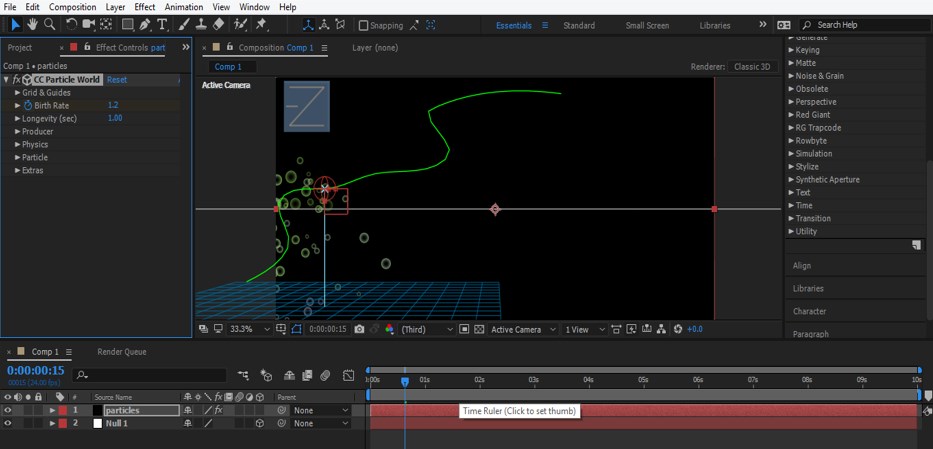
Step 25: You can also adjust the number of the particle by the Birth Rate option. If you increase the value of the birth rate, the number of particles will be increased.
There are many more options by which you can make a good animation effect by using the particle effects option of this software, and this way, you can use Particle in After Effect.
Conclusion
Now you can understand the Particle in the context of After Effects and easily handle this feature’s parameter. You can get a different type of Particle effect by practicing on the particle effect parameters and using them in your project work without any problem.
Recommended Articles
This is a guide to After Effects Particles. Here we discuss the Introduction, how to create Particle effects in after-effects in a step by step manner. You can also go through our other related articles to learn more –
