Updated May 26, 2023
Introduction to Alter Table Mysql
In MySQL, ALTER TABLE command is used to change the name of the table or rename one or more columns of the table, add new columns, remove existing ones, modify the datatype and length, and we can change the index of one or more columns, as well as the table’s name. This command is often used with ADD, DROP, and MODIFY statements depending on the operation you wish to perform for the table, columns, or indexes. We can even change the sequence of the columns in the table using the ALTER TABLE command. In this article, we will learn the syntax and the usage of the ALTER TABLE command accompanied by ADD, DROP, or MODIFY statements with the help of examples.
Examples to Implement ALTER TABLE MySQL
Below are the examples mentioned:
1. ALTER TABLE statement with ADD command
We can add one or more columns to the existing table using the ALTER TABLE statement with the ADD command. The syntax of adding the columns using the ALTER statement is as follows –
Syntax
ALTER TABLE name_of_table
ADD name_of_new_column details_of_column
[ FIRST | AFTER name_of_existing_column ];
Parameters
- name_of_table: This is the name of the existing table in which we wish to add a new column using the ALTER query.
- name_of_new_column: This is the name of the new column we add to the table.
- details_of_column: This helps specify the details and definition of the new column we are adding that includes the column’s datatype and other details such as NULL or NOT NULL, UNIQUE, etc.
- name_of_existing_column: We can specify the position of the column that we are adding with respect to the existing position of the columns in the table named name_of_table by using the FIRST and AFTER keywords. FIRST represents that the new column will be placed in the beginning, while AFTER signifies the position of the new column after the name_of_existing_column named column in the table. The default position where the new column is added is at the last.
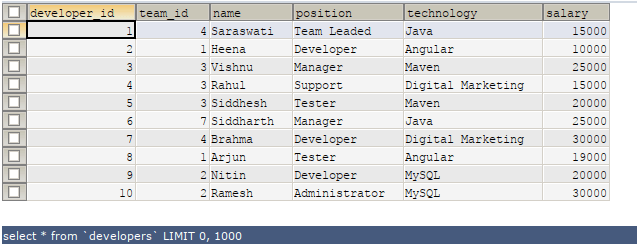
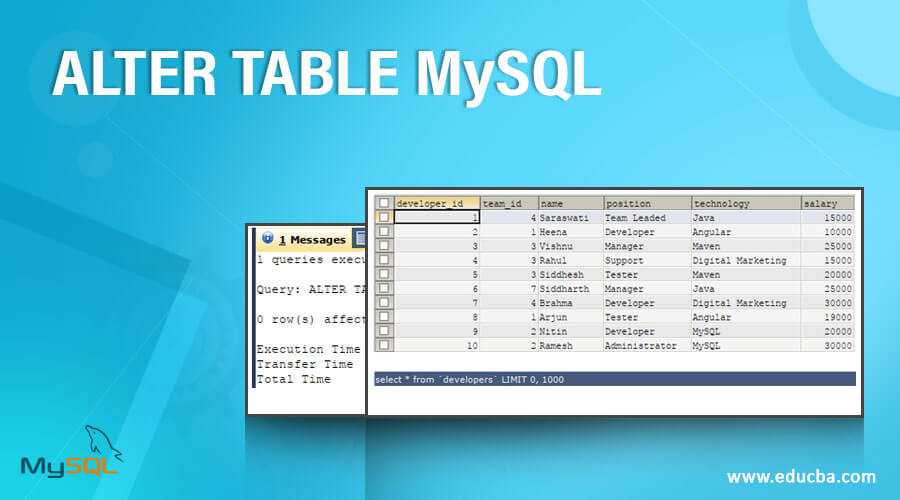
Let us consider an existing table named developers. After executing the following SELECT command –
Code #1
SELECT * FROM 'developers';Output:
We need to add one more column named experience, which is of integer datatype, as it will store value in years. We can use the ALTER TABLE statement with ADD command, and the query will be somewhat like this –
Code #2
ALTER TABLE developers
ADD experience INTEGER NOT NULL DEFAULT 0;
Output:
Let us check the records by selecting them using this query –
Code #3
SELECT * FROM 'developers';Output:
We can even add multiple columns in a single query statement. Suppose we add three more columns named joiningDate, age, and address. We can do so by executing the following ALTER TABLE command –
Code #4
ALTER TABLE developers
ADD joiningDate DATE
FIRST ,
ADD age INT NOT NULL
AFTER NAME,
ADD address VARCHAR(100) NOT NULL
AFTER experience;
Output:
Let us now retrieve the records from the developers’ table to view our changes by executing the following select query –
Code #5
SELECT * FROM 'developers';Output:
All the new columns are added at the positions we mentioned and initialized to their default value depending on their datatype. The default value of the integer datatype column is 0, varchar, i.e., the ” “blank” string for a date is NULL.
2. ALTER TABLE statement with MODIFY command
We can modify the column by changing its definition and position using the ALTER TABLE statement with MODIFY command. The syntax of modifying the column is similar to adding the column, which is as follows –
ALTER TABLE name_of_table
MODIFY name_of_column_to_modify details_of_column
[ FIRST | AFTER name_of_existing_column ];
All the names used have the same ADD command except name_of_column_to_modify, which stands for the existing column’s name that needs to be modified.
Let us alter the joining date column by setting the default value to “2020-05-01”. We can use the following ALTER TABLE query with MODIFY clause in the following way –
Code #1
ALTER TABLE developers
MODIFY joiningDate DATE DEFAULT "2020-05-01";
Output:
Let us check the records of the developer’s table after inserting one record –
Code #2
INSERT INTO 'developers' ('joiningDate', 'developer_id', 'team_id', 'name', 'age', 'position', 'technology', 'salary', 'experience', 'address') VALUES(DEFAULT,'11','2','Suresh','0','Designer','MySQL','20000','0','');Code #3
ALTER TABLE developers
MODIFY joiningDate DATE DEFAULT "2020-05-01";
And now, let us retrieve the records of the developer’s table and check the joiningDate column of Suresh by using the following query –
Code #4
SELECT * FROM 'developers';Output:
Similarly, we can modify multiple columns of a particular table using a single ALTER TABLE query with modify clause.
3. ALTER TABLE statement with DROPcommand
We can delete or drop the column by specifying its name using the ALTER TABLE statement with the DROP command. The syntax for dropping the column is as follows –
ALTER TABLE name_of_table
DROP COLUMN name_of_column_to_drop;
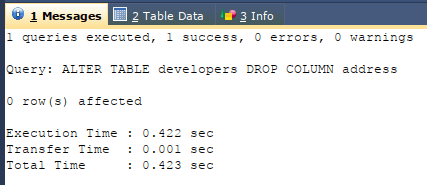
Suppose we want to drop the address column of the developer’s table. We can use the ALTER TABLE command with the DROP clause in the following way –
Code #1
ALTER TABLE developers
DROP COLUMN address;
Output:
Now, let us verify by retrieving all the records of the developers’ table by using the same select query that gives the following output –
So, we can conclude that our address column is deleted completely, including its structure and column values for all records.
4. ALTER TABLE statement with CHANGE command to rename column names
We can change and rename the column’s name using the ALTER TABLE statement with the CHANGE command. The syntax of renaming the column is similar to modifying the column, which is as follows –
ALTER TABLE name_of_table
CHANGECOLUMN old_name_of_column new_name_of_column details_of_column
[ FIRST | AFTER name_of_existing_column ];
All the names used have the same ADD command except old_name_of_column, which stands for the name of the existing column that needs to be renamed, and new_name_of_column, which specifies the new name that column should possess.
Code #1
Let us change the name of column developer_id to the id of the developer’s table. Our alter command will be as follows –
ALTER TABLE developers
CHANGE COLUMN developer_id id INTEGER NOT NULL ;
Output:
Output:
5. ALTER TABLE statement to rename the table
We can even change the name of the table using ALTER TABLE command, for which we need to follow the following syntax –
Code #1
ALTER TABLE new_table_name
RENAME TO new_table_name;
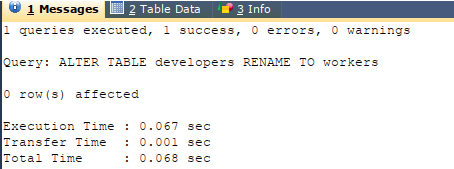
Suppose that, in my example, I have to rename the table developers to workers. In that case, we will use the following ALTER query –
Code #2
ALTER TABLE developers
RENAME TO workers;
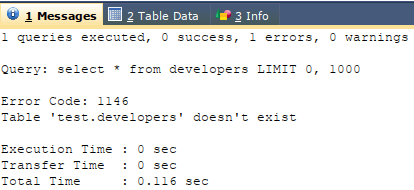
Output:
The test is my database name, which says developers’ tables no longer exist.
Code #3
SELECT * FROM workers;Output:
Conclusion
We can use the ALTER TABLE command to add, modify, and drop the table’s columns and rename the columns and the table names.
Recommended Articles
We hope that this EDUCBA information on “ALTER TABLE MySQL” was beneficial to you. You can view EDUCBA’s recommended articles for more information.
