Updated February 15, 2023
Introduction to Angular Material Chips
Angular material chips are applied to the material design by default; if suppose by using angular material, suppose we want not to apply any styles, then we need to use a basic mat chip. We can use the appearance of the customized chip by adding our CSS. We can select the chip using the selected property and disable the selection by setting the selectable false on the mat chip list.
Overview of Angular Material Chips
Whenever we can change the selection state, the event of chip selection change is emitted by using selection change. We can disable the individual chips while applying the chips attribute which was disabled. We can use the match chip directive with the chip list to streamline the component interaction. The directive of chip input is used to add the specific behavior of the input element with the mat form field by adding and removing chips. The input with the mat chip input is placed inside into the outside or inside into the element of the chip list.
How to Use Angular Material Chips?
As we know, angular material is the library of UI components used to develop web-based applications. Therefore, we can build the design components of the mobile and desktop applications using angular material and chips.
Below we are creating the project of angular material chips. For creating the angular material chips project, we need to install angular material CLI in our system.
1. In the below example, we are installing angular material CLI on the ubuntu system. In the below example, we are installing angular CLI by using the npm command as follows.
Code:
npm install -g @angular/cliOutput:
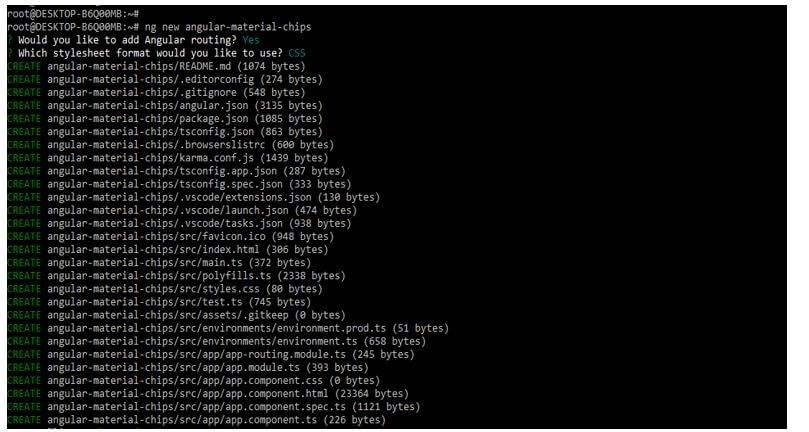
2. In the below example, first, we are creating a new project name, angular-material-chips; at the time of creating the project, we are using routing as yes and the style sheet format as yes.
Code:
ng new angular-material-chipsOutput:
dc
3. We are installing the below packages used when developing the application. This package is used to import the module into our application. We are installing these packages by using the npm command as follows.
Code:
npm install @angular/material –saveOutput:
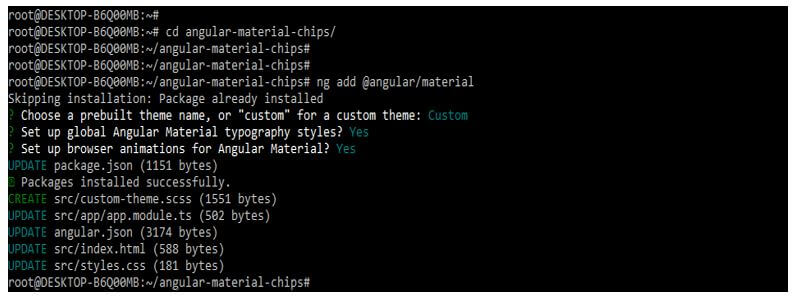
4. Below, we are adding the library to our project. We are using the ng add command to add the library to the project. Also, we are setting the global angular material typography style as yes. Finally, we are defining angular material browser animations as yes as follows.
Code:
cd angular-material-chips/
ng add @angular/material
Output:
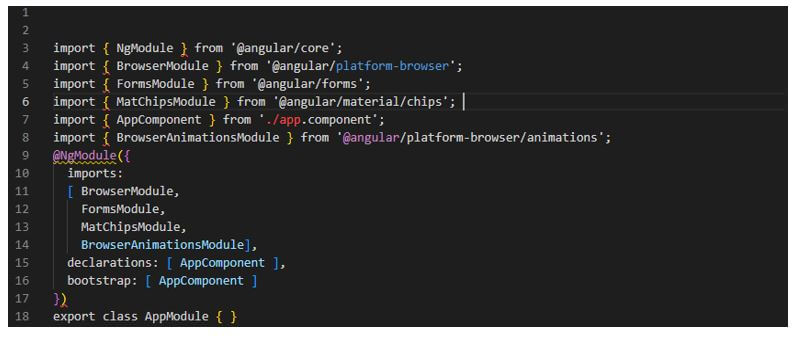
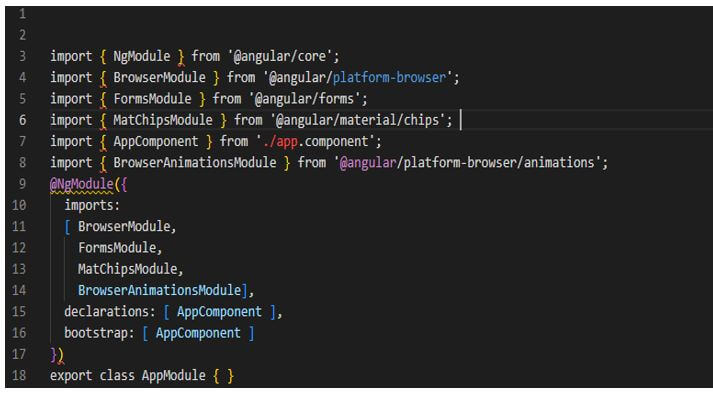
5. Now, we are implementing the app.module.ts file. We are importing the browser module, forms module, mat chips module, and browser animation modules in this file.
Code:
import { FormsModule } from '@angular/forms';
……
@NgModule({
imports:
[ BrowserModule,
FormsModule,
MatChipsModule,
BrowserAnimationsModule],
Declarations : [ AppComponent ],
Bootstrap : [ AppComponent ]
})
export class AppModule { }
Output:
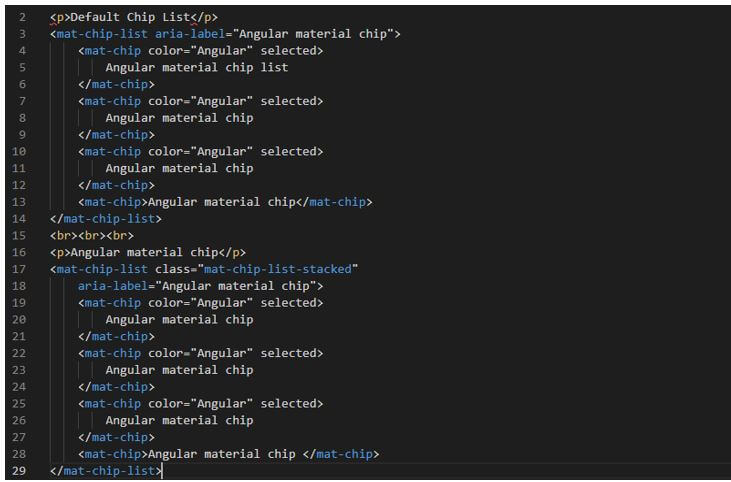
6. In the below example, we are creating the app.component.html file as follows.
Code:
<p>Default Chip List</p>
<mat-chip-list aria-label="Angular material chip">
<mat-chip color="Angular" selected>
Angular material chip list
</mat-chip>
<mat-chip color="Angular" selected>
Angular material chip
</mat-chip>
<mat-chip color="Angular" selected>
Angular material chip
</mat-chip>
<mat-chip>Angular material chip</mat-chip>
</mat-chip-list>
<br><br><br>
<p>Angular material chip</p>
<mat-chip-list class="mat-chip-list-stacked"
aria-label="Angular material chip">
<mat-chip color="Angular" selected>
Angular material chip
</mat-chip>
<mat-chip color="Angular" selected>
Angular material chip
</mat-chip>
<mat-chip color="Angular" selected>
Angular material chip
</mat-chip>
<mat-chip>Angular material chip </mat-chip>
</mat-chip-list>
Output:
Angular Material Chips List
- The mat chip list is an angular directive that lists the values as chips. The material defines component will define the mat chip list. Md-chips is an angular directive used in a special component.
- The below example shows the angular material chips list as follows. We are adding the following code to the app.module.ts file.
Code:
import { FormsModule } from '@angular/forms';
……
BrowserAnimationsModule],
Declarations : [ AppComponent ],
Bootstrap : [ AppComponent ]
})
export class AppModule { }
Output:
- Now we are creating the app.component.html file as follows. In the below example, we are defining the angular material chip list.
Code:
<mat-chip-list>
<mat-chip>Angular</mat-chip>
<mat-chip>Material</mat-chip>
<mat-chip color = "secondary" selected>chip</mat-chip>
<mat-chip color = "accent" selected>list</mat-chip>
</mat-chip-list>
Output:
Angular Material Chips Selection
The angular material chips list represents a small set of information.
- Unstyled chips: By default, the content design style is implemented using a mat chip. Mat basic chip will get the CSS class in addition.
- Selection: The chips are selected by using the selected property. We can disable the same by selecting the mat-chip list.
- Disabled chips: We can disable the individual chips while implementing the chip attribute. After disabling, we cannot select the same.
- Chip input: The chip directive of the mat is used to streamline of chip list for the streamlined interaction of the two-component. Below is the example inside chip input as follows.
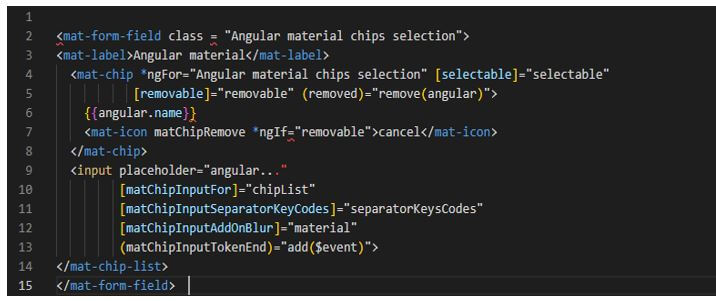
First, we create the app.component.html file.
Code:
<mat-form-field class = "Angular material chips selection">
<mat-label>Angular material</mat-label>
<mat-chip *ngFor = "Angular material chips selection" [selectable] = "selectable"
….
</mat-chip-list>
</mat-form-field>
Output:
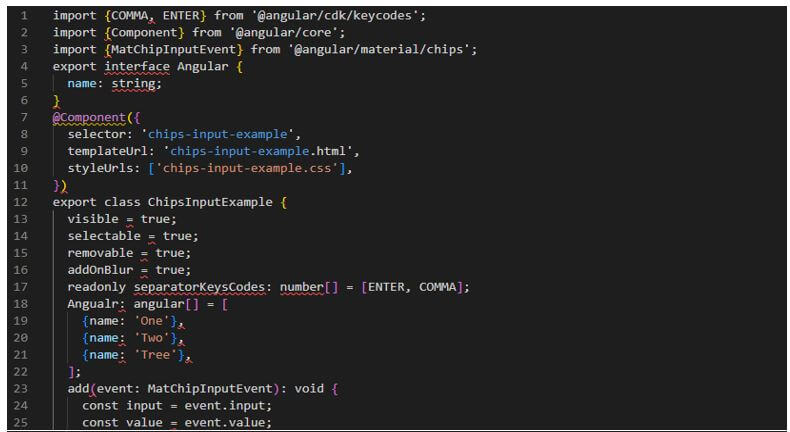
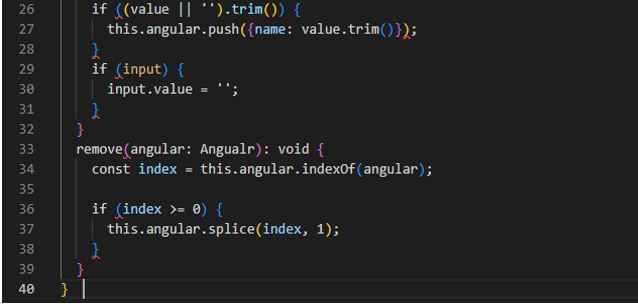
Now we are creating the app.component.ts file as follows.
Code:
export interface Angular {
name: string;
}
@Component ({
……
this.angular.splice (index, 1);
}
Output:
Now we are creating the app.component.css file and running the project as follows.
Code:
example-chip-list {
width: 100%;
}
Output:
- Keyboard interaction: The user can move the chips by using the arrow list and selecting the same by using space.
- Orientation: If we want the chips stacked vertically, we must apply the mat chip list stacked class as follows.
Code:
<mat-chip-list class="mat-chip-list-stacked" aria-label="Color selection">
…..
</mat-chip-list>
Output:
Conclusion
We can use the match chip directive with the chip list to streamline the component interaction. It is applied to the material design by default; if suppose by using angular material, suppose we want not to apply any styles, then we need to use a bare mat chip.
Recommended Articles
This is a guide to Angular Material Chips. Here we discuss the introduction, list, and how to use Angular material chips with selection. You may also have a look at the following articles to learn more –


