Introduction to Angular Material Install
Angular material install provides the UI component, which works on a desktop, web, and mobile. Angular material install is used to develop the process using components such as inputs, data, tables, and cards. To use angular material, we need to install npm, nodejs, angular CLI, and IDE for writing the code. We require node.js to be more significant than 8.11, and npm needs to be greater than 5.6.

Overview of Angular Material Install
The angular material installation contains the UI library for angular developers. In addition, angular material installation style is specified in the visual, interaction design, and visual system, which adapts to different screen sizes and devices. To start the angular material installation first, we need to create a new angular project using the ng CLI tool.
Angular ng CLI tool of angular makes angular development very easy by providing commands to generate the directive, components, and services. After installing the angular material, we can quickly create our web application project and add the angular material component to our code.
How to Use Angular Material Installation?
To use angular material installation, we require node.js, npm, Angular CLI, and IDE to be installed in our system.
Below we are installing all the packages one by one as follows:
1. Node.js
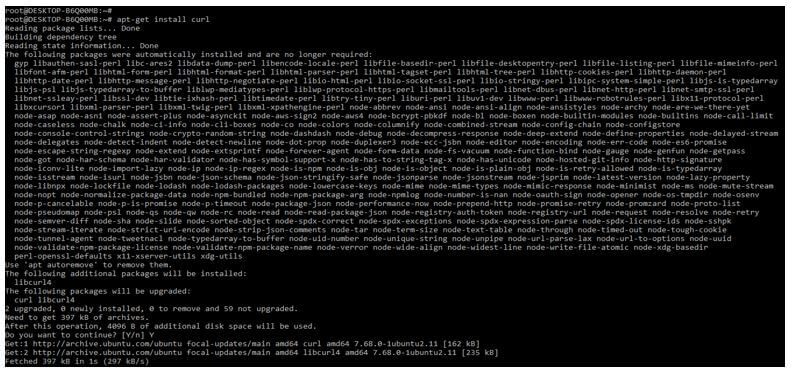
- To install the node.js on the ubuntu system, first, we need to install the curl command in our system. Curl is used to downloading the specified package of node.js. By using curl, we can download the fixed version package of node.js.
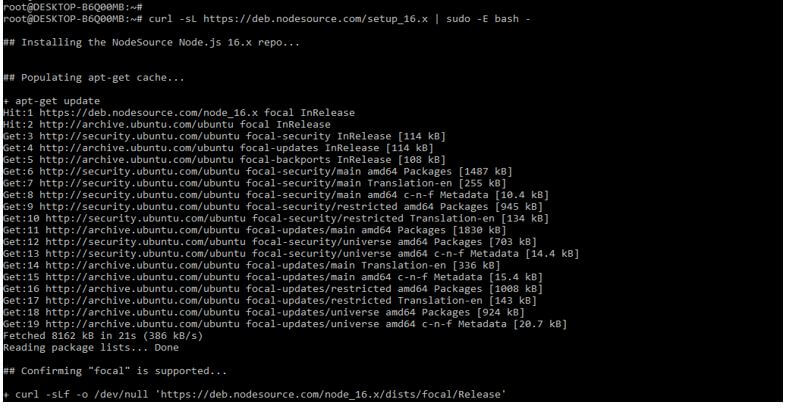
- The below example shows installing the curl package and downloading the node.js as follows. After installing the curl package, we are downloading the node.js package. We are downloading the node.js version as 16.
Code:
apt-get install curl
curl -sL https://deb.nodesource.com/setup_16.x | sudo -E bash –
Output:
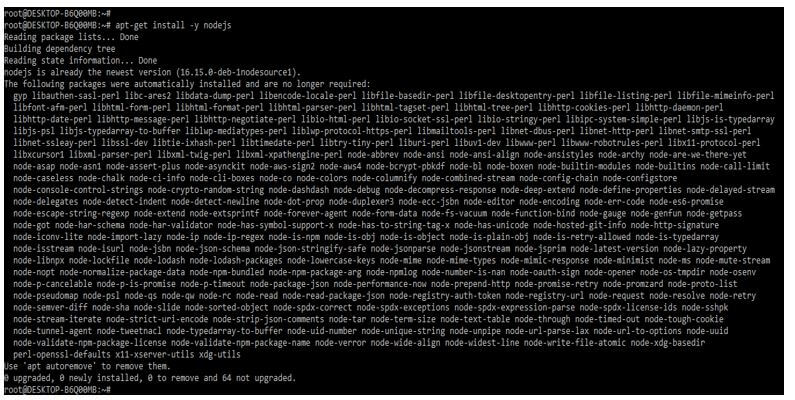
- After downloading the version of nodejs, we can now install the same by using the apt-get command as follows. In the example below, we have already installed node.js, so it will show that zero new packages are installed.
Code:
apt-get install -y nodejsOutput:
- If suppose we have already installed the node.js version, we can check the installed version of node.js by using the following command.
Code:
node –v
node --version
Output:
2. Npm
- Using the apt-get command, we can install the npm package on the ubuntu system. Npm package is handy while installing the package of angular material.
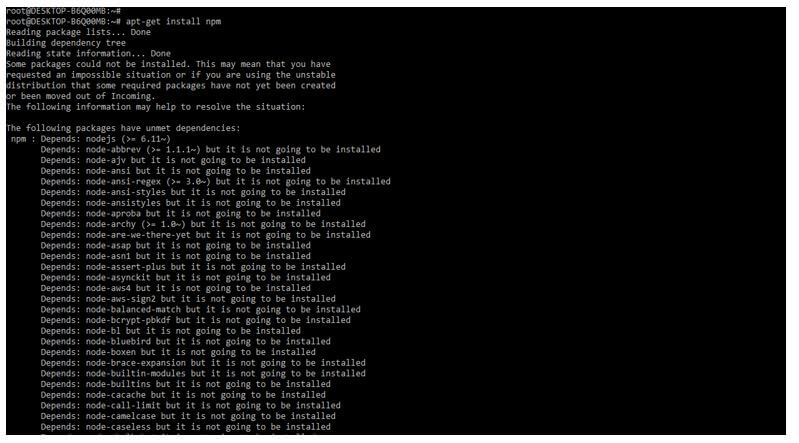
- The below example shows the installation of the npm package using the apt-get command as follows. In the below example, we have already installed a new version of npm to show all the dependent packages, and the npm package is already installed on our system.
Code:
apt-get install npmOutput:
- We can check the installed version of the npm package by using npm –v, and the npm –version command are as follows. The example below shows that our system has installed the npm version as 8.5.5.
Code:
npm –v
npm –version
Output:
3. Angular CLI
- We need to install the Angular CLI in our system to work on angular material. We can install the angular CLI by using the npm command.
- The below example shows installing angular CLI on the ubuntu system as follows.
- In the below figure, we can see that we have changed 196 packages when installing angular CLI.
Code:
npm install -g @angular/cliOutput:
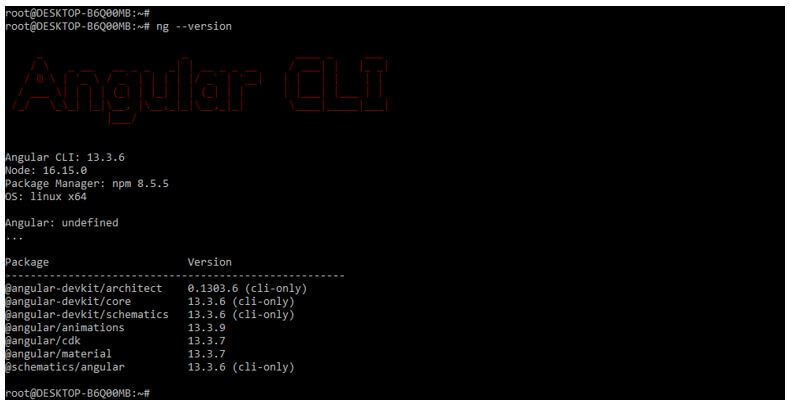
- We can check the angular CLI version using the ng –v and ng –version commands. The below example shows to check the installed version of angular CLI is as follows. When checking the angular version, it will show the angular version as 13.3.6, the node version as 16.15, and the npm version as 8.5.5.
Code:
ng –versionOutput:
4. IDE for Writing the Code
- In the below example, we install the angular CDK, angular animations, and angular material.
- We are installing the IDE by using the npm command. In the below example, we install CDK and animations using the npm command.
Code:
npm install @angular/cdk @angular/animations –saveOutput:
How to Add Angular Material Installation Project?
The below steps show how to add the project of angular material installation as follows.
We need to install angular material CLI in our system to add the angular material installation project. However, we have already installed the CLI in our system, so we do not need to install it again.
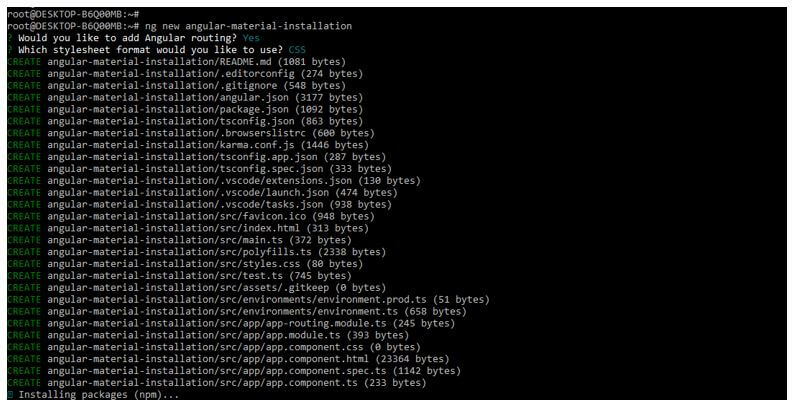
1. We are creating the workspace for our angular project. We are creating workspace names as angular-material-installation. The below example shows how to make the workspace of our angular project. We are adding angular routing; this option will pop up when creating a workspace. Also, we are selecting the stylesheet format as CSS.
Code:
ng new angular-material-installationOutput:
2. We are adding the same to our project in this step. The below example shows add the angular material library as follows.
Code:
cd angular-material-installation/
ng add @angular/material
Output:
3. We are adding the configuration as follows. We are adding the configuration by using the ng module and importing the specified module in our project.
Code:
@NgModule ({
  imports: [module],
  })
export class angular { }
Output:
4. Now, we are importing the angular material component as follows. We are importing the input, button, checkbox, and radio module. We are importing the same module by using NgModule.
Code:
import { MatButtonModule, MatInputModule, MatCheckboxModule , MatRadioModule } from '@angular/material';
@NgModule({
imports: [
   MatButtonModule,
   ………..
   MatInputModule
] } )
Output:
5. We are implementing examples of angular material design as follows. In the below example, we are creating an app.component.html file.
Code:
<div class="container">
   ………..
</div>
Output:
Conclusion
After installing the angular material, we can quickly create our web application project and add the angular material component to our code. In addition, angular material install provides the UI component, which works on a desktop, web, and mobile.
Recommended Articles
This is a guide to Angular Material Install. Here we discuss the introduction, overview, and how to add an angular material installation project. You may also have a look at the following articles to learn more –
