Updated April 8, 2023

Introduction to Angular Material NPM
The following article provides an outline for Angular Material NPM. NPM stands for Node Package Manager; it is one of the important features of Node.js. We can use NPM via a command-line interface, and it basically interacts with the remote registry, which helps us to download the dependency. By the help of this, we can easily use and consume the JavaScript module which are available or, we can say, present in the registry. NPM does not specifically belong to angular. Since it manages Packages and this packages are in the format of CommonJS and also include the metadata file, which is of form JSON.
It basically acts as the default package for the JavaScript runtime environment. It contains various components such as command-line interface, public, private packages, online database etc. It also has an official website where we can see available packages online, and NPM manages this package and registry both. Here we will see how we can use this to create our angular application, which uses material as the added library for designing for better clarity.
Syntax of Angular Material NPM
NPM is alone a lot and big thing that provides us with different and various types of commands to install and manage our dependency required in the angular application. Here we will see a few commands which can be used to install and create the angular project. Node and NPM is the Prerequisites to start with the angular application.
To install the angular CLI:
npm install -g @angular/cliAs you can see in the above syntax, we are trying to install the angular cli by using NPM; first, it takes npm as the identifier; after that, install followed by the dependency or the package we want to install from it.
How NPM Works in Angular Material?
As we know that why we are using npm in the angular project, it provides us packages and manages our dependency, which is needed to create our angular application.
Here we will see detail about NPM with steps to install and create the angular project using npm.
NPM manages the packages which are local dependency for a particular project; it can install any package or dependency for our project in just one simple command. It also contains a number of packages which represent a different type of dependency depend on the requirement.
It has a package.josn file contains all the dependency and their detail about the version and all; if we want to reinstall the dependency, it will make use of the package. json file to download then for the exiting project. For this, we just have to run the simple below command, and it will install all the required dependency needed by the existing project to run; see the below command and try to run this in your application.
Code:
npm installIt also maintains the package-lock.json file, which automatically get an update whenever there is a change in the package. json file.
So we order to create the angular project, we required the dependency, which is managed by the npm, so it is the basic requirement to start our angular project. So let’s see at each step to create the angular project from scratch using NPM and manage our dependency using NPM. Later, we will add the material dependency to it; we will see the node_module package created by the npm.
- First, we have to set up the requirement on our machine to use npm, following the below construction.
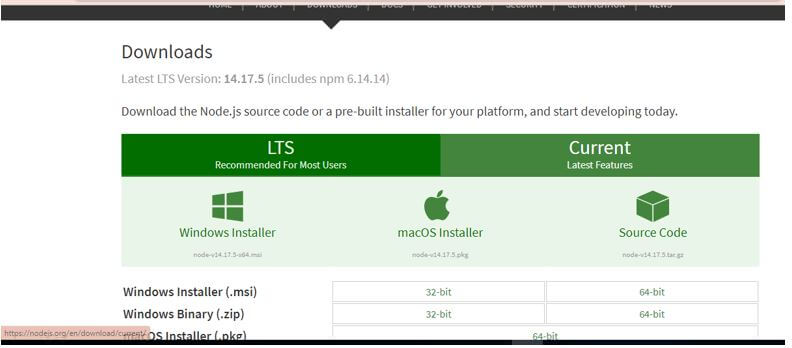
- Install node and npm on your machine with the below-specified version.
- Node 8.9+ and NPM 5.5.1, install them by the below URL, an after that, we can check the version of each of them.
URL:
https://nodejs.org/en/download/
- Check the version by running the below command.
For node:
Code:
node -vOutput:
For NPM:
Code:
npm -vOutput:
1. Install angular cli.
Code:
npm install -g @angular/cli2. Create angular project.
Code:
ng new your project name
>> ng new my-first-project
suitable name for your project 'my-first-project'
3. Install dependency using npm below command.
Code:
npm install4. Run the application using the below command.
Code:
ng serve5. Test it running it on the below URL.
http://localhps:4200
6. Now, the last step is to install the material library to the existing project.
Code:
ng add @angular/materialStart by using the modules.
Example of Angular Material NPM
Given below is the sample example using the material library we are trying to use card and button for this example, the purpose is just to show the usage of NPM while creating a project, follow above steps to setup the NPM env on your machine and build a useful application.
a. index.html code:
<link href="https://fonts.googleapis.com/icon?family=Material+Icons" rel="stylesheet">
<demo-npm>loading..</demo-npm>
b. demo-npm.componenet.ts code:
import { Component } from '@angular/core';
@Component({
selector: 'demo-npm',
templateUrl: './demo-npm.componenet.html',
styleUrls: [ './demo-npm.componenet.css' ]
})
export class AppDemoComponent {
}
c. demo-npm.componenet.html code:
<mat-toolbar color="primary">
<mat-toolbar-row class="flex">
<span > NPM in Angular Material !!</span>
</mat-toolbar-row>
</mat-toolbar>
<div>
<mat-card>
<button mat-button color="primary">One</button>
<button mat-button color="warn">Two</button>
<button mat-button color="accent">Three</button>
</mat-card>
</div>
d. module.ts code:
import {NgModule} from '@angular/core';
import {MatButtonModule} from '@angular/material/button';
import {MatCardModule} from '@angular/material/card';
@NgModule({
exports: [
MatButtonModule,
MatCardModule
]
})
export class MaterialDemoModule {}
// include module as per the need.
Output:
Conclusion
By the use of NPM, we can easily manage our dependency inside the project, we just have to install and run the correct command to add any dependency inside our project, and it will manage by the npm, NPM manages this dependency in an angular project in the folder called as ‘node_module’, which is pretty much easy, less overhead and not at all time consuming for the developers.
Recommended Articles
We hope that this EDUCBA information on “Angular Material NPM” was beneficial to you. You can view EDUCBA’s recommended articles for more information.


