Updated March 31, 2023
Introduction to Angular material template
Angular material provides us an easy way to create the template using material library tags and module inside it. Templates are nothing but the HTML pages that we create for our application. Inside the template, we can use any of the material library module tags, which is valuable to create and design our template. But the module should be present in the root module file in order to use it. To create our own template, we can simply create html file and write our code inside it; the material will provide us default styling and designing which make our application look more user friendly, and by using a material different module to create the template, we can make the development very fast, because it is already built we just have to use as per our need. In the coming section of the tutorial, we will have a closer look at its implementation.
Syntax
As we already know, that template can be easily created in a material library; we can use any of the material in the build module to perform the desired action; let’s have a closer look at the syntax to create it see below;
demo.temp.component.html:
<mat-card>Simple card</mat-card>As you can see, we are trying to create the template using the material library and trying to use one of its components saying ‘mat-card’. in this way; we can use any of the available components inside it. Also, we can write our own code apart from this.
How to create a template in Angular material?
We can easily create templates in using the material library module. The section will see how to use a different component inside the template to create and design our first template using the material library. First, let’s see why we need it; in order to create and use the component, we must have the required module in the root module file; let have a look at the steps needed to create the template in angular using material see below;
1) create a .html to hml file in your project; after this, we can place come inside it to design our template; in this section, we will have to look at the simple file which will help us to get a better idea see below;
e.g. :
<button mat-flat-button color="primary">Hello</button>
<button mat-flat-button color="accent">world</button>
In the above, we have cerate and used ‘button’ inside the temple, but for this, we have to have a button module from material in place in order to use the tag without any error and be able to see the styling and animation provided by the angular material library. So in this way, we can use any of the components inside our template in order to create it.
follow the below steps to create a sample project in angular using material library also, after this only we will be able to create the template and be able to use the material library in the build module in order to create our template; let’s get stated see below;
- download the angular CLI globally into your machine for windows; follow the below command. Also, it will help us to install any of the angular dependency directly.
e.g.:
npm install -g @angular/cli)3) now we can create our first angular project using CLI, execute the below command on the command prompt, here you can specify the name of your project, you can use any name see below command for windows with the project name;
e.g.:
ng new your project name
>> ng new my-first-project
you can check the project by going to the specified project location where you have executed the command.
4) after creating the project, we cannot see angular dependency until we run the below command; it will create the and install the required dependency for us, execute the below command on the command prompt;
e.g.:
npm install5) now run the application using the below command, it will start the server for us, and after that, we can test our application if any error you can see on the command prompt itself while running it;
e.g.:
ng serve6) default it run on 4200, type in the below URL on a browser to test your application see below;
e.g.:
http://localhps:42007) install material library to use it inside the application and cerate the templet after this
e.g.:
ng add @angular/materialnow we are ready to create the template using the material library. We have already mentioned the steps to create the template inside the application follow that.
Example of Angular material template
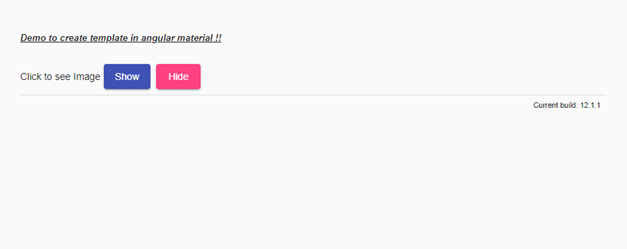
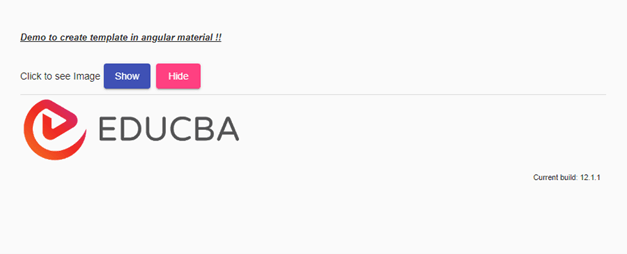
Sample example to caret template using material library component, for demo purpose we are using button component to hide and show the ‘image’.
1) inde.html code:
<!DOCTYPE html>
<html lang="en">
<head>
<meta charset="utf-8">
<meta name="viewport" content="width=device-width, initial-scale=1.0">
<link href="https://fonts.googleapis.com/icon?family=Material+Icons&display=block" rel="stylesheet">
<title>demo template</title>
</head>
<body class="mat-app-background">
<demo-temp>Loading ..</demo-temp>
<span class="version-info">Current build: 12.1.1</span>
</body>
</html>
2) module.ts code:
import {NgModule} from '@angular/core';
import {MatButtonModule} from '@angular/material/button';
@NgModule({
exports: [
MatButtonModule,
]
})
export class TemplateDemoMaterial {}
// include all the required modules here in order to use them inside the application to create the template without error.
3) demo.temp.component.ts code:
import {Component} from '@angular/core';
/**
* @title demo template
*/
@Component({
selector: demo-temp',
templateUrl: 'demo.temp.componen.html',
styleUrls: ['demo.temp.componen.css'],
})
export class DemoTemplate {
imgshow: boolean = false;
show(){
this.imgshow = true;
}
hide(){
this.imgshow = false;
}
}
4) demo.temp.component.html code:
<h5><u><i> Demo to create template in angular material !! </i></u></h5>
<section>
<div class="example-label">Click to see Image</div>
<div class="example-button-row">
<button mat-raised-button color="primary" (click)= "show()">Show </button>
<button mat-raised-button color="accent" (click)= "hide()">Hide</button>
</div>
</section>
<mat-divider></mat-divider>
<div *ngIf="imgshow">
<img src="https://lh5.googleusercontent.com/p/AF1QipN_aupGaqTiv5_xbfKTl2qZz0XAJlGMt0WucgkU=w319-h100-k-no" alt="Photos of educba">
</div>
Output:
Before click :
After click:
Conclusion
By using a template, we can design our application and see something on UI. this template is responsible for showing the data and making users perform any action on it. It interacts with the ts file and shows data on the UI. Therefore, it is very easy to create and maintain where we write all our logic.
Recommended Articles
This is a guide to Angular material template. Here we discuss How to create a template in Angular material along with the example and output. You may also have a look at the following articles to learn more –


