Updated July 7, 2023

Introduction to Area Tag in HTML
In this article, we will learn about Area Tag in HTML. Area Tag defines a hotspot in an image map and associates or links with a hypertext reference to allow a user to be clickable on the web page. It helps link the different pages while a map portion is clicked. And a tag becomes useful when there is a need for multiple links on the image.
Syntax
The basic syntax is given below:
<area alt="text" class=" "coords = " " shape " "/> ;Here alt is used for alternate text if an image is not rendered.
- class: Defines a class name for an element.
- coords: Has a set of values for the shapes.
With an image map, the syntax is:
<img usemap="# name" src="path loacation">
<map name=" name">
<area shape="shapeName1" coords="x,y coordinates" href="html linkPath">
<area shape="shapeName2" coords=" x,y coordinates " href="htmllinkPath">
</map>
Explanation: This is an empty tag with no closing tags, whereas, in the case of XHTML, it is declared as <area/>. And this area tag is always embedded with <map> tag (included in the map container), which gives the coordinates values of the specific image. And also, an overlapping takes place inactive areas; it is resolved by giving priority to the higher area is activated. The following portion covers how to use the area tag with an example and Brower compatibility and supported attributes by them.
How does area Tag work in HTML?
Here is the process to make it through; initially, the image in the image map.
1. To insert an image to the page, we are supposed to use an image tag which is given below:
<img src="edu.jpg" alt="EDUCBA logo"> // image from the saved folder. Also, we can get from the web URL directly and map with <map> tag.It comes with src attributes: Source and alt-text describing the image content.
2. Secondly, open the map element with the attribute #map. This image tag comes with a use map followed by the ‘#’ symbol (use map =” #map”). Mapname should be the same name as the usemap.
How to create an image map? Using map and name attributes together to have images and maps together. The browser recognizes the area of the shape when the mouse cursor over the screen becomes a pointer(hand symbol).
3. To declare the areas that are to be used to map.
<area shape="rect" cords=…….href=""  alt ="">
href comes with alt attribute by default.
Attributes
In general, HTML tags have one or more attributes that help show the browser visually pleasant. There are three varieties of attributes used, namely global, event handling, and element-specific attributes. The area tag contributes tag-specific attributes, and a description of them, which are listed below, and the HTML 5 has some new attributes.
1. Tag-Specific Attributes
| Name of Attributes | Description | Example |
| alt | Defines an alternate text in the specified area which improves accessibility. | <area alt=”hello” shape=”circle” coords=”40, 50, 10″> |
| href | Defines the hyper reference means a link to the next page points/ URL of a Page. It changes an area into a hyperlink. | <area href=”doc.html” alt=document” shape=”circle” coords=”30, 30, 20″> |
| shape | Defines the different shapes to be done on the image. | <area href=”doc1.html” alt=”First doc” shape=”circle” coords=”40, 40, 20″>
<area href=”doc2.html” alt=”Second doc” shape=”rect” coords=”11, 82, 92, 160″> < area href= “doc3.html” alt= “Third doc” shape=” poly” coords=” 11, 170, 12, 110, 15, 197″> |
| coords | Gives the specific values appropriate to the region in the image. The Coords are specified as follows :
Default: no cords required. Rect: left, top, right, bottom Circle : x , y ,radius Poly: x1,y1, x2,y2,x3,y3… |
<area href=”doc.html” alt=document” shape=”circle” coords=”30, 30, 20″> |
| target | Specifies where to open the link page, or I can say the end target page. | <area href=” new.html” target=” _blank” alt=” First” shape=”rect” ords=”10, 40, 60, 170”> |
| Nohref | Defines that absence of href. This means the area doesn’t have a link to next page | <area nohref shape=” rect” ords=” 10, 40, 60, 170″> |
| type | Specifies the content type (MIME) | <area href=”pic.jpg” type=”im/jpeg” alt=”Authors edition”> |
| hreflang | Specifies language-type | <area hreflang=”es-ES” href=”esd.html” alt=”Second doc (spanish version)” shape=”rect” coords=”10, 60, 90, 150″> |
2. Standard Attributes
The description of these attributes has already been discussed in the previous article.
- Access key
- class
- dir
- id
- Style
- lang
- id
- tab index
- title.
3. Global Attributes
- onmouse down
- onmouse up
- onmouse over
- onmouse move
- onmouse out
- on focus
- on blur
- onkey press
- onkey down
- onkey up.
Examples to Implement Area Tags in HTML
Below are examples of implementing area tags in HTML:
Example #1
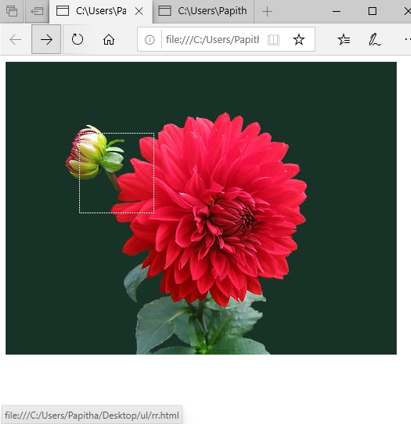
In the below example, I have created a jpg image diary.jpg. When u execute the code, the hand tool moves over the image at the specified cords; when you click on it, it directs you to the page rr.html.
Code:
<!DOCTYPE html>
<html>
<body>
<img usemap="#Diary" src="diary.jpg">
<map name="Diary">
<area shape="rect" coords="94,91,189,193" href="rr.html">
</map>
</body>
</html>
Code: rr.html
<!DOCTYPE html>
<html>
<head>
hello
</head>
<body> Online tutorial Class</body>
</html>
Output:
Example #2
Code:
<!DOCTYPE html>
<html>
<body>
<img src="edu.jpg" alt="EDUCBA logo" width="412" height="82" usemap="#ccmap" class="logo"/>
<map name="ccmap">
<area shape="rect" coords="89,9,294,50" href="sha.html" alt="EDUCBA">
<area shape="rect" coords="297,7,407,54" href="rr.html" alt="Welcome">
</map>
</body>
</html>
Code: rr.html
<!DOCTYPE html>
<html>
<head>
hello
</head>
<body> Online tutorial Class</body>
</html>
Code: sha.html
<!DOCTYPE html>
<html>
<head>
hello
</head>
<body> Welcome to the Page</body>
</html>
Output:
The Output below shows the logo of EDUCBA; clicking the word BA directs to the page Hello page.
Example #3
Code:
<!DOCTYPE html>
<html>
<body>
<img src="new.png"  alt="usemap" border="0" usemap="#Protocols"/>
<map name="Protocols">
<area shape="Poly"
coords="74,0,113,29,98,72,52,72,38,27"
href=https://www.manageengine.com/network-monitoring/what-is-snmp.html"
alt="SNMP Tutorial"
target="_blank" />
<area shape="rect"
coords="22,83,126,125"
alt="FTP Tutorial"
href="https://www.techtarget.com/searchnetworking/definition/File-Transfer-Protocol-FTP"
target="_blank" />
<area shape="circle"
coords="73,168,32"
alt="http Tutorial"
href="https://www.webopedia.com/TERM/H/HTTP.html"
target="_blank" />
</map>
</body>
</html>
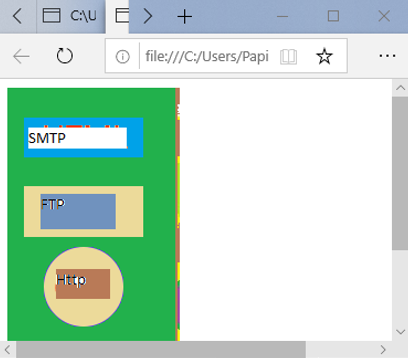
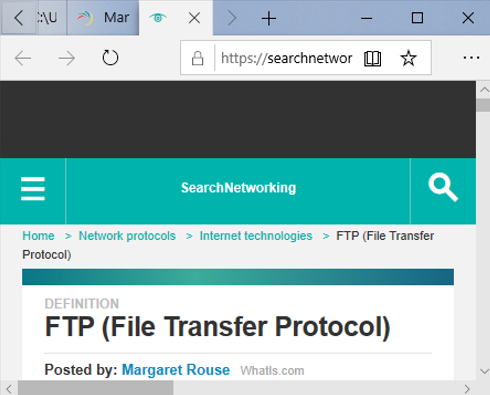
Explanation of the above program: In this example, we have created an image map using the image file called new.png, which has three clickable areas declared within it using the <area> tag. The first clickable area is a polygonal shape that links to the SNMP page called www.managengine.com. The second clickable area is a rectangular shape that links to the FTP page called www.searchnetworking.com, and finally, the last clickable area is a circle that links to an HTTP page called www.webopedia.com.
Output:
Output:
Conclusion
Therefore, we have seen how the area tag is used in active areas in switching to the pages with brief information explaining how to use the < area> tag in clickable areas with syntax and demo examples.
Recommended Articles
This is a guide to Area Tag in HTML. Here we discuss the introduction, area tag work, appropriate syntax, attributes, and respective examples. You can also go through our other related articles to learn more –


