Updated March 28, 2023
Introduction to ASP.NET PostBack
Post Back is one of the common define processes in the software industry where the server receives the posted response from a web application and returning the usual information back to the browser for display or presenting in the screen for the end-user, suppose for a web application; there have one the screen where user name and password need to provide by the user in the browser, then those values will post to the server for authentication, then server-side code will execute the logic and returning back to the web browser for display. In this topic, we are going to learn about ASP.NET PostBack.
Syntax
ASP.net postback can be used for this kind of scenario, where some of the critical or secure tasks cannot be handled from the client browser; in that case, we need server site attention, and post back actually comes into the picture. If there are multiple web controls in one web page, that web controller must have its own auto post back define. ASP.net has its own auto postback configuration, which can be defined in the JavaScript function. When that specific Java script function is called, it will automatically push the postback, which means sending the required data to the corresponding web server.
<script language="javascript">
Function doPostBack (target, eventArgs) {
if ( !formName.onsubmit || (formName.onsubmit() != false)) {
fromName.targetField.value = target;
fromName.evenArgsField.value = eventArgs;
fromName.submit();
}
</script>
This JavaScript function is mainly triggered when a postback is required, and this method sets the value of the target URL and requires post arguments passing by that event, then submit the corresponding form.
Hidden fields are also actually required for holding multiple data for one web page. For example, below are two fields mainly used for posting back and setting the javascript values.
<input type="hidden" name="evenArgsField" id="evenArgsField" value="" />
<input type="hidden" name="targetField" id="targetField” value="" />
This doPostBack method is normally automatically created by the ASP.net application; the developer doesn’t need to manually create this method. ASP.net web application can easily communicate one client-side program with the server-side program by using the above javascript method as intermediate.
Every ASP.net web page normally followed one specific life cycle like below:
- The javascript doPostBack function was called from the client-side browser, and the client browser page was submitted to the server-side for further process.
- ASP.net runs ASPX code internally and regenerates the page.
- ASP.net ASPX code then reads the required information or specific state information from the hidden field value, does the corresponding require a task, and updates that specific control.
- ASP.net then calls the loading process of the page.
- Then proper or appropriate control has been fired for the change event.
- After firing the corresponding even controller, the page populates based on the postback value.
- At last, the unloading of the page event has been fired.
- Now create the new page which has been sent to the client for the final presentation.
Example to Implement ASP.NET PostBack
There can have multiple examples of presenting ASP.net postback applications. One of the greatest examples to understand the same by generating one application of a tracking event. This application gives a view of the triggering events based on its proper configuration.
Event Trigger application ensures whatever data the user from the screen will be added by calling one specific event trigger, that specific logic written into the log method of corresponding ASPX dot net class. So now, when they add multiple data into the list, every time it is returning and display it into the screen as a postback response. So now, if we put some additional radio button to capture those postback responses, it will come at the end of the event to properly understand how this postback actually works in the dot net web application.
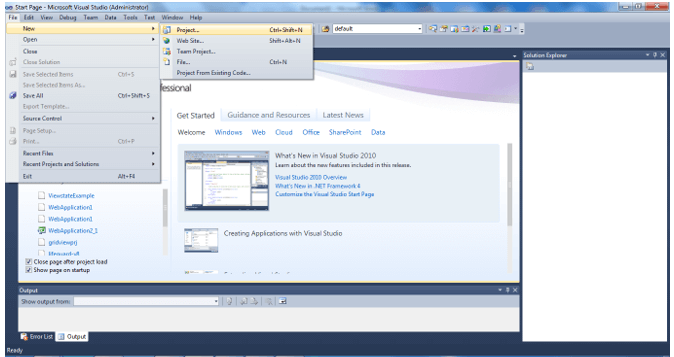
- Create a project in visual studio for creating an Event Tracker application.
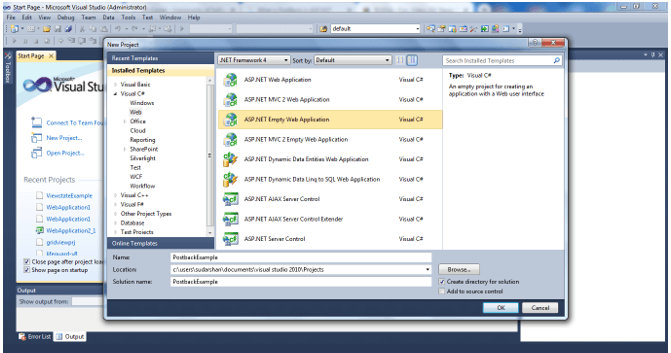
- Choose the proper DOT net version for further process.
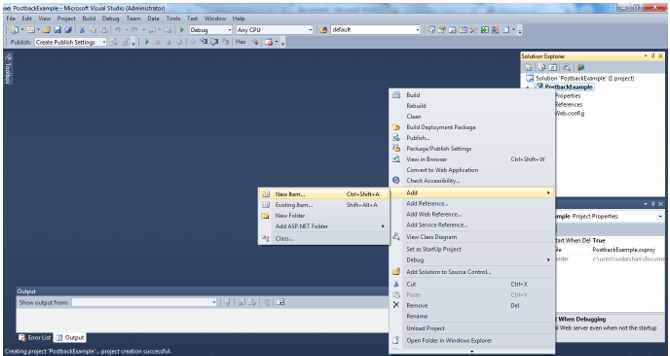
- Create a specific item to map with a specific object.
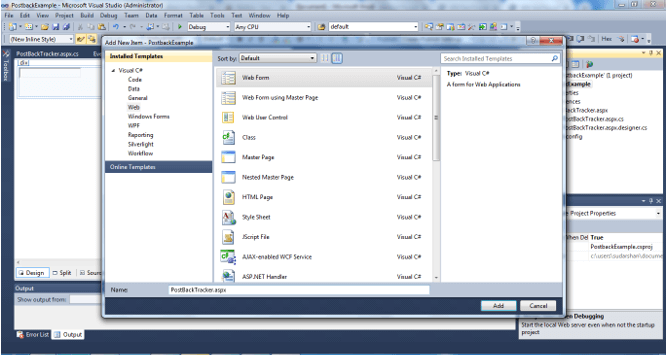
- Choose to require a template for further process in ASP.net application.
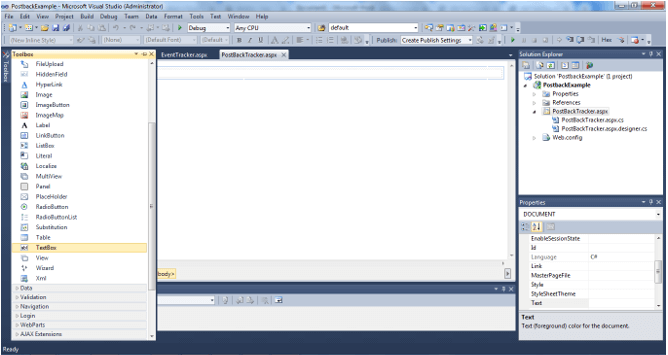
- Choose specific text boxes to design the page in the expected approach.
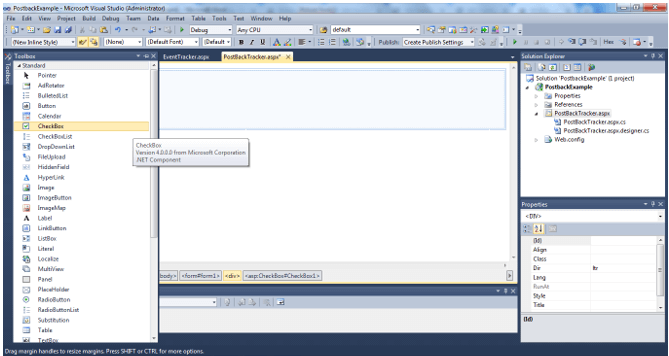
- Designing the page creating a multi-select checkbox for presenting the dashboard.
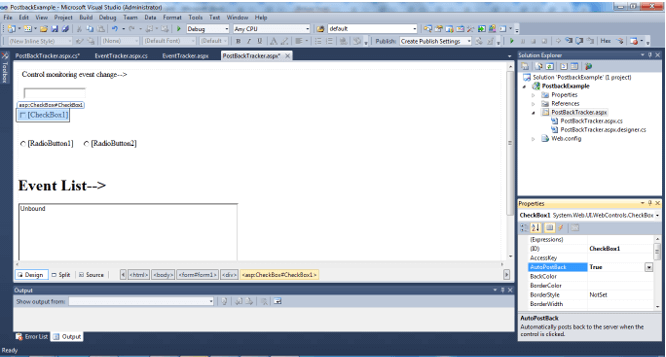
- Event Trigger controlling dashboard design preview from the visual studio tool.
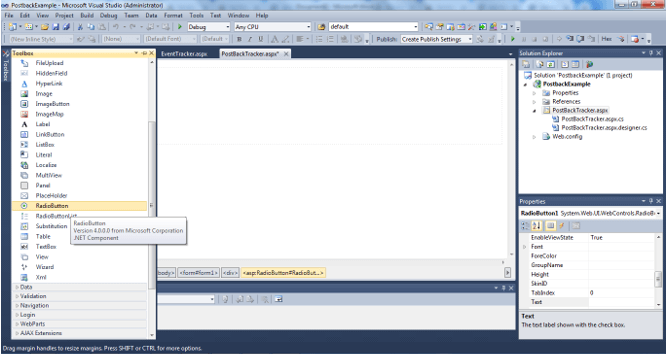
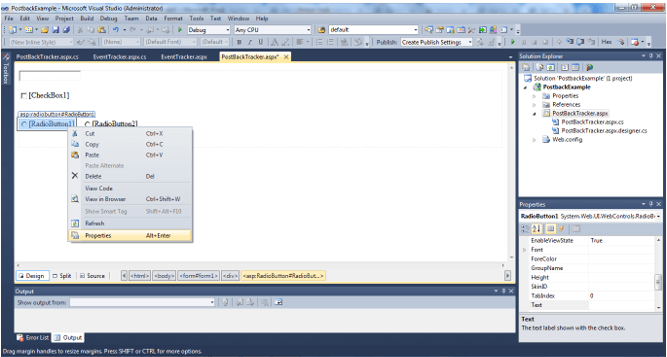
- Create a specific radio button for designing the page.
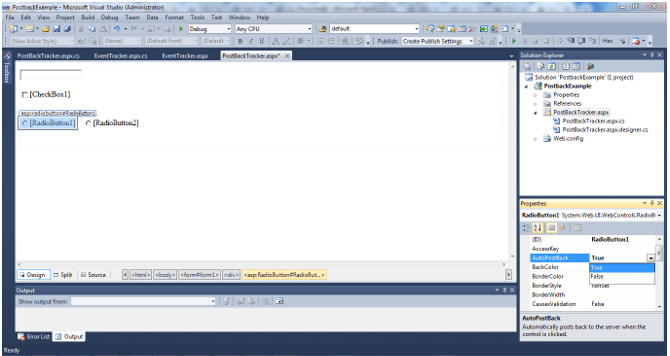
- Define the radio button individual event handler class.
- Design completed for the Event Trigger application.
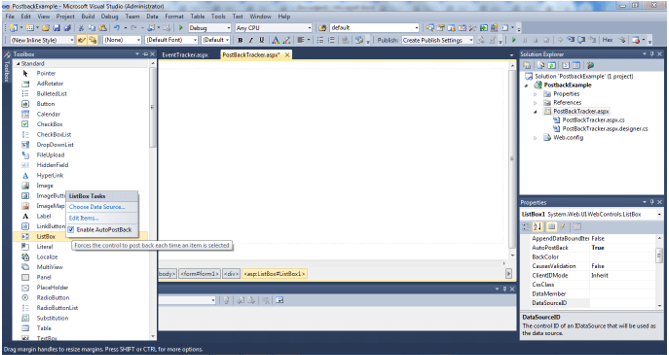
- Create one edit box and define the corresponding task.
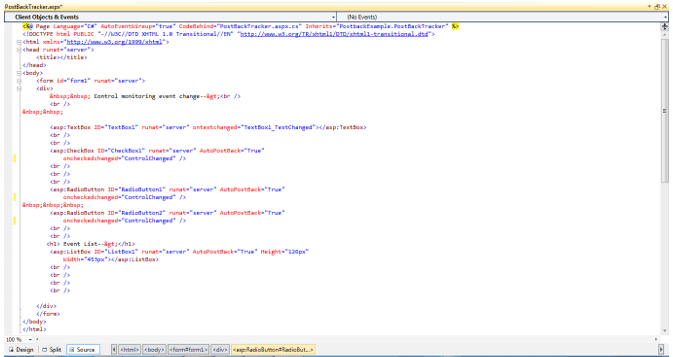
- HTML code auto-generated after completing the design of the Event Trigger application.
<%@ Page Language="C#" AutoEventWireup="true" CodeFile="ETracker.aspx.cs" Inherits="ETracker" %>
<head>
<title>Event Tracker</title>
</head>
<body>
<form id="formE" >
<div>
<h1>Monitoring the control for every change event:</h1>
<asp:TextBox ID="txt1" runat="server" AutoPostBack="true" OnTextChanged="ControlChange" />
<br />
<asp:CheckBox ID="chk1" runat="server" AutoPostBack="true" OnCheckedChanged="ControlChange"/>
<br />
<asp:RadioButton ID="opt11" runat="server" GroupName="Example"
AutoPostBack="true" OnCheckedChanged="ControlChange"/>
<asp:RadioButton ID="opt21" runat="server" GroupName="Example"
AutoPostBack="true" OnCheckedChanged="ControlChange"/>
<h1>Require expected Events: </h1>
<asp:ListBox ID="listE" runat="server" Width="380px"
Height="160px" /><br />
<br />
</div>
</form>
</body>
</html>- Corresponding the main control change method in the ASPX code base for handling those events.
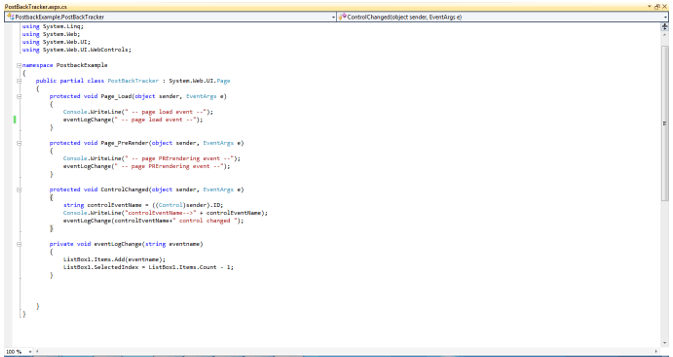
protected void ControlChange(Object sender, EventArgs e)
{
string controlName = ((Control)sender).ID;
Log(controlName + " Triggered");
}
private void Log(string entry)
{
listE.Items.Add(entry);
listE.SelectedIndex = listE.Items.Count - 1;
}
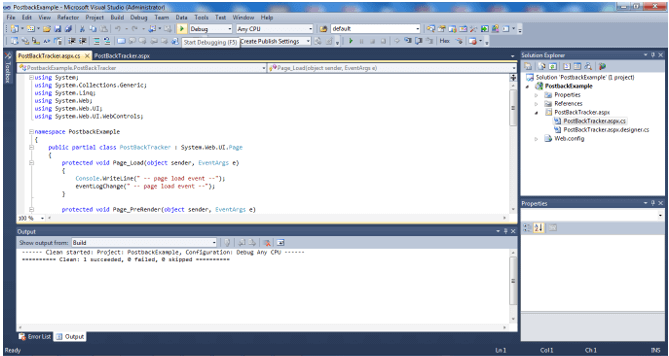
}- ASPX classes where post-back logic has been written for displaying the data properly based on the event trigger.
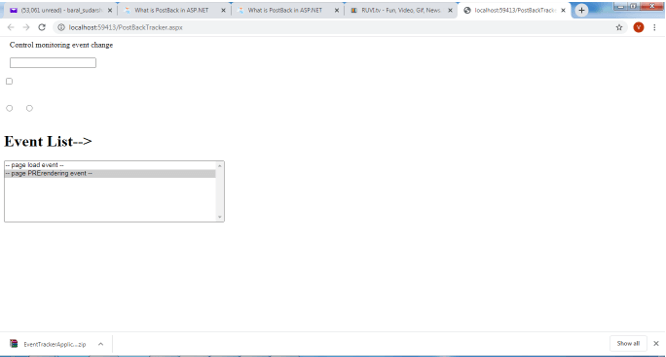
- Presenting of page loading and pre-rendering event.
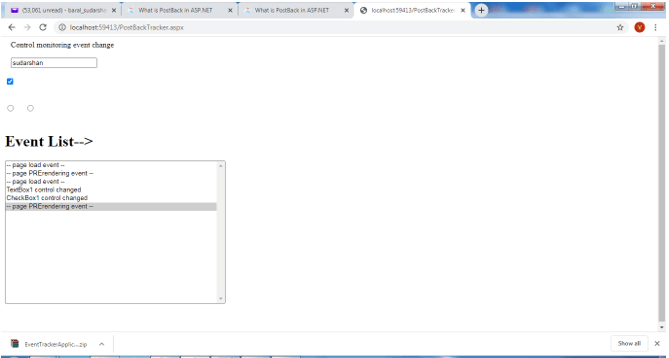
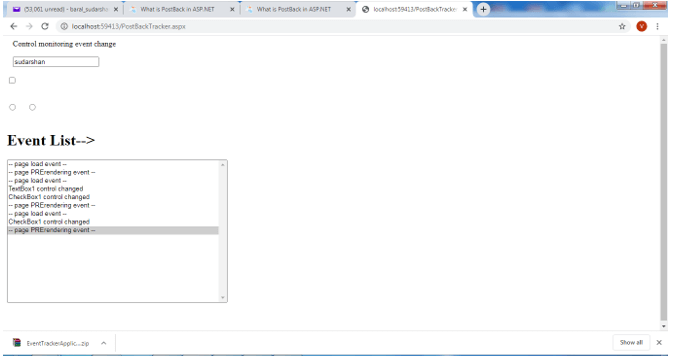
- Check the corresponding checkbox for the further population of the corresponding event.
- Uncheck the checkbox will populate the entire list data on the screen.
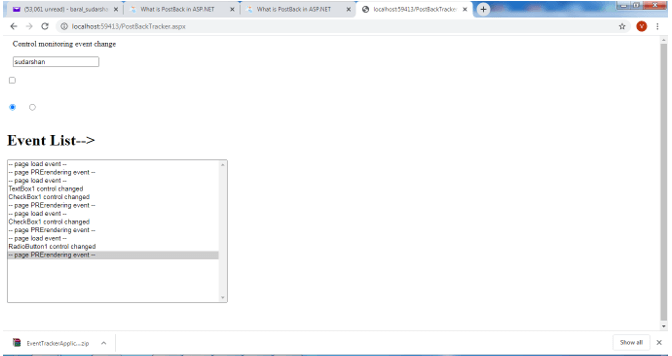
- 1st radio button was selected, then it populated the corresponding event list on the page.
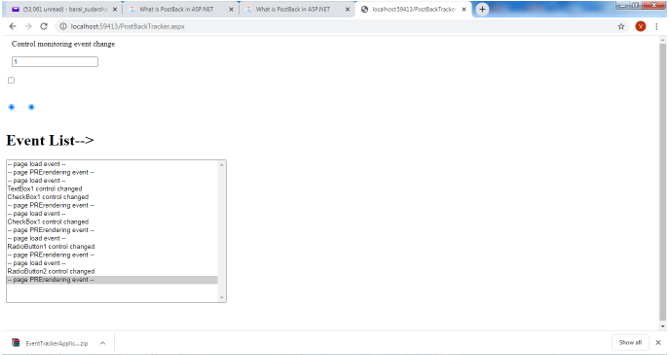
- 2nd radio button click will be given the list of postback details and presenting the same in the event list box.
Conclusion
ASP.net postback is the default characteristic of the dot net server. It must require for communicating between client-side code and server-side code. The client browser always expects to design business logic or database communication through server-side code as security. So, any critical business logic implementation or database communication postback is must require in ASP.net web application.
Recommended Articles
We hope that this EDUCBA information on “ASP.NET PostBack” was beneficial to you. You can view EDUCBA’s recommended articles for more information.
