Updated March 21, 2023
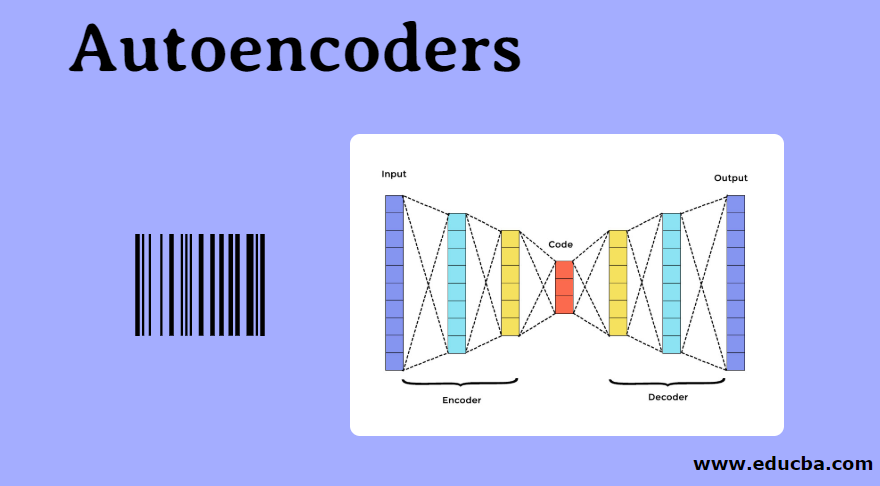
Introduction to Autoencoders
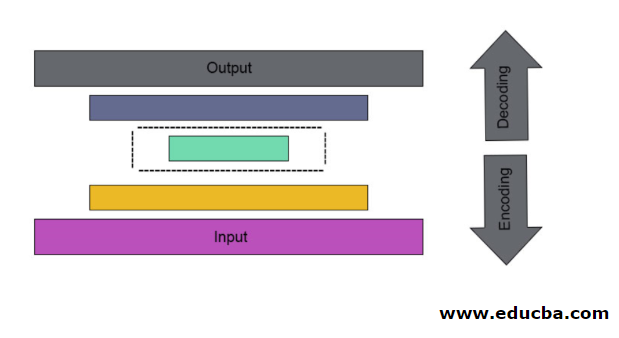
It is the case of artificial neural mesh used to discover effective data coding in an unattended manner. The Autoencoder goal is used to learn presentation for a group of data, especially for dimensionality step-down. Autoencoders have a unique feature where their input is equal to its output by forming feedforwarding networks. Autoencoder turns the input into compressed data to form a low dimensional code and then again retrace the input to form the desired output. The compressed code of input is also called latent space representation. In simple, the main aim is to reduce distortion in between circuits.
Components of Autoencoder
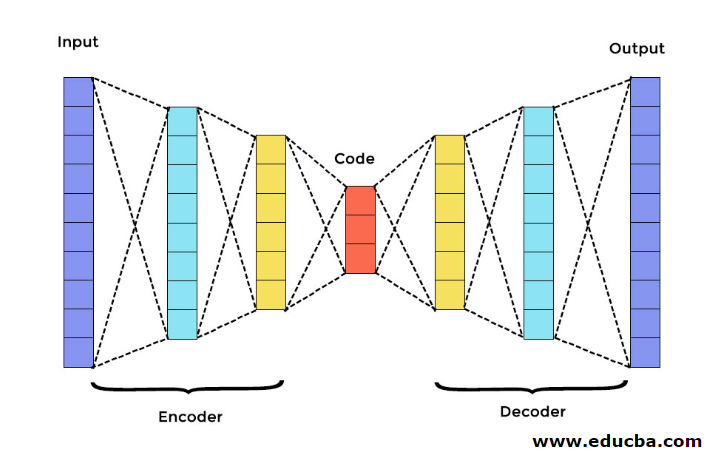
There are three main components in Autoencoder. They are Encoder, Decoder, and Code. The encoder and decoder are completely connected to form a feed forwarding mesh—the code act as a single layer that acts as per its own dimension. To develop an Autoencoder, you have to set a hyperparameter; you have to set the number of nodes in the core layer. The decoder’s output network is a mirror image of the input encoder in a more detailed manner. The decoder produces the desired output only with the help of the code layer.
Ensure that the encoder and decoder have the same dimensional values. The important parameter to set autoencoder is code size, number of layers, and number of nodes in each layer.
Code size is defined by the total quantity of nodes present in the middle layer. To get effective compression, the small size of a middle layer is advisable. The Number of layers in the autoencoder can be deep or shallow as you wish. The Number of nodes in the autoencoder should be the same in both encoder and decoder. The layer of decoder and encoder must be symmetric.
In a stacked autoencoder, you have one invisible layer in both the encoder and decoder. It consists of handwritten pictures with a size of 28*28. Now you can develop an autoencoder with 128 nodes in the invisible layer with 32 as code size. To add many numbers of layers, use this function
model.add(Dense(16, activation='relu'))

model.add(Dense(8, activation='relu'))
for conversion,
layer_1 = Dense(16, activation='relu')(input)

layer_2 = Dense(8, activation='relu')(layer_1)
Now the output of this layer is added as an input to the next layer. This is the callable layer in this dense method. The decoder performs this function. It uses the sigmoid method to obtain output between 0 to 1. Since the input lies between 0 to 1 range
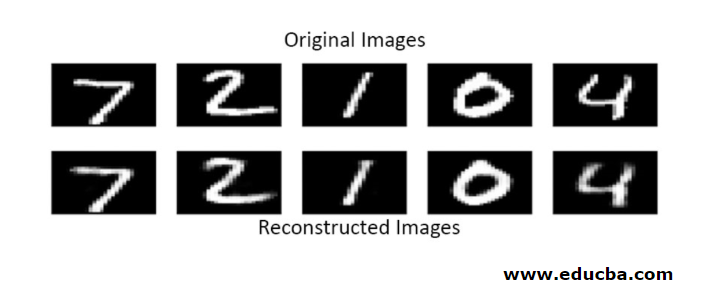
Reconstruction of input by an Autoencoder in this method is done by prediction. Then, the individual image test is carried out, and the output is not exactly as input but similar to the input. To overcome these difficulties, you can make autoencoder more efficient by adding many layers and adding multiple nodes to layers. But making it more powerful results in a copy of data similar to the input. But this is not the expected result.
Architecture of Autoencoder
In this stacked architecture, the code layer has a small dimensional value than input information, which is said to be under a complete autoencoder.
1. Denoising Autoencoders
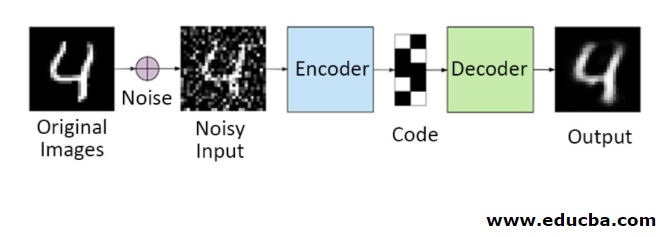
You cannot copy the input signal to the output signal to get the perfect result in this method. Because here, the input signal contains noise that needs to be subtracted before getting the result that is the underlying needed data. This process is called denoising autoencoder. The first row contains original images. To make them a noisy input signal, some noisy data is added. Now you can design the autoencoder to get a noise-free output as follows
autoencoder.fit(x_train, x_train)
A modified Autoencoder is as follows,
autoencoder.fit(x_train_noisy, x_train)
Hence you can get noise-free output easily.
Convolution autoencoder is used to handle complex signals and also get a better result than the normal process.
2. Sparse Autoencoders
To use autoencoders effectively, you can follow two steps.
Set a small code size, and the other is denoising autoencoder.
Then another effective method is regularization. To apply this regularization, you need to regularize sparsity constraints. To activate some parts of nodes in the layer, add some extra terms to the loss function, which pushes the autoencoder to make each input as combined smaller nodes, and it makes the encoder find some unique structures in the given data. It is also applicable for many data because only a part of the nodes is activated.
The sparsity constraint value is closer to zero.
To generate a code layer,
code = Dense(code_size, activation='relu')(input_img)
To add regularizing value,
code = Dense(code_size, activation='relu', activity_regularizer=l1(10e-6))(input_img)
In this model, only 0.01 is the final loss that too because of the regularization term.
In this sparse model, a bunch of code values is true to the expected result. But it has fairly low variance values.
Regularized autoencoders have unique properties like robustness to missing inputs, sparse representation, and nearest value to derivatives in presentations. To use effectively, keep minimum code size and shallow encoder and decoder. They discover a high capacity of inputs and do not need any extra regularizing term for encoding to be effective. They are trained to give maximized effect rather than copy and paste.
3. Variational Autoencoder
It is used in complex cases, and it finds the chances of distribution designing the input data. This variational autoencoder uses a sampling method to get its effective output. It follows the same architecture as regularized autoencoders
Conclusion
Hence autoencoders are used to learn real-world data and images involved in binary and multiclass classifications. It is a simple process for dimensionality reduction. It is applied in a Restricted Boltzmann machine and plays a vital role in it. It is also used in the biochemical industry to discover the unrevealed part of learning and identify intelligent behavior patterns. Every component in machine learning has a self-organized character; Autoencoder is one of that which is successful learning in artificial intelligence
Recommended Articles
This is a guide to Autoencoders. Here we discuss the main components in Autoencoder, which are an encoder, decoder, and code and the architecture of Autoencoder. You may also have a look at the following articles to learn more –
