Updated March 17, 2023
AutoFill in Excel (Table of Contents)
- What is Autofill in Excel
- Autofill in Excel for Text
- Autofill in Excel for Dates
- Autofill in Excel with Alphabets
What is AutoFill in Excel
AutoFill in Excel is quite a time-saving command which automatically fills the value to all selected cells. To use autofill, first select the data which we need to fill down below and then drag the pointer, which is there at the bottom right corner, to all subsequent cells. For example, if we have three numbers like 1, 2, and 3 and we want to fill the rest of the values automatically, select the number and then drag these using Small Square located at the bottom right corner. We will see the rest of the numbers followed by currentlnumbers chosenrs in order.
Autofill in Excel is the feature that will help you to input data automatically for a few cases. Let’s see the examples.
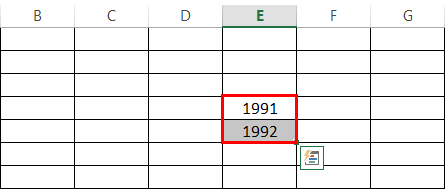
When we want to enter multiple years continuously in a spreadsheet, we don’t need to input them manually. We need to input the first two years; later, you can drag until the required number of years.
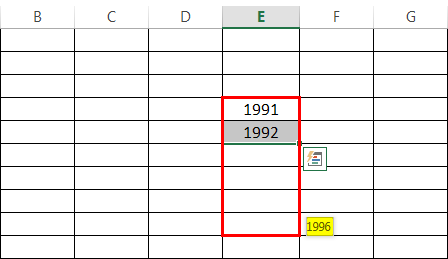
Then drag the selection until the required number of cells. The next subsequent years will fill in that dragged cells.
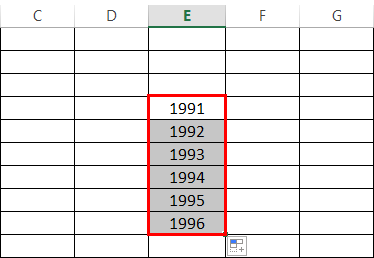
We can observe I dragged about 4 cells down, and the dragging is showing 1996, which is the value that will fill in the last cell. Once you release the mouse, the data will fill. Below is the picture after releasing the mouse.
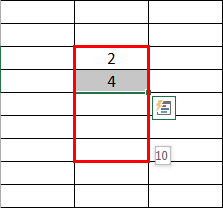
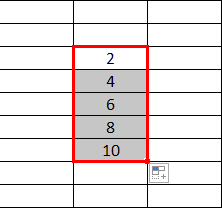
It is not limited to the sequence of numbers, but you can use this auto-fill feature dragging of even or odd numbers like below. We can observe we have 2 and 4 in the spreadsheet; when we drag three cells, it shows value 10.
Once we leave the mouse after dragging, the results will be like below.
As shown above, we can perform for odd numbers.
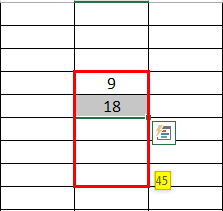
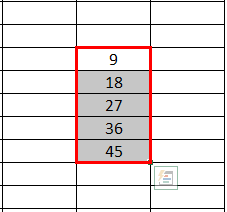
Suppose we want to know the values of the 9th table. Fill 9 and 18, then drag until the required number of cells; it will give us the values of the 9th table.
So, autofill in excel will apply for something of a similar pattern.
AutoFill in Excel for Text
This autofill feature is not only for the number but also for pattern texts like months and days.
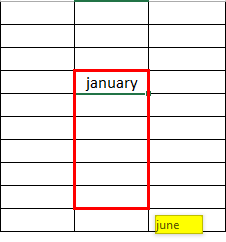
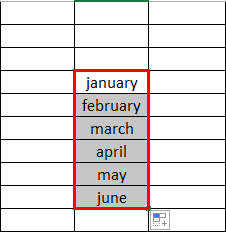
Input January in one cell,
And drag until the required length; it will automatically fill the next months once we release the mouse.
Similarly, try applying for a day.
Input Monday and drag until the required length; it will fill the next days.
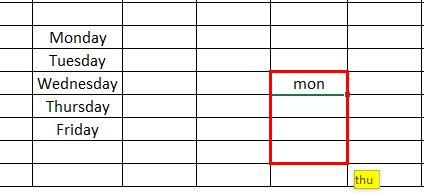
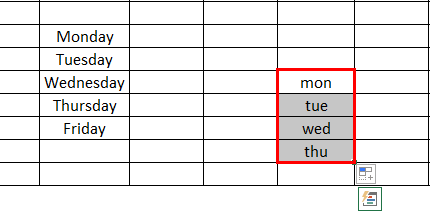
Suppose you are not good at spelling and lazy to enter an entire month or day; just input the short form and drag. Still, the Autofill feature will work. We have seen when I just input ‘Mon’; it still gives ‘Thu’.
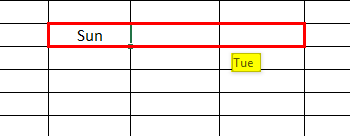
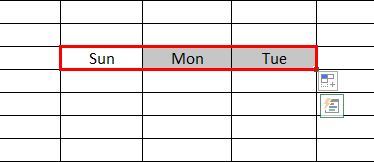
It will not only apply in a Vertical way but can use this feature horizontally also.
Below is an example of days.
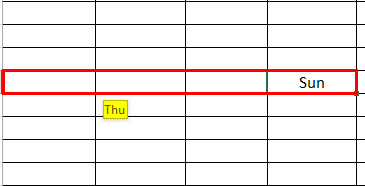
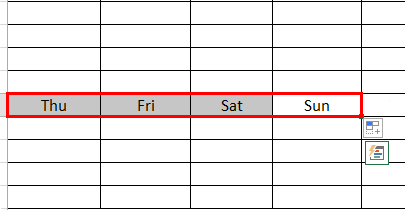
In the above example, I dragged to my right; hence, it shows as ‘Tue’; if I drag to my left, it will show as per that. We can find the below example, which dragged from right to left. While dragging, you will not find the “+” sign cursor in the left corner; it will be in the right corner only; we just need to click on the right corner and drag it to our left side. Below is an example for reference.
AutoFill in Excel for Dates
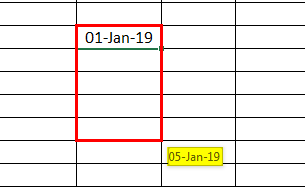
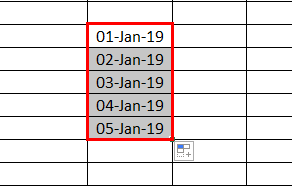
Now we will see how we can use this autofill in excel for dates. First, we will see how to automate dates, months, and years. Input the required date from where you want subsequent dates. Suppose we need the dates from 1st Jan 2019, just input and drag as usual. See, we have input 1-Jan-19
and dragged for 4 cells, it is showing 5-Jan-2019.
I hope you have understood the concept of autofill in excel. Now we will see how to work with working days (Except Saturday and Sunday).
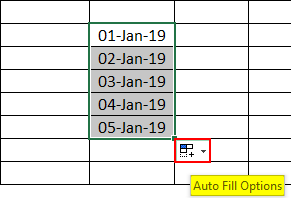
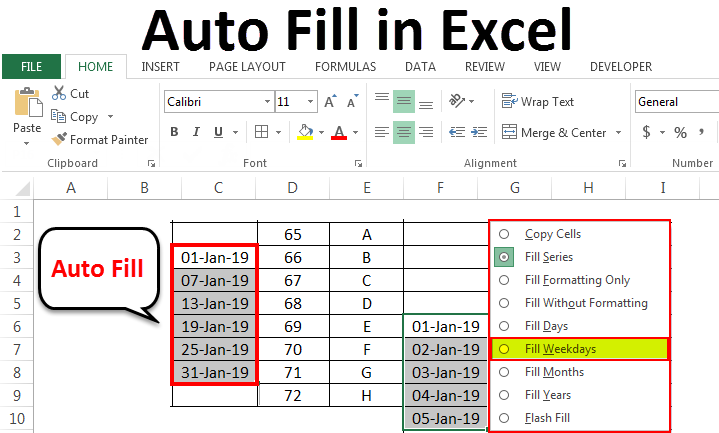
To fill only working days, drag as usual and click on the smart tag marked in red color as shown in the below picture.
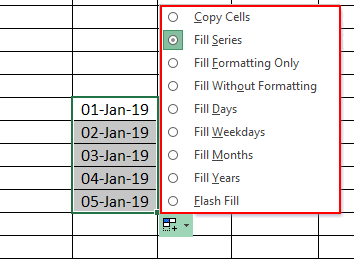
Once you click on the smart tag, a drop-down will come asking for the choice fill days, months, years and weeks, etc.
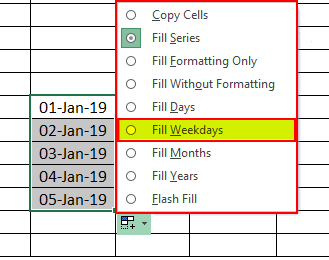
From the drop-down, select the required option; now, we want only weekdays select weekdays option.
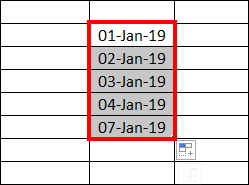
It will fill all the working days, avoiding Saturday and Sunday.
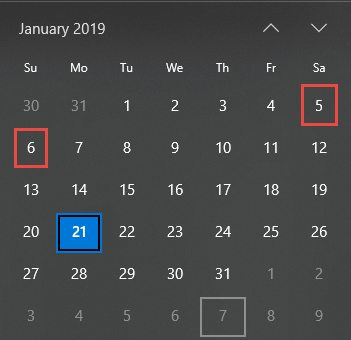
If you observe in the below example, 5-Jan-19 is Saturday, and 6-Jan-19 is Sunday.
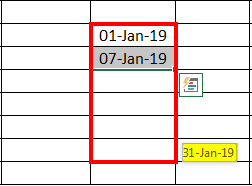
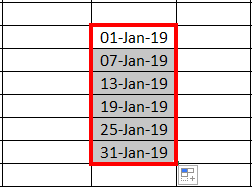
Similarly, we can autofill in excel the years and months also by selecting a respective option. In addition to these, if we want to fill dates of required sequence, like input every 5th day or 7th day, we can simply perform this with the help of auto-fill in excel. In this case, we need to auto-fill in excel two days as per the required sequence, then select both and drag until the required range.
The above example will give the below sequence.
AutoFill in Excel with Alphabets
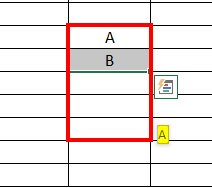
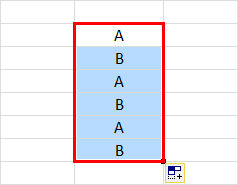
This feature of autofill in excel will not work with Alphabets. Try to fill A and B in the two cells subsequently, select them and try to drag; it will not fill the next letters, but it will only fill the same A and B in the next cells also.
If you observe the below picture, it repeats the same A and B pattern. If you give three letters, It will repeat that pattern.
Solution:
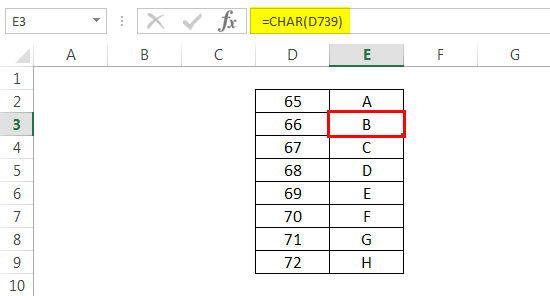
If you really want to fill Alphabets, you can apply this. First, input 65 and 66 and drag them, then input a formula CHAR(Number) which will convert the number to the alphabet as per ASCII code. This is not a part of autofill, but I usually encounter this problem while working on Excel and get this solution from Google.
In this way, we can fill the alphabet in excel. Once you reach Z, the letters will change; hence you need to stop at Z and select the entire A to Z range and drag the autofill feature.
Features
Allows users to quickly fill a range of cells with sequential values (such as numbers, dates, or text), by dragging the Autofill handle across the range. It can also be used to create simple formulas in an Excel worksheet that automatically perform calculations and display results. With autofill, you can quickly populate a range of cells with data based on patterns already present in other cells.)
To use the Autofill feature in Excel, you can follow these steps:
- Enter the first item in the series in the cell where you want the series to start.
- Click and drag the fill handle (the small square in the bottom right corner of the cell) over the cells where you want the series to be filled.
- Release the mouse button when you have selected all the cells you want to fill.
- Excel will automatically fill the cells with the appropriate pattern or sequence based on the initial item you entered.
Things to Remember
- AutoFill in Excel is one of the features that are available in Excel. It helps to fill subsequent data automatically when we drag the selected cell corners.
- We can use autofill in excel for numbers, sides (East, West, North, and South), years, dates, months, and other data types. Smart tag helps to fill the sequence, format, months, etc.
- Because of this feature, we can save time while working on a large amount of data. This AutoFill in Excel is not capable of filling alphabets; this is one of the drawbacks of this.
Recommended Articles
This has been a guide to AutoFill in Excel. Here we discuss AutoFill in Excel and how to use AutoFill in Excel, along with practical examples and a downloadable excel template. You can also go through our other suggested articles.
