Updated August 19, 2023
Introduction to Autofit in Excel
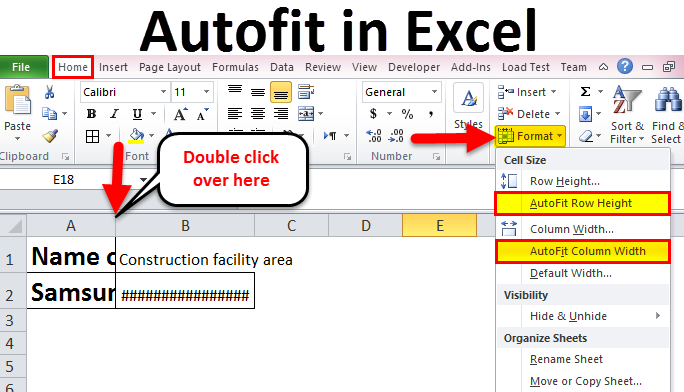
AutoFIt in Excel is used to adjust and fix the column and row height to till maximum limit until it has the text in it. If a cell or column contains content that is not seen to its full length, like some of the characters are being overlapped with other cell’s content or it is going out from the cell limit, then we can use AutoFit by pressing the shortcut keys ALT + H + O + I simultaneously which will make the cell fit its maximum length, or we can select any suitable option from Format option’s drop-down menu which is available in Home menu ribbon. We can also double-click on the Column edge for autofit.
AutoFit option can be used by using 3 different methods, which are mentioned below:
- Using double-click on AutoFit columns and rows.
- By using ribbon to AutoFit columns and rows.
- Using the keyboard shortcut to AutoFit columns and rows.
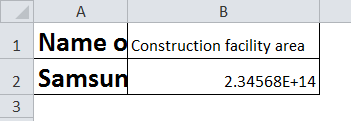
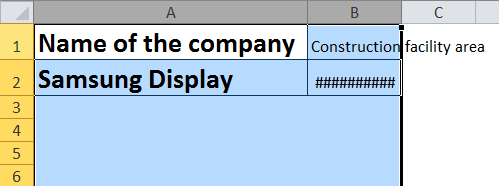
Consider the below example as shown in figure1
Now let us use the above 3 methods for the example shown in Figure 1 and also compare the efficiency of these three methods.
How to Use Autofit in Excel?
Autofit in excel is very simple and easy. Let’s understand Autofit in Excel by three different methods: below.
Method 1 – Using Double-click to AutoFit Column width and Row Height
This method is one of the easiest and quickest ways to adjust the column width and row height. The steps to implement this method are as follows:
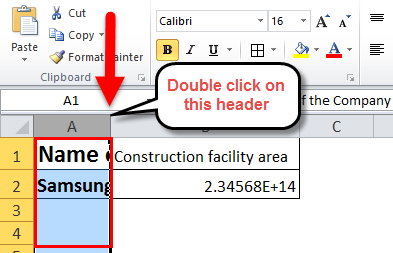
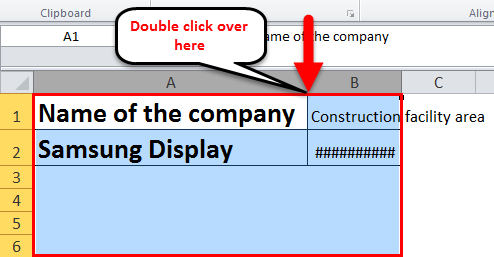
- To autofit the column width, drag the mouse pointer to the right border of the column header. When the double-headed arrow appears, double-click that border.
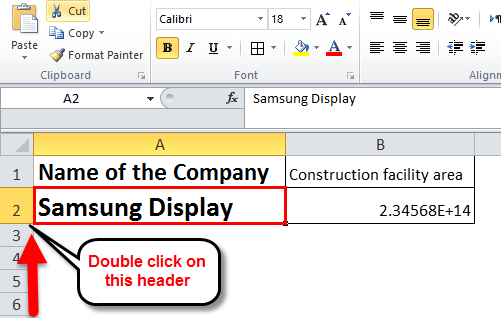
- To autofit the row’s height, drag the mouse pointer to the lower border of the row header. After the double-headed arrow appears, double-click that border.
- To autofit multiple columns or rows, select them all by clicking and dragging over them, and then double-click between any two-column or row headers.
The figures below will explain the above steps in detail.
Step 1: Double-click on the header option shown in the image below. By doing this, the width of the column is adjusted. And the changed width can be seen in Step 2.
Step 2: Double-click the header as shown in the below image.
Step 3: In the below image, the value is not displayed in cell B2 as the column size is small. Therefore, to display the value, the column width should be increased.
Step 4: Double-click between the columns as shown in the below image. This will autofit the width of the columns.
Step 5: The autofit implemented to the column width and row heights using the double-click option is shown below.
Method 2 – Using Ribbon to AutoFit Column Width and Row Height
This is also one of the methods to autofit the column width and row height of cells in the Excel sheet. The ribbon method used for the autofit is a bit longer when compared with other methods. This method is a long process to implement the autofit feature compared to the other two methods. Consider the above example, as shown in Figure 1, and follow the steps discussed below:
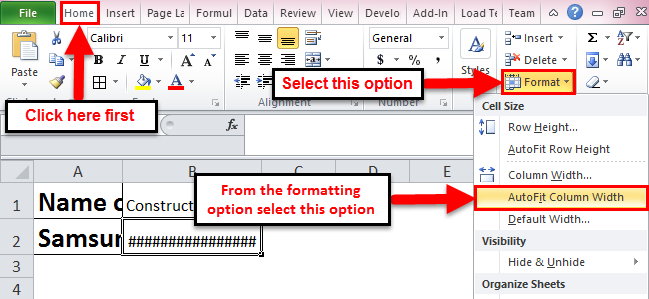
- For adjusting the width of one or several columns, select the columns. After selecting all the columns, go to the ‘Home’ tab; under the ‘Cells’ option, select the ‘Format’ option. From the list of options under the format, select ‘AutoFit Column Width’.
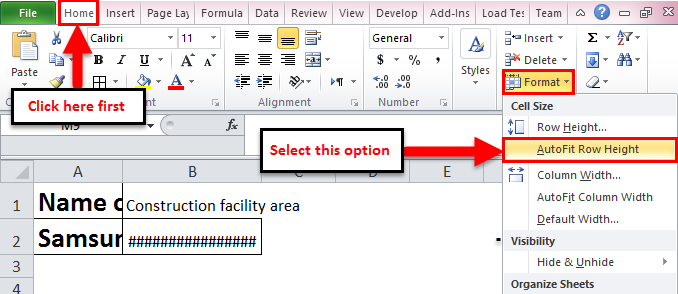
- Similarly, select the rows to adjust the height of one or several rows. After selecting all the rows, go to the ‘Home’ tab; under the ‘Cells’ option, select the ‘Format’ option. From the list of options under the format, select ‘AutoFit Row Height’.
The figures below will explain the above steps in detail.
Step 1: In this step, after selecting the columns for which you need to adjust your column width, Click on Home->Format->AutoFit Column Width.
Step 2: In this step, after selecting the rows for which you need to adjust your row height, Click on Home->Format->AutoFit Row Height.
Method 3 – Using the Keyboard Shortcut to AutoFit column width and Row Height
This method is used by users familiar with using the keyboard for most of their operations in Excel. Consider the below steps to implement this method to autofit the column width and row height.
- To AutoFit the Column Width: Select the number of columns according to your choice, then press ‘Alt+H’, then ‘O’, and then ‘I’.
- To AutoFit the Row Height: Select the number of rows according to your choice, press ‘Alt+H’, then press ‘O’, and then ‘A’.
- If you need to autofit the entire sheet, press ‘Ctrl+A’.
The ‘Alt+H’ opens the home tab; ‘O’ opens the format menu; ‘I’ selects the autofit column width option; ‘A’ selects the autofit row height option.
Advantages of Autofit in Excel
- The option AutoFit in Excel is a real-time-saver, wherein it helps readers to read clearly what is being written in the cell.
- Using the shortcut key option for the autofit of column width and row height is useful as it is the fastest way to implement the autofit feature.
- The ribbon method is useful in cases where you have a large number of cells filled with data. Using the double-click option will be a tedious job.
Disadvantages of Autofit in Excel
- A new user won’t be comfortable with using the keyboard shortcut options, as the user won’t be able to remember the keys and for which function which keys are used.
- In cases where you authorize the row height to the text entered in the cell, it will take that row height, and then you cannot set a standard row height. Also, changing the font size or style changes the size of the row height.
Things to Remember
- The maximum width of the column is 255 i.e. it can accommodate a maximum of 255 characters, but increasing its font size or changing the font style can reduce that number.
- The rows have a maximum height of 409 points, where 1 point is equivalent to 0.035cm.
- If the text entered by you is a text wrap in the cell, make sure to click ‘Wrap Text’, or else the height of the cell will be the height of the font.
- In case when the column width or row height is set to 0, that particular row or column is usually not visible, i.e., it is hidden.
Recommended Articles
This has been a guide to Autofit in Excel. AutoFit in Excel is a feature that automatically adjusts the width or height of a cell. The easiest way to adjust a column is to use AutoFit in Excel. Here we discuss how to use autofit in Excel, practical examples, and a downloadable Excel template. You can also go through our other suggested articles-
