Updated March 10, 2023
Introduction to Azure Application Gateway
Microsoft Azure Application Gateway (AGW) is a service used to manage web traffic on your web application. It is like a load balancer for web traffic. Application Gateway makes routing decisions based on the URI path or host headers which are added as additional information attached in HTTP requests. Traditionally load balancer routes web traffic based on source IP address to destination address, and it operates at transport layers like OSI layer 4 of TCP or UDP. Application gateway uses information from HTTP requests; it can route traffic based on the URLs to its specific set of servers like /images to image pool server or videos to video pool.
How Azure application gateway works?
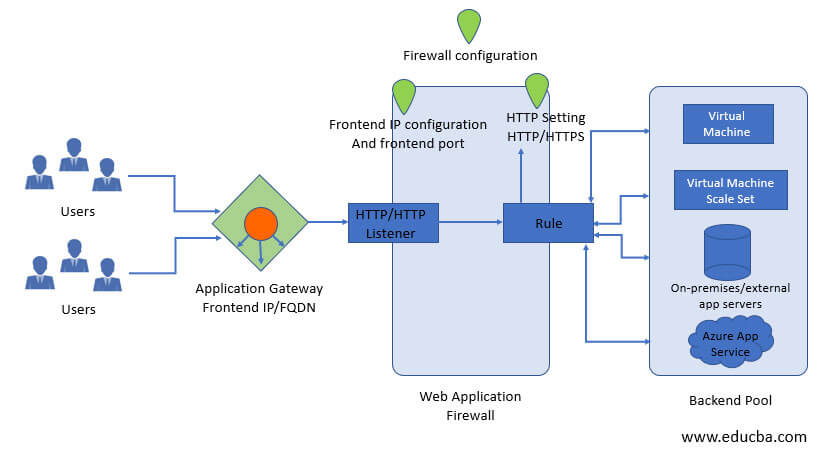
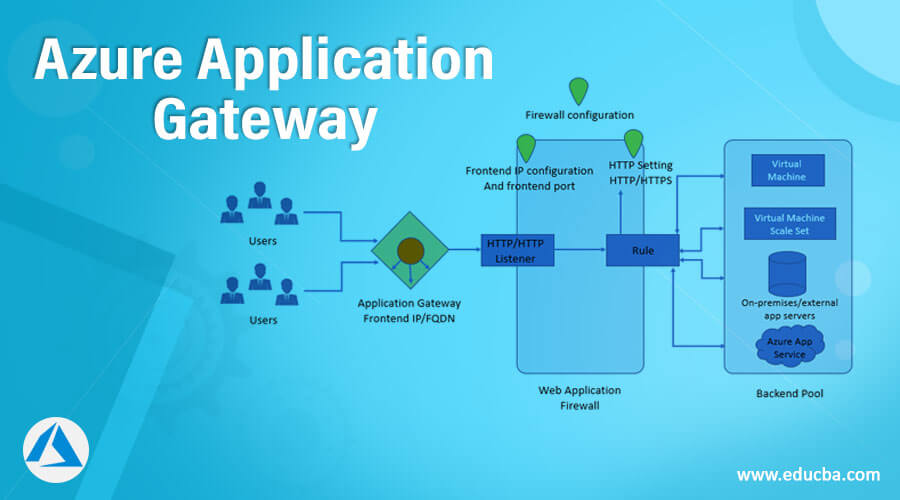
Azure application Gateway manages web traffic on one or multiple web applications as it acts as a load balancer enabler to manage traffic on the web applications. Application gateway works in two parts :
- Accepting incoming requests.
- Route the request to the backend pool.
1. Accepting incoming requests
- The application gateway uses the Domain Name System(DNS) server to resolve domain names before the user sends any request. Azure Controls the DNS entry as all the application gateways are in the azure.com domain.
- THE front-end IP address will be returned to the client by Azure DNS.
- HTTP listener checks for connection requests, and the application gateway accepts the incoming requests on the listener. Listeners are configured to the frontend IP address.
- The header and Body of every request are checked against the rule Web Application Firewall (WAF) to determine if the request is valid or the security threat. Valid requests are routed to the backend pool, and invalid requests are blocked. WAF has 2 modes of prevention mode and Detection mode; in prevention mode, invalid requests are blocked, and in detection, mode requests are evaluated and logged and then forwarded to the backend.
2. Gateway Routes a Request
- Application gateway analyses the routing request rule in the listener to determine which backend server to route the request.
- Application gateway routes the request from the listener to a specific backend pool based on the URL path or redirects the request to an external site or other ports.
- The application gateway used the round-robin algorithm to send the request from the listener to the healthy backend servers. Healthy servers are the servers with health probes; if there are multiple requests, then load balancer the requests on the server.
- Once the backend server is selected, a new TCP session will open based on HTTP settings. These HTTP settings will provide protocol, port, and other routing settings to establish new sessions on the backend server.
- Traffic between the gateway and backend server can be encrypted based on the HTTP settings or unencrypted.
How to create and use the application gateway in Azure?
Before learning to create the Azure Application Gateway, users must have an Azure subscription so that you can log in with valid credentials to the Azure Portal.
Step #1
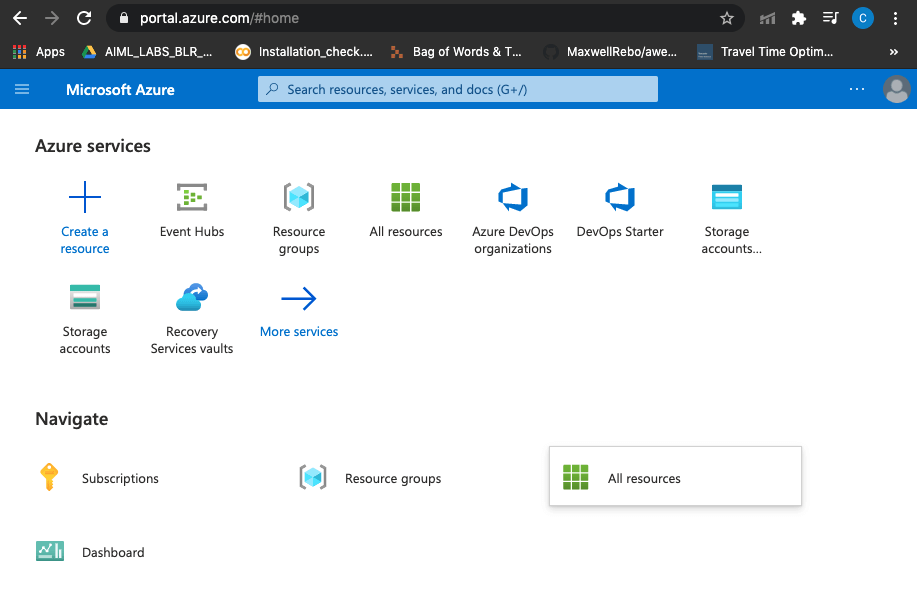
Use a valid credential to Login into the Azure Portal :
https://portal.azure.com/learn.docs.microsoft.com
Step #2
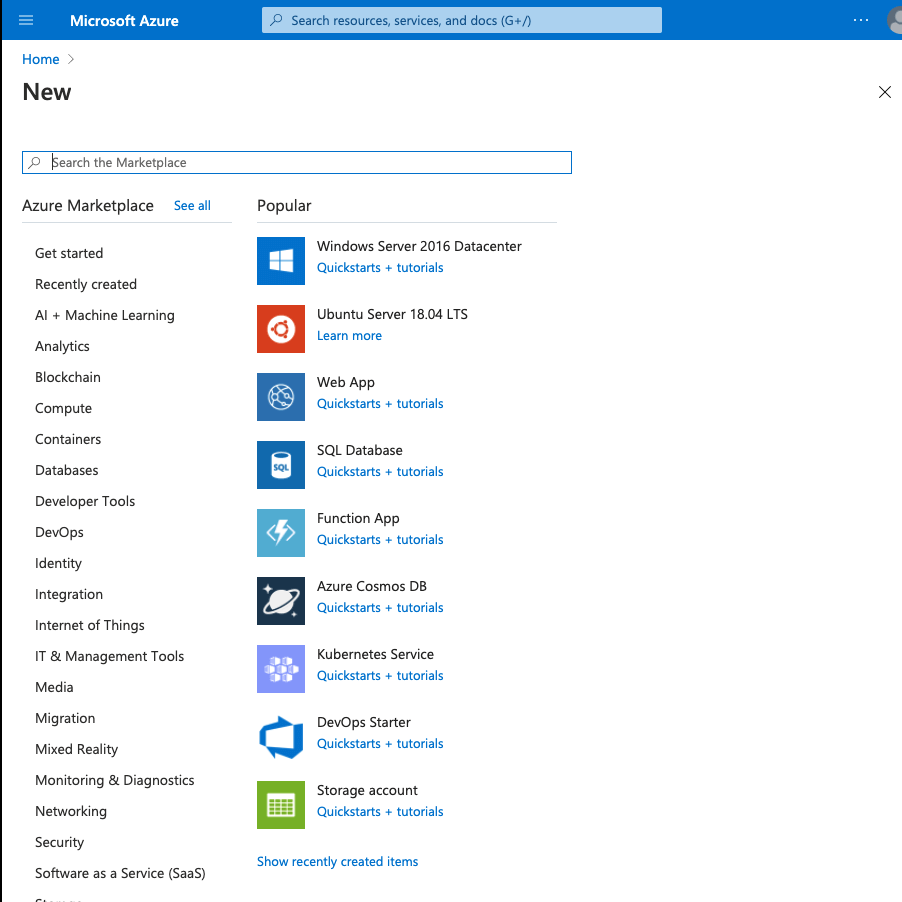
Click on the Create a resource, and a new window will appear:
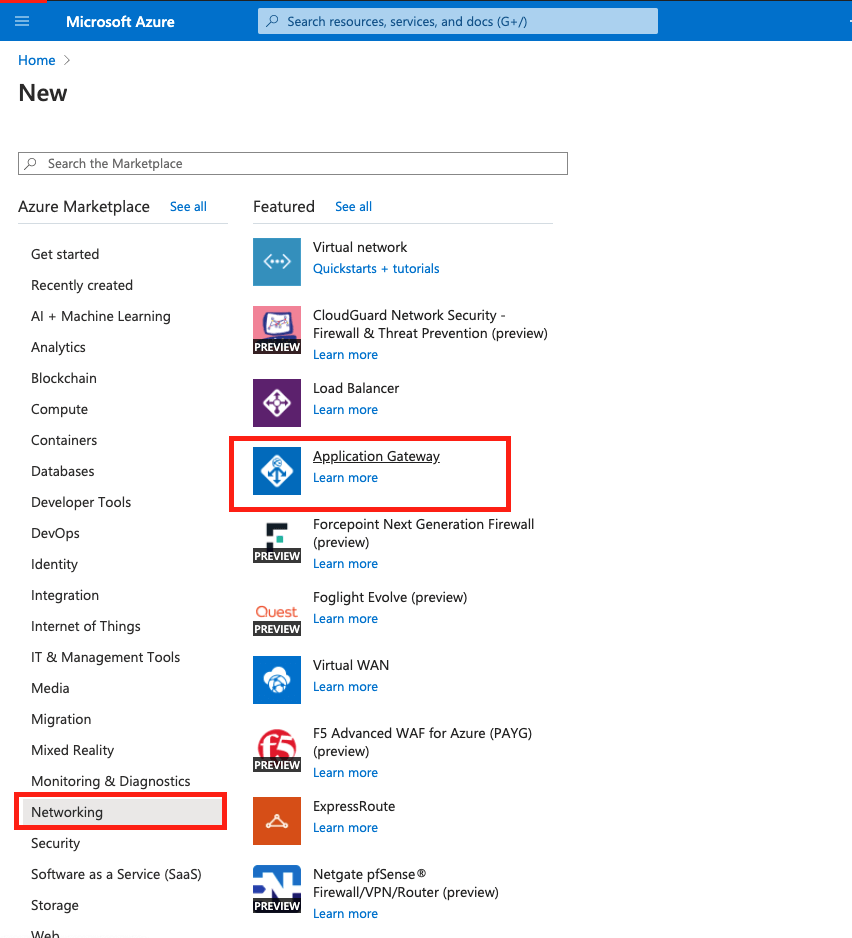
Step #3
From the Azure Marketplace, select Networking and then select Application Gateway:
Step #4
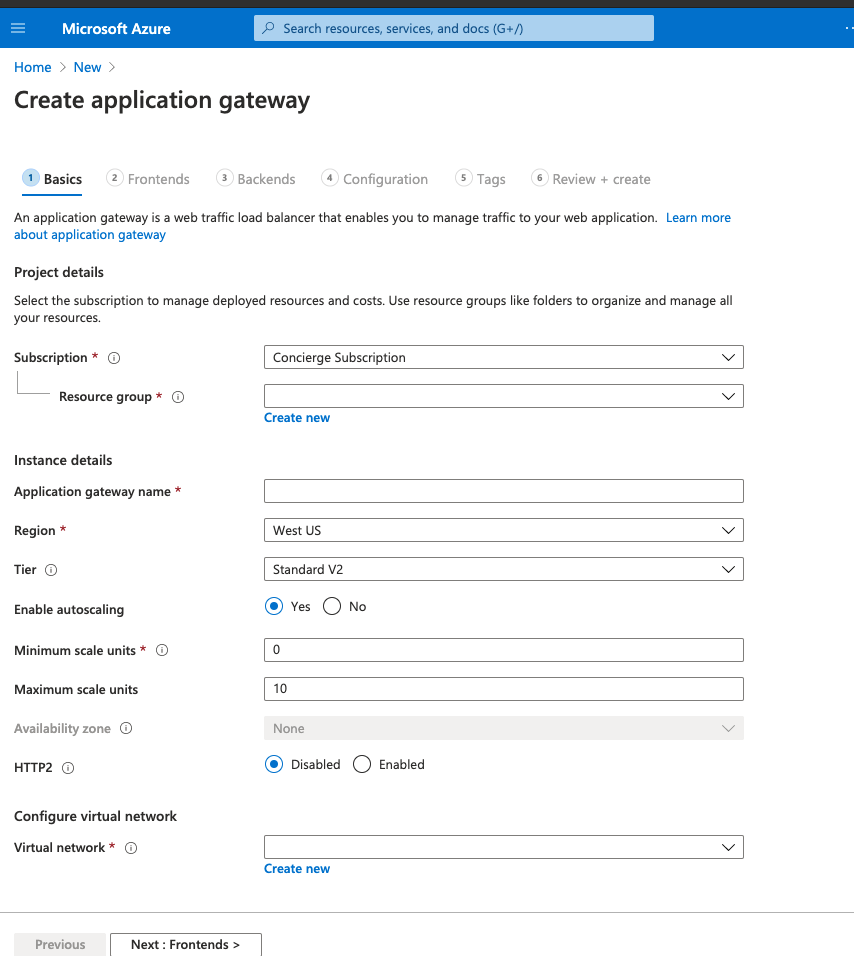
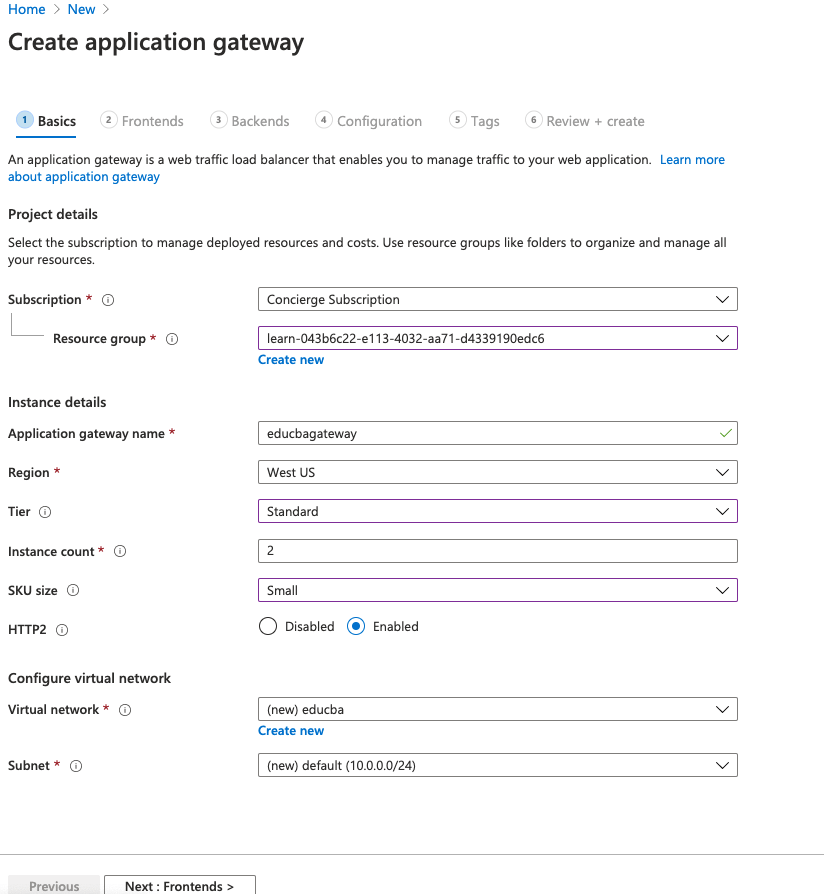
Now from the Create application gateway page, select the Basic tab and enter the details.
Step #5
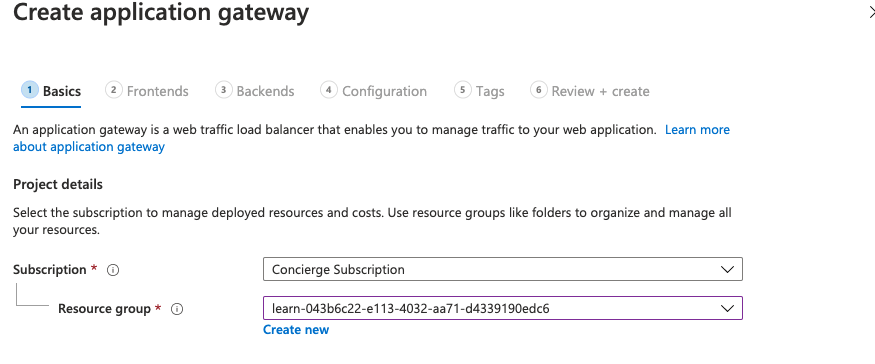
Enter project details by selecting the subscription and Resource group.
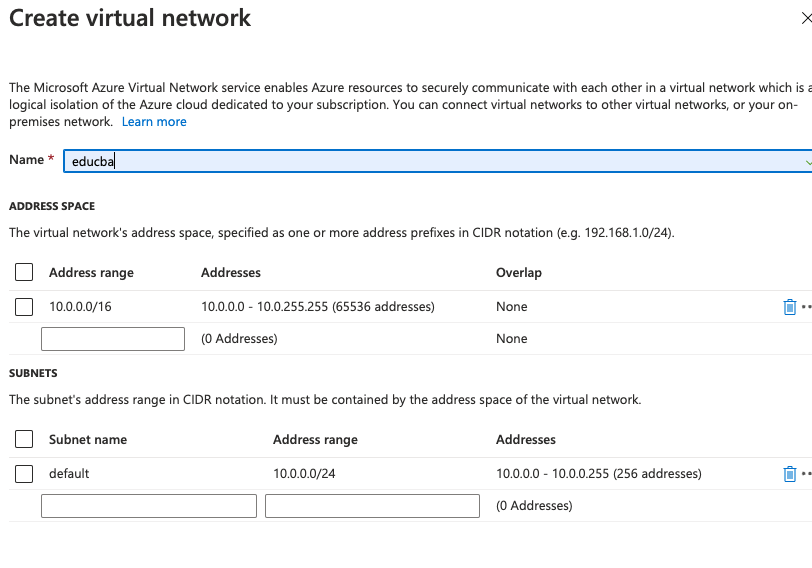
Enter the Instance Details by entering Application gateway name, region, Tier, SKU size, and creating a new virtual network by clicking on Create new and click on ok.
Step #6
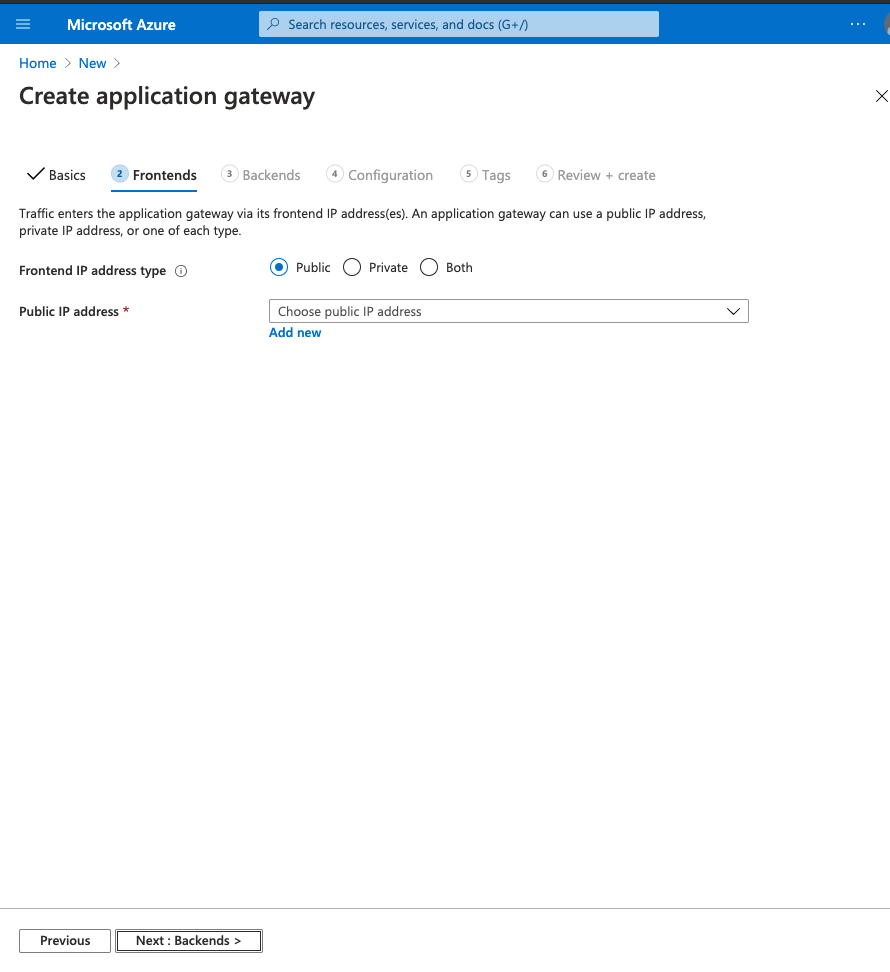
Click on the Frontends tab and select the Frontend IP address type :
Step #7
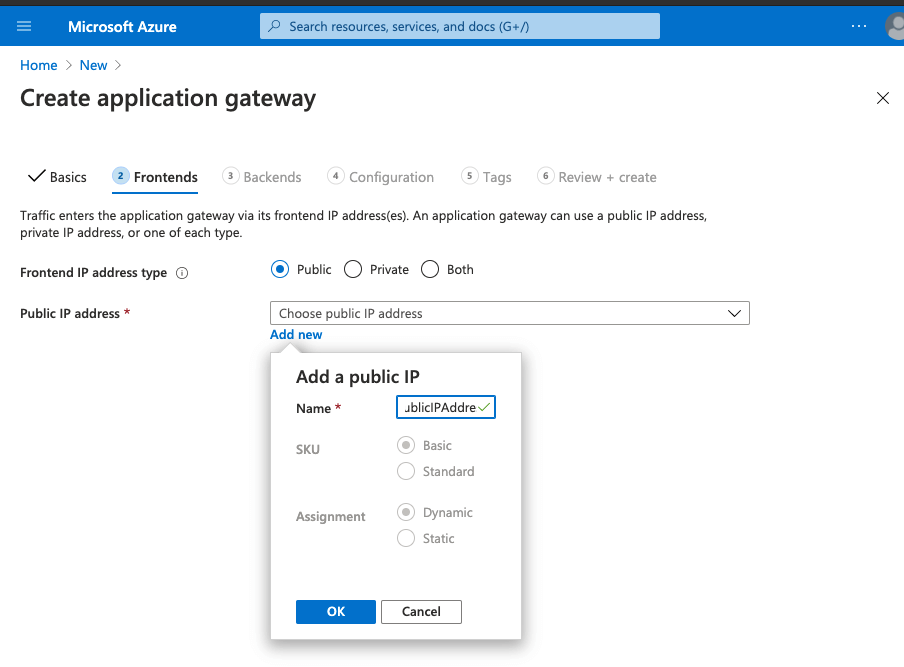
Click on the Add new to create a new public IP address and enter the name or IP address and select SKU and Assignment and click on OK:
Step #8
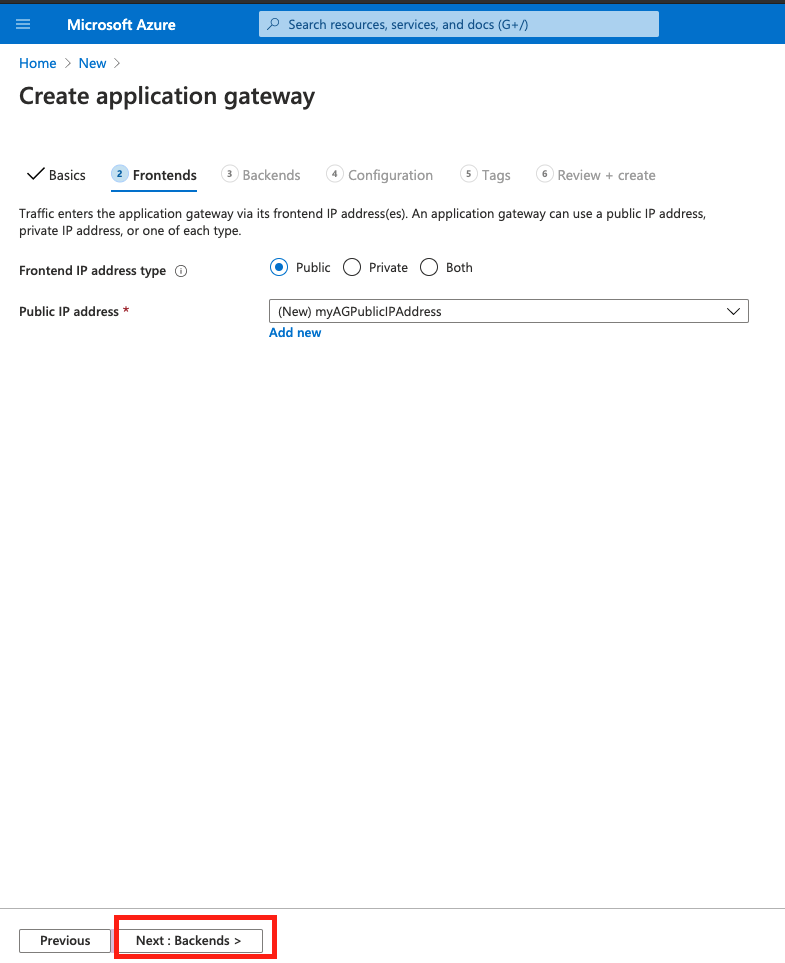
Select the Next:Backend from the page:
Step #9
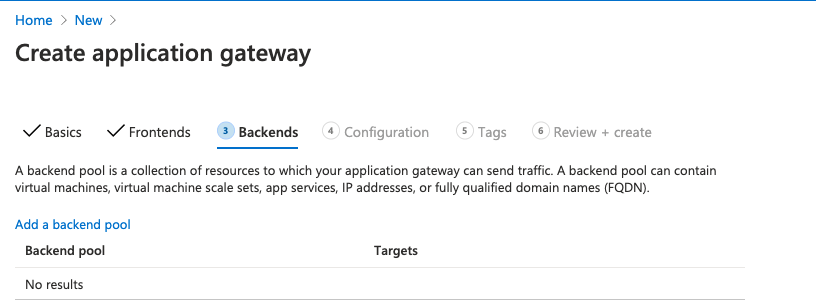
Select add a backend pool from the Backend tab:
Step #10
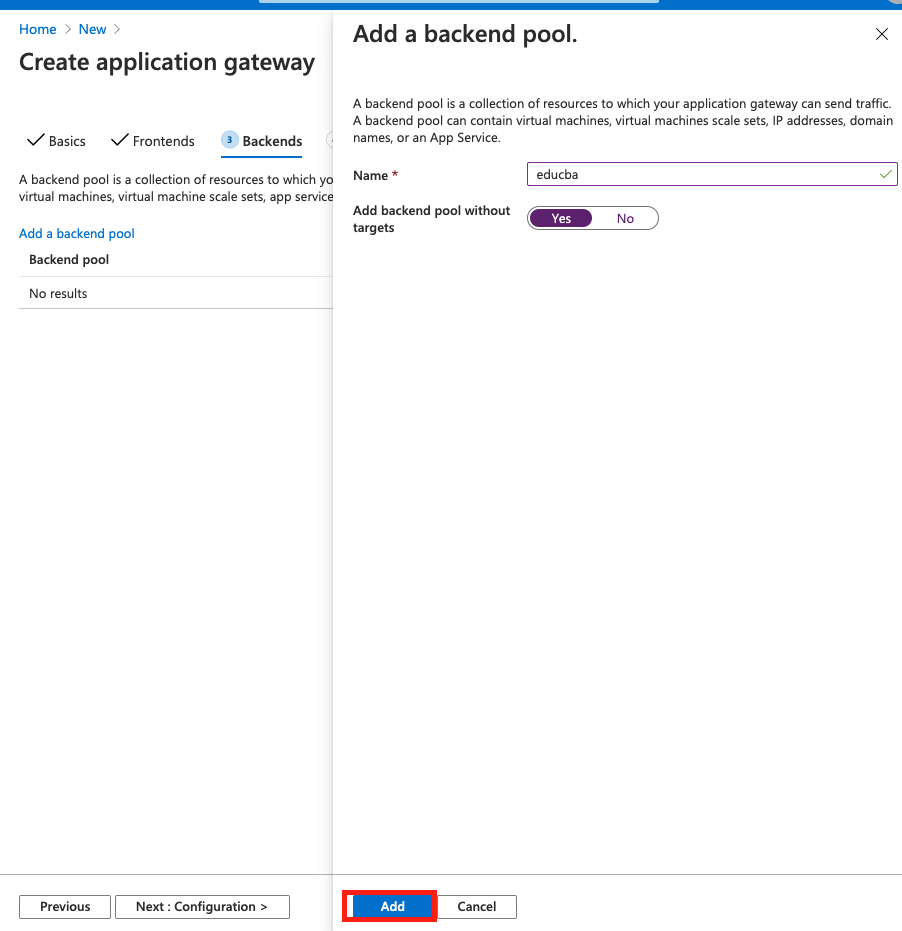
Enter the Name in the backend pool and select Yes in the backend pool without target and click on the Add:
Step #11
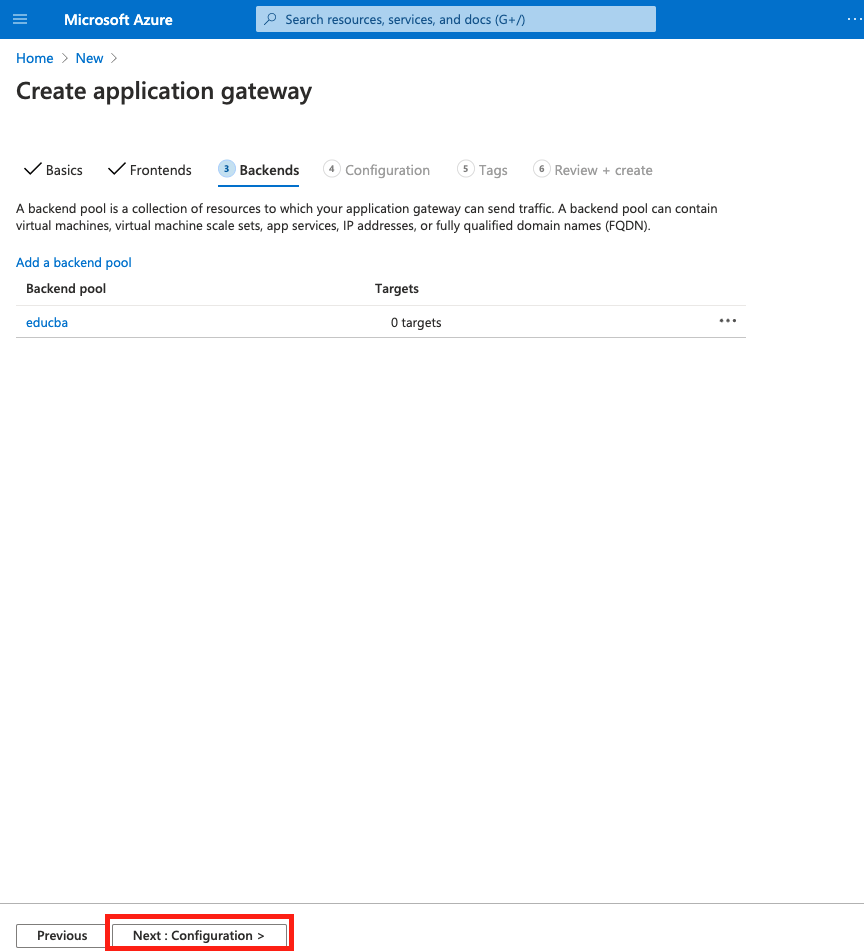
Now select the Next: Configuration> to add new configuration detail:
Step #12
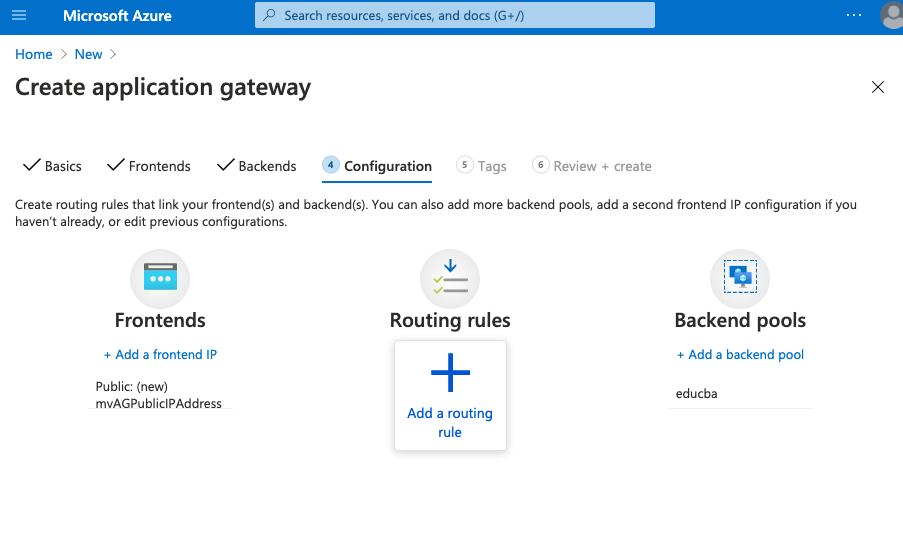
In the configuration tab, select the Frontends, Routing rules, and Backend pools:
Step #13
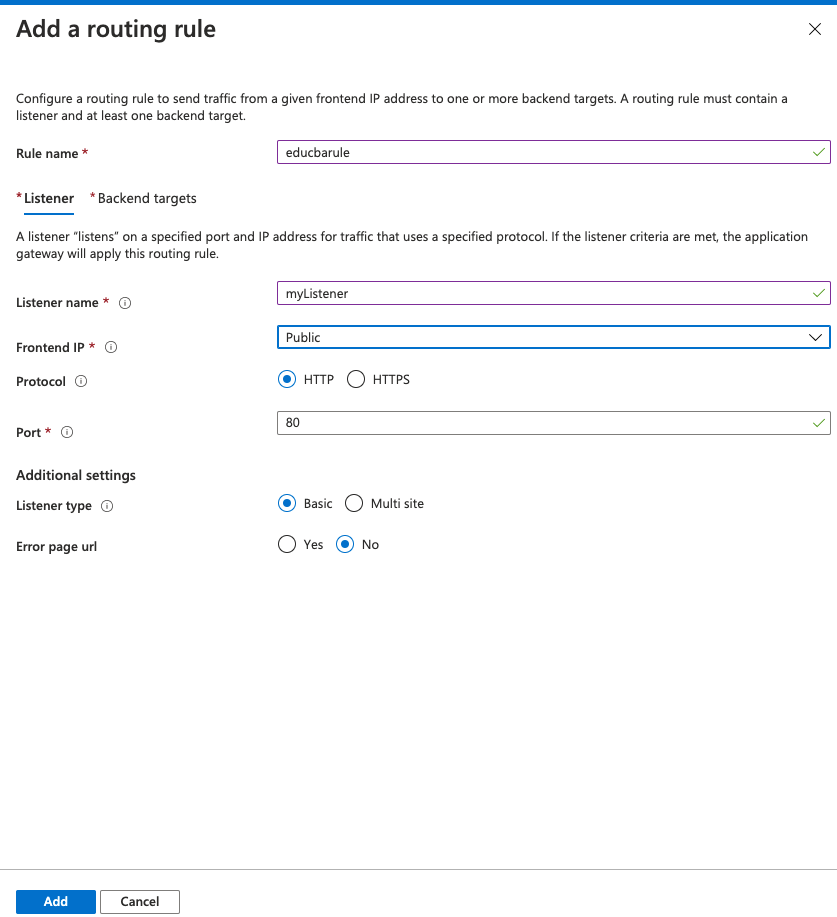
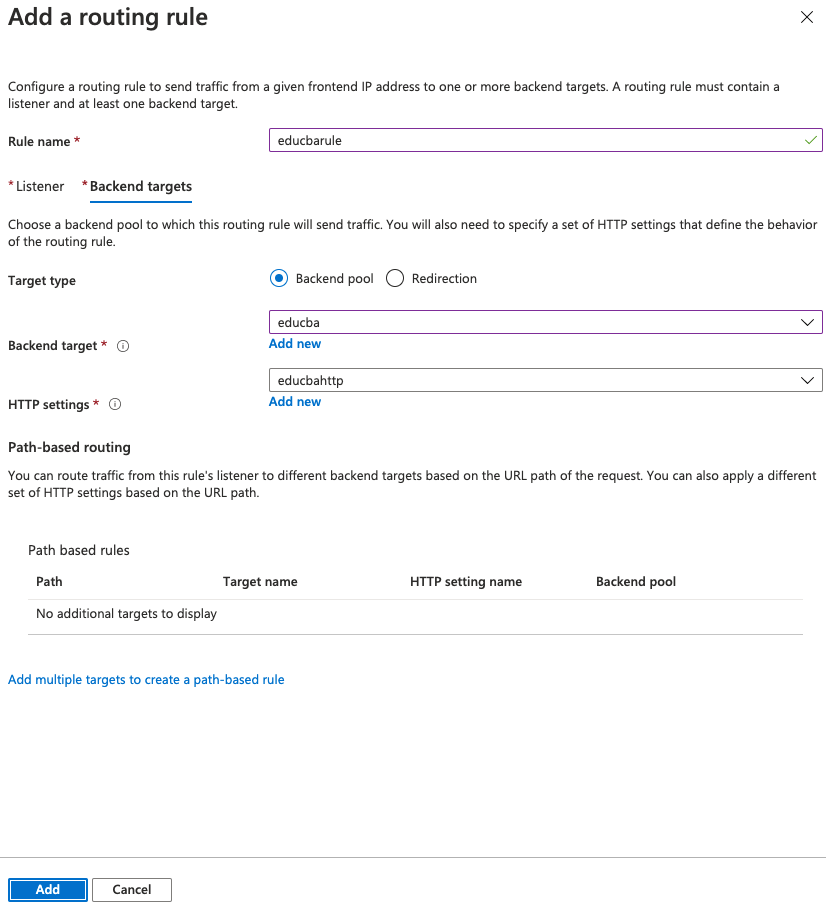
Select the Add a routing rule from the create application gateway and add routing rule details in the Listener tab :
In the Backend Target tab
Step #14
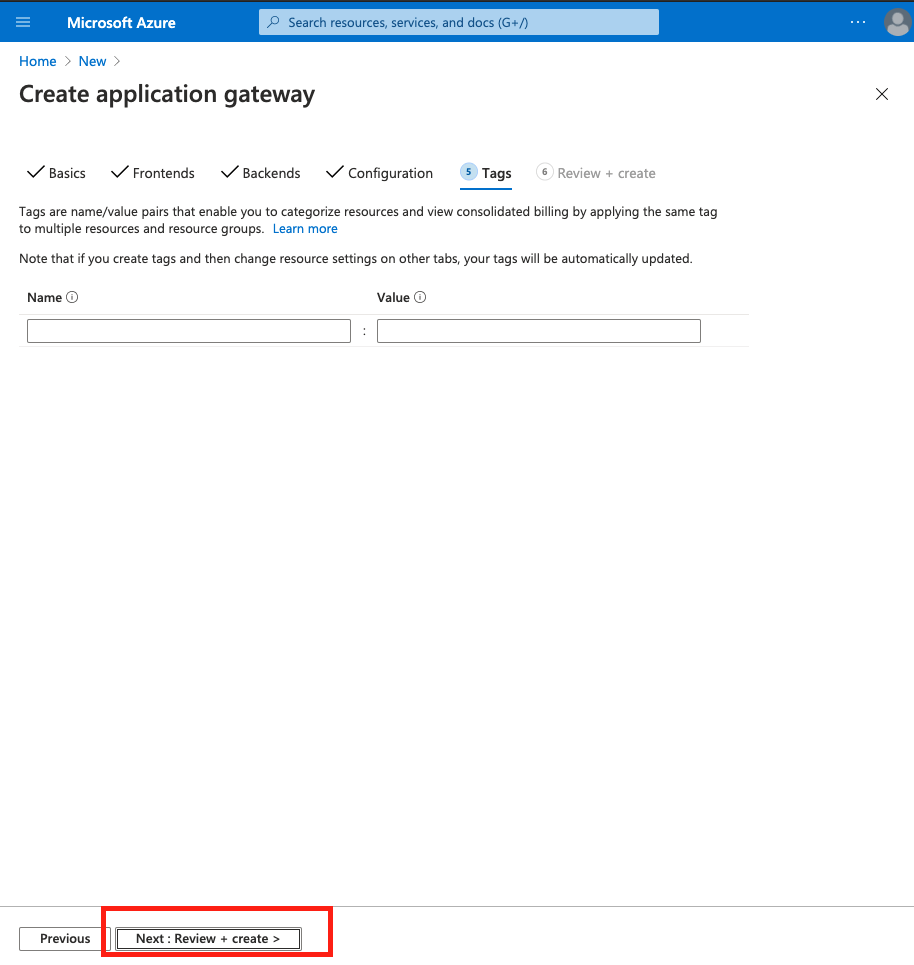
Now select Next: Tags and then Next: Review + create to validate and review the entered detail and then click on the Create to create a new Application gateway.
Step #15
A new Application gateway will be created as myAppGateway. Here users can add new Virtual Machines, Backend pools, and users can clear the resources.
Uses of Azure application gateway
- Azure Application Gateway has autoscaling features and based on web traffic; it can scale up or down based on traffic load. Autoscaling helps in removing the dependency on the deployment size during provisioning.
- It has Zone redundancy as Application Gateway has multiple availability zones and offers fault resiliency.
- It has URL path-based routing and, based on the URL path of request requests, are routed to the different servers or backend pools.
- It has static VIP to ensure VIP is associated with a gateway and does not change over the lifetime.
- Application gateway has support for Web Application Firewall, which provides centralized protection to block the security thread.
Conclusion
Azure Application Gateway is a service offered under Microsoft Azure which helps in managing the traffic directed towards user’s web applications. In addition, it has autoscaling features that help in deploying and as it is integrated into Azure is more secure.
Recommended Articles
This is a guide to Azure Application Gateway. Here we discuss How to create and use an application gateway in Azure along with the steps. You may also have a look at the following articles to learn more –
