Updated March 28, 2023

Introduction to Azure Backup
Microsoft Azure offers its user a cloud-based service to backup data securely and restore the data with a cost-effective solution. This azure service is called Azure Backup. It is a simple and cost-effective solution to take a backup of data so that data can be restored in case of any human error and provide protection from ransomware. This service is provided as a part of the Azure Recovery Services vault. It is simple to use and configure as azure provides one-click backup solution which can be used by enabling the data recovery option. Users are provided with an option to either use Azure Backup on-premises or on the cloud.
How does Azure Backup Service Work?
Microsoft Azure clients can backup data from machines using service. Here are the ways to back up the data:
1. Back up On-Premises Machines
Microsoft Azure has Microsoft Azure Recovery Services (MARS) agent which helps users to take backup of data from on-premise Windows machine to Azure backup. MARS Agent takes backup of files, folder, and state of the windows machines and stores them in the recovery vault. MARS can only be used for Windows OS and does not support Linux Machines.
Take a backup of on-premise Machine data to the backup server and then user store the backup server data to Recovery Service vault. There are two backup servers available in it that are used to backup files and application data and backup data on Azure vault as well as to disk or tape.
- System Center Data Protection Manager(DPM)
- Microsoft Azure Backup Server (MABS)
2. Backup Azure VMs
Data from Azure VM can be directly backed up on Azure Backup as it installs the backup extension to Azure VM. This backup extensions from Azure Backup helps Azure to back up the entire Virtual Machine. Running a MARS agent on Azure VM helps users to take a backup of specific files or folder on Azure VM. Users can also take a backup in MABS running in Azure VM, then backup data from MABS can be backed up on Recovery Vault.
Components of Azure Backup
It has multiple components which in turn helps to take a backup of data to recovery service vaults in azure. These components can be downloaded and deployed as per the data you want to backup. Recovery service vaults is an online storage system in Azure that holds the copies of Files, Folders and backup policies. Users can choose or filter where they want to store data based on geo-redundant storage (GRS) or locally redundant storage (LRS). Given below are the different component:
1. Azure Backup Agents
It has different agents to take a backup of machine data and depending on the type of data this agent can be used.
- MARS Agent: MARS runs on the on-premise Windows or Azure VM to back up files, folders, and the system state. It does not need separate backup servers. MARS agents then store data to Recovery vaults. It can backup data 3x per day and does not support Linux machines.
- Azure VM extension: It install the Azure VM extensions which run on Azure VM and back up Azure VM to vault directly.
2. System Centre DPM
Users need to install the DPM system on the machine. This is a protection agent and helps in protecting files, folders, VMs, Applications, etc. DPM/MABS backup data on local disk or servers and from there data is backed up to the vault with the help of the MARS agent running on the DPM server. DPM also supports local and tape disk storage. It supports backup of Linux guest VM on Hyper-V.
3. Microsoft Azure Backup Servers (MABS)
Users need to install MABS on the machine to use similar to DPM. It has full flexibility to take a backup and does not require a system center license. We can not backup oracle data using MABS and require Azure subscription. Users can store data to Recovery service vaults or local disks although it does not support tape backup. It helps in the backup and restoring of Virtual Machines (VMs).
How to Perform Backup Action in Azur?
Step 1: Login into the Azure portal using the below URL:
https://portal.azure.com/#home
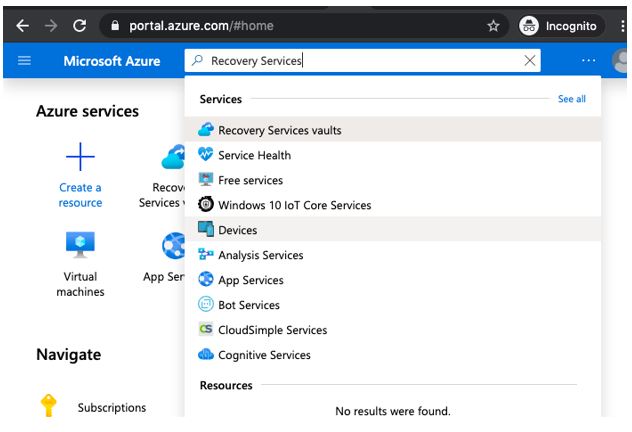
Step 2: Click on search and type Recovery Services then under services Recovery Services Vaults.
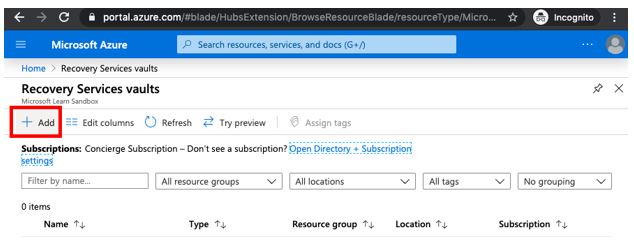
Step 3: From Recovery Services vaults page select +Add as below.
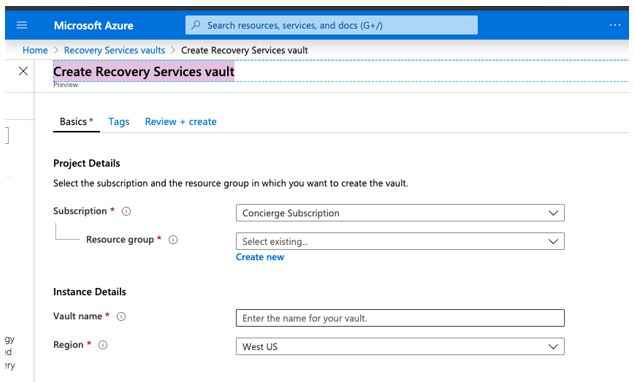
Step 4: In the Create Recovery Services vault page, enter Vault name in the box and the name should be unique between 2 to 50 characters.
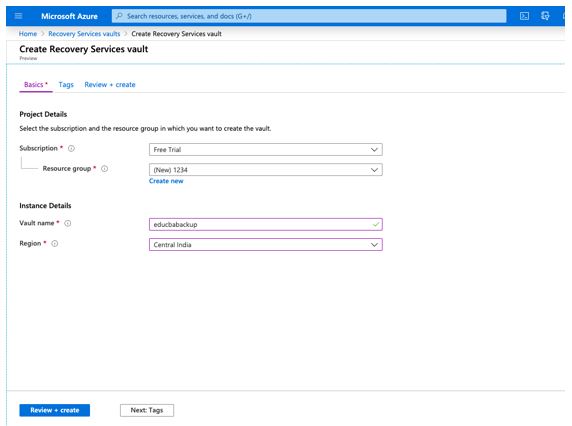
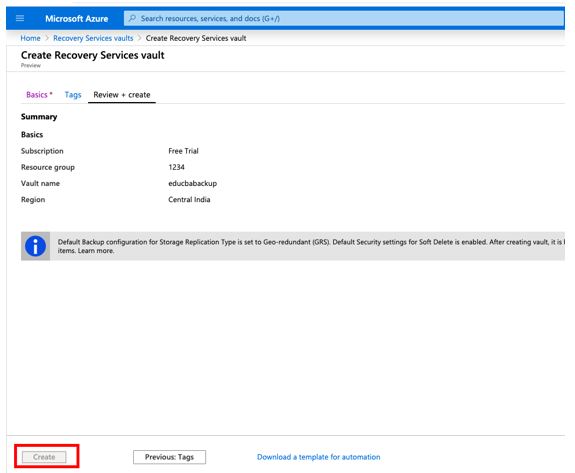
Step 5: Enter vault name as well as Azure subscription, resource group, and geographic region to create a vault as per requirement and click on the create button.
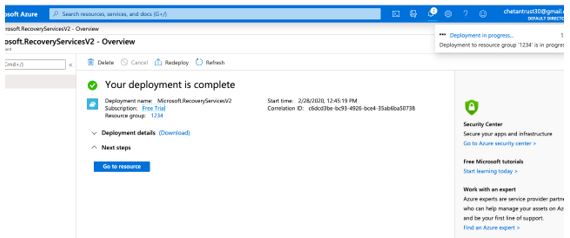
Step 6: Creation of Vault will take around 5 – 10 minutes. Monitor the notification icon in the menu bar.
Step 7: Once the vault is created, it will be available in the Recovery Services vaults list.
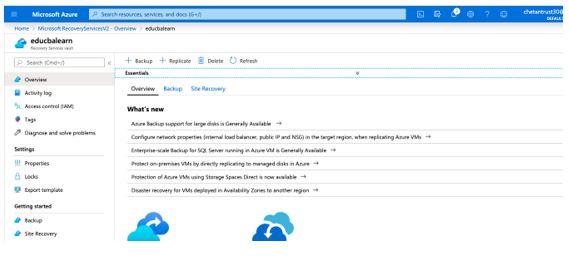
Step 8: Here is the detail of a recently created vault.
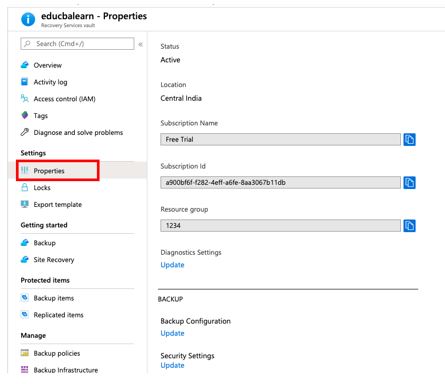
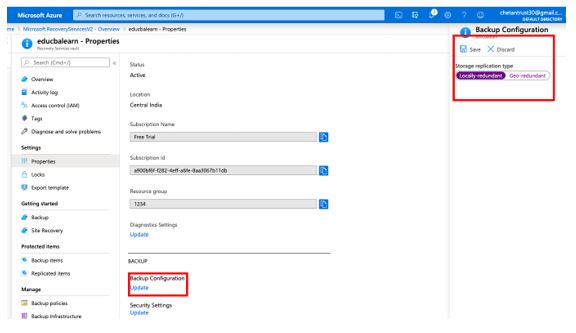
Step 9: To set the storage redundancy. Select properties from Setting Section.
Step 10: Now click on Update under Backup Configuration which will show Storage replication type select either Local or geo-location-based on the requirement and by default It will be Geo-redundant and click on Save.
Step 11: To take a backup of data or Machine. Select +Backup from the overview section of the page.
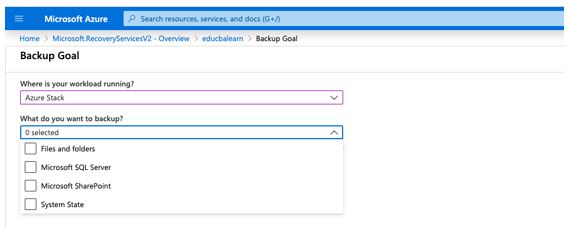
Step 12: In the Backup Goal window you will be provided with below options:
- Where is your workload running?
On selecting a drop-down list of user will be provided with options as Azure, Azure Stack and On-Premises location based on requirement user can choose one.
- What Do you want to backup?
Another option is to select what files or folders to backup and user can select same for the drop-down list as below:
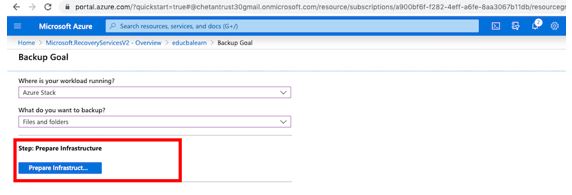
After selecting the required backup and workload click on Prepare Infrastructure.
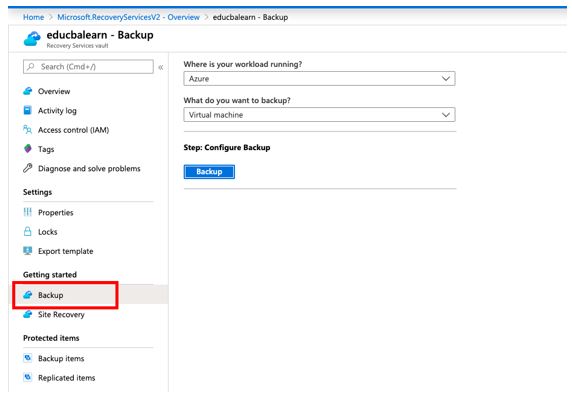
Step 13: From the Getting, Started Section select Backup option as below.
Step 14: Select Backup button from the configure backup pane.
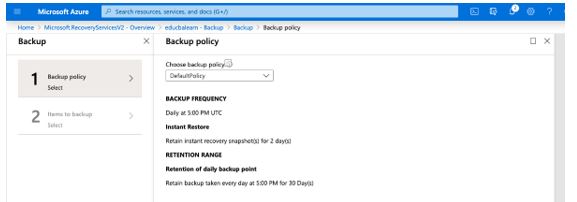
Step 15: In the Backup Policy page choose the backup policy from the drop-down list or create as per requirement here as part of backup policy user can give Backup Frequency and time to restore data.
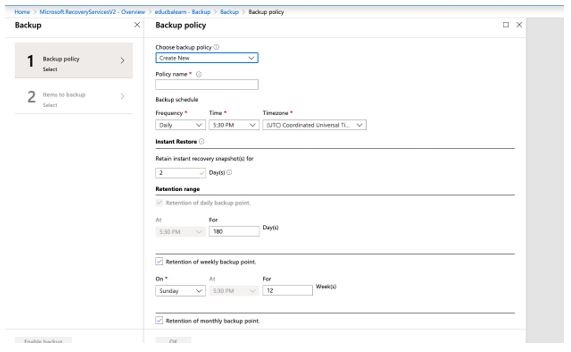
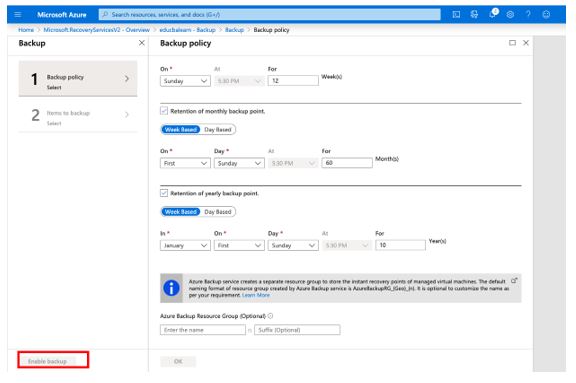
Step 16: If we select create new policy below page will be shown.
Step 17: Select Item-to-backup page and give the items which you want to backup.
Step 18: Now click on Enable button which will be active once the above options are selected and MARS agent will start running as per scheduled time to take a backup.
Using the Above step your backup process will be active using the Azure portal.
Conclusion
In conclusion, users can backup the data from the Azure VM or Windows or Linux to the Microsoft Azure cloud platform which provides protection to the data and takes a backup of the same.
Recommended Articles
This is a guide to Azure Backup. Here we discuss the introduction, components, and how to perform backup action in azure? You may also have a look at the following articles to learn more –
