Updated March 27, 2023

Introduction to Azure Blob Storage
Azure blob storage is a feature provided by Microsoft’s object storage system to store unstructured data in Microsoft’s cloud platform. This data from blob storage users can use to build and deploy apps. Unstructured data is data with no predefined model or structure. Unstructured data is in the form of a video clip, audio clip, text data or binary data, etc. Blob is basically a Binary Large Object which groups the data into containers and these containers are tied to the user storage account which can be modified using .NET code.
Why do we Need Azure Blob Storage?
Microsoft Azure Blob storage stores unstructured data that means it can store any type of data whether it is video, audio, or PDF document. As this unstructured data is in a big volume blob store system has the capacity to handle gigabytes of data which helps users to scale storage systems as needed.
Here are some of the reasons why we need Azure Blob Storage:
- It is needed as all images and documents are available on the browser for the user.
- It helps in writing the log files so that users can access the logs as needed.
- As it stores unstructured data of video and audio forms. It helps users to stream audio and video files.
- We need azure storage to take a backup of data and restore the system so that in case of disaster system can recover easily.
- Azure blob storage not only stores data but to make access faster it has the ability of distributed access.
Working on Azure Blob Storage
While using Azure Blob storage to store the data one must know how blob storage works and organize the data so that to build the app user can use the required storage resources provided by the blob.
There are three types of resources available in the Azure blob as below:
1. Storage Account
To use Microsoft Azure services users are provided with a unique namespace in Azure for your data. Whenever a user stores some data on the azure storage that data has some address that contains your unique account name. The base address of the object in the storage account is the combination of the account name and the azure storage blob endpoint. To organize blob data single storage account is enough.
Example:
Suppose your storage account name is: myeducbastorage
Then by default blob storage is: http://myeducbastorage.blob.core.windows.net
2. Containers
Every Blob Storage account has assigned a container to organize the group of blobs like a directory of the file system. A single storage account can have an unlimited number of containers. While creating container name users have to follow a certain set of rules apart from general rules like length limitation and character restriction. The container name used should be a valid DNS name. The public can access individual containers if the user makes configuration to allow public access but by default to access the containers require authentication.
Example:
Naming convention of the container needs a valid DNS name the URI of the container is as below:
Storage Account Name: myeducbastorage
Container Name: educbacontainer
URI: https://bit.ly/3btUA9L
3. Blobs
Blobs are generally used as a personal file system in Azure. Each container has data stored in the form of a blob. By default public needs authentication to access all blobs as blobs can be used to share personal documents.
There are three types of blobs to store data:
- Block blobs: In this blobs are composed of blocks of different sizes this is created by uploading data to block and commit them to a blob in parallel.
- Append blobs: This is a specialized block blobs that are only used to append new data efficiently. Mainly used in writing logs or streamed data.
- Page blobs: This blob is used by virtual machines to store virtual hard disk (VHD) files. This is created to add the functionality of random-access reads and writes.
Blobs names also follow a certain set of rules on length and character restrictions. By default, blob does not have any nesting or hierarchy in naming but users should names that look like path segments to blobs so that users can filter out API’s operations from the list of blobs.
Example:
Storage Account Name: myeducbastorage
Container Name: myeducbastorage
Blob Name: educbablob
URI: https://bit.ly/2Uf3Cl3
Uses of Azure Blob Storage
Azure blob storage offers several uses to the users to different kinds of data based on application and architecture:
- Blob storage can be used to share the Blob URLs in messages for the apps which transfer large amounts of data as data is stored in the blob in binary form and can be shared in small messages.
- It can also be used as a file storage system to share documents and other data.
- Unstructured data such as images, video, and audio can also be stored as a blob and, if necessary, can be made available to the public on web servers.
- Microsoft azure components like Azure Cloud shell and Virtual machines use azure blob to store files, configuration, etc. Similar to this, many Azure services use azure blobs at the backend.
How to Create Azure Blob Storage?
Here we will learn to create Azure blob storage in the Azure portal before beginning to create blob storage users need access to Azure Portal and to access the same user needs Azure subscription. All-access to the azure portal is through a storage account.
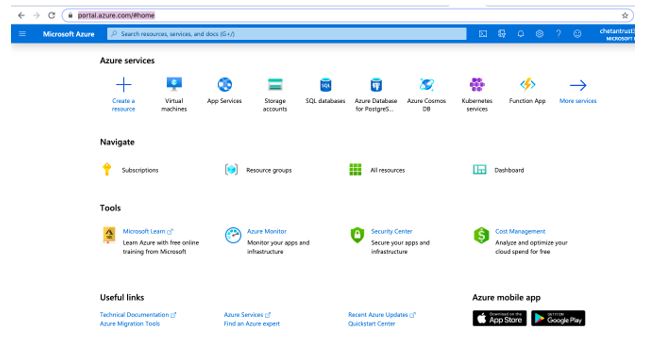
Step 1: Login into the azure portal using the below URL:
https://portal.azure.com/#home
Below home page will be opened on entering a valid email and password.
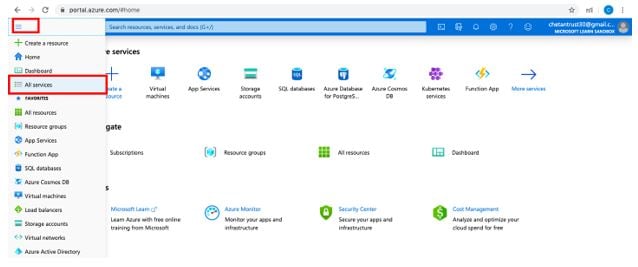
Step 2: From the upper right side of the Azure portal menu select All services.
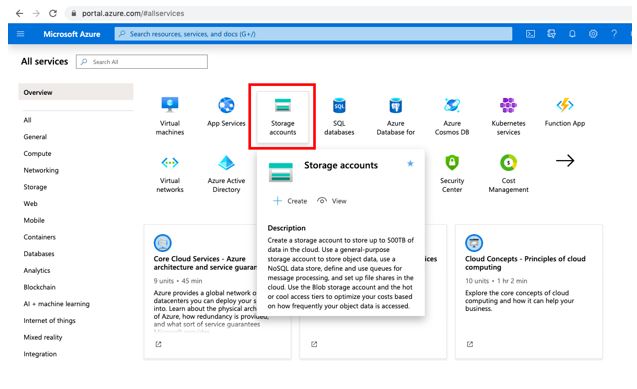
Step 3: From the left panel of the all services page select Storage Accounts.
Step 4: From the Storage Accounts windows select +Add.
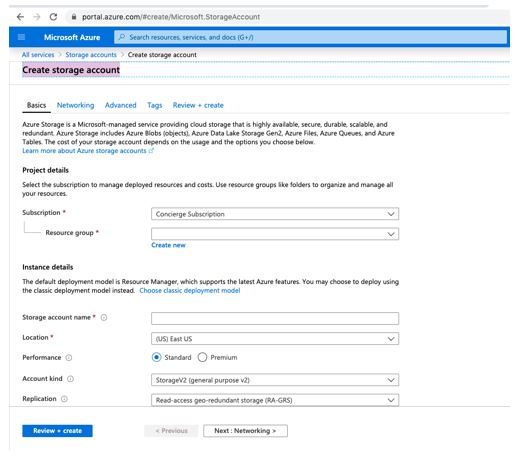
Step 5: Create a storage account window and it will ask for a subscription of which you want to create a Storage account.
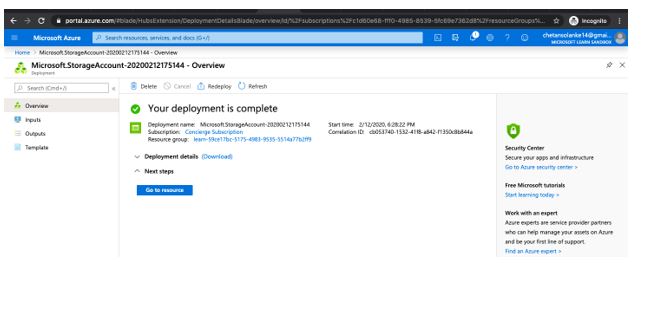
Step 6: Now click on the Review+Create button then click on Create and it will show the below message once the deployment is completed.
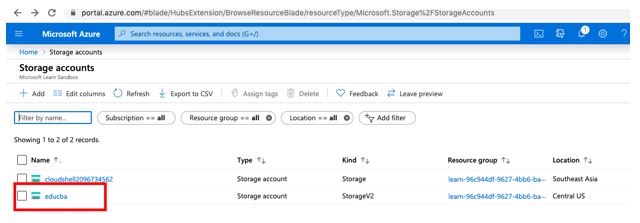
Here, I have created a storage account as “educba”.
Step 7: Now we will try to create a container, for which go to recently created Storage account and select storage account.
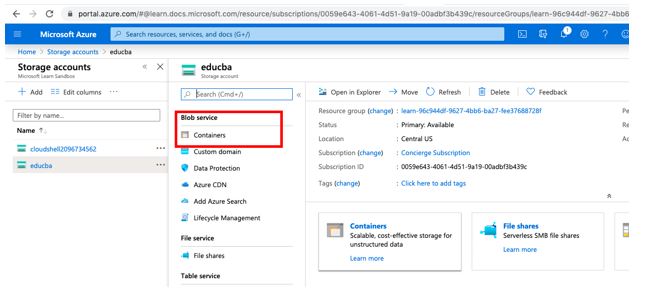
Step 8: Now select Container from the Blob Services section which can be checked by scrolling down.
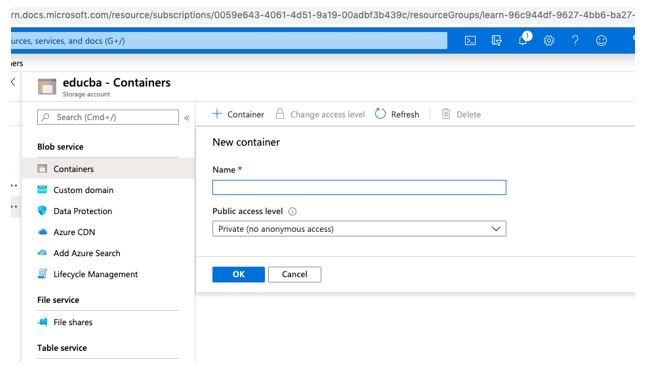
Step 9: Now select “+ Container” button from the “educba – Containers”.
Here educba is a Storage account name you can see your own account name.
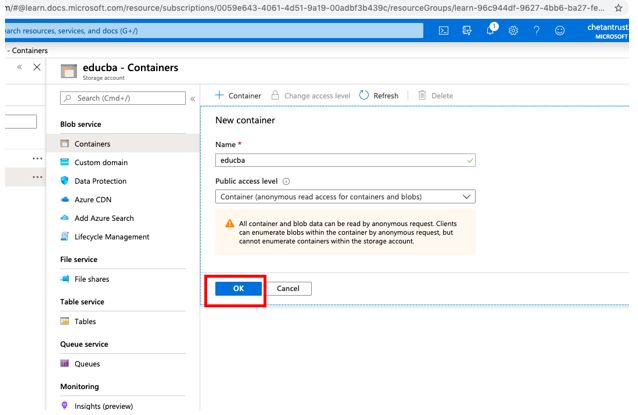
Step 10: Enter the Name of your container, I will use the container name as educba and by default, Public access level will be privately set for this access level to Container. Click on OK to create the container.
Step 11: In the notification, users can check that the container created message will show up as below.
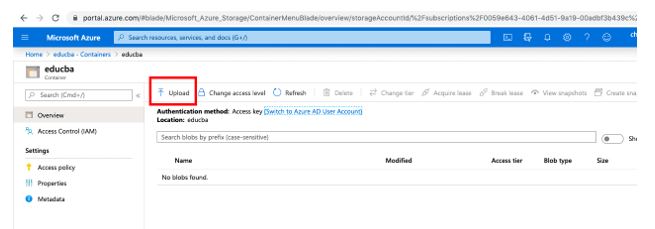
Step 12: Now go to your recent container created from Azure portal.
Step 13: As the container is new it shows no blob is created, select the upload button from the container window.
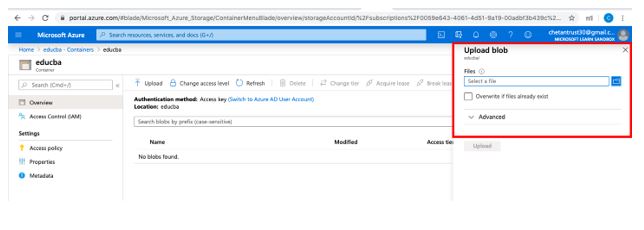
Step 14: This will provide an option to browse the local file system.
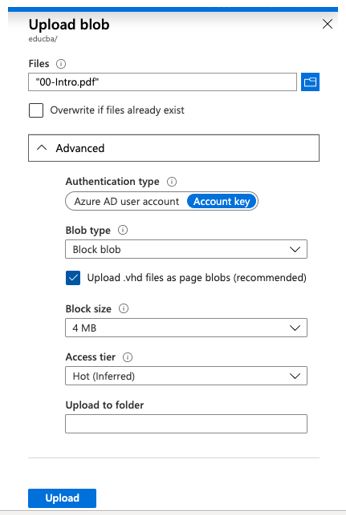
Step 15: Browse your file system and upload one file as block blob which can be seen by expanding the Advanced section.
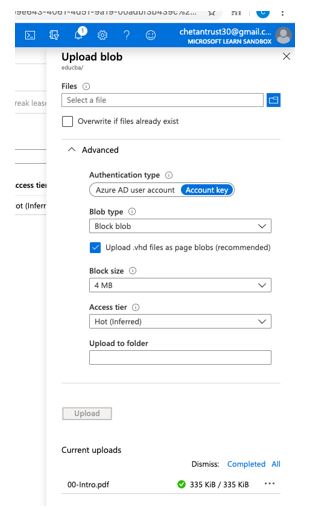
Step 16: Now select the upload button to upload the blob you can upload as many blobs you like.
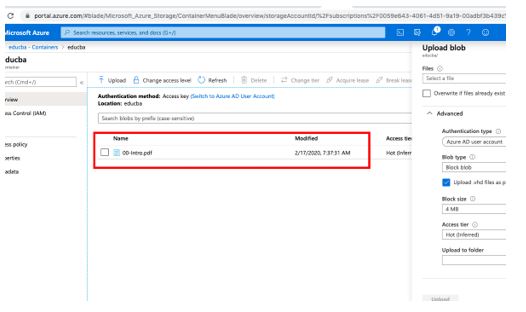
Step 17: We can verify that data is loaded to the container from below and also can download the same.
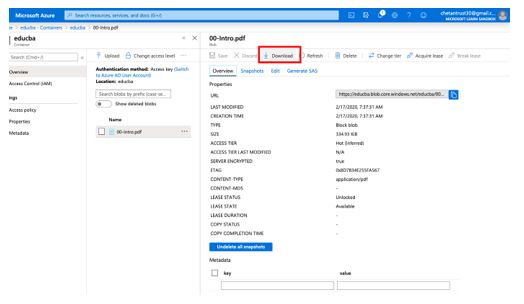
Step 18: On selecting the specific file we get download options also.
Here we learn how to create storage, account, and container also, uploaded some data as a blob.
Conclusion
In conclusion here, we saw that Azure blob storage can be used to store PDF, audio or video unstructured data and we have also seen an example by loading pdf files as a blob to the azure storage.
Recommended Articles
This has been a guide to Azure Blob Storage. Here we discuss the introduction, uses, working, and how to create azure blob storage. You may also have a look at the following articles to learn more –
