Updated June 29, 2023

Introduction to Azure Queue Storage
Microsoft Azure Queue storage is a service used for storing the various large number of messages which need to be accessed from any region in the world. As it uses Azure data centers worldwide, these calls should come via authenticated calls using HTTP or HTTPS. Azure Queue Storage can also be used to create a backlog of work to process asynchronously. Azure Queue storage can store millions of incoming messages up to the total capacity of the storage account, and each message size can be up to 64 KB. It is also cost-effective storage which queues up all the incoming calls and messages them between different applications.
The Architecture of Azure Queue Storage
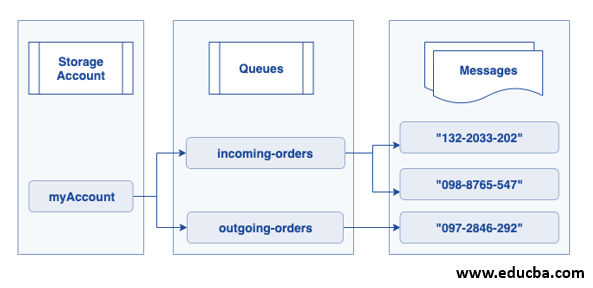
Below is the Azure architecture:
Microsoft Azure Queue Storage supports managing asynchronous tasks and building the process of workflows. Here we will discuss the different concepts used in it:
Image Reference: https://docs.microsoft.com/en-in/azure/includes/media/storage-queue-concepts-include/
1. URL Format
In this account, queues are created with a unique namespace and are addressable using the URL format of this storage account as below.
Azure Storage Format:
http://<storage_account_name>.queue.core.windows.net/<queue_name>
2. Storage Account
This is used to provide and manage all the access related to the storage account, and It is the basic building block of the Azure services. To transfer or migrate the incoming orders from one application to another, the storage user needs to have a storage account as it provides a unique namespace. It contains all the data objects used in Azure, like Blob Storage, File Storage, Queues Storage, disks, and Azure Table Storage. So to access Azure Table Storage service, users need to create a storage account.
3. Queue
This is the set of messages in the queue, and the queue name needs to be in lowercase and unique with a valid DNS name with 3 to 63 characters.
4. Message
This can store a single message up to 64 KB in any format. The queue storage capacity (maximum time to live) of the older version came before 2017-07-29 was 7 days. The latest version came after 2017-07-29. Has maximum time to live is any positive number or -1 so that message does not expire. If the above maximum time-to-live parameter is not set in the newest version by default message queued capacity is 7 days.
How to use Queue Storage in Azure
Below are the steps to use Queue Storage:
Prerequisites: Users with valid Azure credentials can use the Azure queue storage services using the Azure portal to create Azure tables. It is the two steps process for the first-time user; the first user needs to create an Azure Storage Account and then Add new queue storage or move an application data to Azure. Here we will learn to create a storage account and create a new queue and add a new message to it.
1. Create a Storage Account
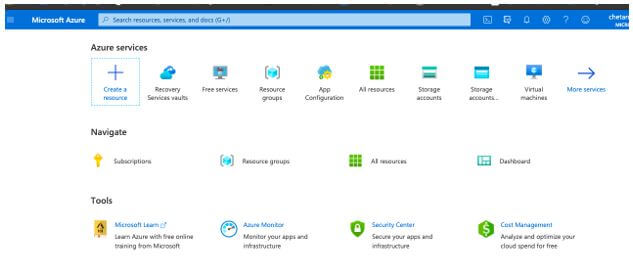
Step 1: Login into the Azure portal using the below URL.
https://portal.azure.com/#home
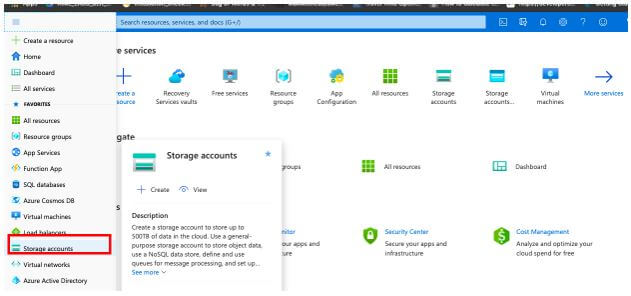
Step 2: From the Azure Portal, click All services and select Storage Account from the list.
Step 3: Now from the Storage Account page select and click on the Add button.
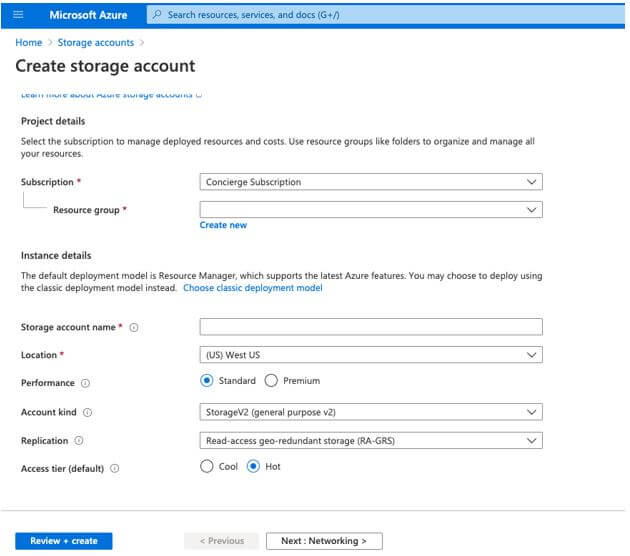
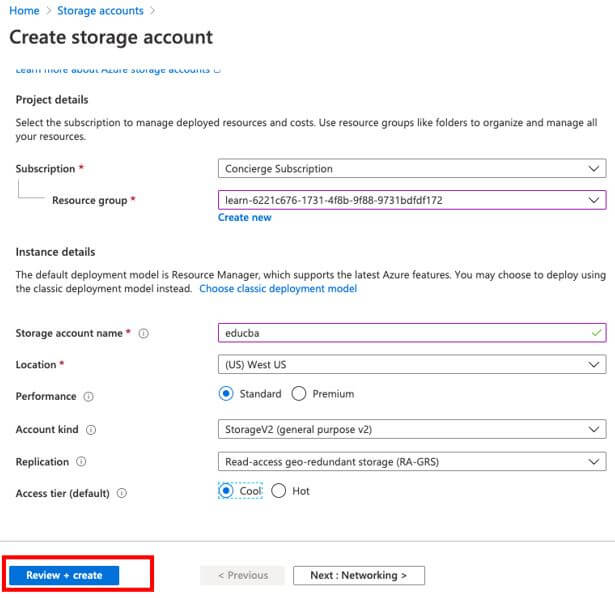
Step 4: Enter all the details required as per the subscription to create a storage account.
Step 5: Now, as we have entered all the details, click on the Review+Create button.
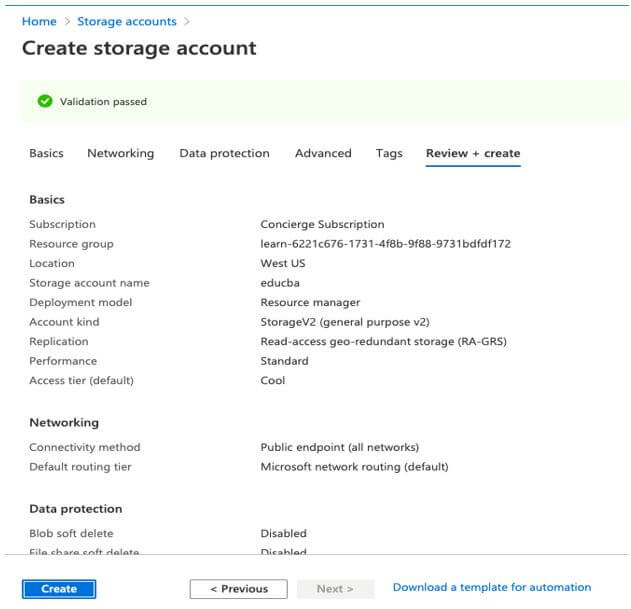
Step 6: Validation will start to check for all the entered details and click on Create button from the page.
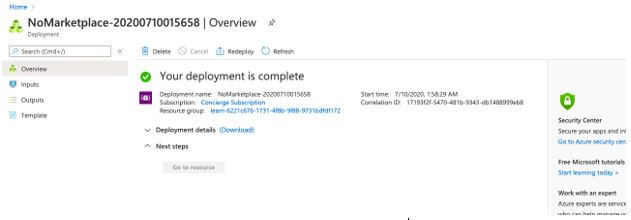
Step 7: Process to create a new storage account will start and complete in 5-10 minutes.
2. Create a queue and add a message in Azure storage
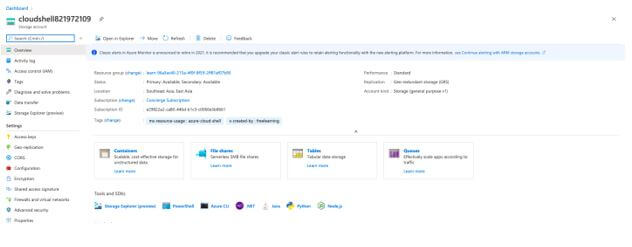
Step 1: Go to the newly created resource form the Azure portal:
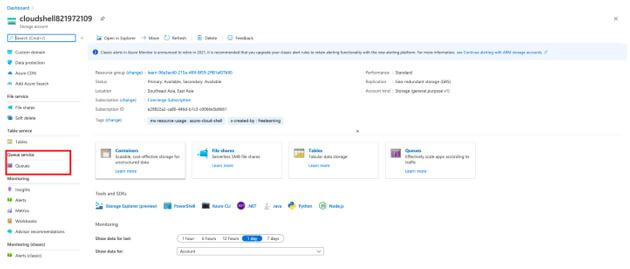
Step 2: Front the left pane of the Azure Storage account, select the Queues from the Queue Services:
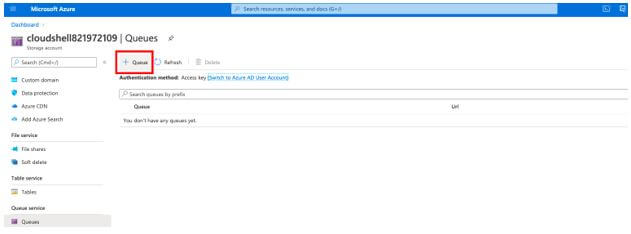
Step 3: Click on the Queue button form the Queue Services page to add a new queue:
Step 4: Enter the new queue name:
Step 5: New queue is added to the Queue Services:
Step 6: Select the newly created new Queue from the page:
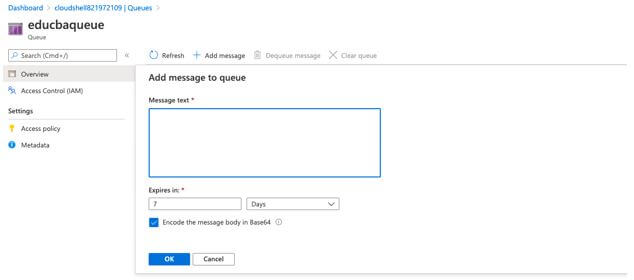
Step 7: Click on the Add message from:
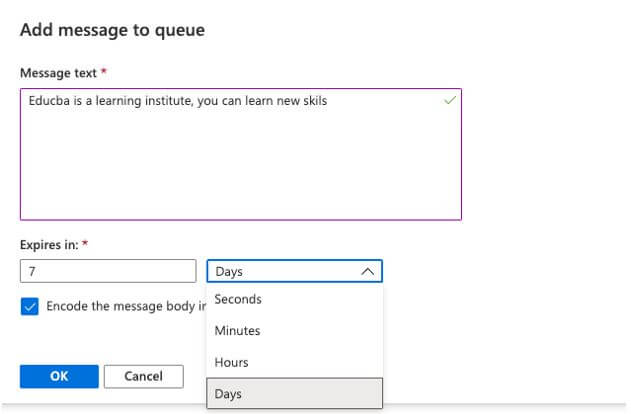
Step 8: Enter the new message in the field, and also user can select the time allowed in Expires inbox:
Step 9: Click on the OK button to add a new message to the queue:
Conclusion
Microsoft Azure Queue Storage can easily store large messages and transfer messages between different applications. Microsoft manages and maintains the data queue storage, ensuring that customers only pay for the resources they use. This allows customers to focus on extracting comprehensive insights from the data stored in the storage and efficiently transferring data and storing messages in queues.
Recommended Articles
This is a guide to Azure Queue Storage. Here we discuss an introduction, architecture, and how to use it with steps. You can also go through our other related articles to learn more –
