Introduction to Azure Storage Account
Microsoft Azure allows developers to store the data in the cloud as it offers security, durability, and scalability to the data stored in Azure storage. The azure storage account is a repository that combines a set of Microsoft azure storage services together and users can manage those services together. An azure storage account can store all types of data like blobs, files, queues, tables, and disks.
As storage is scalable its capacity can be increased as required and due to the pay-as-you-go model, there is the flexibility of paying for the resources you have used. This storage can be accessed remotely from anywhere by using HTTP or HTTPS and Storage account has its own unique namespace for azure storage data.
Why do we Need Azure Storage Account?
Azure storage offers a cloud-based storage system and we need these storage accounts as it is:
- Resiliency and High Availability: Azure storage is resilient to any event of hardware failure. Also, there is an option for data replication across data centers as protection from any system failure. Data is highly available as data is replicated in data centers.
- Security: Data is also highly secure in azure storage as data is written in an encrypted form. To control who can access the data azure provides users with fine-grained control.
- Scalability: In today’s era data is created in different sources and to store this data storage system needs to be highly scalable and Azure storage offers scalability so that user storage system capacity can be increased as needed.
- Managed and Maintenance: Microsoft Azure updates itself and handles maintenance and fixes critical issues. Due to this, there will be no downtime during maintenance time.
- Accessibility: Data from Azure storage account can be accessed anywhere from the world by using HTTP or HTTPS.
Apart from the above Microsoft azure storage has libraries in many languages like .NET, Java, Node.js, Python, PHP, Ruby, Go, etc. It also supports Azure CLI or Powershell for scripting.
How to Create an Azure Storage Account?
Here we will learn step by step how to create an azure storage account using the Azure Portal.
Step 1: Sign-in into the azure portal using your email id and password.
URL: https://portal.azure.com/learn.docs.microsoft.com
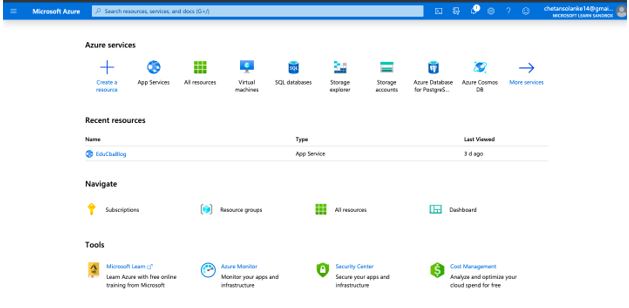
Step 2: Below the Azure portal Home Page will be opened.
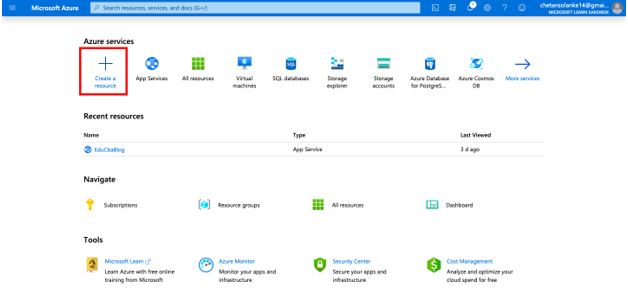
Step 3: Select Create a resource from the Azure services panel of the Azure portal.
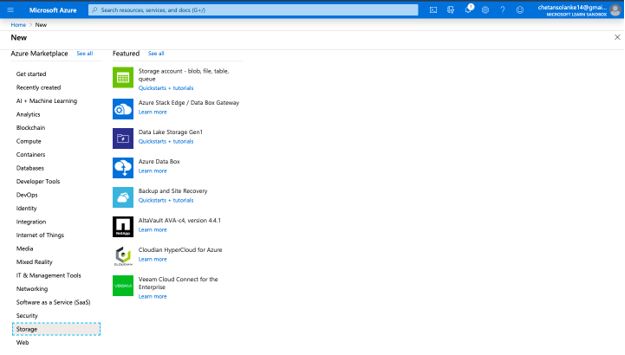
Step 4: Select Storage from the right side of the Azure Marketplace page as shown in the screen below.
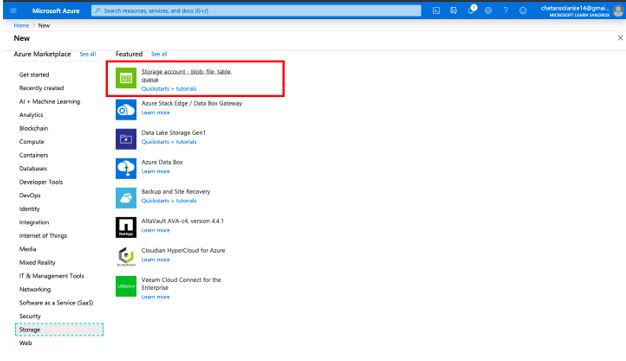
Step 5: By Selecting the Storage page on the left side featured services will be opened select Storage account from the page.
Step 6: Microsoft StorageAccount-ARM page will be opened with options for configuration to create a storage account.
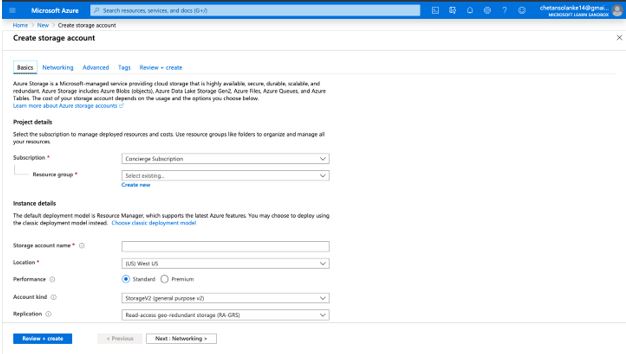
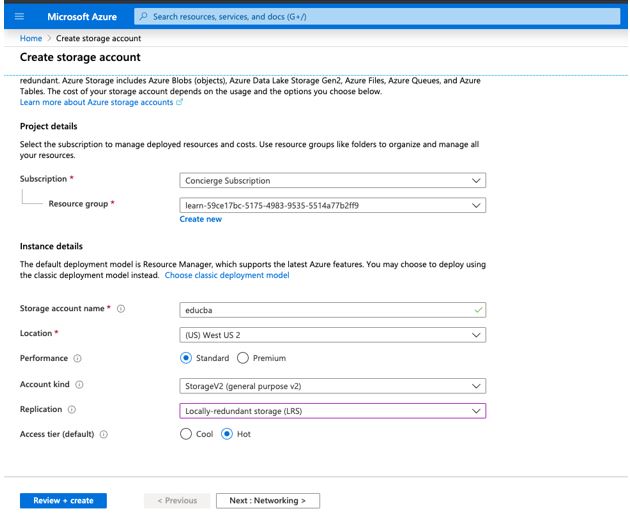
Step 7: Enter project details to create the storage account as below.
- Storage account name: Enter the name to generate the public URL to access and the name must be 3 to 24 characters.
- Location: Enter your location like Central US, Central India, etc.
- Performance: Select Standard from standard and premium options.
- Account kind: Select account kind as StorageV2 (general purpose v2) to get access to the latest features and pricing.
- Replication: Select replication as Locally-redundant storage (LRS) to ensure high availability.
- Access tier: There are two options for the access tier as hot and cool. Select Hot access ties as it is ideal for frequently accessed data.
Enter the above detail in the Basics tab:
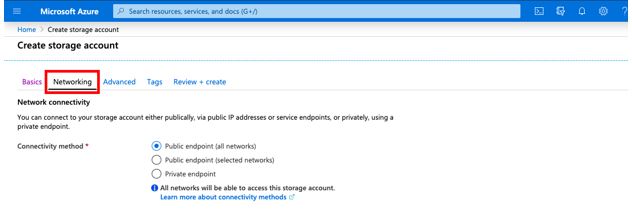
Step 8: Configure the Networking tab options as below.
Select the Connectivity method as Public endpoint (all networks) this allows users to isolate storage accounts on the azure virtual network.
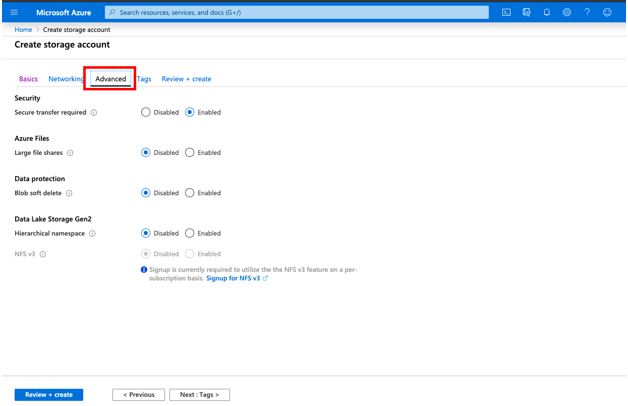
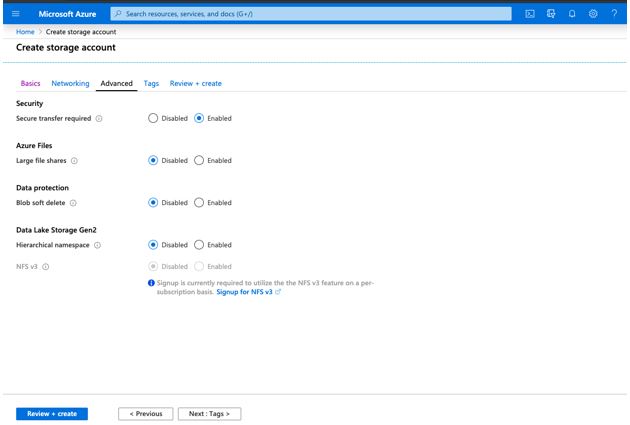
Step 9: Now Configure the advanced options by moving to the advanced options tab as shown in the below screen.
Set the below parameter in the Advanced tab:
- Secure Transfer Required: Select this option as enabled. This will allow all clients to use SSL (HTTPS) to access data in the storage account.
- Large File Shares: Set this option to disabled. As in Azure storage, users can share up to 100TB.
- Blob Soft Delete: Set this option as disabled. Soft delete lets users recover data.
- Data Lake Storage Gen2: Set this option as disabled. This option is provided to handle big data applications.
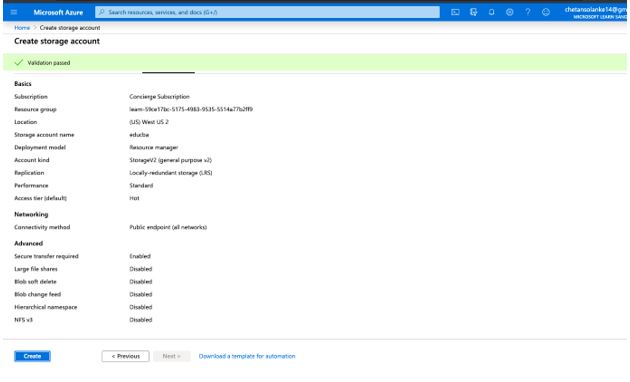
Step 10: Select the Review+create option to review the settings. To do the validation and check all the required fields are filled or not. It will show the message as a header that is Validation passed.
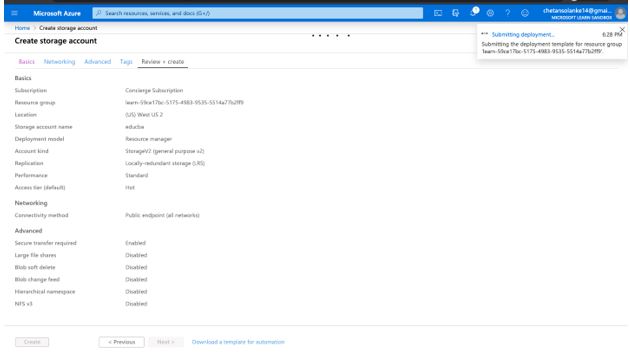
Step 11: Click on the Create button to create the Storage Account. It will show the below screen as it will take a few minutes to deploy the model.
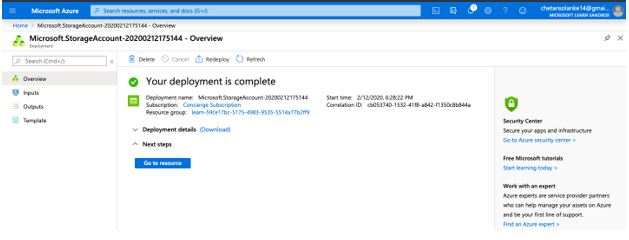
After the account is created successfully and deployment is completed the user will see the below screen.
Click on the go-to resources button and you can verify that the storage account is created as below.
Types of Azure Storage Account
Azure storage stores data in the cloud and to do this it offers several types of storage accounts based on features and pricing. To create a storage account user needs to consider the factors associated with each account.
1. General-purpose v2 accounts
This is a basic account type that supports services like Blob, File, Queue, Table, Disk, and Data Lake Gen2. It supports both performance tier i.e. Standard and Premium. It provides the lowest prices per gigabyte storage.
2. General-purpose v1 accounts
This is a Legacy account type that supports services like Blob, File, Queue, Table, and Disk. It does not have the latest features or lowest prices. This type only supports Azure Resource Manager deployment mode which is a classic deployment model. It also supports both performance tier Standard and Premium.
3. BlockBlobStorage accounts
This is a premium performance and provides support to services only for unstructured object data of block blobs and append blobs. It is used in a high transaction rate or low storage latency scenario. This account type does not support tiering to hot, cool or archive access tiers.
4. FileStorage accounts
It is a specialized files only storage account with a premium performance tier. It is used mainly for high-performance scale applications.
5. BlobStorage accounts
This type supports services for only Blob accounts and it uses general-purpose v2 accounts sometimes and has Standard performance characteristics.
Conclusion
In conclusion, we learned here to create a storage account. Based on the requirement we can configure the storage account also there are different types of Azure Storage Accounts to fulfill users’ requirements. We have also created an Azure storage account and verified that the account is created or not successfully. Azure storage offers different services combined in a single account and can be accessed remotely from anywhere in the world.
Recommended Articles
This has been a guide to Azure Storage Account. Here we discuss the introduction, types, why do we need azure storage account, and how to create an Azure storage account. You may also have a look at the following articles to learn more –
