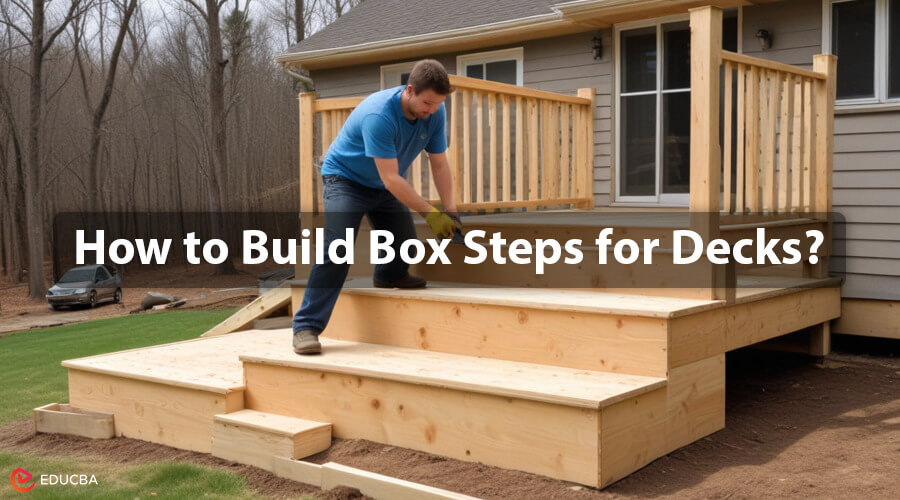
What are Box Steps for Decks?
Box steps for decks are stairs in the shape of boxes stacked on top of each other. They are a little easier to build and do not need to be cut or notched.
They are ideal for connecting very low decks to multi-level decks and expanding your home on a budget. Box steps, which are essentially a series of boxes stacked on top of each other, are a little easier to build and do not need to be cut or notched. They provide safe and easy access to the deck and extra storage or seating space. These practical and aesthetically pleasing steps make them a great addition to any deck.
If you are interested in building deck box steps and stairs, this article will guide you through the entire process of making a plan, designing, construction, etc.
How to Build Box Steps for Decks?
A. Planning and Design
The first thing is planning and designing for building sturdy, stylish box steps and stairs for your decks.
#1. Consider costs
When planning to build box steps and stairs, it is important to consider all costs involved. It includes materials such as wood or composite, pins, and tools, as well as a budget for any professional help needed and factor in additional expenses like permits or unexpected costs. A total budget will help keep the project on track.
#2. Assess the site
Start by assessing the area where the deck is. Measure the height difference from the ground to the deck surface to determine the required height for the stairs. Ensure enough space for the stairs to be comfortable and safe. The height of your deck will decide if box steps are a suitable option for your deck. For decks with wide staircases, building box steps is a good idea. If your box step is more than 3 steps, you should build it with longitudinal beams. Also, consider any existing landscaping or structures that can impact the placement of the stairs.
#3. Determine how many treads and risers you require
To ensure a practical and comfortable staircase, it is important to determine the number of treads and risers you will need. First, calculate the total vertical height and divide it by the maximum riser height your local building code allows to find the number of risers needed. Then, calculate the horizontal distance by dividing the total height by the number of treads. Ensuring that each tread is wide enough to provide a secure foothold is crucial.
#4. Select the materials
Select durable, weather-resistant materials for your deck steps that complement your deck design. Pressure-treated wood is generally affordable yet strong and durable; however, maintaining its appearance requires constant care and maintenance. Composite material is a low-maintenance alternative that looks just like wood. Consider the long-term impact of the material you choose, including subsequent longevity and maintenance needs.
#5. Design the steps
Think carefully about your functional requirements for box steps. Do you want them to serve as additional seating or storage? If so, you will need to design hinged or removable treads for the steps to allow access to enclosed spaces. Consider the overall design style, including the style of the handrail and the impact of the stairs on the visual appeal of the deck.
B. Building Codes and Permits
Before beginning construction, consult your local building department for specific code requirements regarding stairs and decks.
- It includes specifications for tread widths, riser heights, clearances, and handrail requirements.
- Apart from the local building codes, also apply for other necessary permits if required.
- Permits may require the submission of detailed plans and payment of associated fees.
- Make sure your design meets all code requirements to avoid delays or penalties.
C. Building Box Steps
#1. Mark the area
Mark the area for your deck steps, making sure they are level and in the correct position in relation to the patio. Use stakes and mason lines to outline the perimeter and determine the exact location of each tread and riser.
#2. Construct the cross beams
Build the struts, which are the framework that supports the treads. Each transom consists of a center riser and two outer tread supports (riser and tread). Cross beams should be cut to the correct angle to match the deck elevation to ensure consistent rise and run.
#3. Cut the treads
Cut the treads to size, making sure they are level and properly supported by the crossbeams. Treadplates should extend slightly beyond the beams to create a neat appearance. Use a circular saw with a fine-toothed blade to ensure accurate cutting and minimize the risk of damage.
#4. Build risers
Make riser boxes to enclose the space between the treads. You can use the same material as the treads or a contrasting material for added visual interest. Depending on the height and design, risers can provide a complete look and add privacy.
#5. Install the treads and risers
Secure the treads and risers to the beams, making sure they are properly aligned and tightened. Secure the treads and risers with screws or nails to ensure they are tight.
Final Thoughts
By following these steps, you will be well on your way to creating a beautiful outdoor space where you can relax and entertain. Remember to plan carefully, gather the right materials and tools, and take your time to ensure a sturdy and well-built box steps for your deck that will last for years to come. However, building stairs requires many specialized skills, so consider hiring a professional if you do not have enough experience.
Recommended Articles
We hope this guide on building box steps for decks helps you build durable box steps for your deck. For similar guides, you can check out these articles:

